![]() Key Takeaway
Key Takeaway
There’s no official web browser on the Switch, but there’s a workaround. To access the hidden web browser, manually change your DNS settings to 045.055.142.122.
One major complaint about the Nintendo Switch is its lack of web-browsing capabilities. However, there’s an unofficial workaround for the Nintendo Switch, Switch OLED, and Switch Lite, and this method doesn’t void your warranty.
Table Of Contents
Change Your Primary DNS to Access the Web Browser
The Switch’s web browser won’t provide as good of a browsing experience as a desktop or mobile device would, but if you’re wanting to do a simple Google search, this gets the job done. To access the web browser, you’ll need to change your DNS settings.
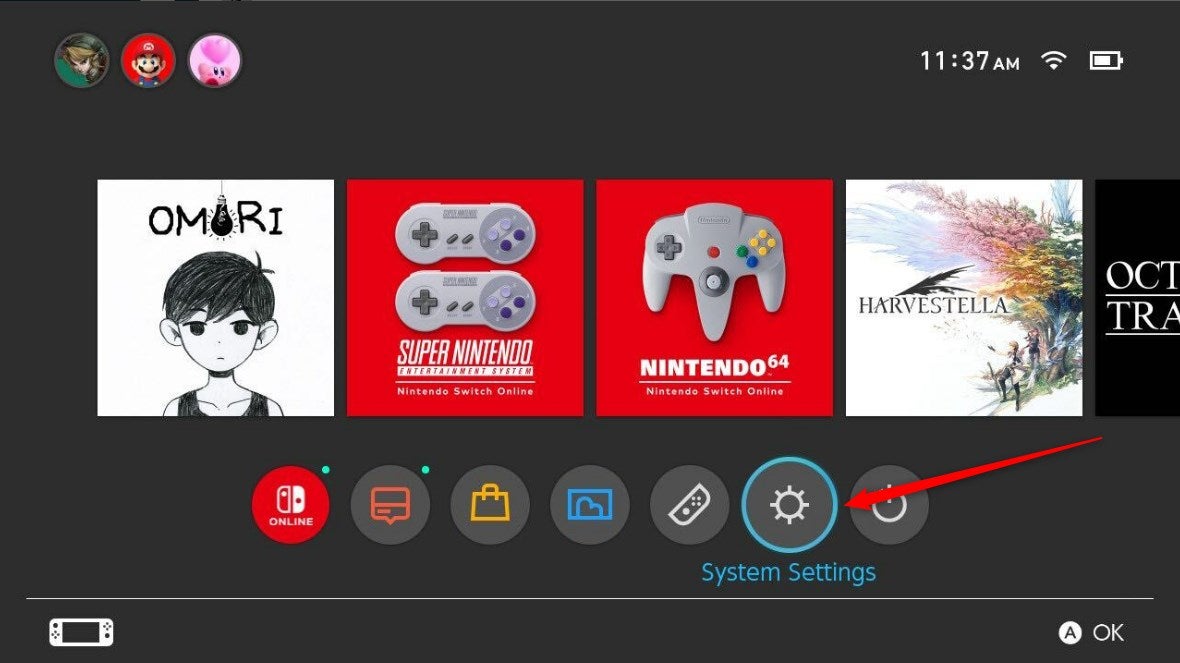
To get started, select System Settings on the Switch’s home screen.
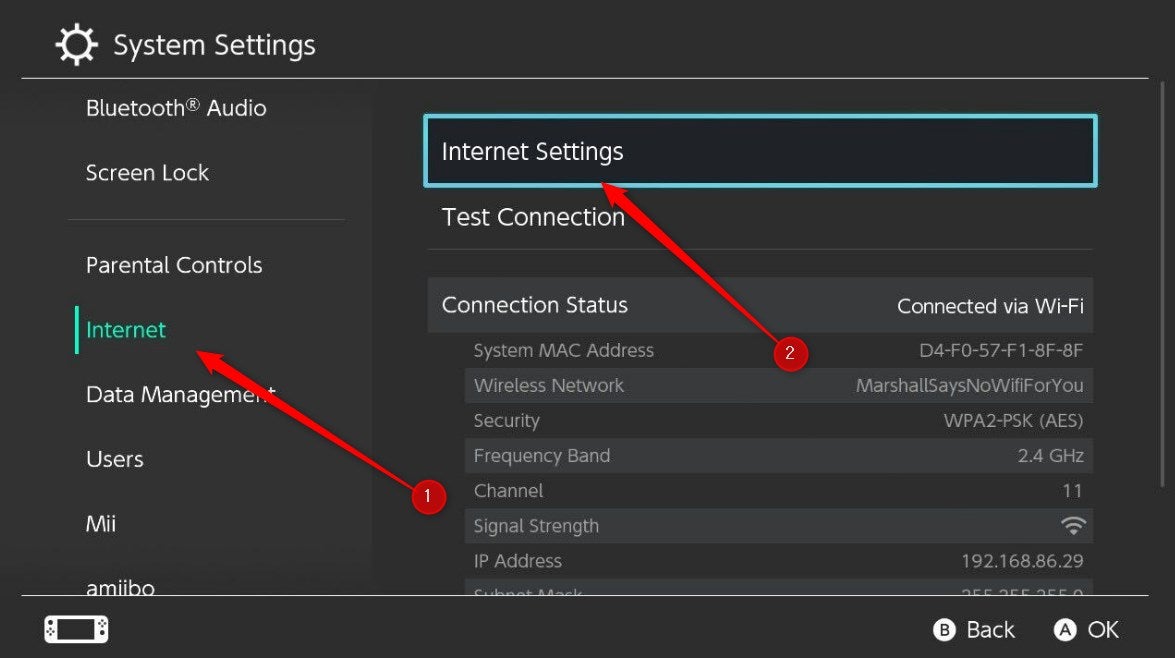
You’ll now be on the System Settings screen. Select Internet in the left-hand pane, and then select Internet Settings.
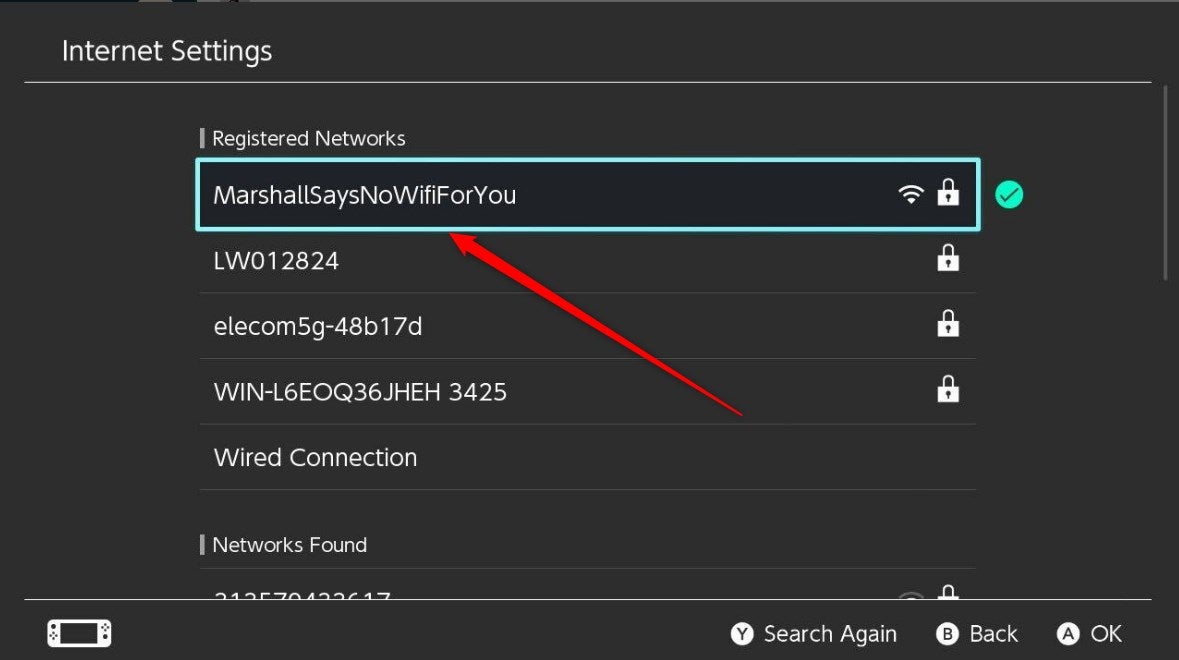
On the next page, select the Wi-Fi connection that you’re connected to.
Next, select Change Settings.
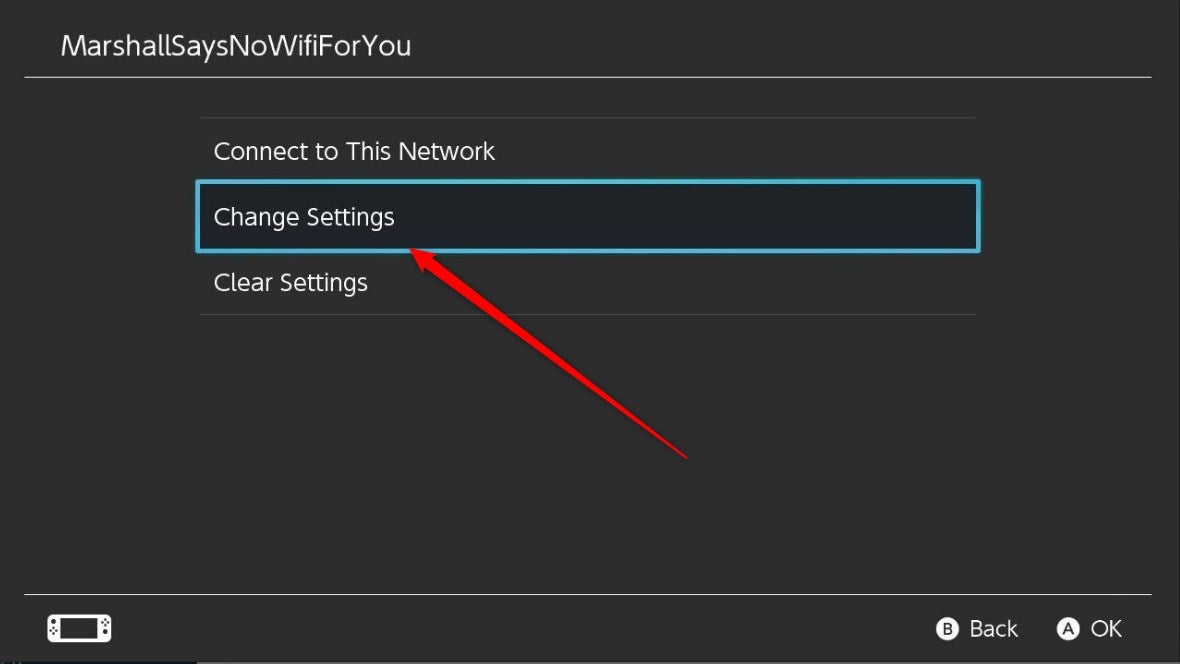
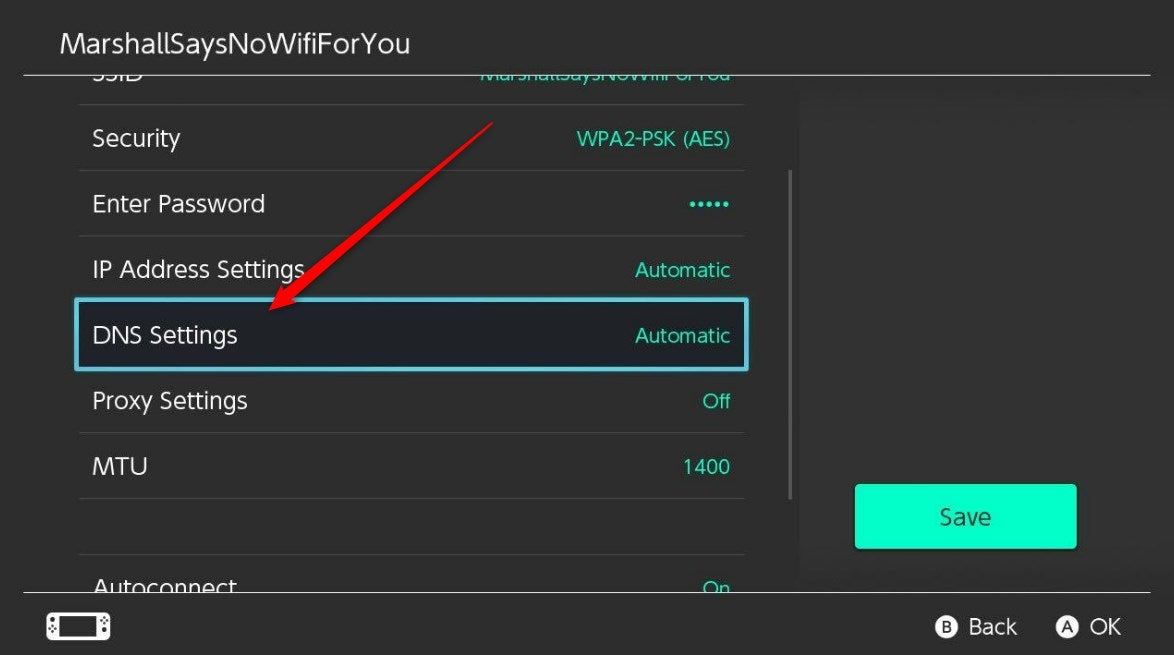
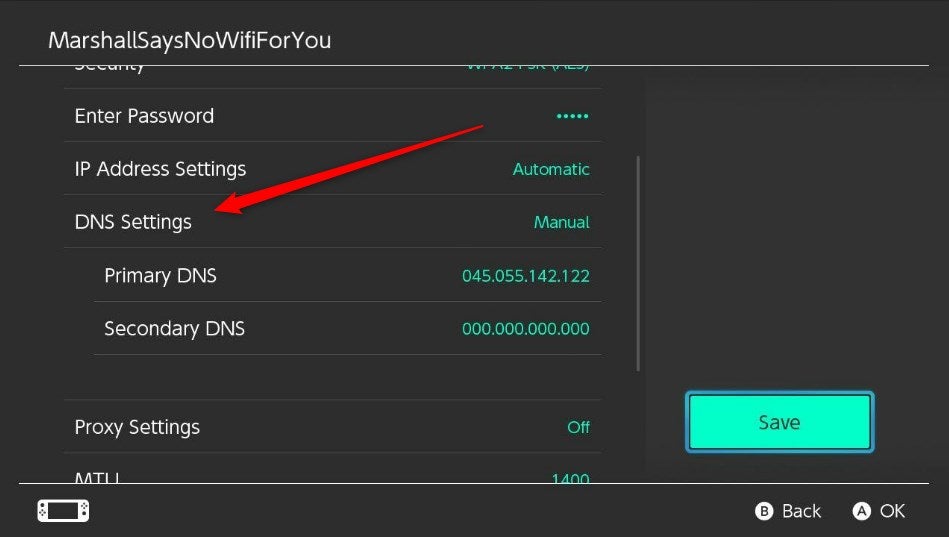
This page displays different settings for your Wifi connection. Scrolls down to DNS Settings, which is currently set to Automatic, and select it.
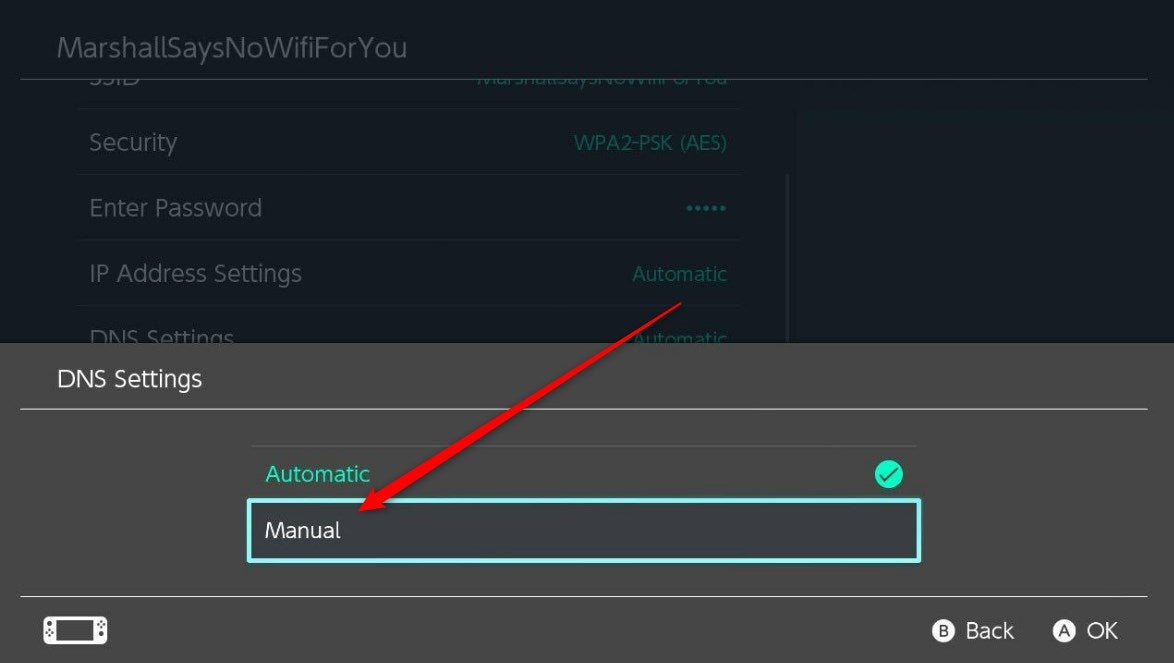
A window will appear at the bottom of the screen. Select Manual.
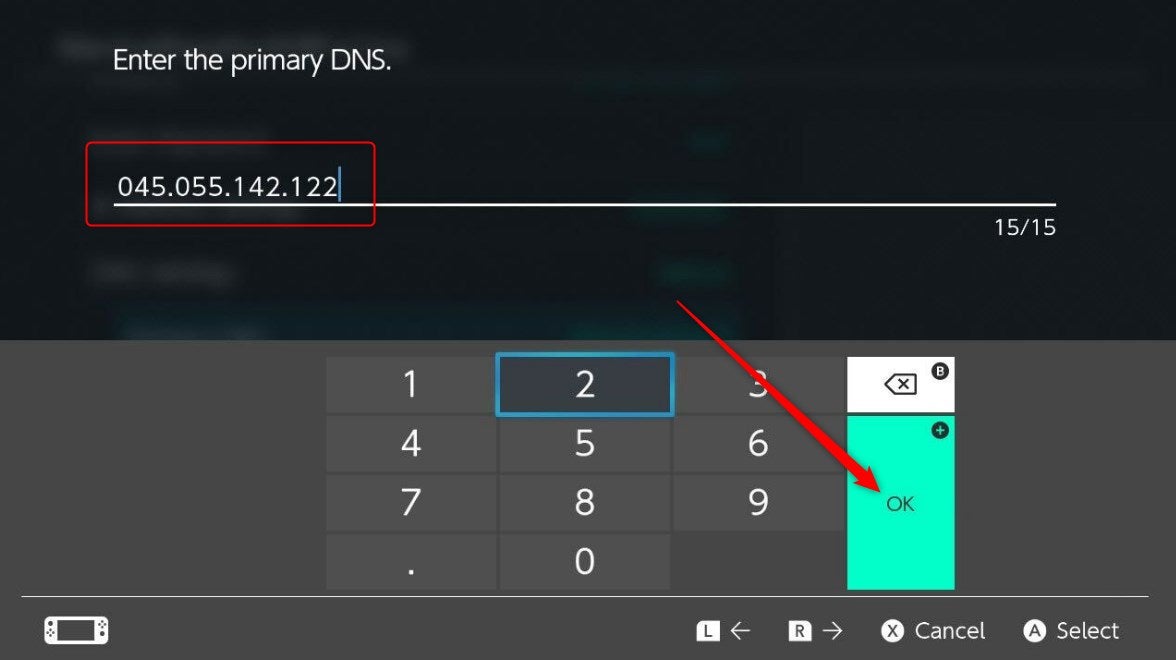
Two new options will now appear under DNS Settings: Primary DNS and Secondary DNS. Select Primary DNS.
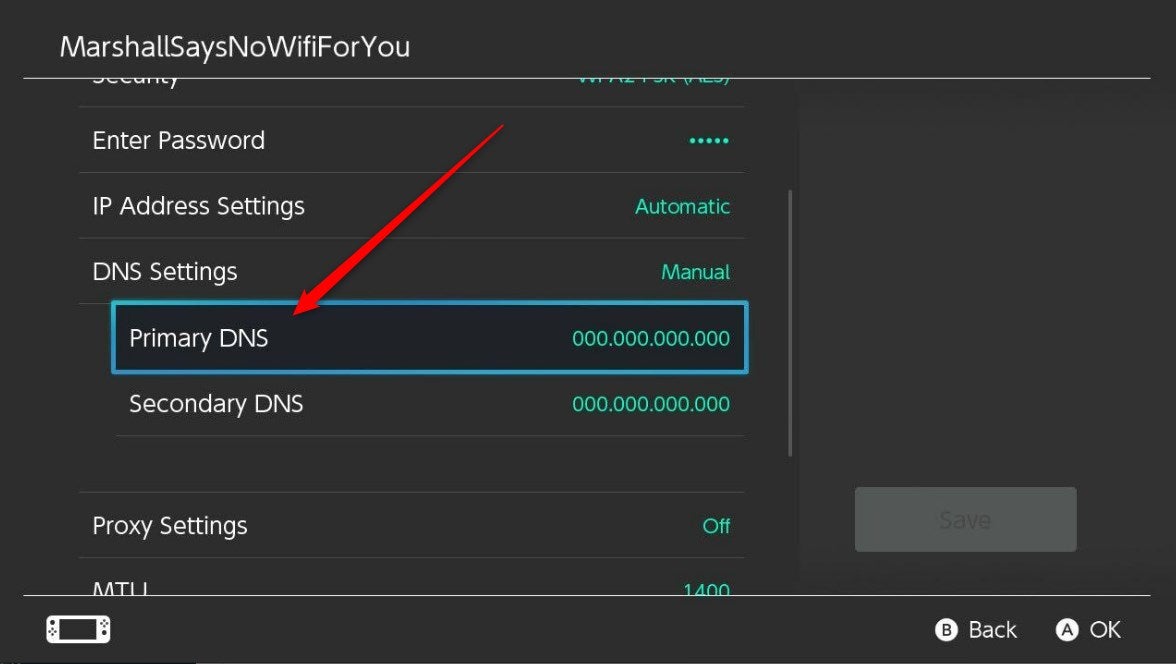
Change the Primary DNS setting to 045.055.142.122 and then select Ok.
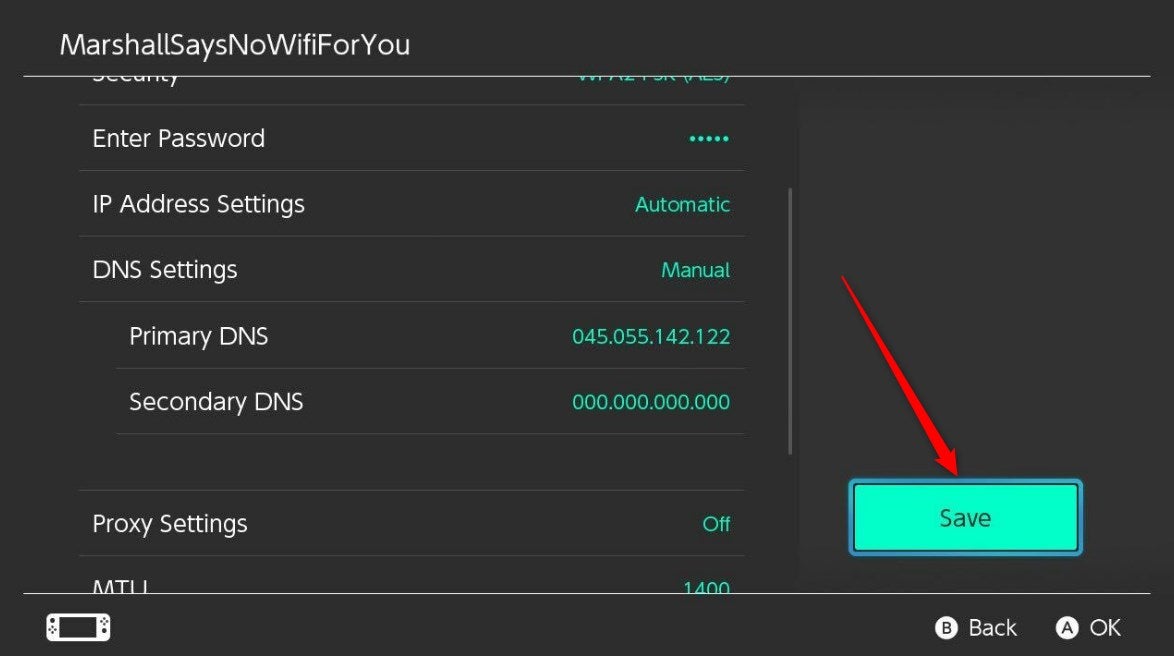
Select Save in the bottom-right corner of the screen.
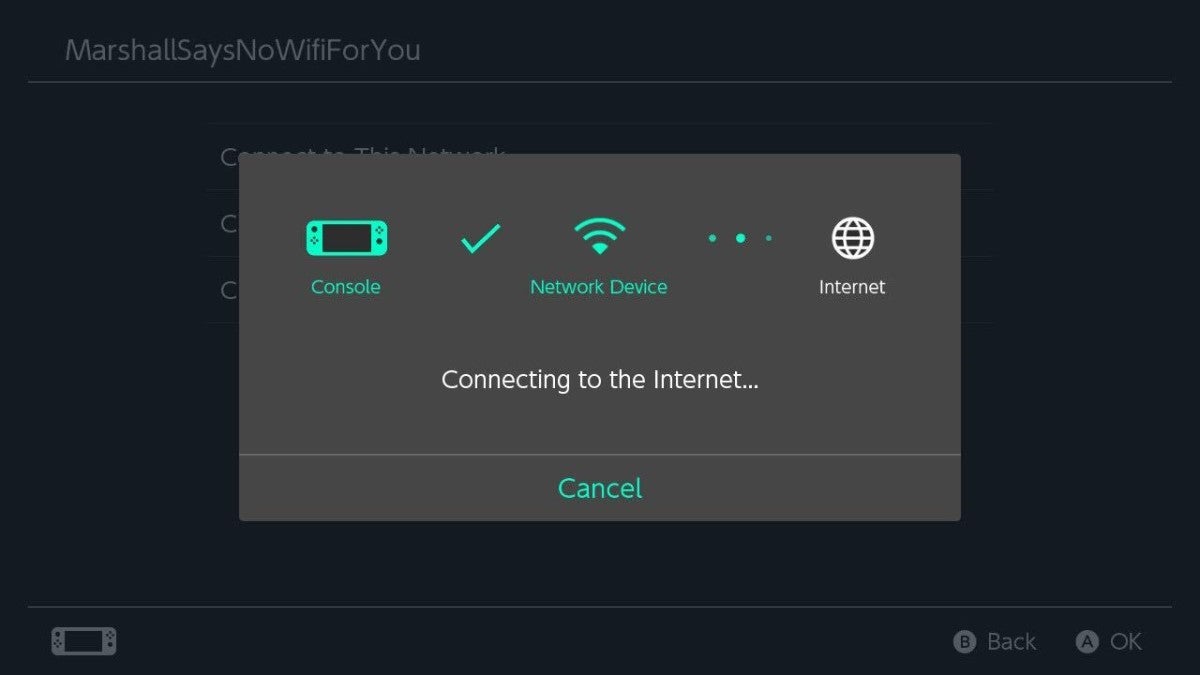
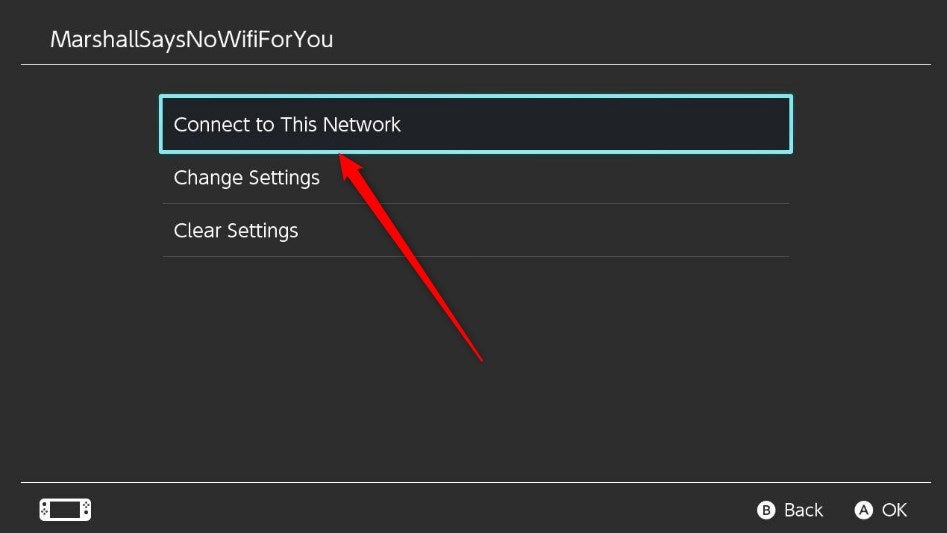
A pop-up message will appear stating that your settings have been saved. Click OK. Once you click OK, you’ll be back on the previous screen. Here, select Connect to this Network and your switch will begin connecting.
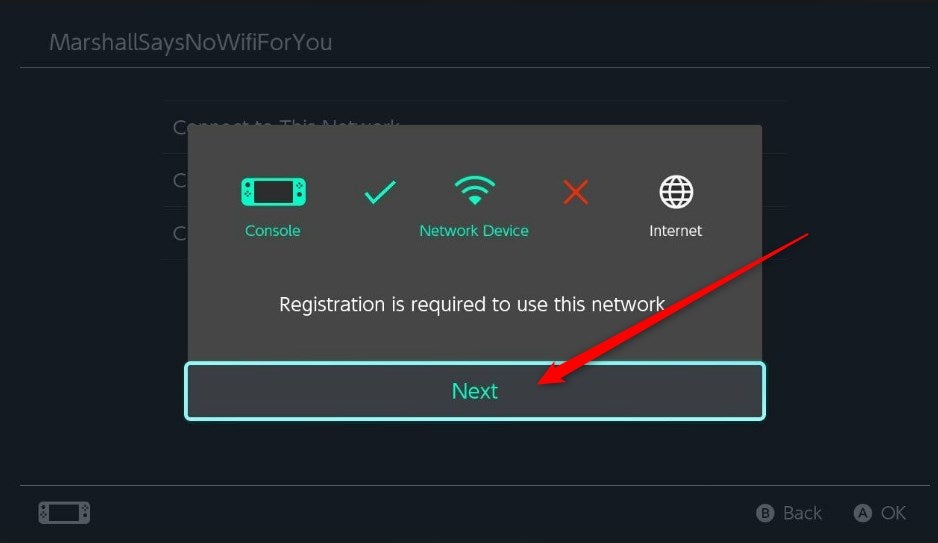
This connection will fail, which is expected. A message will appear telling you that you need to register in order to use the network. Click Next.
You’ll now be redirected to the SwitchBru DNS page. Simply click Continue to Google.
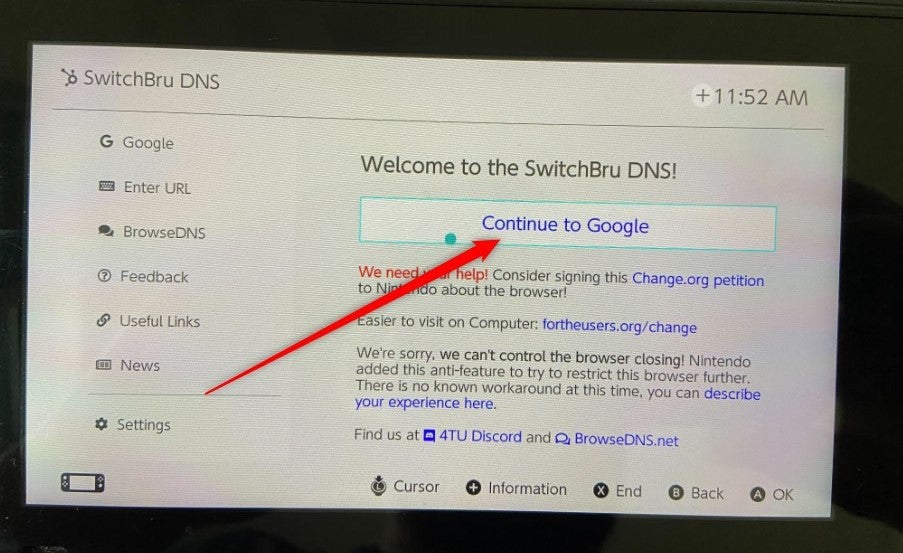
You can now browse the web on your Nintendo Switch.
Revert the DNS to Automatic When Finished Browsing
When you’re finished using the web browser on your Nintendo Switch, you’ll want to switch the DNS settings back to Automatic. To do so, select System Settings from the Home screen.
On the next screen, select Internet and then select Internet Settings.
Select your Wi-Fi connection from the list.
On the next screen, select Change Settings.
Find and select DNS Settings.
The DNS Settings pop-up window will appear. Select Automatic.

Click Save to save your changes. That’s all there is to it. If you ever find yourself wanting to browse the web on your Switch again, just repeat this process and you’re good to go!