![]() Key Takeaway
Key Takeaway
You can adjust your crosshair settings in Overwatch 2 from the game’s Controls menu. You can change the type, size, and color of your targeting reticle, amongst other customization options.
You’ll want to use every tool at your disposal to come out on top! One way to gain a competitive advantage is to change crosshair settings in Overwatch 2. Adjusting them could make a big difference to your gameplay.
Table Of Contents
How to Change Crosshair Settings in Overwatch 2‘s Controls Menu
Experimenting with your crosshair settings in Overwatch 2 is ultimately a matter of personal preference. However, it’s a key way to customize your experience. It’s also one of the best ways to quickly boost your shooting prowess.
Trying out a range of different crosshair configurations can be a way to help you improve your overall skill in matches. So, it’s worth adjusting your settings to work out what feels best for your play style and your platform.
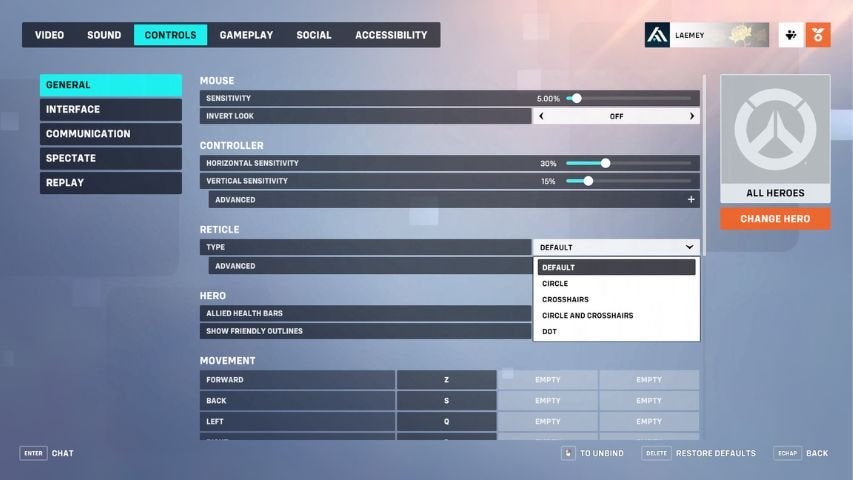
To change crosshair settings on PC, Xbox, PlayStation, or Nintendo Switch, head to the game’s Main Menu. From here, you’ll want to tab across the navigation menu to the Controls option.

On the left-hand side, you’ll see a sub-menu with various settings options. Select General, and then scroll down until you see the Reticle section of the settings.
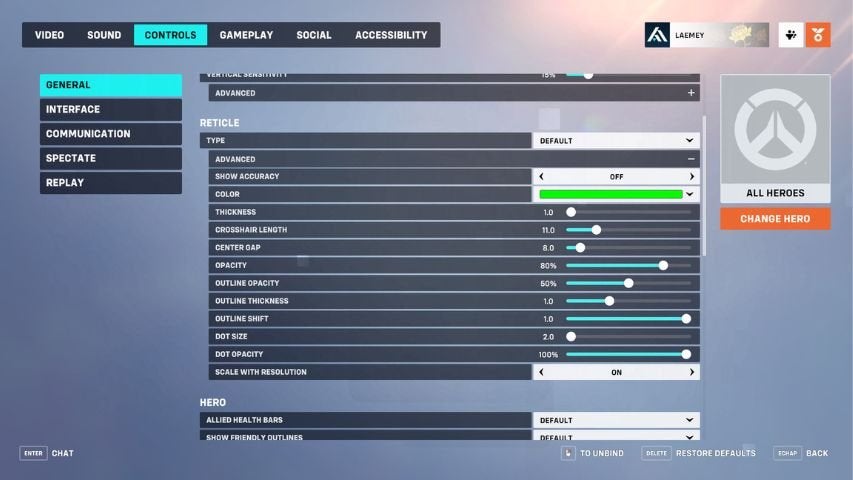
Change the type of reticle from Default to one of the other types of available Crosshairs. Then expand the Advanced tab that sits underneath it clicking the plus (+) symbol.

This section will let you fine-tune the specifics of your chosen reticle. You can change its color, size, and shape in this menu—all of which can help you improve your aim and accuracy.
You can also experiment with settings for opacity (and other specifics) in this menu.
Crosshair Settings Tips
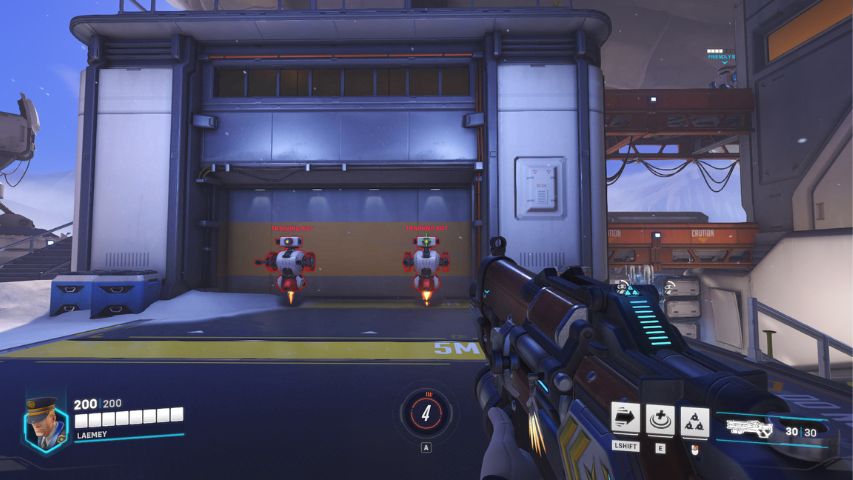
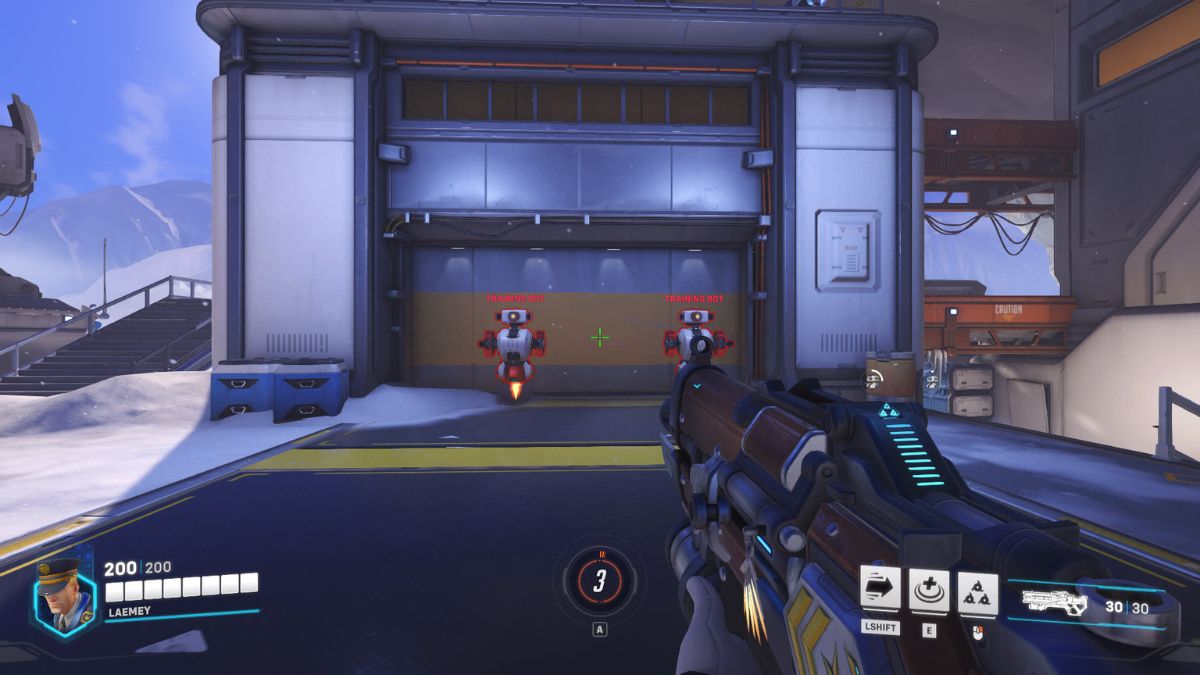
To get the most out of your crosshair adjustments, be sure to select a vibrant color for it. You’ll want to opt for a bright, noticeable hue for your reticle. This bold color contrast will speed up your coordination and make sure your crosshairs stand out more clearly.
Experiment with the different sizes and thicknesses. It takes time to find out what works best for you, so don’t be afraid to try out different types of reticles.
You can set specific types of crosshair settings for each hero in Overwatch 2. In the Controls menu, you’ll be able to select a specific hero to customize on the side of the screen. Select Change Hero underneath the All Heroes image box to do so.
Choosing a Dot might be a good option for more seasoned players, or when you’re feeling confident in your shooter skills. This is to further minimize any distractions and help you perfect the precise aim needed for rapid kills.
If you’re new to the game, consider toggling the Show Accuracy setting on for a while. It will help you see how the ‘spread’ of a hero’s weapon affects accuracy. You can toggle this setting off again at any time in the Controls menu.
Benefits of Changing Your Crosshair Settings
Overwatch 2 is an incredibly fast-paced first-person shooter. Speed is of the essence, both in terms of movement and targeting your opponents. To ensure your gameplay is at its best, you’ll want to improve your accuracy.
Fortunately, if you’re new to first-person shooters, there are specific crosshair settings to help you do that. Even if you’re a seasoned pro at shooter titles, you’ll want to take some time and adjust these settings to your liking. To make sure you don’t lose vital seconds targeting the opposition, you should tweak your crosshair settings to suit your playstyle.

This is especially helpful if you play Overwatch 2 on a console. Adjusting your crosshair settings on an Xbox, PlayStation, or Nintendo Switch can speed up targeting and responsiveness. PC players can also benefit from tuning up their crosshair settings to best suit their style of play.
Using a particular type of reticle can also improve your shooter skills with each individual hero. If you’re just starting out with Overwatch 2, you’ll also want to try out different crosshair settings for different hero roles.
Winning isn’t everything, but, in competitive games like this, it certainly makes playing more fun. Besides deciding to change crosshair settings in Overwatch 2, you should experiment with other settings as well. The more you fine-tune your performance, the more likely you are to win matches. And, as a result, you can impress allies enough to make friends—whom you can play with in future matches. In this 5v5 game, the more the merrier!


