![]() Key Takeaway
Key Takeaway
Throughout this quest, Nav Mode lets you see where to go next. However, misinterpreting where Nav Mode is leading you can cause confusion. Pay attention to your Ghost’s dialogue and the area’s layout for an easier time progressing through A Spark of Hope.
After you defeat the wizard Navôta in one of the introductory quests of Destiny 2, A Spark of Hope automatically begins. This adventure leads you through the EDZ and the Cosmodrome in search of an exotic weapon.
Table Of Contents
Step #1 – Speak to Zavala in the Tower
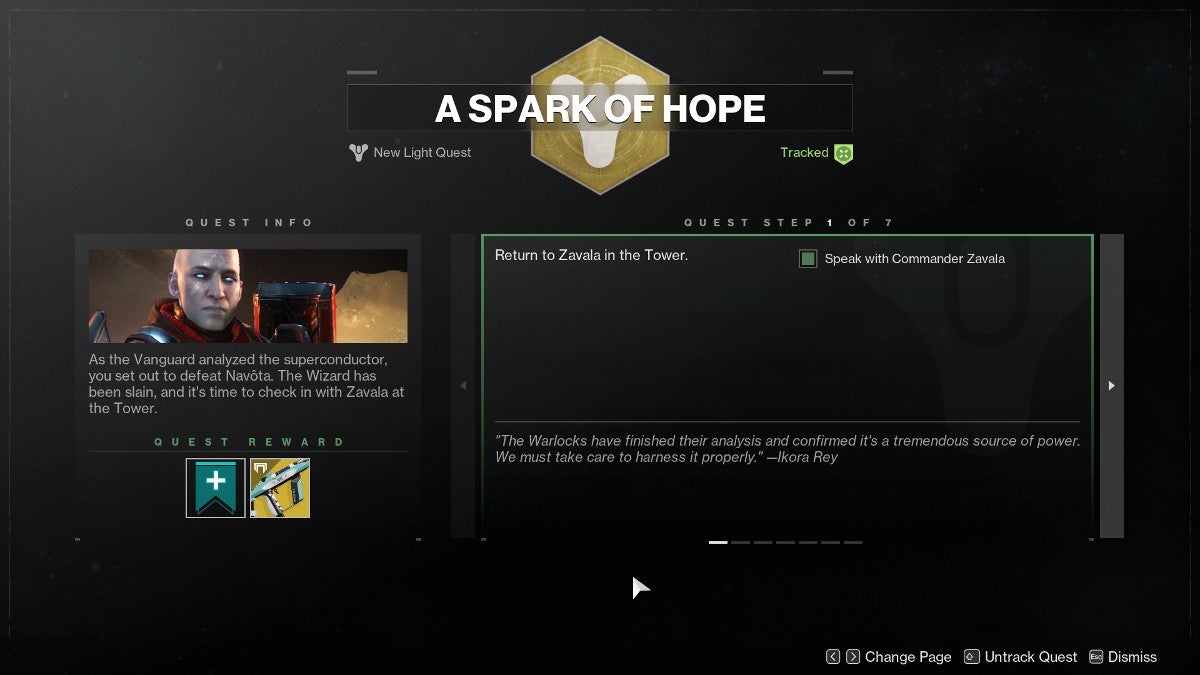
When this quest begins, you’re told to head to the Tower and speak with Zavala about what happened in the previous quest. After exchanging some information, Zavala tells you that Ikora Rey has made progress in her research. Zavala then tells you to meet up with Ikora Rey to learn about what she’s up to.
Step #2 – Speak to Ikora Rey in the Tower
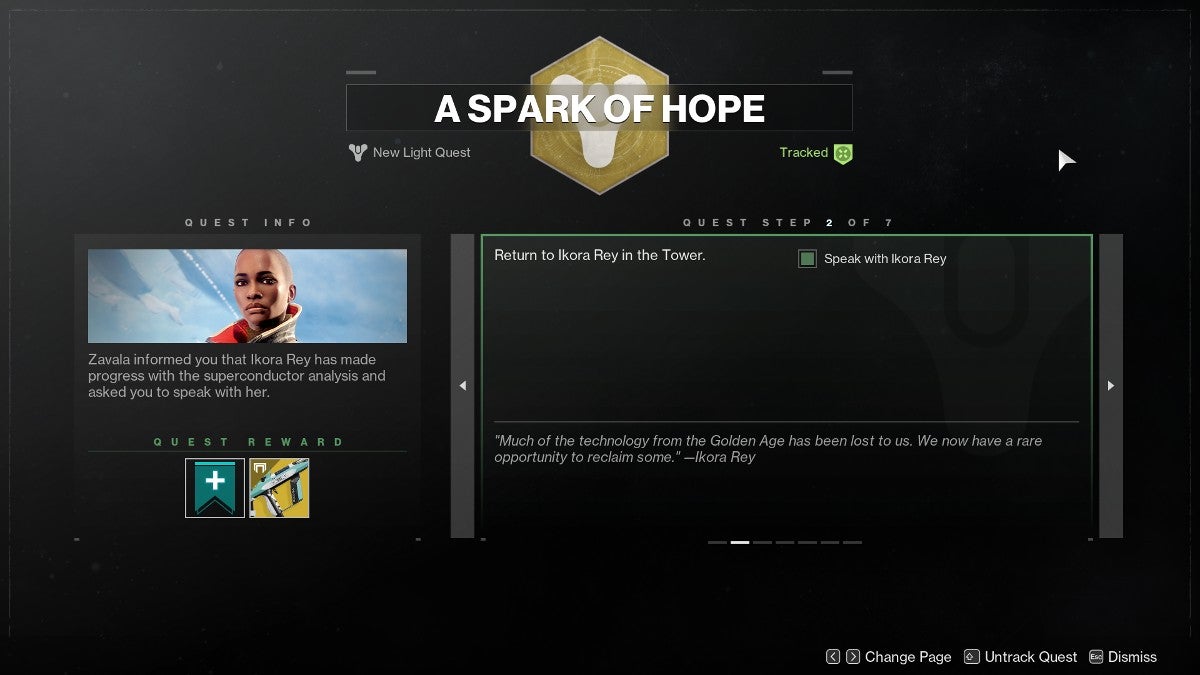
Meeting with Ikora Rey leads to you learning about the superconductor that the warlock vanguard has been analyzing. Eventually, your conversation with her turns to the topic of a Golden Age weapon frame that can be repaired with the superconductor. This is where A Spark of Hope begins to get interesting.
Step #3 – Find Devrim Kay in the EDZ
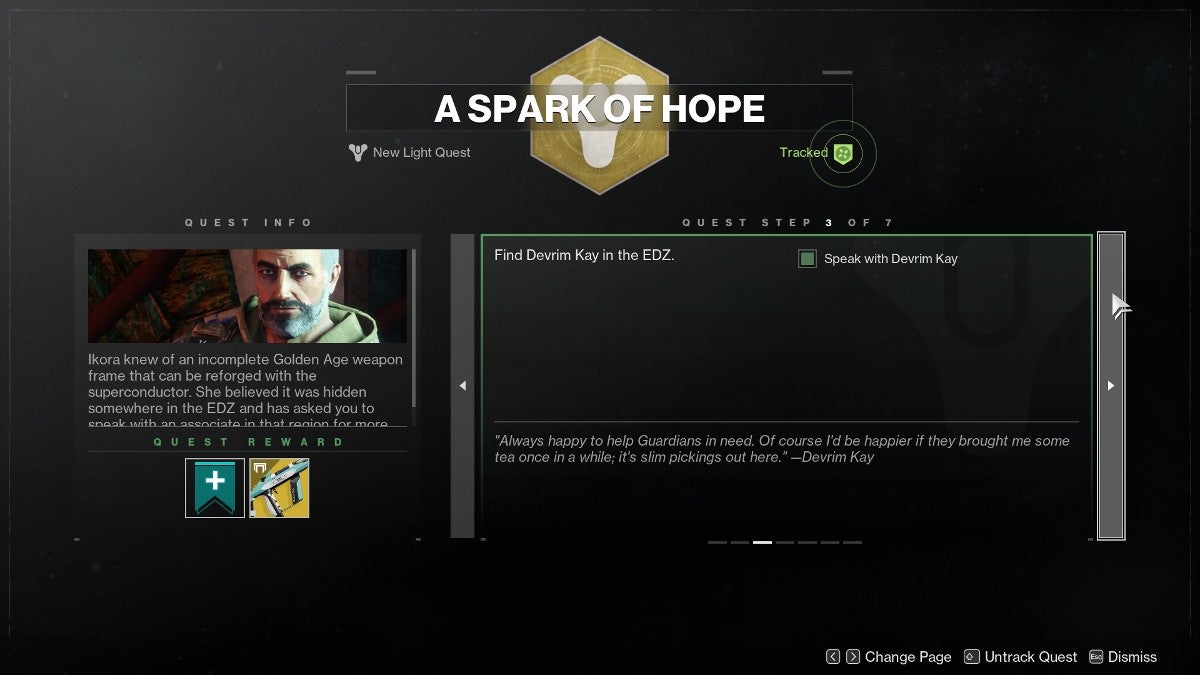
Ikora Rey thinks that the Golden Age weapon frame that can be repaired with the superconductor is in the EDZ. She tells you to find Devrim Kay, who has more information to give you about the weapon frame.
Leave the Tower and go to the EDZ (European Dead Zone). After you land, follow the marker to a tall church in the middle of the rundown city of Trostland.
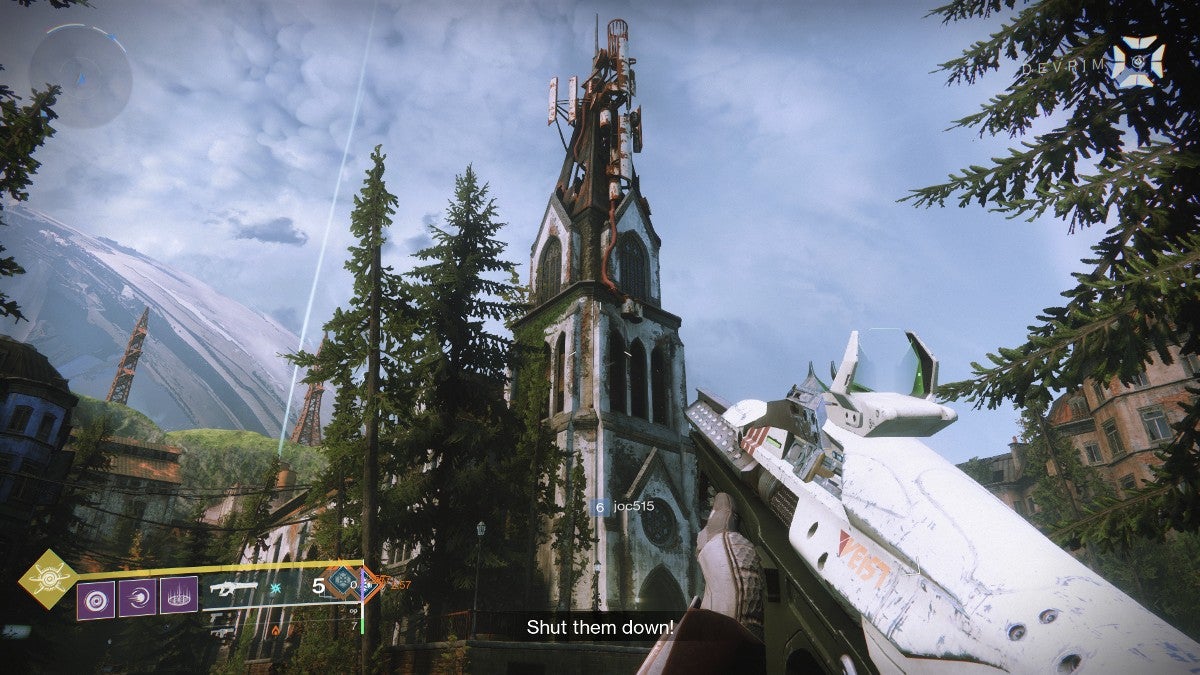
Ignore the enemies that spawn nearby. They are not part of this quest. Go into the church and then follow the ramps up to the very top of the tower. There, you’ll find Devrim Kay at his sniper post.

Devrim tells you about map fragments that, when pieced together, will lead you to the lost weapon frame. This begins the next step of A Spark of Hope.
Step #4 – Reclaim the Map Fragments in the EDZ
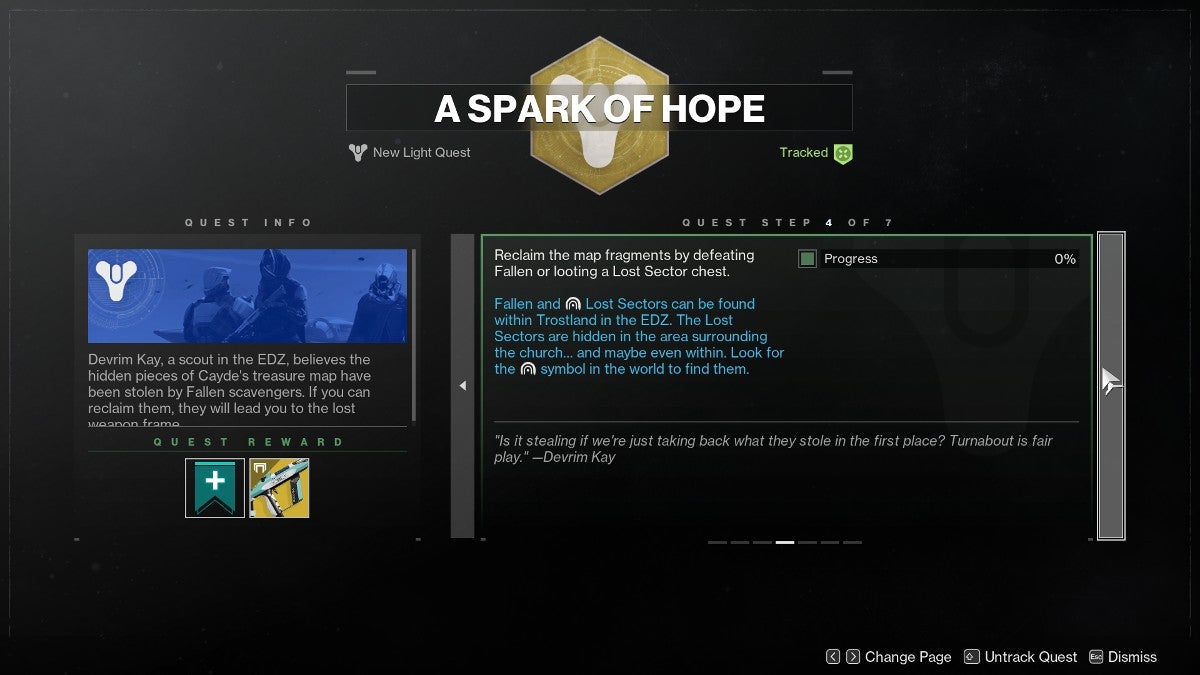
Here’s where A Spark of Hope opens up. In step 4, you can search a few different areas for the map fragments. However, there’s one Lost Sector that’s conveniently marked both in and out of Nav Mode.
This Lost Sector is one of the closest points of interest to Trostland’s church, so it’s one of the better ones to search for map fragments.
Head to the Outskirts South of Trostland to Find a Lost Sector
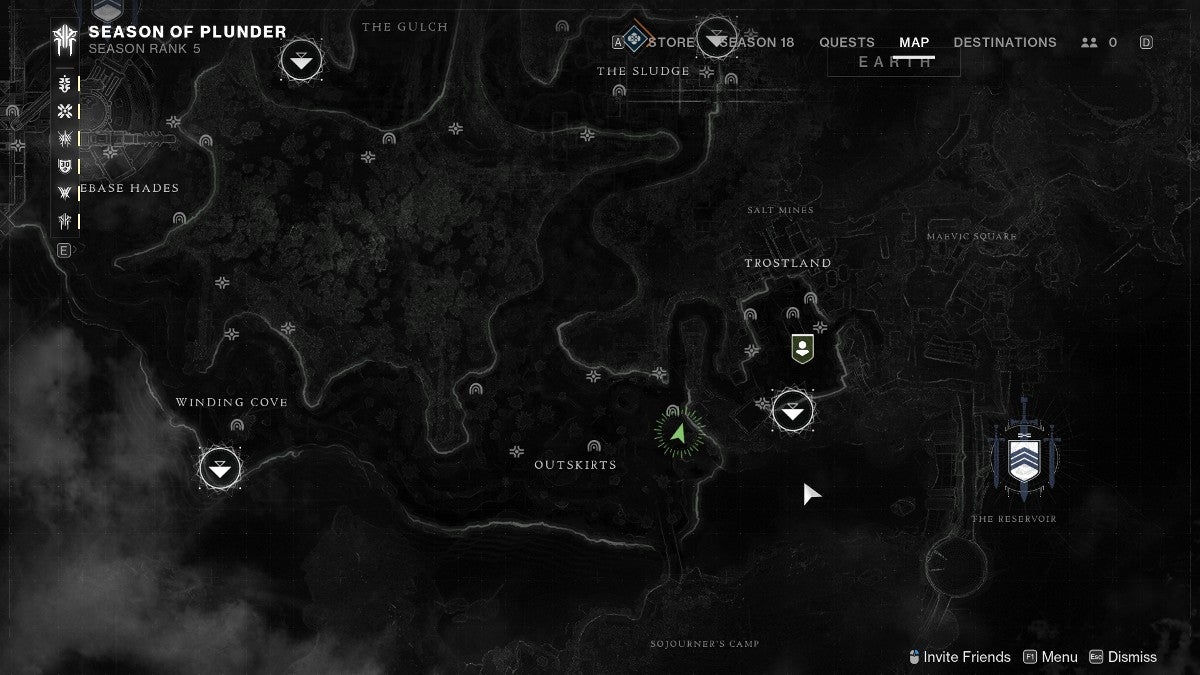
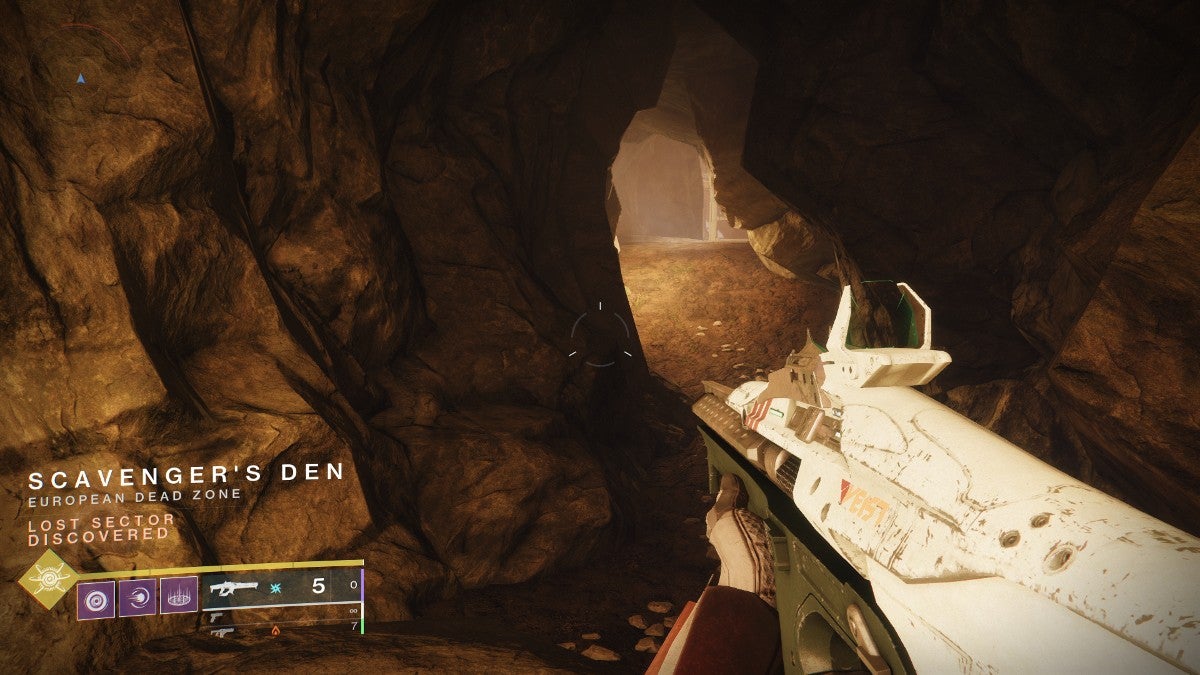
From Trostland’s church, head mostly west down the winding main street until you reach the swampy outskirts southwest of town. After following the marker, find the Lost Sector symbol on a rock just outside of a cave.
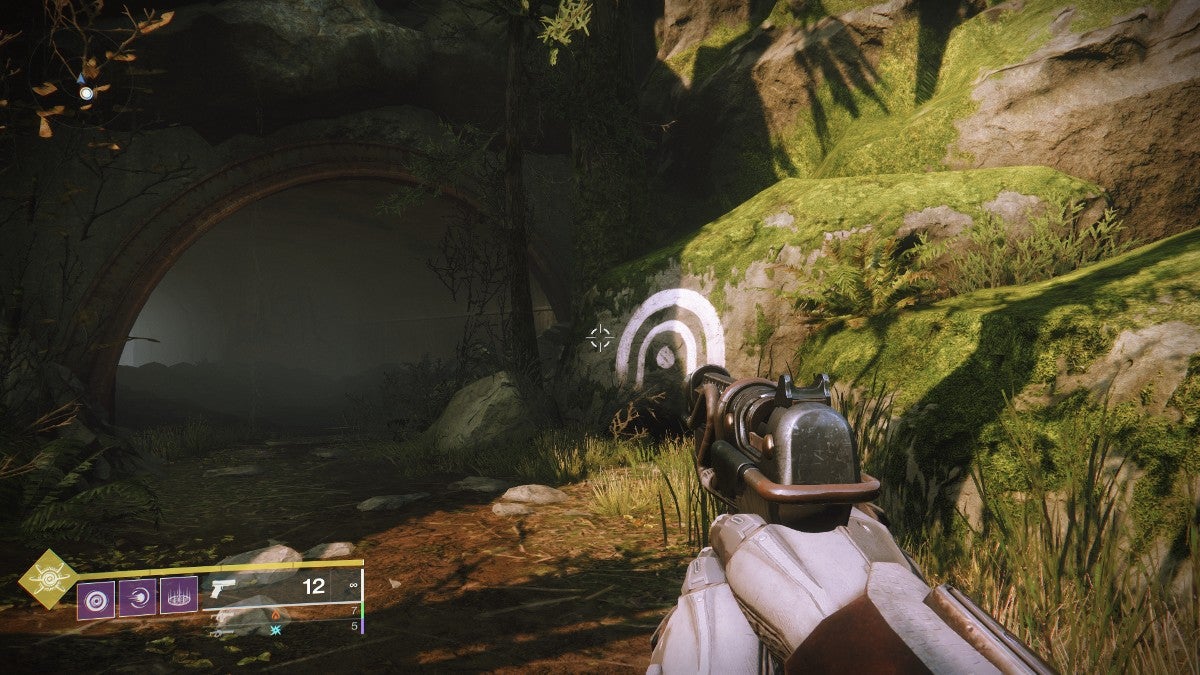
In Nav Mode, the marker will hover over the symbol. However, you need to head into the cave to find the Lost Sector.
Clear the Lost Sector to Find the Map Fragments
When you enter the cave, you need to do some light platforming to reach the true entrance to the Lost Sector. Go far enough in and the location’s name will appear in the bottom-left corner of your screen (Scavenger’s Den). This means you’re in the right place.
Within, there are plenty of Dregs and Marauders to fight, but you want to keep your eyes peeled for a unique enemy with a yellow health bar. This foe (usually a captain of some sort) is the one holding the map fragments that you need. The easiest place to find them is in an upper area with two pink walls from which new enemies spawn.
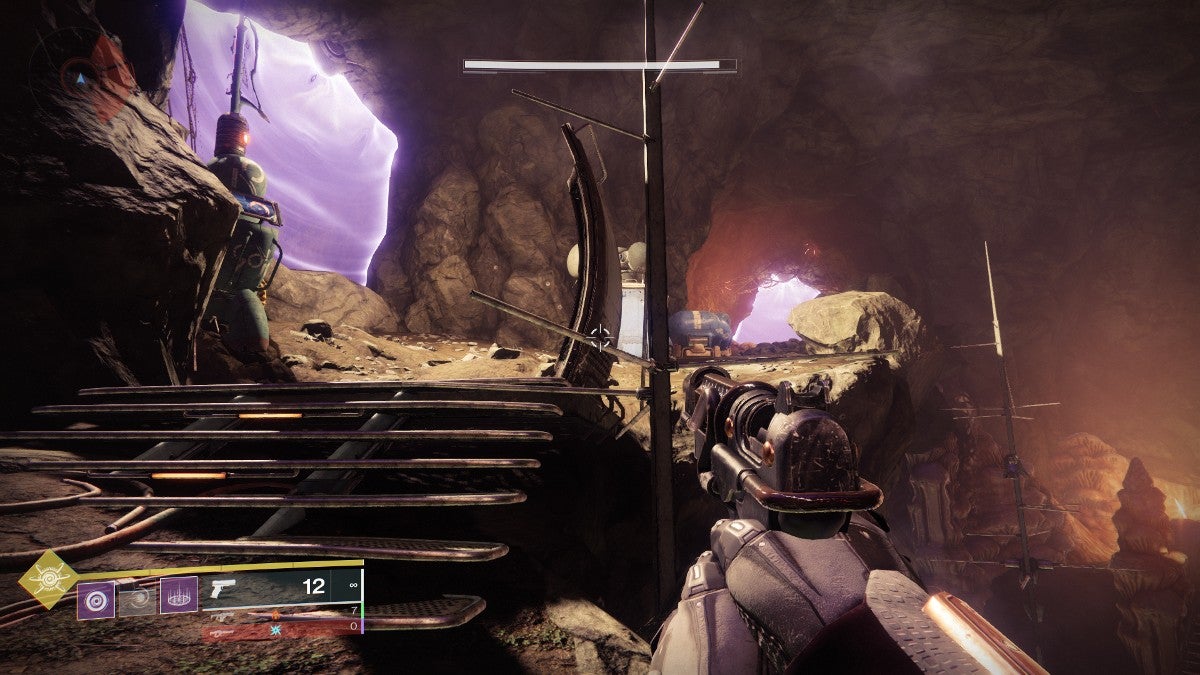
Be careful, as there isn’t much cover from enemy fire up here. The elite enemy with the yellow health bar is also pretty tough, so use your stronger weapons to take them down quickly. Once they are defeated, grab the map fragments and leave Scavenger’s Den. Besides the map fragments, there is nothing interesting here right now.
Step #5 – Return to Devrim Kay

With the map fragments in hand, head back to Devrim Kay. While the map fragments are intact, they don’t make sense. You need Devrim to help you figure out where to go next.
After a chat with Devrim, you must go to the Cosmodrome next. The Golden Age weapon frame you’re after is located there. It’s time to leave the EDZ.
Step #6 – Complete the Risk/Reward Mission in the Cosmodrome
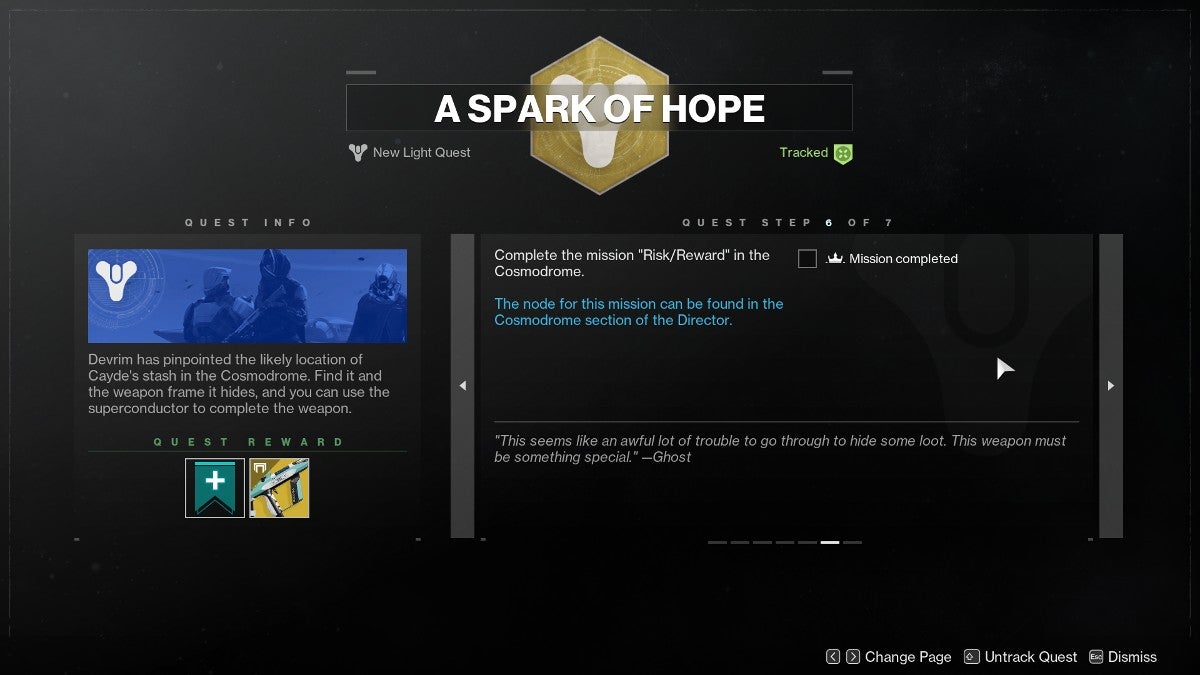
When you go to the Cosmodrome, there is a mission here called Risk/Reward. You need to complete this mission to progress A Spark of Hope. On the Cosmodrome map, you can see Risk/Reward in the southwest of this location.
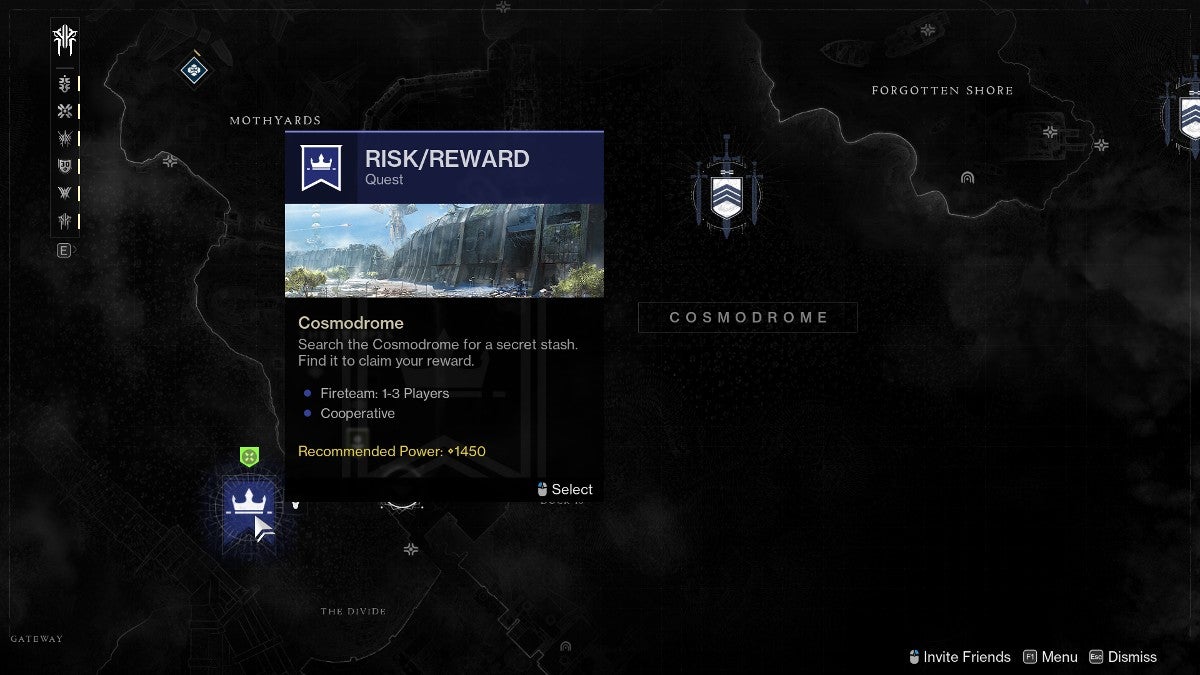
Since the recommended power for this mission is 1,450 and up, be sure to equip gear that will raise your power to this level or higher. If you don’t, you’ll have a hard time fighting some of the enemies in this mission. You can also ask some friends to help you, as this mission supports fireteams of up to three players.
Kill Three Dusk Captains
Your first task in this mission is to find and defeat Dusk Captains. Although, these elite enemies do not spawn by themselves. You have to take out Mechanics to draw them out.
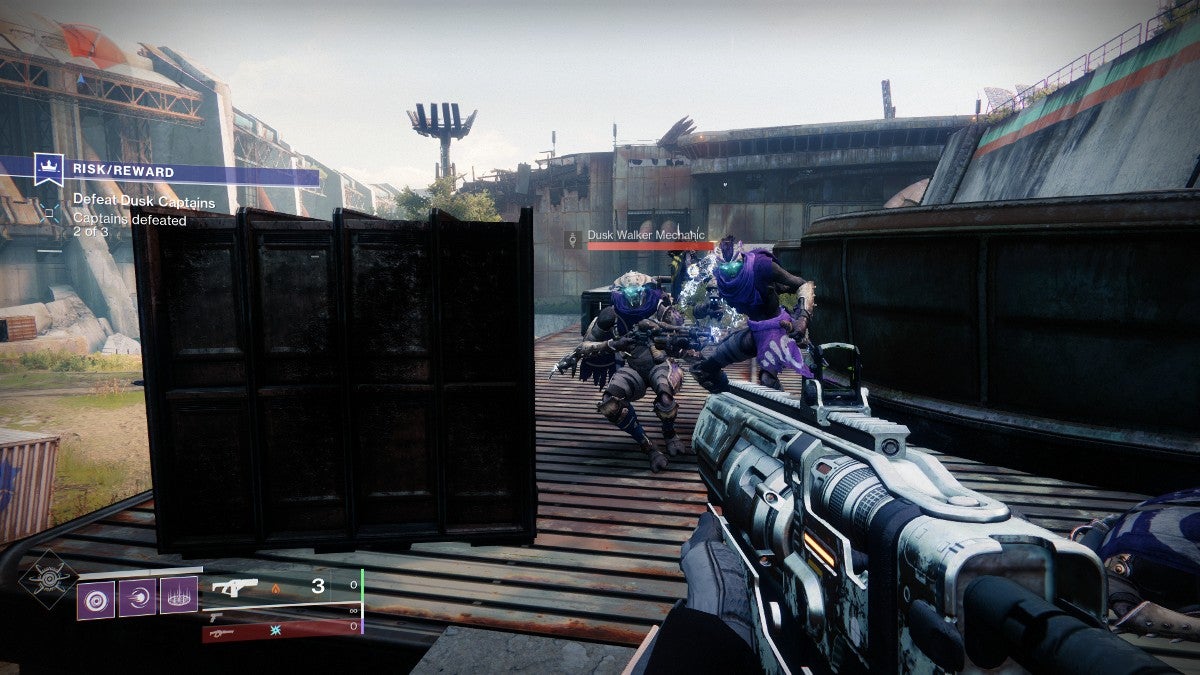
Dusk Walker Mechanics are the enemies with grey bodies and white heads. They have a purple scarf, but that’s the only color on their bodies. You can tell the Mechanics apart from other enemies by their dull appearance. Keep killing all Mechanics you see until a Dusk Captain shows up.

When a Dusk Captain spawns, they will be easy to spot. They’re noticeably taller than other enemies and they have a yellow health bar. Equip one of your stronger weapons and blast them away. You need to take down three Dusk Captains to progress, so keep killing Mechanics to draw out more Dusk Captains.
Find the Locked Gate
After you kill three Dusk Captains, your quest data will update. Your Ghost tells you that you now need to find and open a locked gate “near the gap” in the Breach.
This is not a very good hint, as there is no frame of reference for where or what the Breach is. However, you can use Nav Mode to spawn markers that will guide you.
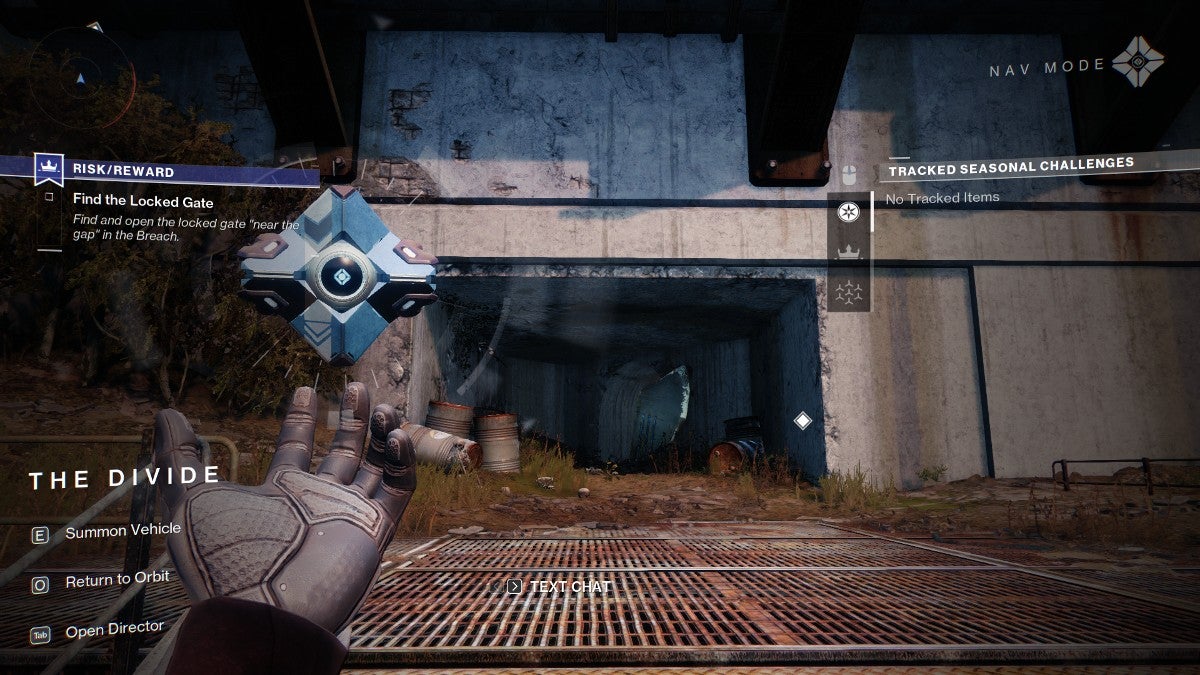
The markers may not show up in helpful directions if you’re high up. Stay on the ground and move towards the large concrete building at the far end of the mission area.
If you’re going the right way, you’ll find a rectangular entrance that leads into the concrete building. Sadly, there is no map of this mission area, so you have to rely on Nav Mode to find the right way to go.
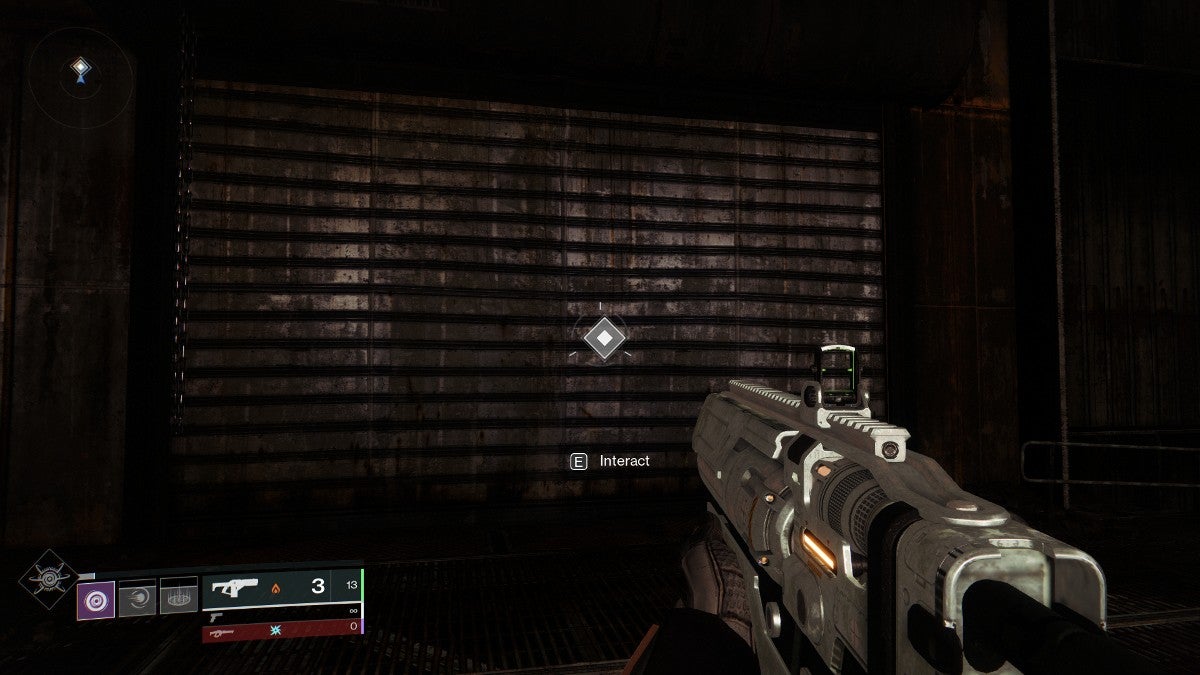
The tunnel leading through the concrete building is very linear, so keep following it until you reach the locked gate. When you do reach the locked gate, it will look like a garage door. Interact with it to open the passage beyond. Get ready for a lot of platforming.
Do a Lot of Platforming to Reach the Secret Stash
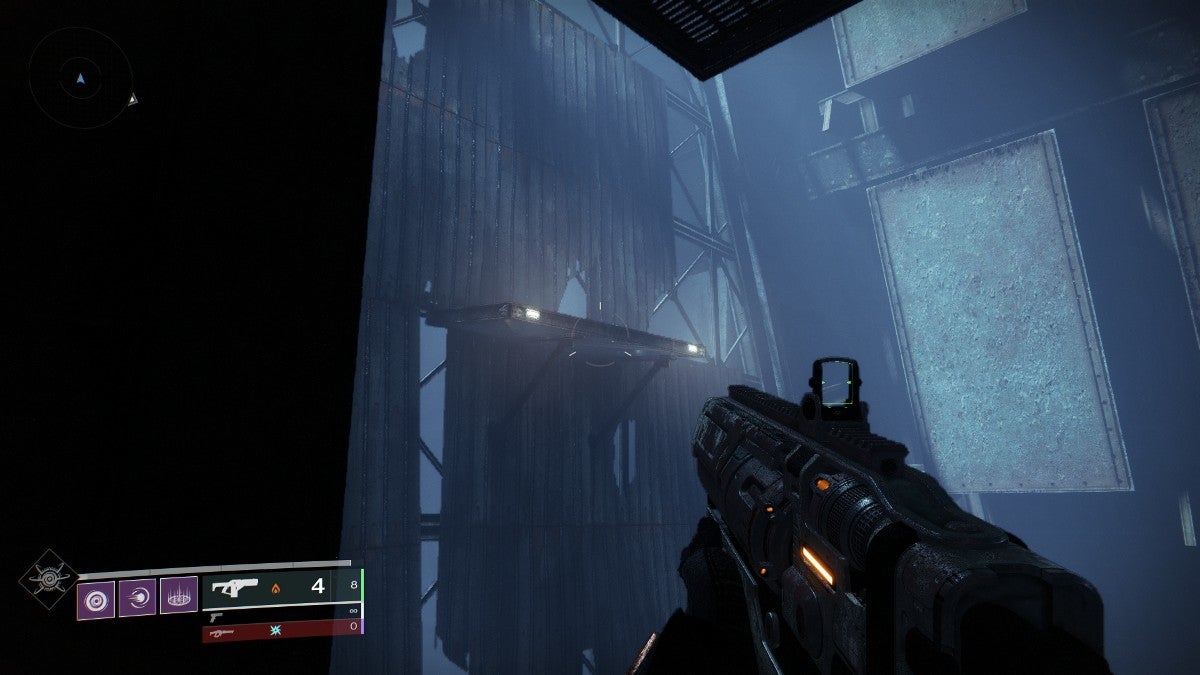
This next part of the mission can be tedious and annoying, so here are a few tips that can help:
- Follow the lights, as the correct path is usually shown with areas that are lit up
- Turn up the brightness on your monitor to see better in darker areas
- If you can’t make a jump, look around for a closer platform to jump to first
- Open Nav Mode to see the next platform you need to jump to
After many jumps, you arrive at an area that looks like an old workshop lit with dull yellow lights. Your quest data will also update to tell you to “keep searching,” despite the fact that you’re pretty much already at your destination.
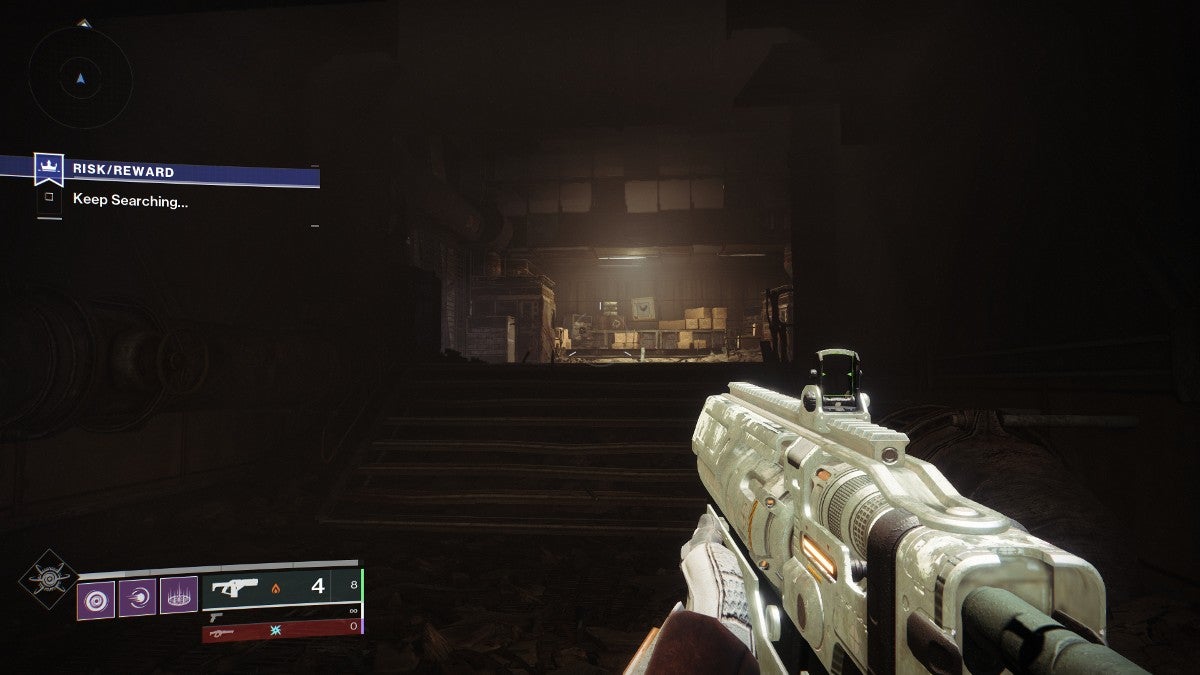
Walk up the short flight of stairs and the prompt to “Recover Arc Conductors” will appear. The Arc Conductors are lying on a table covered in orange bits of paper.

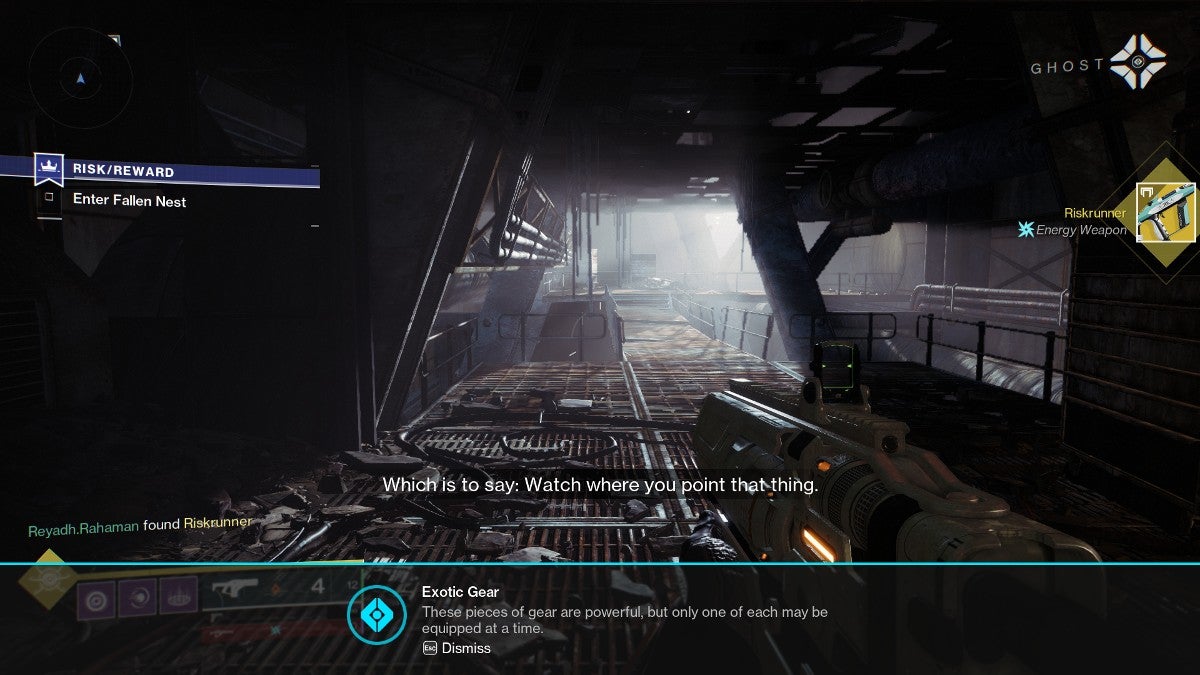
Clear Out a Fallen Nest
At this point, you get an exotic gun. You’re told to equip it and use it to clear out a Fallen Nest. Do so to progress through the last part of the Risk/Reward mission.
When you enter the Fallen Nest, you must take out all the enemies—including a named elite foe with a yellow health bar. There are lots of pillars in the area to use as cover, so you should be able to take out all enemies without too much trouble.
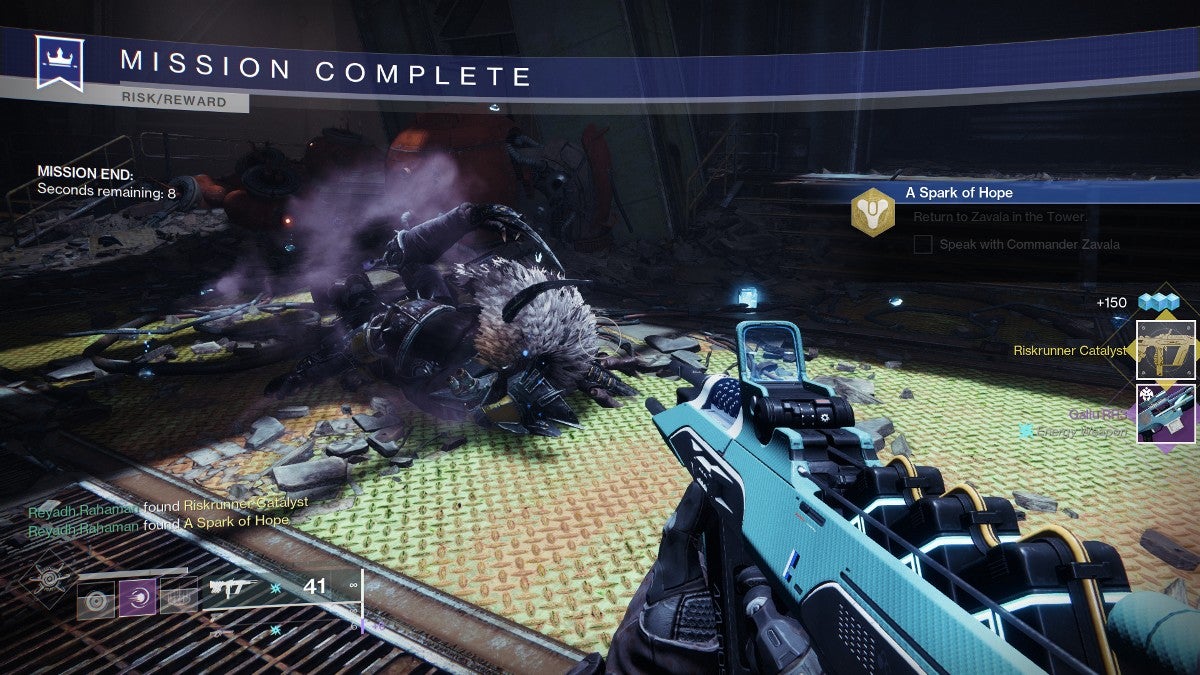
After clearing out the Fallen Nest, the mission will end. This will bring you to the last step of A Spark of Hope.
Step #7 – Return to Zavala in the Tower
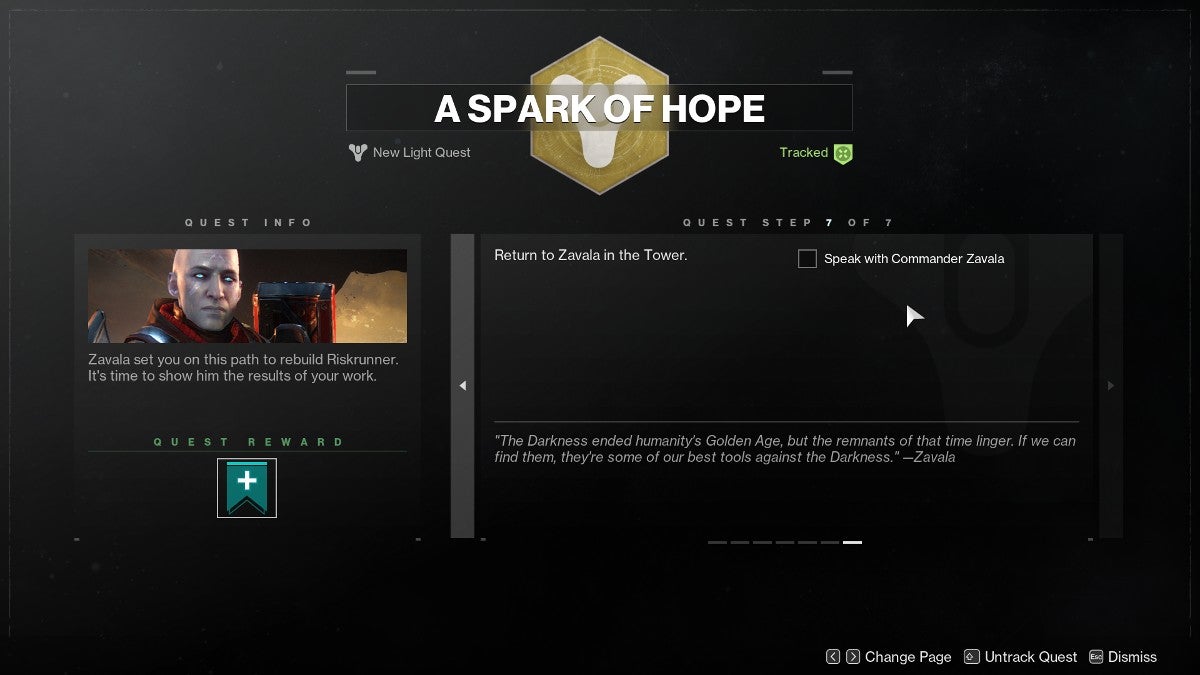
Now all that’s left to do is to return to Commander Zavala in the Tower. When you do, he’ll have rewards for you.
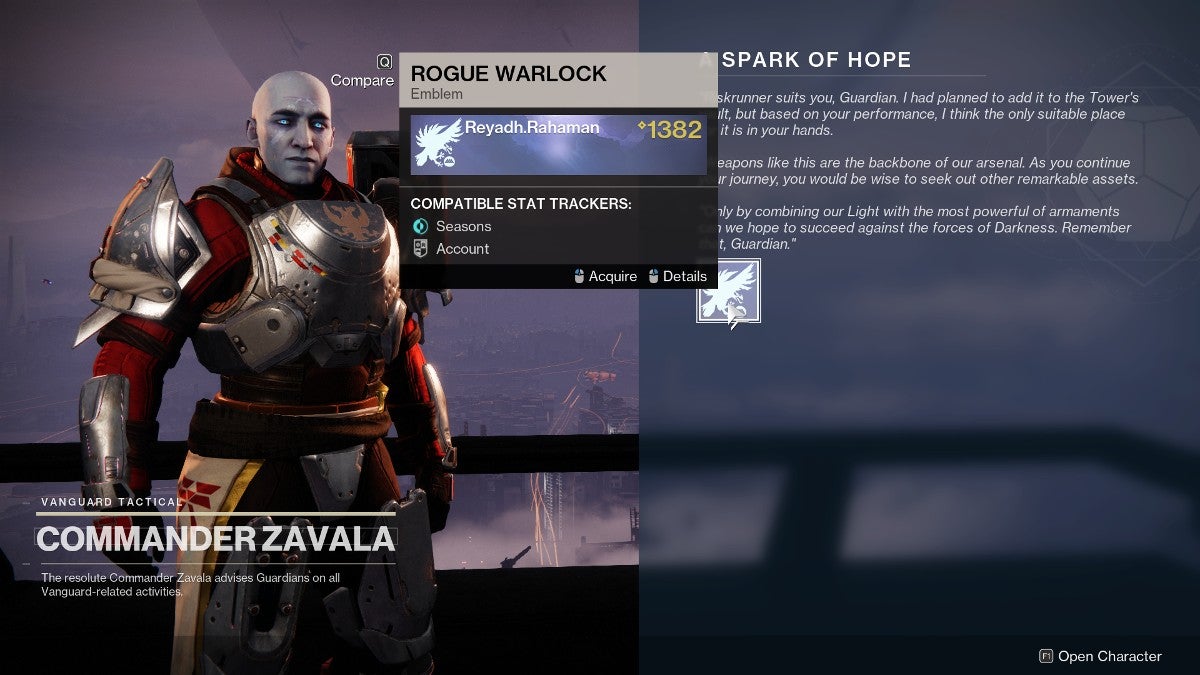
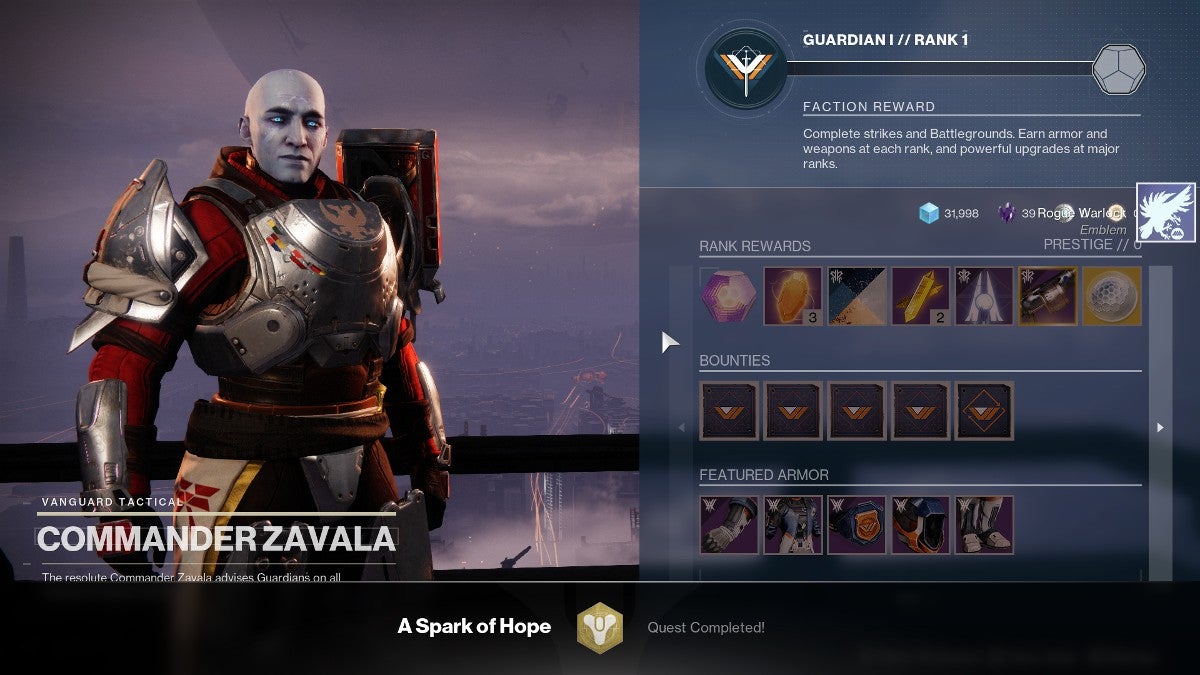
Speaking with Zavala will cause him to give you an emblem. He also talks about your success and that it has strengthened the Guardians. Following this, the quest comes to an end. Well done, Guardian, you’re well on your way to saving the universe now!