Table Of Contents
Speak with the King of Cornelia
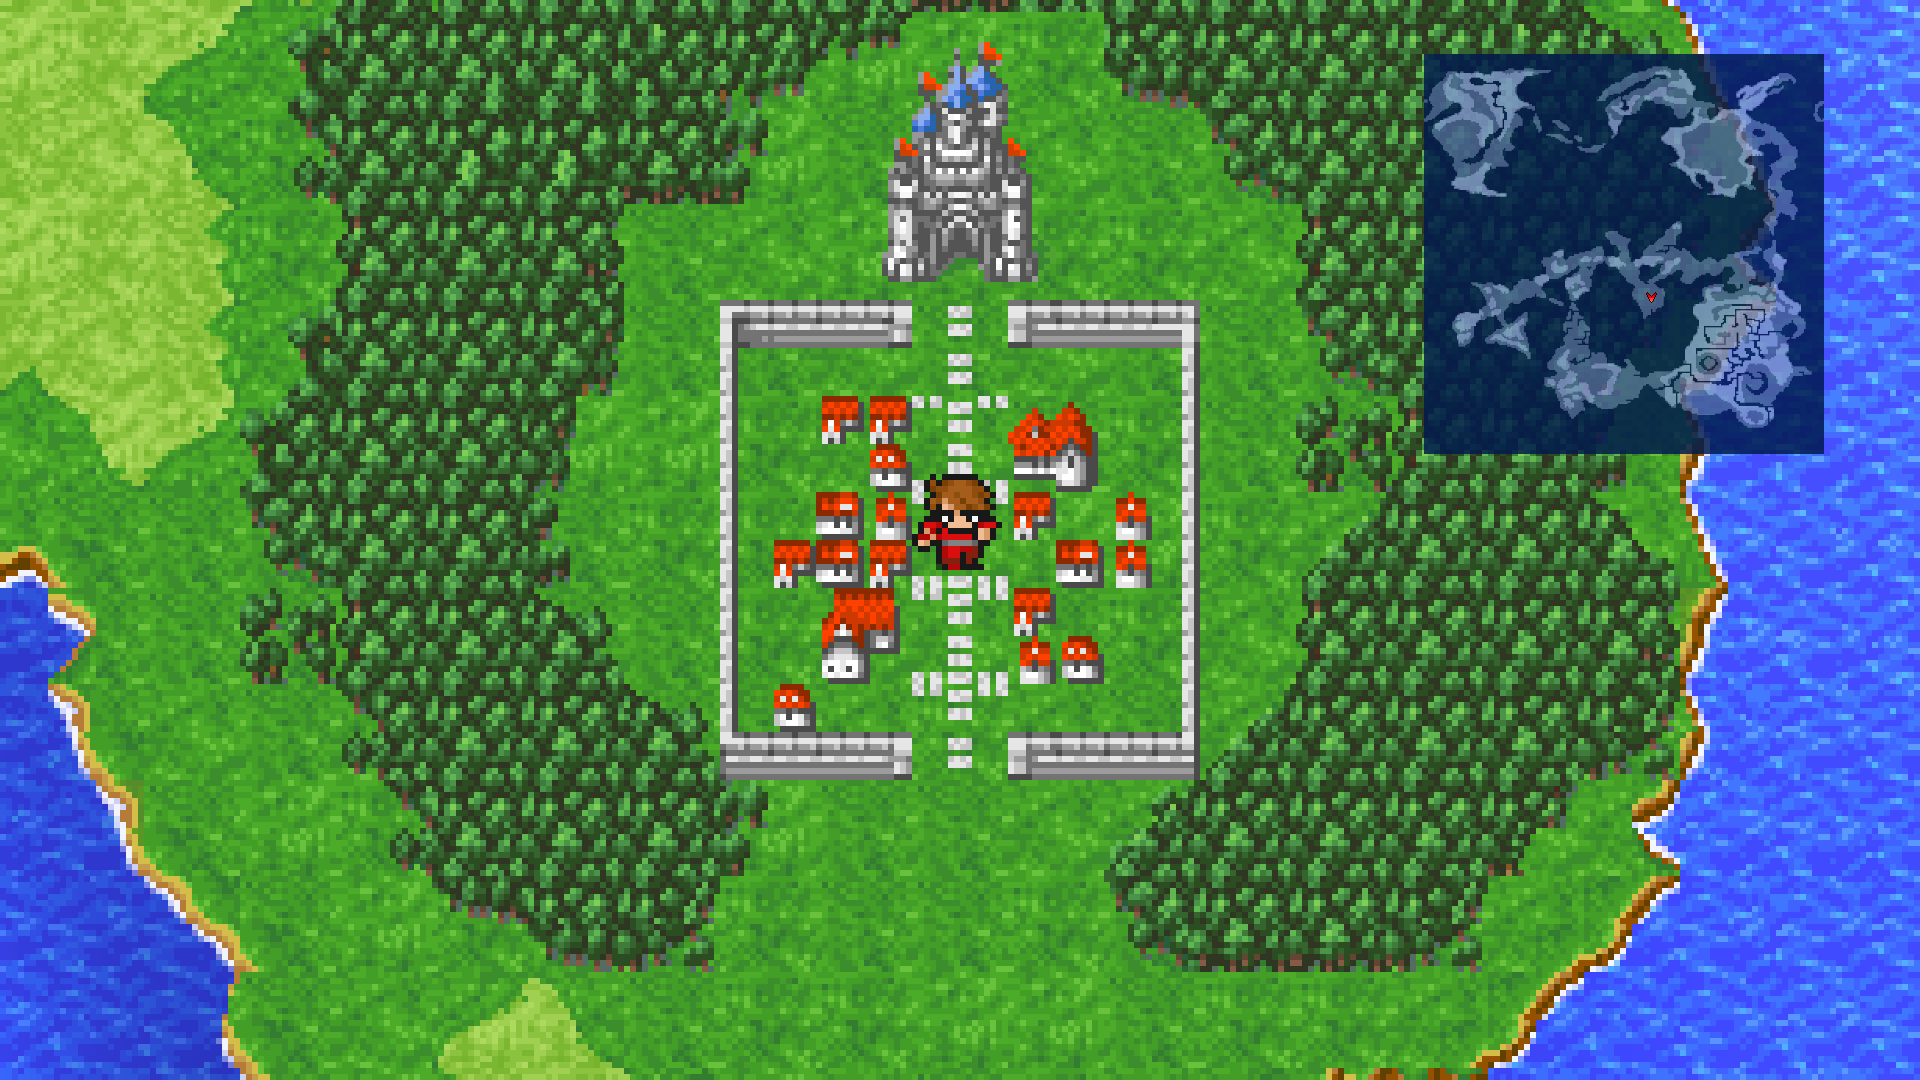
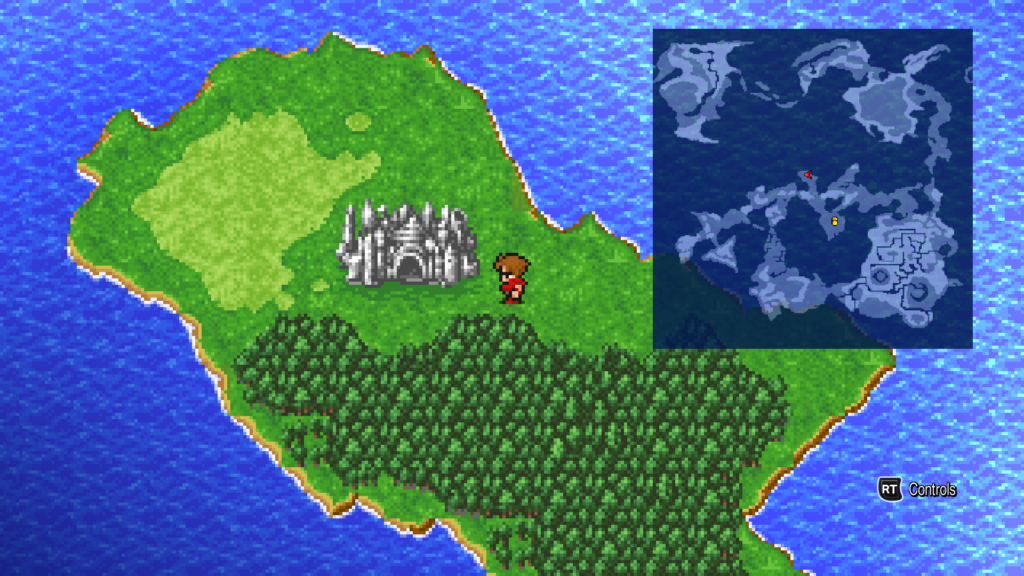
After the opening cutscene, the Warriors of Light will appear in front of the Kindom of Cornelia. You need to visit the king first, so walk north to enter the castle.

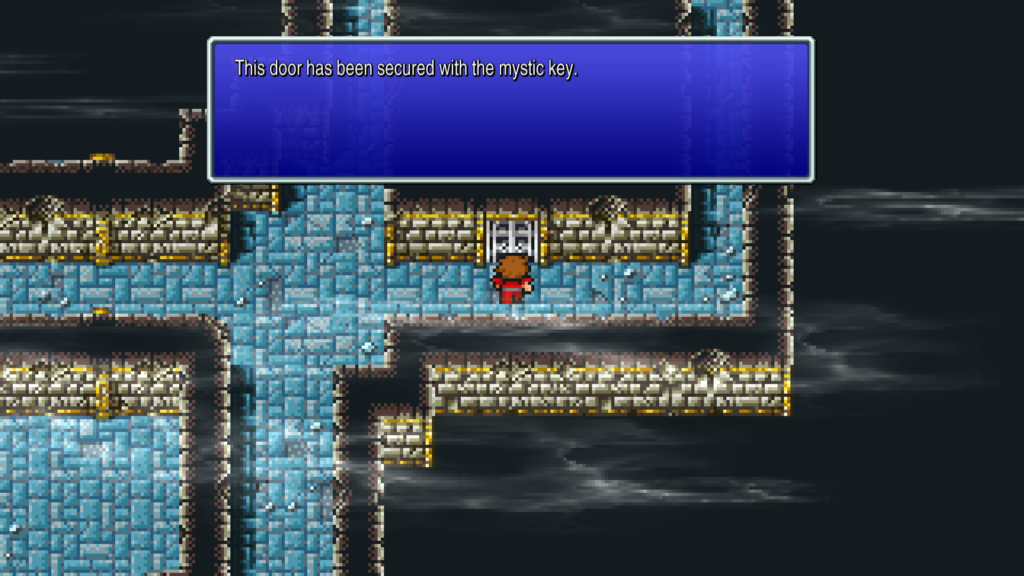
Once inside the castle, speak with the occupants on the first floor. You’ll learn that Princess Sarah has been abducted and that the king and queen are searching for the Warriors of Light. You’ll also find two doors that are sealed with the mystic key which was given to the elf king until the coming of the Warriors of Light. Ignore those doors for now and walk up the stairs to the second floor.
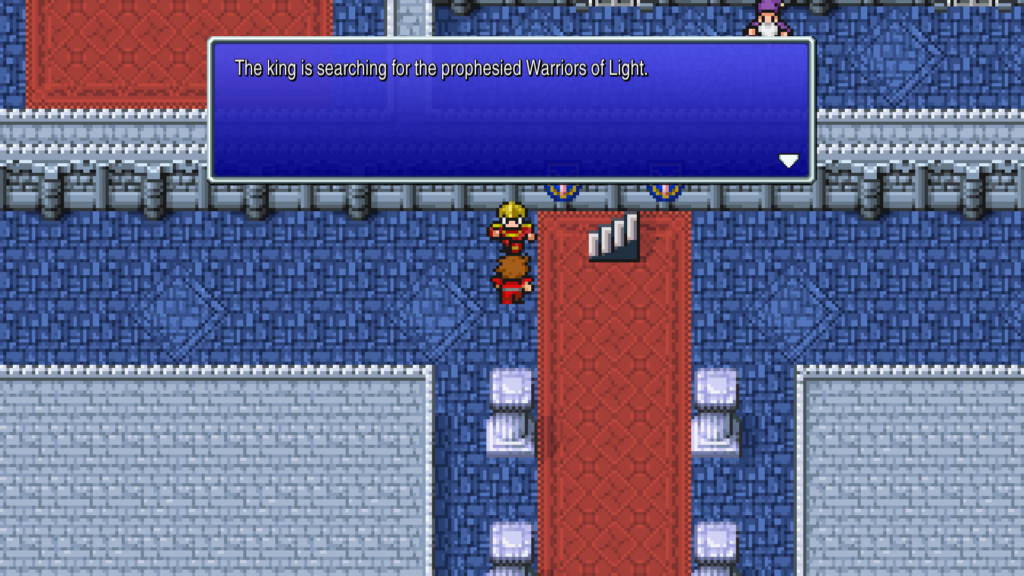
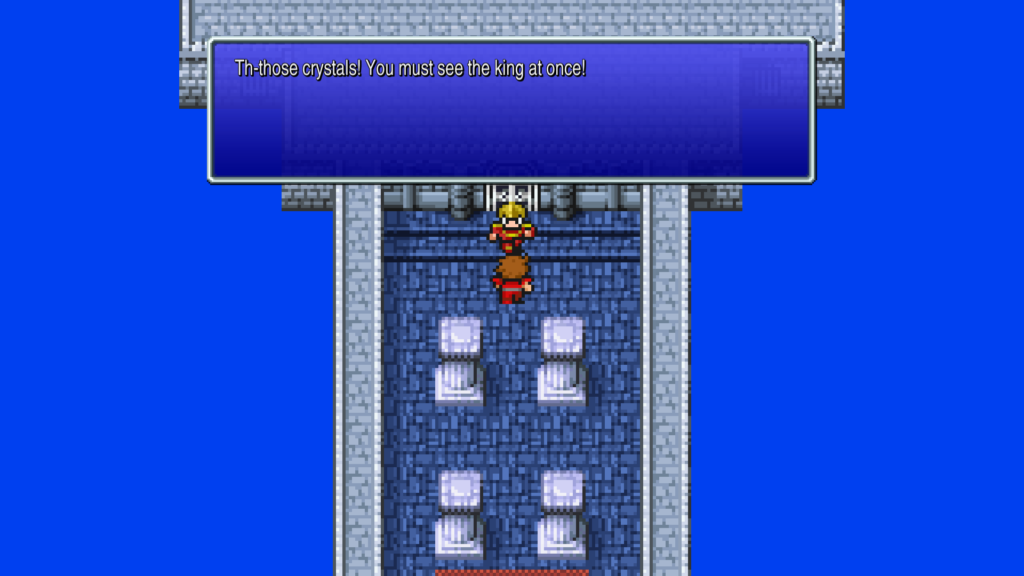
On the second floor, speak with the guard to the south to learn that Garland fled north with Princess Sarah. Head north and speak with the guard standing in front of the king’s chambers. He will notice the crystals held by the Warriors of Light and let you in to see the king.
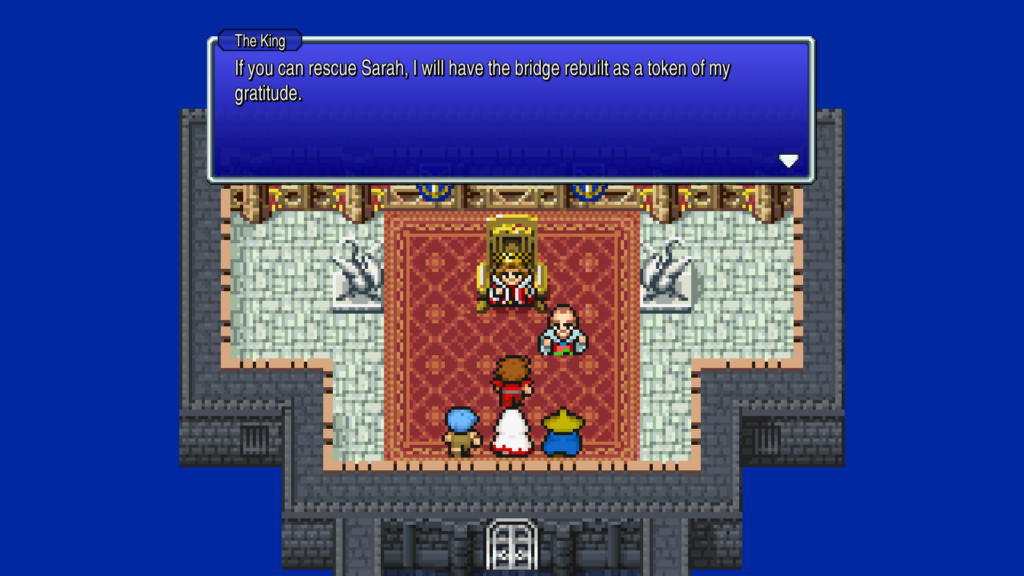
The Warriors of Light will enter the room and show the crystals to the king. The chancellor warns the king that the crystals alone aren’t enough to prove that the four warriors are the Warriors of Light. The chancellor will ask you to rescue the king’s daughter, Sarah, from the ex-knight, Garland, who has fled to the Chaos Shrine in the north. In return, he will believe that you are indeed the true Warriors of Light and will rebuild the bridge to the north.
We now know what must be done, but before rescuing the princess you should make some preparations.
Visit the Town of Cornelia and Equip Your Characters
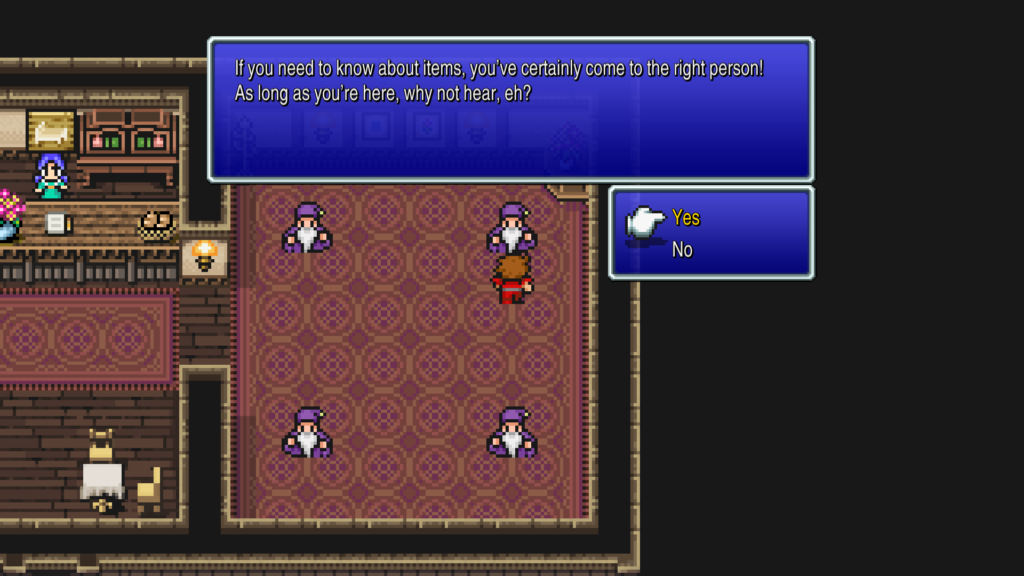
Once you exit the castle, you’ll be back on the world map. Enter any of the small houses to the left or right to enter Cornelia, the city of dreams. Be sure to speak with all of the townsfolk to learn some useful information and tips. In the Inn, there are four wizards who will teach you about equipment, items, magic, and monsters. Talk to each of them to learn the basics.
You need to be well equipped for your upcoming venture to the Chaos Shrine, so after speaking with the people of Cornelia, it’s time to do so shopping. You only have 500 Gil at the beginning of the game, so make your purchases count.
The equipment and magic you purchase depend on which character classes you’ve chosen. White mages can equip white magic, black mages can equip black magic, and red mages can equip both. Keep in mind that mages can only equip three spells of each level. Each magic level has four spells, so choose wisely.
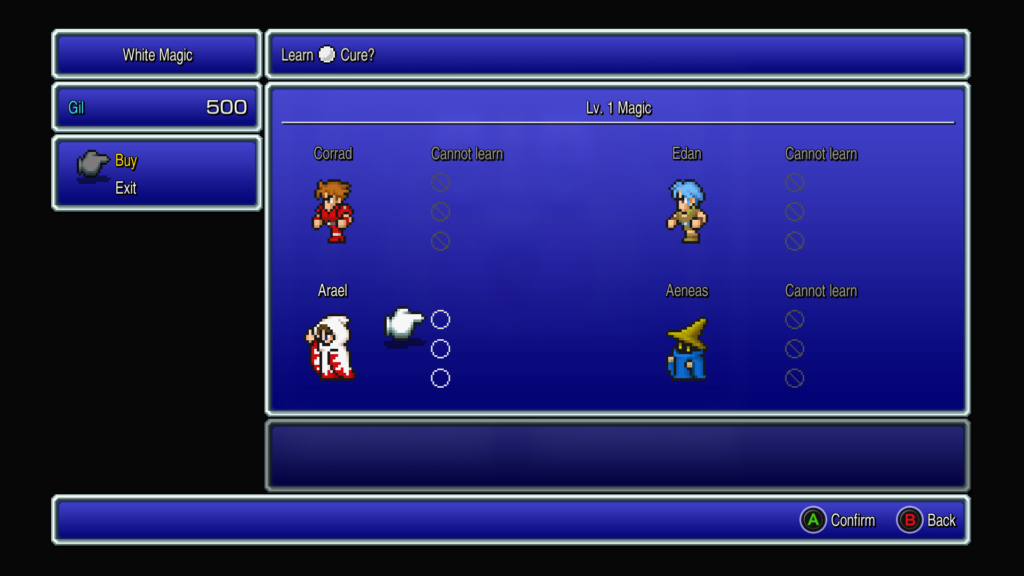
For white magic, you’ll definitely want to purchase Cure. You won’t make it far without it unless you have a large stock of healing items in your inventory. Dia is also very effective against undead enemies, and the Chaos Shrine is crawling with them. You should also grab the black magic spells Fire and Thunder. Sleep is also useful in a pinch and is sometimes effective against Garland.
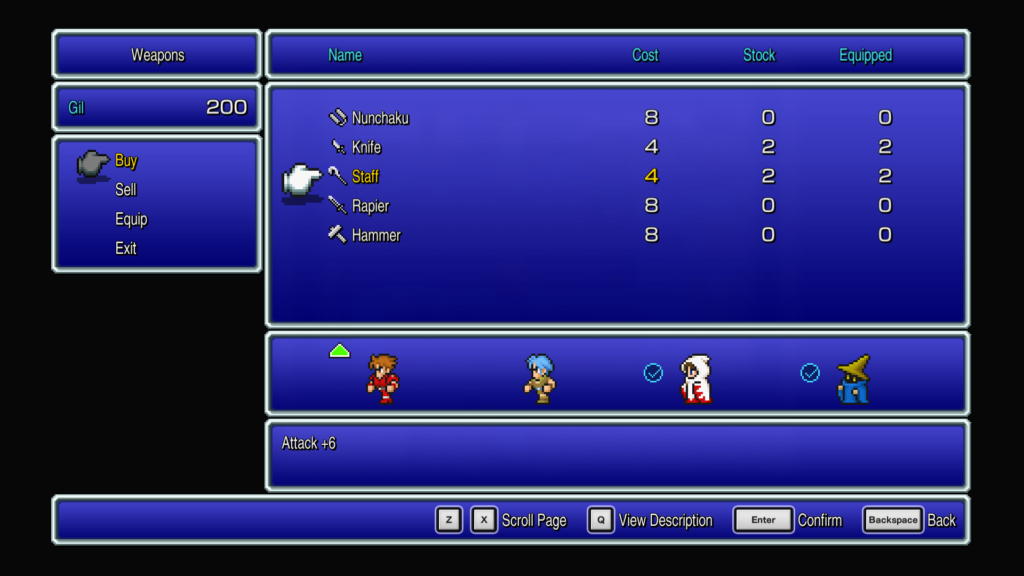
There’s a pretty small selection of weapons and armor to choose from, but it’s more than enough for your upcoming fight. Equip the best weapons and armor possible on your party members. If a piece of equipment increases your stats, a green arrow will appear next to the party member while shopping. If it lowers your stats, a red down arrow appears. If your party member already has the item equipped, you’ll see a checkmark. If the party member can’t equip the item, nothing is shown next to the character. Use this as a guide to shop for the best equipment. And most importantly, don’t forget that you actually have to equip the items after you purchase them. Purchasing them doesn’t automatically equip them.
Finally, visit the item shop and grab some necessities for the road. Stocking up on several potions and antidotes is a must. The enemies in the upcoming dungeon can inflict poison, so you’ll want to be ready. Grabbing a couple of Ethers and a sleeping bag or two would be nice. Phoenix Downs are great, but they are 500 Gil for 1—Gil you don’t really have at this point in the game.
You should have enough money to buy all of the armor, weapons, and magic that you need, but you’ll be running low on funds by the time you make it over to the item shop. You need to level your characters a bit before you head to the Chaos Shrine, so use this as an opportunity to earn some Gil and stock up on items you need before you go.
Grind Your Characters Before Departing
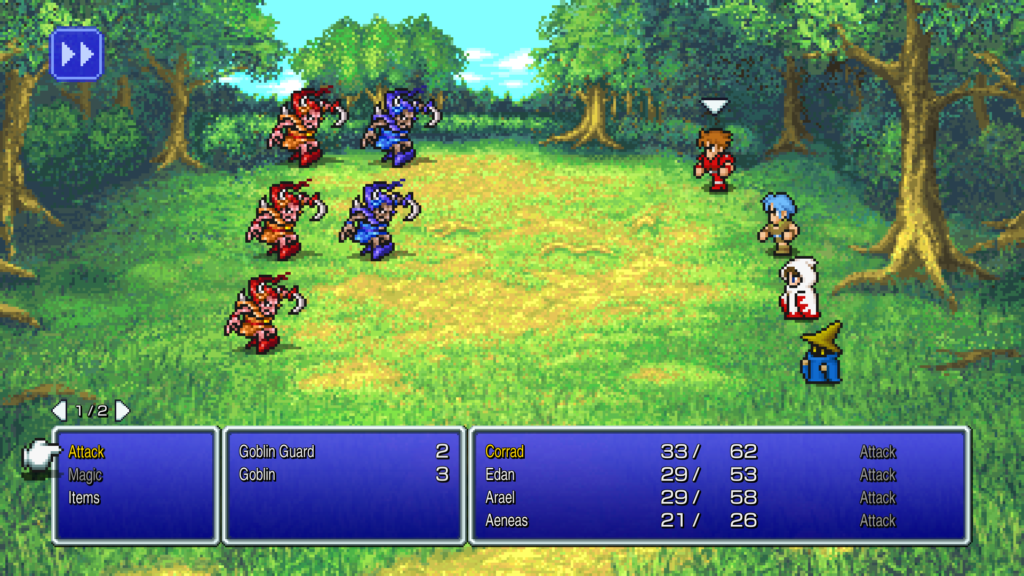
Your characters are pretty weak at the start of the game and without a little grinding, you’ll have a tough time in the Chaos Shrine. At a minimum, you’ll want to grind your characters to level 3, but if you’re wanting things to be a little easier, level 4 or 5 is a comfortable place to be. When you walk outside of Cornelia, you’ll face random encounters with enemies. Mostly you’ll fight a group of goblins and you’ll occasionally encounter a goblin guard—nothing to worry about. On rarer occasions, you’ll encounter a crazy horse. This enemy is much tougher than goblins and goblin guards, but still nothing you can’t handle.
If at any point one of your characters is slain, you can use a phoenix down to resurrect them, but that costs a significant amount of Gil that you don’t really have at this point in the game. Instead, go to the sanctuary to the northeast of town and speak with the priest. He can revive party members for 40 Gil a person. Also, don’t forget to rest at the inn before setting out. When you level, your HP/MP isn’t replenished as you may expect.
Once you’re properly leveled up, healed, equipped, and have plenty of items, then it’s time to rescue the princess from Garland.
Garland and the Chaos Shrine
The Chaos Shrine is located to the north of Cornelia. You’ll encounter a few enemies on the way, but if you’re appropriately leveled, they’ll be easy. Enter the Chaos Shrine from the front once you’ve located it on the world map.
The layout of the Chaos Shrine is very simple. In each corner of the shrine are rooms holding treasures. The southwest room contains a Leather Cap. The room to the northwest contains a Potion and a Tent. The rooms in the northeast and southeast corners are sealed with the mystic key, so you can ignore these rooms for now, but remember them for later.
When you’re ready to take on Garland, enter the room located in the middle of the shrine. Talk to Garland to learn why he kidnapped the princess. After the dialogue, the battle will begin.
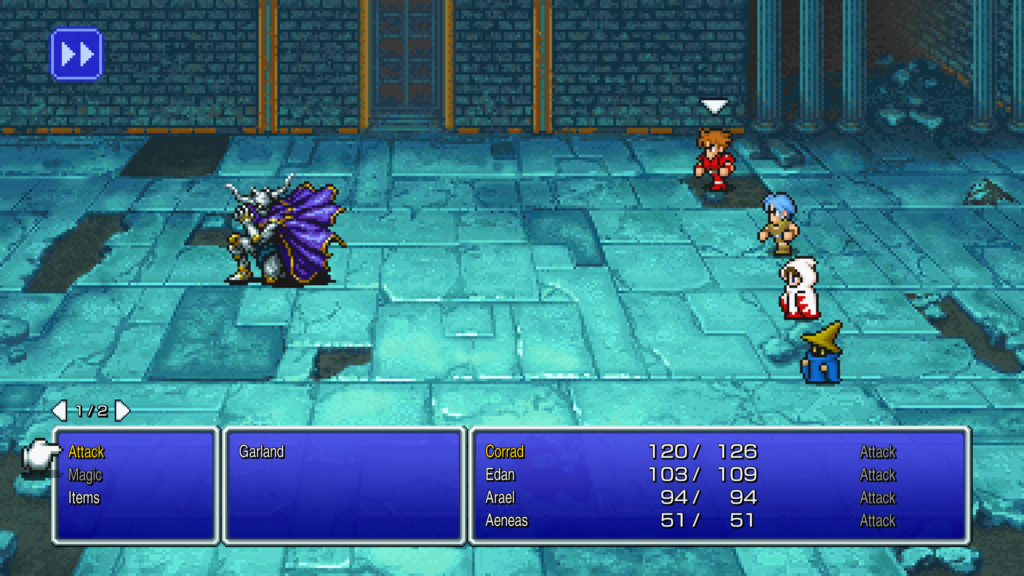
Garland isn’t actually that hard of a boss, especially if you’re level 5 or above. Warriors, thieves, and monks should just attack. Black and red mages should use Fire or Thunder. White mages should cast Cure or use a Potion when a party member is running low on health. Otherwise, just attack. Garland will be wiped out in no time.
You’ll receive 250 Gil and 130 experience for defeating Garland.
Princess Sarah, the Lute, and the North Bridge
Once you’ve defeated Garland, Princess Sarah will introduce herself and thank you for rescuing her. She will thank ask the party to accompany her to the castle so that she can repay them. The scene will cut and then you’ll appear in Cornelia Castle. The king will thank you for bringing his daughter back to him and acknowledge that you are indeed the Warriors of Light from Lukahn’s prophecy.
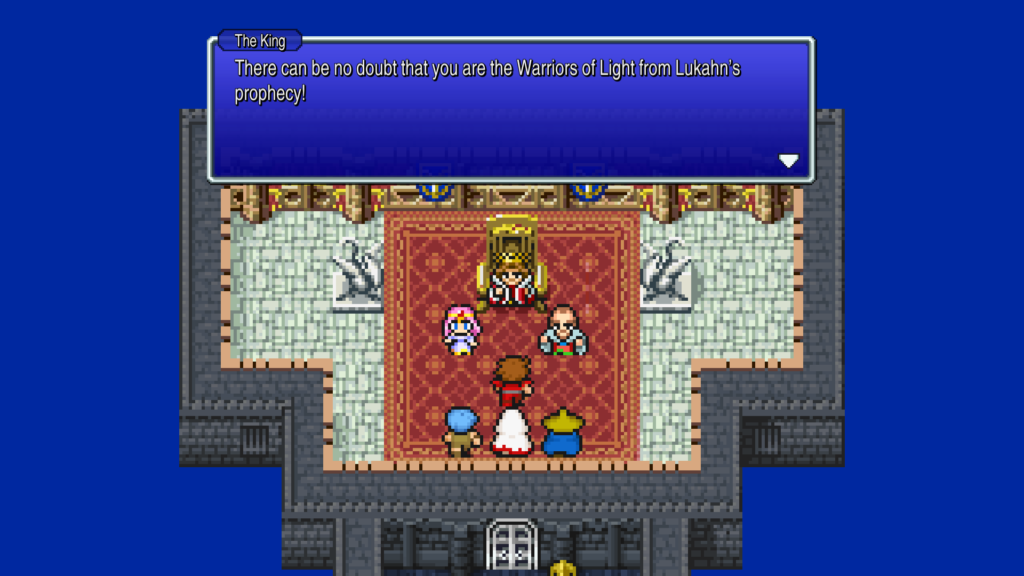
He will then recite the prophecy to you.
When darkness veils the world, four Warriors of Light shall come. If they cannot gather the shards of light, the darkness will consume all. The four Crystals will never shine again…
He’ll then tell you that one of the crystals can be found to the north, but in order for the Warriors of Light to get there, the bridge must be repaired. As promised, the king will have it fixed. Before you leave the castle, talk to Sarah and she will give you the Lute. Leave the castle and watch the cutscene of the workers repairing the bridge. After the cutscene, leave the courtyard. Once on the world map, head north to the newly-repaired bridge. Once you cross the bridge, another cutscene takes place.
And so their quest began.
As the four warriors of light, they felt overwhelmed by the great task destiny had placed before them.
They did not even know the true significance of the four crystals they held in their hands…
The crystals that once, long ago, held a light that shone so brilliantly.
The time for their journey had come.
The time to cast of the veil of darkness and bring the world once more into light…
Now it’s time to head out to Matoya’s Cave and the city of Pravoka.