GFs: Carbuncle
Draw Points: Thundara, Esuna, Zombie, Bio
Enemies: Red Bat, Creeps, Grand Mantis
Bosses: Iguions, Seifer, Edea
Table Of Contents
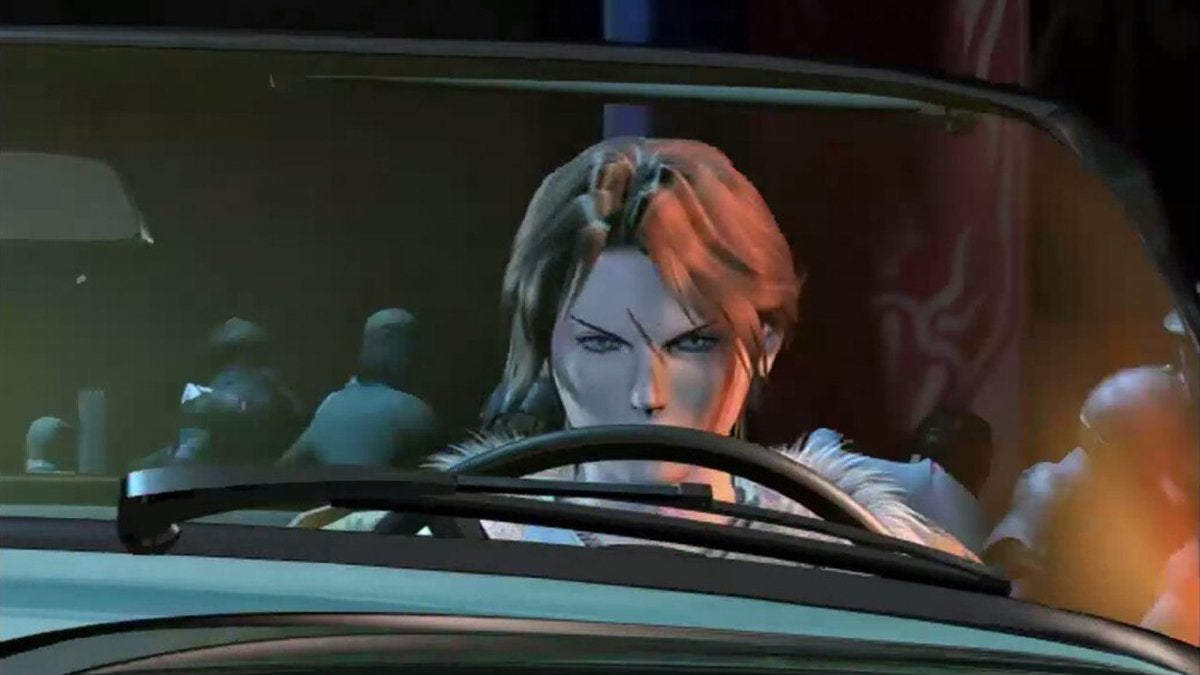
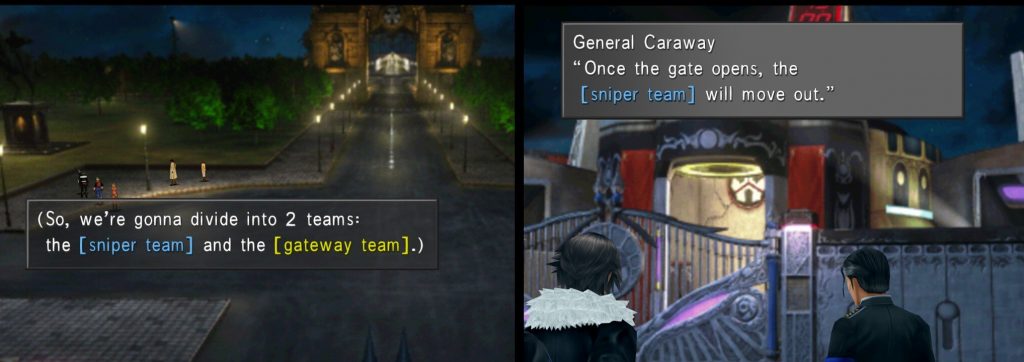
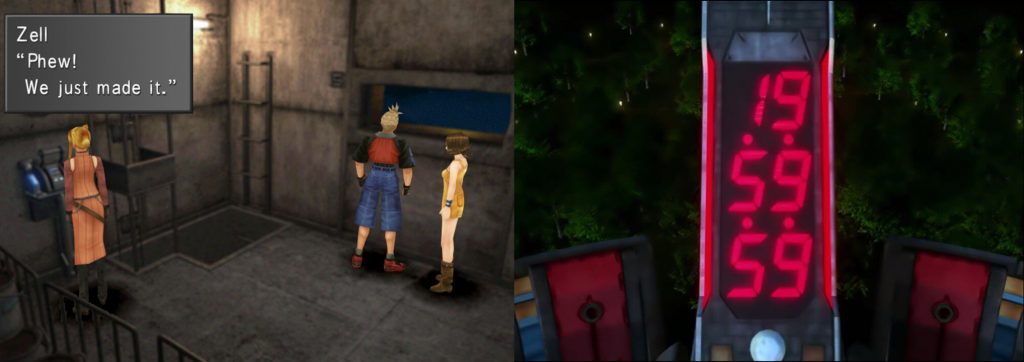
This is the final part of Disc 1. Your next destination is Caraway’s Mansion once again.
The Code
When you have returned to the Guard standing at the entrance, enter the Student ID number that was found on the sword in the Tomb of the Unknown King.
The guard requires you to enter the code in reverse, meaning he wants you to enter the ones column, then the tens column, and then the hundreds column. In this example, the ID number was 19, which has a ‘9’ in the ‘ones’ column, a ‘1’ in the tens column, and nothing in the hundreds column. In this instance, you’d enter “9,” then ‘1,’ then ‘0’.
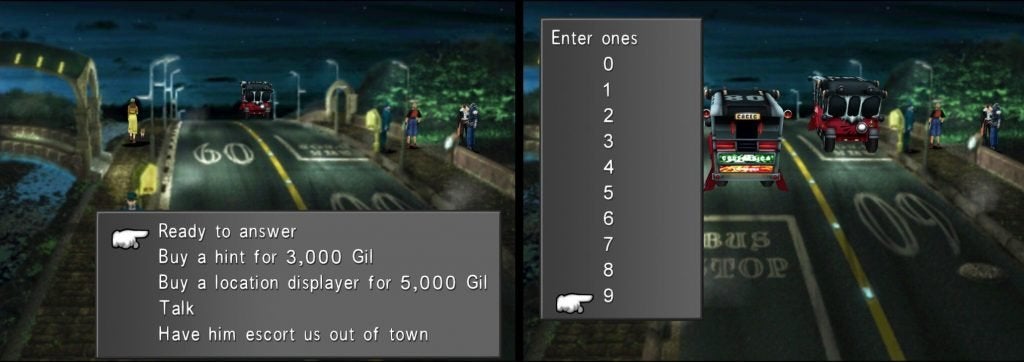
The same process applies to all three columns.
The Plan
Once you have successfully given the correct student ID, proceed into the mansion and talk to Rinoa. The ensuing dialogue choice will only affect the conversation here. After this, a longer chain of dialogue with General Caraway will start as he outlines the details of the assassination. Simply follow him as he explains the plan.
When he has finished outlining the plan, your party will be free to explore and prepare. Stop by the Item Shop to get some Ammunition for Irvine’s Limit Break with your recently earned salary. You may also be able to upgrade one or two of your party’s weapons at the Junk Shop. You won’t be able to explore freely for a while once you return to Caraway’s Mansion, so be sure you’ve taken care of everything you’d like to do first.
The Mission
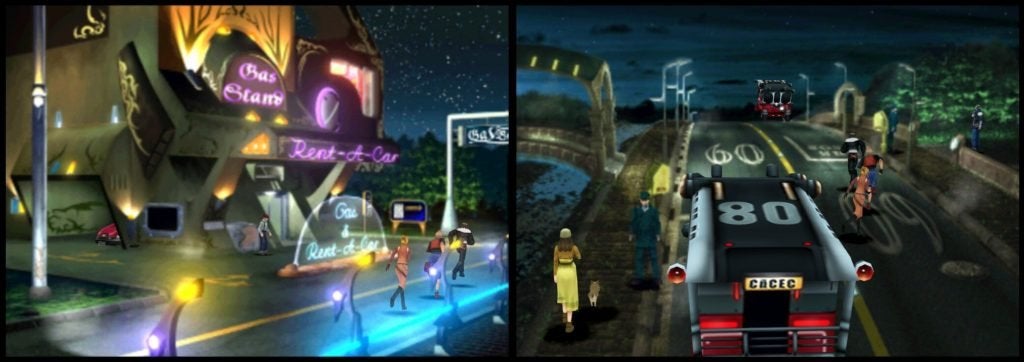
As soon as you enter the mansion, your mission will begin and the teams will be assigned. Proceed through the dialogue until you control Quistis. Attempting to exit the mansion will continue the dialogue further as Rinoa enters the room. After this, you will then resume control of Squall. Here, simply follow Caraway through Deling City with Irvine until you reach the gate.
You will pass a Draw Point containing Thundara along the pathway. Once at the gate, talk to Caraway to continue. You can follow the Gateway Team in for some additional dialogue, but it is not necessary.
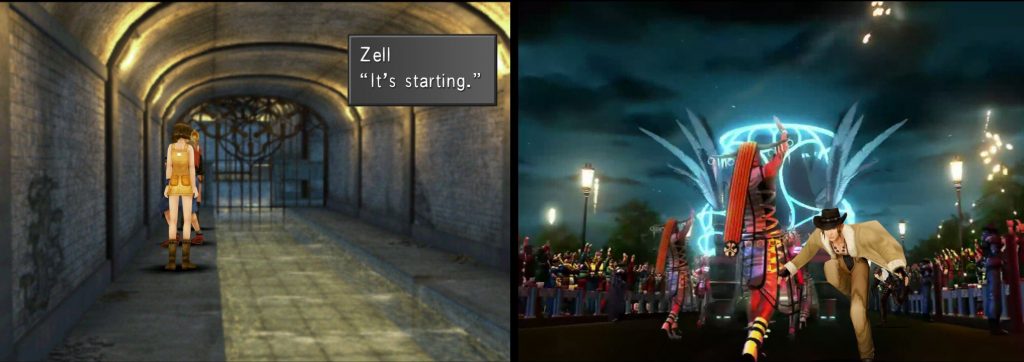
Continue to follow Caraway to proceed with the mission. Your perspective will then return to Quistis and the rest of the Gateway Team. Quistis is having second thoughts about her conversation with Rinoa, so you’ll need to take Quistis, Selphie, and Zell back to the mansion. As the Gateway Team runs in, Rinoa runs out, and they get locked in in Rinoa’s place.
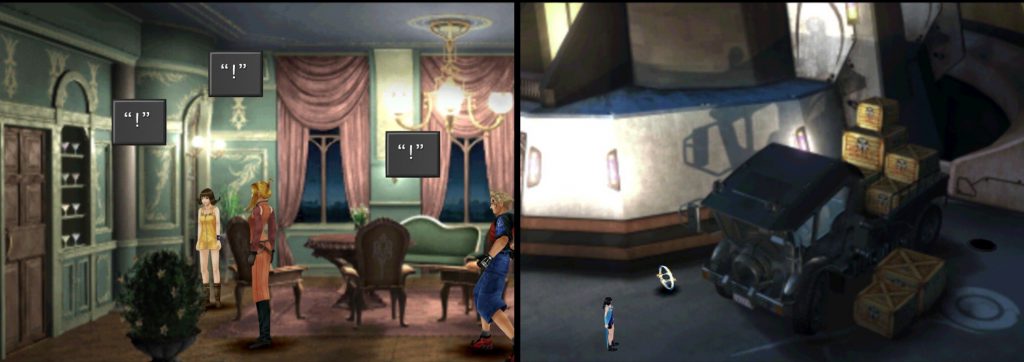
You will then assume control of Rinoa. Leave the mansion once again. Rinoa is outside the Presidential Residence in front of a truck with boxes, your secret way into the Residence. To the right of the truck, there is a manhole cover that will lead you to a small section of the Sewers. While you can risk it for the Weapons Monthly Magazine you’ll find down there, you will be facing the battles solo.
The Red Bats and Creeps down there are relatively easy to beat; however, Red Bats have an attack: Ultrasonic Waves. It can inflict Sleep if Rinoa is under level 20, or Confuse if she is over level 20—both of which can end in a game over without another character to support her. You’ll get another chance to go down into the sewers when you’re not playing a solo character, so, if you don’t want to risk it, leave the manhole for later and climb up the boxes to access the roof of the Residence.
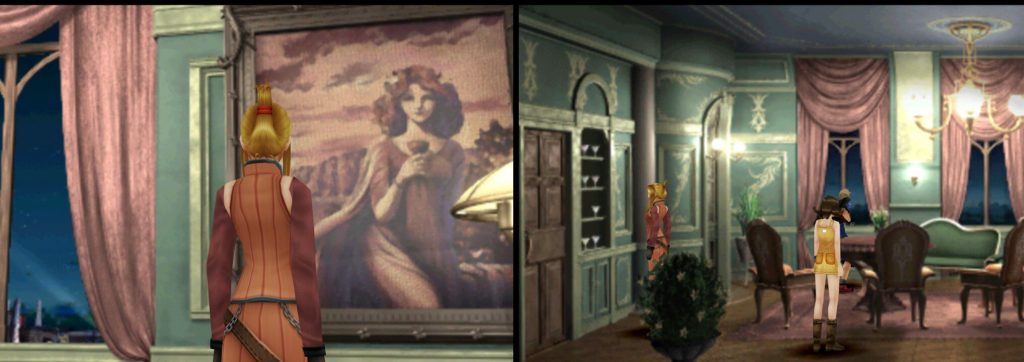
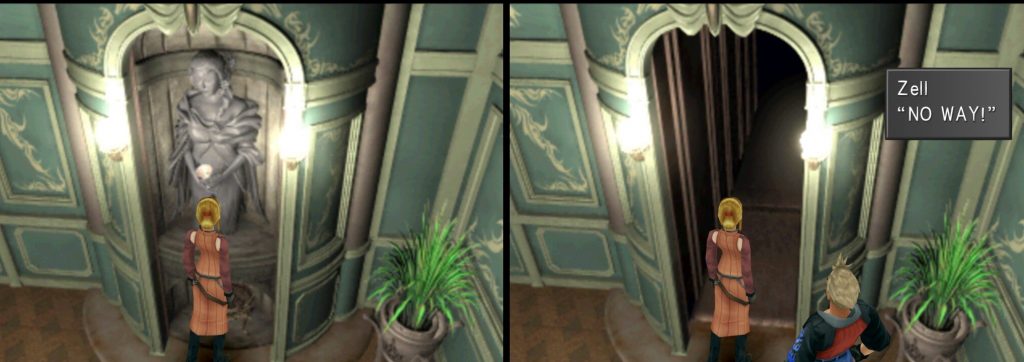
You now control Quistis and the rest of the Gateway Team and must figure out a way to escape the locked room in Caraway’s Mansion. Examine the room for clues. The painting by the window shows a woman holding a wine glass. There is a statue of a woman in the left corner of the room. And beside it, there are shelves with wine glasses.
Pick up a glass from the shelf and place it in the statue’s hands. This will open a secret path to the sewers. Even though this will be brief, make sure Quistis, Zell, and Selphie are junctioned in case you encounter any battles down here.
Once you get to the bottom of the ladder, head over to the small bridge platform near the waterwheel. Ride the waterwheel up to the gate in the middle of the screen and open the left side of the gate. As you head up to the next gate, Zell will hear the sound of the parade, and control will switch back to the Sniper Team of Squall and Irvine.
A mini boss is coming up, so be sure to junction both of them. Most importantly, you’ll want to make sure you have Draw, but you’ll also want to make sure you have either Magic or Item equipped for status healing.
Follow Irvine through the parade and the gate to the Presidential Residence. You’ll have a second chance to take the manhole down to the sewer, taking the straight path all the way to the left will allow you to retrieve Weapons Monthly May.

Now return to the surface and climb the boxes just like Rinoa did. You’ll need to go a bit further than Rinoa for some reason, so climb up onto the leftmost rooftop with the blue trim to make your way inside.
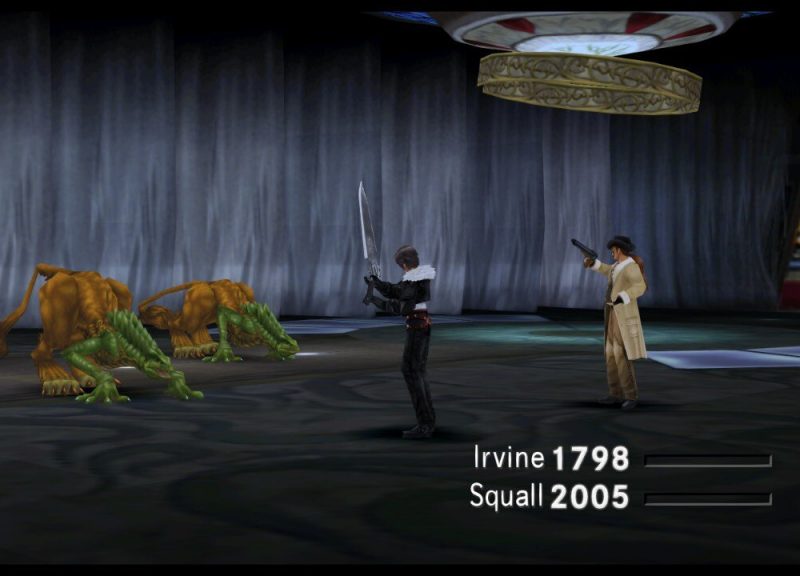

Iguions
Level Range: 10-19
HP Range: 755-1747 (each)
Draw: Cure, Esuna, Break
Drops: G-Returner x4
Mug: G-Returner x6
Scan: A mutilation of a gateway decoration. Uses Petrify attacks. Someone has given it the Reflect power.
AP: 20 (10 each)
Start by drawing Carbuncle from either Iguion, without it, they’ll have Auto-Reflect on. Watch out for their Magma Breath, a damaging attack that starts a 6-turn Petrification counter. You’ll want to use a Soft (or if you prefer to use magic, an Esuna, which both Iguions have in their draw list in case you don’t have any yourself) to reverse the countdown or the petrification status if either character’s counter reaches zero. The Iguions will also do a unique attack called Resonance, a dual attack that does a ton of damage.
Casting Haste on yourself is risky because this means Magma Breath will start on a counter of 3 instead of 6 and the countdown will go much faster. The Iguions have Break to draw, which is a petrifying status magic that can come in quite handy. If you can manage to draw some of these between keeping yourself alive and drawing Carbuncle, do so.
The Iguions are resistant to Fire and weak against Earth magic, so if you’re using GFs, go for Brothers over Ifrit.
Go back to the hatch as Squall, Irvine, and Rinoa, and pick up the Sniper Rifle to hand to Irvine. Proceed through the conversation until the perspective switches back to the Gateway Team.
The Sewers
Make sure that Quistis, Selphie, and Zell are prepared for battle, and don’t forget to equip your new GF. Carbuncle has Vit-J and can learn HP-J, Mag-J, and Status Def-J as well as Counter—an automatic counterattack ability. Once you’re equipped, it’s time to sort out this maze.
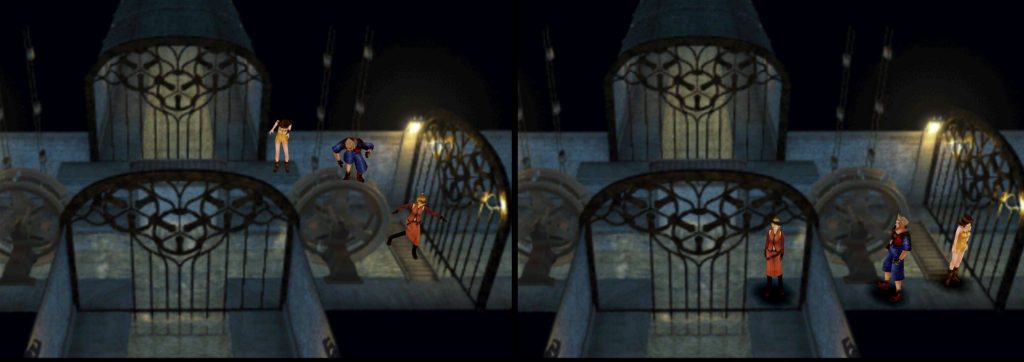
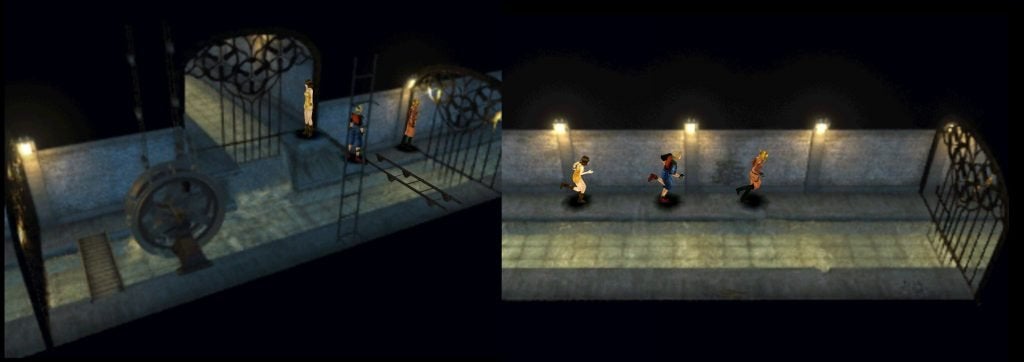
Walk forward through the gate in front of you. There are two directions to take from the room you enter. The left gate furthest from the camera can be opened. Once inside this gate, you’ll see a ladder. Try to climb it and it’ll fall, making a bridge over the water. Take the ladder bridge across the water and head through the left gate to find an Esuna Draw Point.
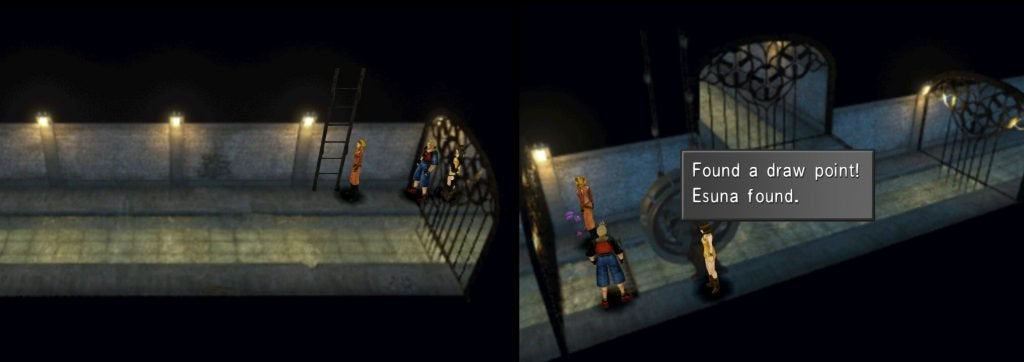
The waterwheel near the Draw Point is turning towards Quistis, not away from her, so you can’t ride this one. Retrace your steps and head back over the ladder bridge. Head left and return to the room with the Draw Point, though you’ll now be on the opposite side of the water. Walk up the small ramp and through the opened gate to enter the next room.
You’ll find another pair of waterwheels but neither is turning in the right direction to ride, and you’ll be limited to only the right side of the room. The gate furthest from the camera is unlocked. Continue to the right through the next screen and into another waterwheel room.
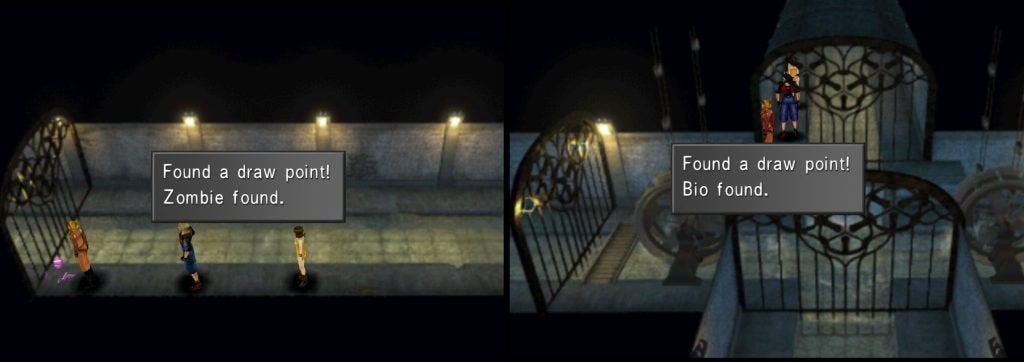
In the next sewer room, you will only have access to the left side of the room instead. The waterwheel on this side goes up, but there are also two visibly unlocked and open gates you should explore first. The one on the bottom left leads to a Zombie Draw Point.
The open gate closer to the middle of the screen leads to what seems like a dead end; however, a hidden Bio Draw Point is visible if you’ve got Move-Find on. If you don’t have Move-Find equipped, you are still able to draw from it, just click around until the draw menu pops up.
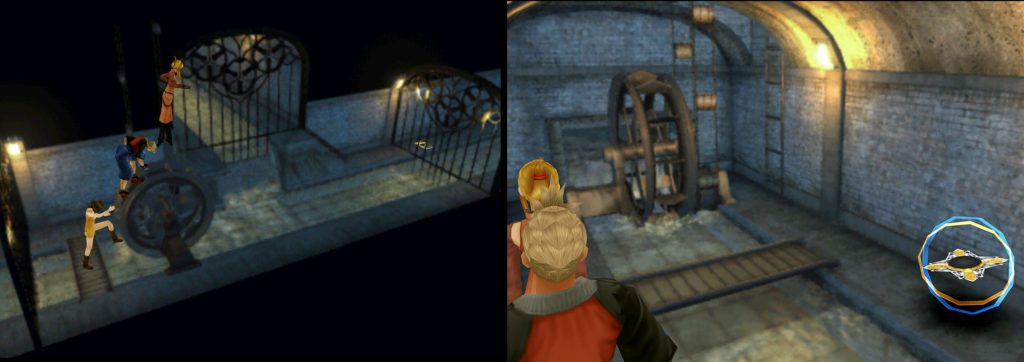
Return to the waterwheel and ride it up. You’ll find that neither of the center gates will open up, but the waterwheel on the right side is going down. Ride it to get to the other side of this room. Of the three gates on this side of the room, the two on the right are locked. Only the center bottom gate will open; head through it to find yet another waterwheel going down. Again, the right side gates are locked, and the center bottom gate will open for you.
In the next waterwheel rooms, repeat the process and ride the waterwheels down. None of the side gates will open so there’s only one way to go.
You’ll find yourself on the opposite side of the room where Zell heard the parade beginning. Proceed down into the first room you entered with one waterwheel and two ladders. The ladder closer to you will fall to make a bridge back to where you began, and the ladder closer to the screen is the same ladder you came down in the first place, which leads back up to the Save Point and Caraway’s Mansion.
You can head up the ladder quickly if you’d like to make a save before moving on, but there is another Save Point coming up shortly so this is entirely optional.
If you did go back up to the Save Point, return back over the ladder bridge. Head through the right gate furthest from the screen. Run to the right through the next screen, you will enter the last waterwheel room.
This is the room you could see through the gate while retrieving the Weapons Monthly May. If you didn’t go down through the manhole cover as Rinoa or Irvine and Squall, you’ll see it through the gate. You’ll be able to access that part of the sewers from here next time you’re in Deling, and you can buy it from a bookstore on Disc 3, so don’t worry too much if you missed it.
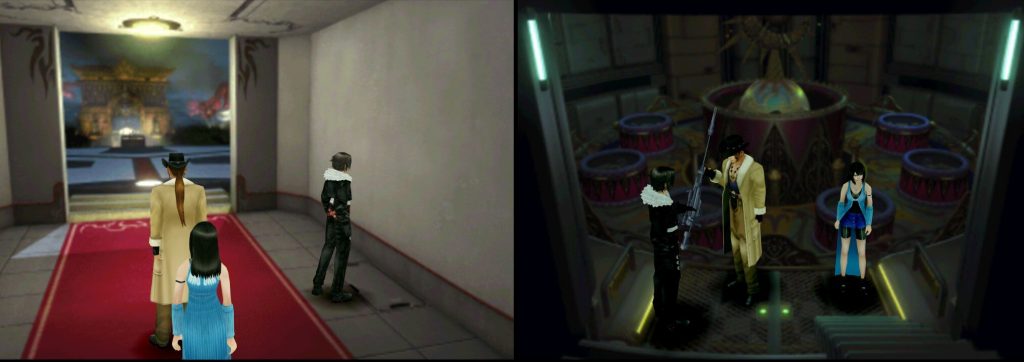
Ride this final waterwheel up and head through the left side gate. Go straight through the next room. Through the gate at the end, you’ll see the last room of the sewers. Complete with a Save Point and then head up the ladder up into the Gateway. Head all the way up to the 2nd floor of the Gateway (Quistis, Zell, and Selphie will get off the ladder at the 1st floor and interact with the ladder again to climb up further) and you’ll be just in time to pull the switch.
The Assassination
Once you’ve trapped the Sorceress, you’ll have control of Squall. After a quick pep talk from Squall, Irvine takes his shot, but the mission comes down to Squall after all. Before he jumps into action, the game will bring you to the menu to ensure you’ve got all your junctions set. Be sure to equip Squall, Irvine, and Rinoa fully for battle. The person junctioned to Carbuncle should have the GF command equipped. If you’ve learned Mug, equip Diablos to Squall in order to steal from Seifer.
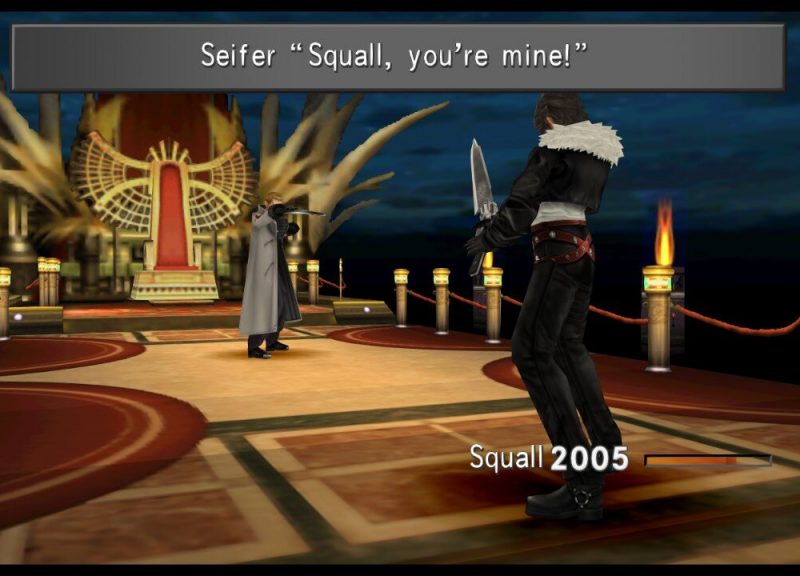
Boss: Seifer
Level Range: 7-20
HP Range: 342-1150
Draw: Fire, Cure, Life
Drops: None
Mug: Hero
Scan: Decided to become a Sorceress’ Knight under Edea. Uses fire magic in conjunction with sword attacks.
AP: None
Seifer will either attack Squall with his Gunblade or cast Fira, the latter of which he will do rarely. If you have Mug equipped, you’ll get a Hero from Seifer, an item that will make one character Invincible for 24 seconds. You shouldn’t need it for this fight, as Squall can handle him pretty easily with only basic attacks. Once you’ve defeated him, the Sorceress herself steps up.
Boss: Edea
Level Range: 10-20
HP Range: 4000-7000
Draw: Cura, Dispel, Life, Double
Drops: None
Mug: Elixir
Scan: A powerful sorceress and ruler of Galbadia. Her sorceress powers may be the most powerful in the world.
AP: 20
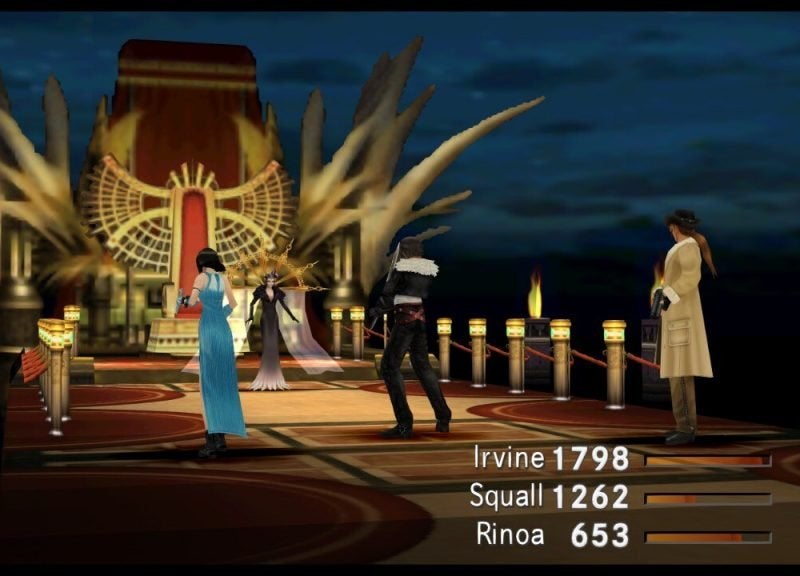
At first it’ll seem like you’re fighting Edea solo as well, but Rinoa and Irvine come to back you up. Begin by summoning Carbuncle in order to cast Reflect on the party. In order to avoid her spells reflecting back at her, Edea will take the next three turns casting Dispel which you can also draw from her, along with Double if you didn’t get enough of them from Minotaur in the Tomb of the Unknown King.
Be aware that any healing magic you cast on yourself while Reflect is on will heal Edea, undoing the damage you’ve done to her, so be sure to use Items to heal if Reflect is active. When she is not using Dispel, Edea will cast Thundaga, Blizzaga, Firaga, as well as a single target physical attack called Astral Punch. Keep up your health and distract her with Reflect and you’ll be watching the cutscene in no time.
After you’ve watched the aftermath of the Assassination, you’ll be prompted by the game to save. You’ve made it to Disc 2.