
Stashing Places: Twrs Vestibule
Gold: 160G, 160G, 160G, 160G, 160G, 480G, 160G, 160G, 160G, 480G, 160G, 160G, 160G, 160G, 480G
Items: Seed of Speed, Spell Breaker, Health Weed, Vacuum Scroll, Revival Stone, Bond of Trust, Seed of Power, Move Breaker
Equipment: Sudden Death Charm, Forest Charm, Odd Hat, Angel’s Darts
Key Items: Medal of Wisdom
Enemies: Horned Toad, Medusa Dancer
Use the Save Point, then run west-northwest to find 160G on a rock. Head east-northeast from there to find another rock with another 160G.
Move east and follow along the rock into a small cave with a Seed of Speed inside. Use it on Justin, then go west and follow the spinning arrow to the Twin Towers South.
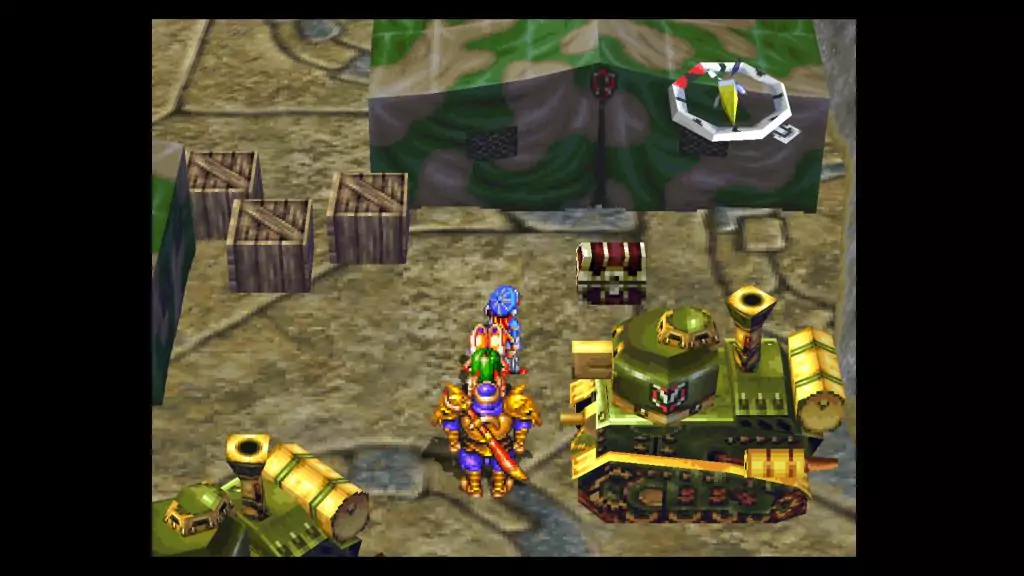
After a quick scene, head northeast and follow the path to the Eastern section. It’s a dead-end here, but grab the 160G you’ll come across near the tanks. Be sure to check the northeastern corner to find a chest with a Spell Breaker inside as well.
Head back to the Twin Towers South and return to the entrance, then proceed north and northwest, following the path to the Twin Towers West. Continue northwest and keep following the long path as it turns northeast to the Twin Towers North.
Move northeast until you finally reach the entrance to the actual ruins to your south. Go inside to find a lovely maze.
From the entrance here, head south, west, south, and west to a fork. Move south, west, and southwest to a Health Weed, then go back to the fork and head west to an open area near the main wall. Run northeast and follow the path to a dead-end with 160G, then return to the open area and make your way southwest along the wall.
Head southeast back into the maze when you can, following the path to a button on the ground. Step on it to make the statue will disappear, then walk east to be in the center of the maze.
You can use the DungeonScope Icon on the north side if you want. Otherwise, continue east past a button that’s already been pressed.
Follow the path until you reach a machine opening and closing. Grab the 160G to the south of it, then go through it, being careful not to get snagged.
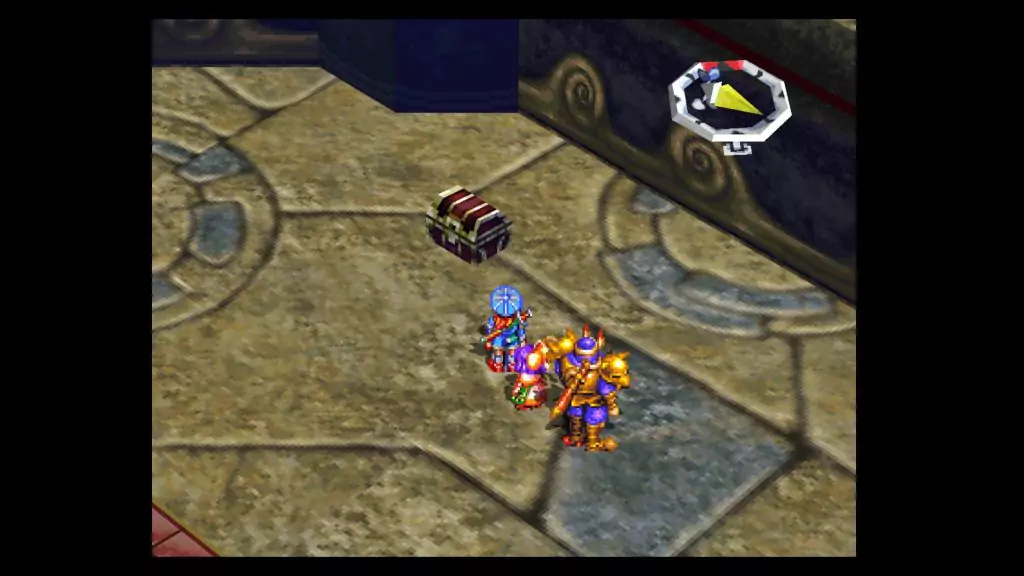
Head northeast along the wall, then north to a fork. Go west, north, and east to a chest with a Vacuum Scroll in it, then return to the fork and move east to an open area.
Make your way south and around the broken wall to find 480G, then go back and head north to the main wall, where there’s a Revival Stone to your northwest. (This is an instant Resurrect Potion that works as soon as you die in battle. Keep it with whomever you want, but I always keep it in Justin’s inventory.)
Head west-northwest from there, then turn south and follow that path as it goes west to another button. Jump on it, then you’ll be back at the center of the maze. Head south from there into the next section.
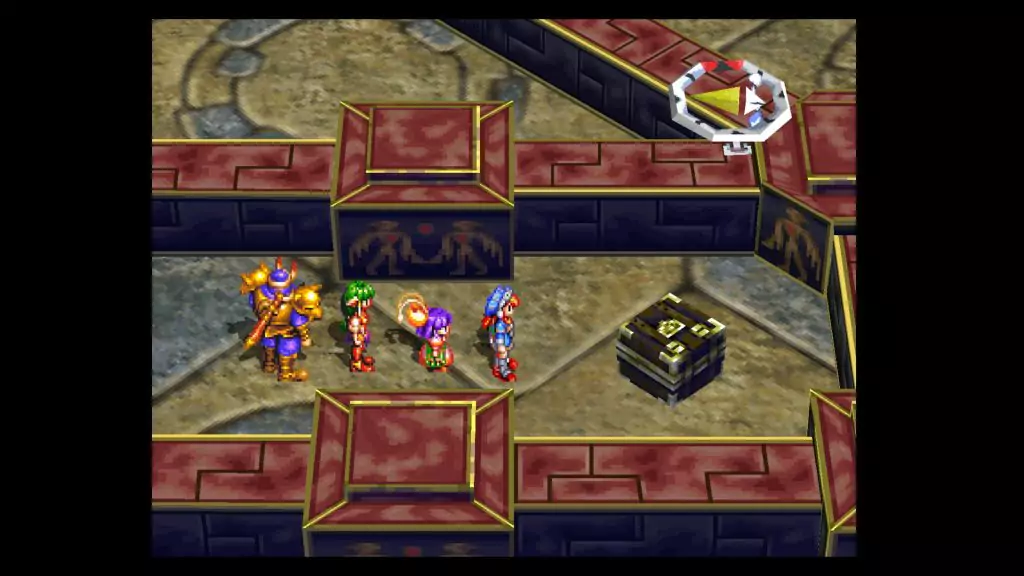
Walk west, north, and west to a fork, then head south and east, grabbing the Sudden Death Charm out of the chest.
Return to the fork and head west to the wall, where you’ll find 160G near this dead-end. From it, move southeast through another one of those pinching mechanisms, then continue southeast and east some more to the entrance of the ruins.
Talk to the soldier here, choosing the second option to gain access. Go into the Vestibule, where you’ll find a Save Point and Stashing Place here. Use them (free up some space in Justin and Feena’s inventory, just in case), then walk around and talk to people here if you like.
When you’re ready, move west of the Save Point and head southeast into the building here for a quick scene. Once you’re inside, check out the Magic Circle in the middle of the room, then check out the dead-end path that is pointed out to you.
Start to leave the building, and you’ll have to watch a few scenes where you wind up separated from the rest of your party.
Inside
When you gain control inside, head west and check out the Save Point by the stairs if you want. Climb the nearby stairs, then follow the path to a platform with a lot of Horned Toads. Go all out if you need to. There’s a Save Point nearby, so you can always be at max HP/MP/SP.
When you’re done slaughtering them, head east, south, and north up the stairs. Go down the stairs here, and one frog will jump out into four. Waste them, then go up the stairs to the west for a quick scene.
Run over there, grabbing 160G along the way, and fight the Toads off. Afterward, watch a few more scenes before you regain control.
Climb the stairs there, then go up the next two sets as well. Head right and use the lift to get to the Hall of Murals. Walk along the path going up the stairs when you need to for a scene.
Afterward, use the lift on the right to go up, triggering another scene. When you finally regain control, go forward and examine the glowing sphere like before, which eventually leads to you receiving the Medal of Wisdom.

Time to go back outside!
Back Outside
You’ll land back in the center of a maze, but not the same maze as before. After the scene, use the Save Point near you, then head south. Follow the path to an open area where Feena will find you.
When you regain control, go south some more and you’ll be back outside the gate. Gadwin and Sue will then find you, and you can now go back to Gumbo. To the south is the exit to get back to the beach… But there are more items to be found here in the Twin Towers.
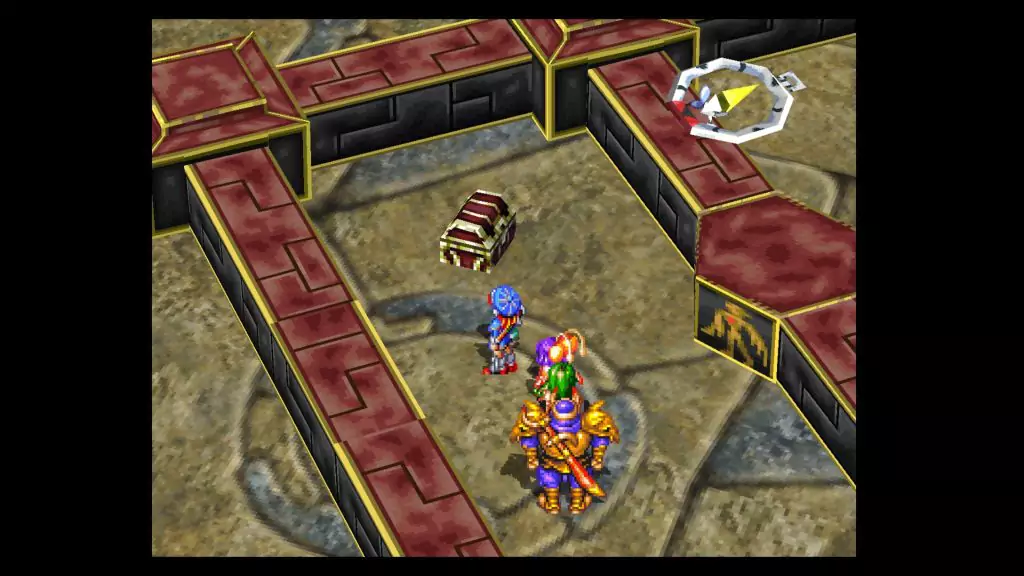
Step back inside the maze to the north to be at a fork. Head northeast a few steps, then head west, north, and east, following the path to a chest with a Forest Charm inside.
Return to the fork and head east, then north to find 160G at the dead-end here. Now head back to the center area where the Save Point is by going back to the exit of the Southern maze (where you met Sue and Gadwin), then continue west and north from it.
Once you’re back there, go through the northern path to a fork. Move north and follow it to 480G, then go southeast through the trap, then further southeast to another 160G. From this corner, make your way southwest to a further corner, then turn north and follow this path to a button. Step on it, then continue west back out to the center area, where you can now take the western path.
Follow the path to another fork near a larger wall. Head north and northeast, following the path to a chest with an Odd Hat. (This hat allows you to sometimes warp to your enemy when attacking, so since Sue’s MOV is kind of slow, put it on her for a DEF boost.)
Head back north and west to the fork, then move southwest and south. Follow it for a while to another open area, where you’ll need to look northwest for a lone chest containing a Bond of Trust.
Head back southeast, east, and around to the fork one last time, then go back down your original south path and make your way back to the central area. Go back through the eastern path, making your way to the main wall to the southeast.
Once you’re there, head northeast and north, back through the trap, then west, south, and west back to a button. Jump on it, then go back through the southern path, following the path back south out of the maze.
The Northern entrance was the only one you could enter before, and we just exited from the Southern entrance, so that must mean that the Western and Eastern entrances may possibly be accessible. Sadly, the Eastern entrance cannot be reached in any way, neither via the south (which you picked up two items earlier) nor the north will allow it.
If you feel up to it, make your way to the Western area of the Twin Towers by going northwest from the Southern area. Head northwest until you reach the entrance to the western maze, then enter the maze to your east.
You’ll be in an open area, so head directly southeast from the entrance, then turn south to find 160G. Return to the entrance and walk east a few steps, then go north through an opening, west, north, and east to a Seed of Power.
Go back a few steps west and south a little, then head east and follow the path to another button. Push it, then go to the center area of this maze. Take the southern path here to another trap, passing through it to the main wall, then go southwest along it to a chest containing a Move Breaker.
Go northwest along the wall some more. When you can’t follow it anymore, go north and east, following the path to another button.
Jump on this button and you’ll be back in the central area. Take the eastern path to be at a fork. Go north to another fork, then west to find 160G.
Go back and take the northern-west path, then continue west for a while. Follow the path (ignoring the Action Icon to your southwest that may appear as you turn northeast), all the way to a chest containing Angel’s Darts.
Head southeast through another trap, then continue southeast to find 160G. Move south, west, and south to a fork, then go south and west to find 480G.
Now, go back north and follow the path back to the trap. Go through it back to the opened chest, then head southwest to the corner. Go east just a little, then south to an Action Icon. Use it for a shortcut to the other side. Ignore the button to the east, and instead, go south, west, south, and west out of the maze and back outside the main wall.
That’s it for the Twin Towers, so head south and southeast and make your way back to the Southern section. Follow the path back southeast and south to the beach, where you can return to Gumbo.
Dight Village
There’s a guy here in Dight who is wearing a green suit and helmet with a blue vest, who is directly southeast of the second gate past the weapon shop. Talk to him and he’ll give you a First Aid Kit.
It shouldn’t be that hard to find him, but if you can’t, just talk to everyone and you’ll eventually find him and be rewarded with your prize!
(You can TECHNICALLY get this as soon as you’re done with the Volcano, but seeing as you had to come back here anyway…)
Make your way to the Village Elder’s House, which is south of the gate and west across a bridge. In here, talk to the Elder for some dialogue, then leave for a scene with Dr. Alma and Sue. Sue will now temporarily leave your party, and it’s time to take on the next area.
Go to the Inn or Weapons Store if you need to, and make sure to re-stash the Spirit Stone and the Medal of Wisdom. If you still have them, make sure to put the Chain of Gems back on Gadwin.
When you’re ready, head to the Mysterious Vanishing Hill.