![]() Key Takeaway
Key Takeaway
To catch every fish in the game, you’ll need fishing rods that work in all habitats, a net that can catch coastal and oceanic fish, as well as some pots. Also, using the bait mechanic makes your life a lot easier when capturing open ocean fish.
It’ll take some time to fill up the fish encyclopedia in DREDGE. However, if you’re a completionist, it’s worth it. In addition to using your keen eyes, there are some simple tricks you can use to find all fish locations.
Table Of Contents
DREDGE – All Fish Locations Video Guide
In this guide, we won’t go into where to find the Exotic Fish or aberrations. We have a separate guide for finding the four Exotic Fish. As for the aberrations, you can find them in the same spots as their original (non-aberrated) species. Simply look for the green particle effects over fishing spots to find aberrations.
Furthermore, if you need help getting all the fish in the Pale Reach DLC, we also have a guide for that!
The Marrows Fish Locations
Excluding aberrations, there are 12 fish species found in The Marrows. Here’s the equipment you need to catch all of them:
- Coastal fishing rod
- Coastal net (optional)
- Shallow fishing rod
- Shallow net (optional)
- Oceanic fishing rod
- Oceanic net (optional)
- Any kind of pot
#1 – Blue Mackerel (00:23 in the Video Guide)
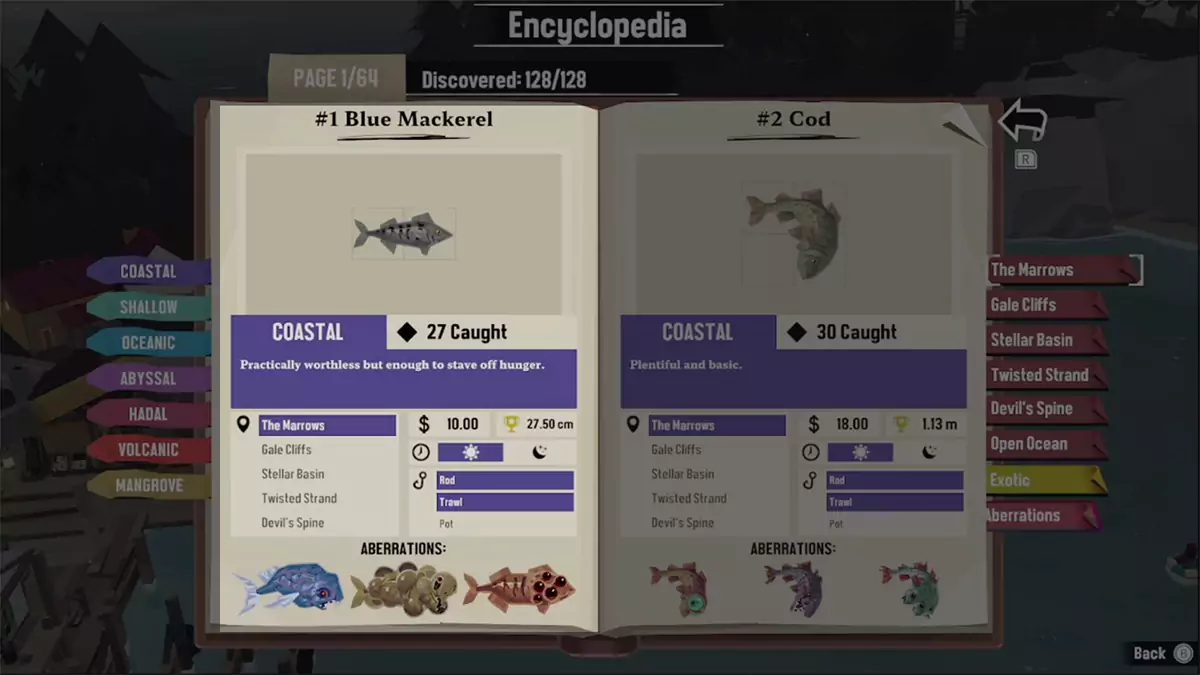
This one’s easy. During the day, sail a short distance away from Greater Marrow’s port and you’ll find a school of these Blue Mackerel. You can catch them with a Coastal fishing rod or a Coastal net. The map coordinates where you can find at least one group of these fish is 8J.
#2 – Cod (00:47 in the Video Guide)
Here’s another easy catch. During the day, sail a short way out of the Greater Marrow port and you’ll find a bunch of Cod swimming around. You can catch them with a Coastal fishing rod or a Coastal net. They can be found at coordinates 8J and 8K—as well as in other areas around The Marrows.
#3 – Arrow Squid (01:06 in the Video Guide)
These pointy predators are the first entry in the encyclopedia that only appears at night. Thankfully, they’re easy to find, so you don’t have to sail out into dark and dangerous waters. Head a bit out of Greater Marrow’s port to spot a group of them.
You can use either a Coastal fishing rod or a Coastal net to snag Arrow Squids. They’re most quickly found at coordinates 8J—but also appear in other spots around The Marrows after the sun goes down.
#4 – Grey Eel (01:32 in the Video Guide)
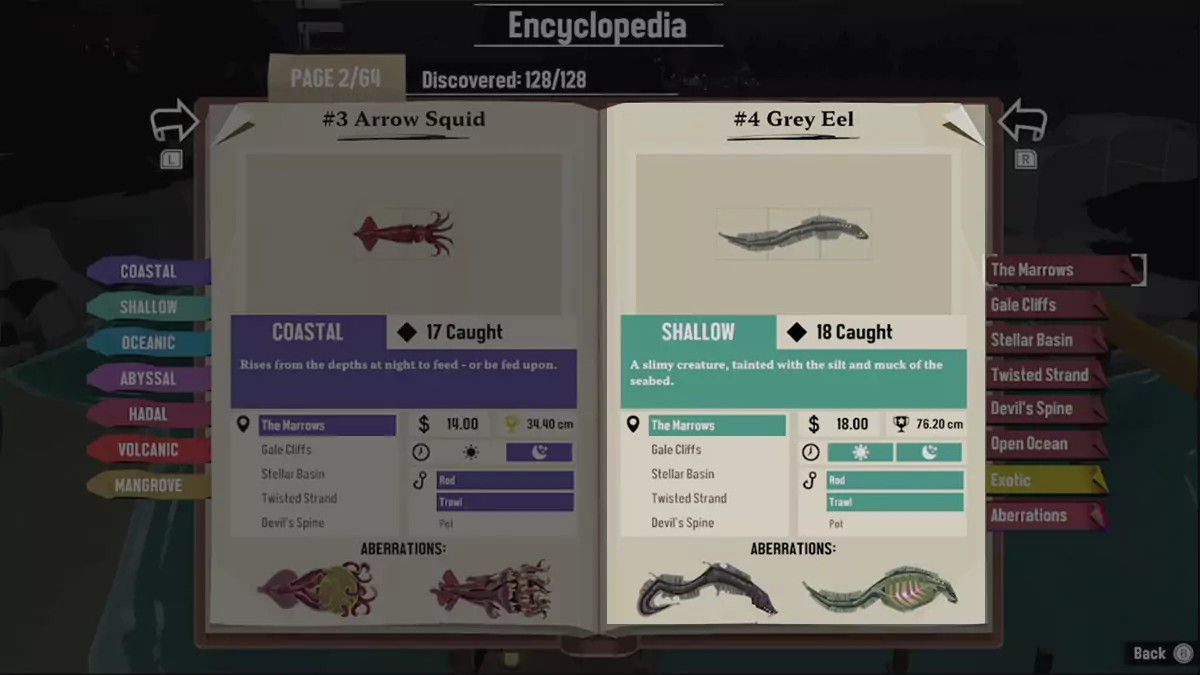
Grey Eels are slippery fellows but can be found both during the day and night. However, you’ll need either a Shallow fishing rod or a Shallow net to catch them. This species likes to hang out in narrow crevices around The Marrows, but you’re guaranteed to find at least one group of them at coordinates 7J—just southeast of Greater Marrow.
#5 – Gulf Flounder (02:32 in the Video Guide)
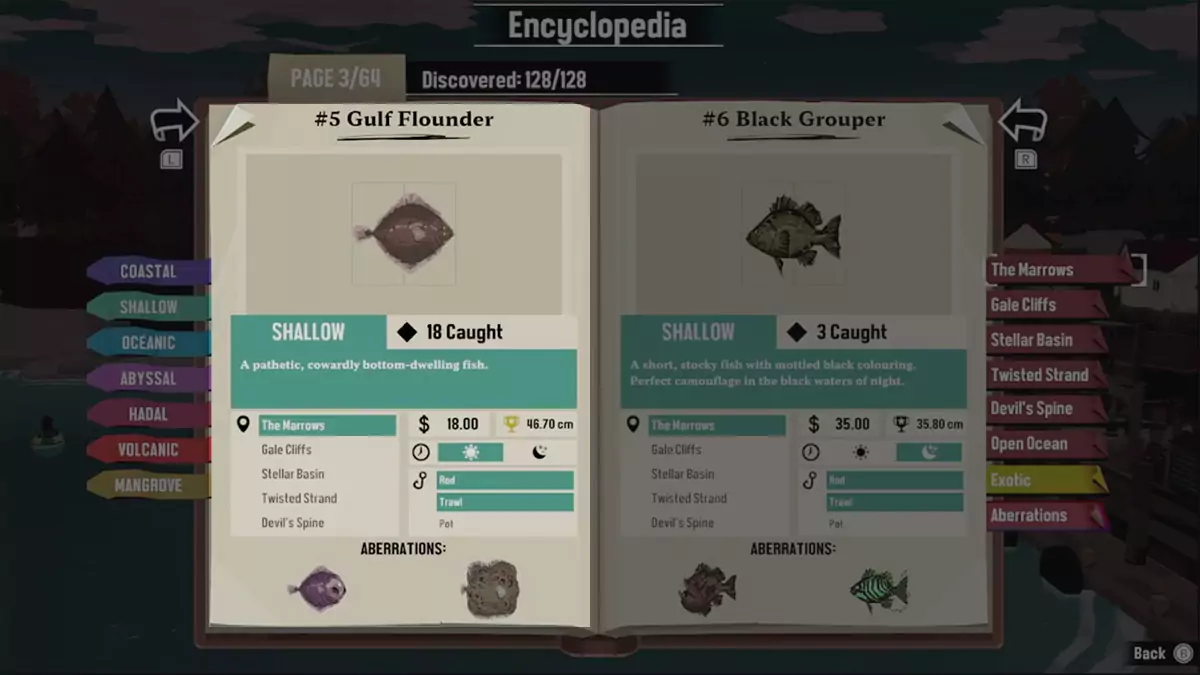
Gulf Flounder are pretty common around The Marrows. They are a daytime species that you’ll need either a Shallow fishing rod or a Shallow net to catch. The coordinates where you can find some are 8J and 8K.
#6 – Black Grouper (03:01 in the Video Guide)
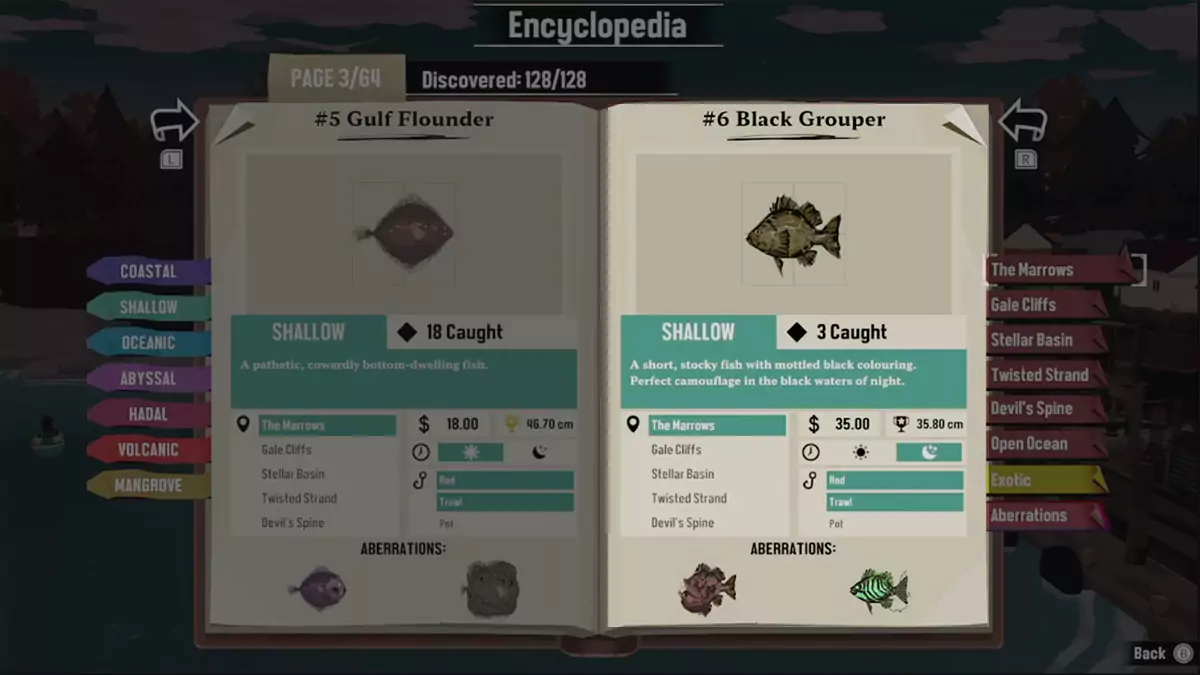
Catching Black Groupers means sailing at night. Although, you won’t have to travel far. If you use a Shallow fishing rod or a Shallow net, you can reel some in at coordinates 8J—a touch southeast of Greater Marrow.
#7 – Stingray (03:33 in the Video Guide)
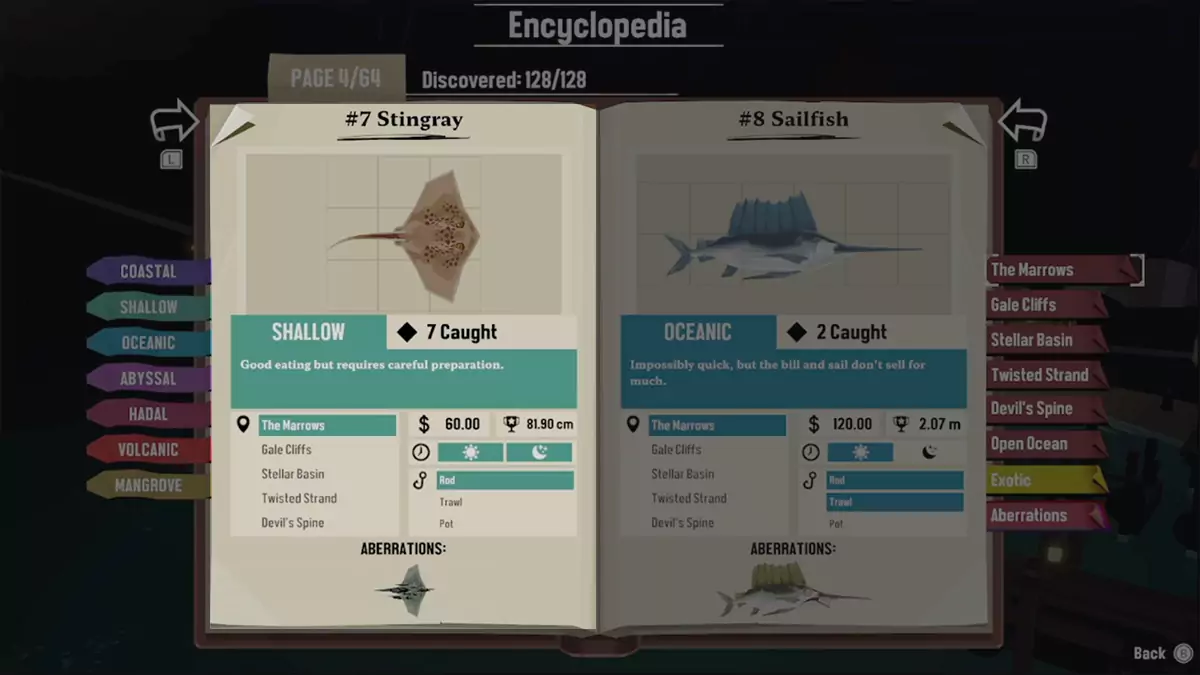
You can catch common Stringrays during either the day or night—but only with a Shallow fishing rod. You’ll find some of these flat fish swimming just south of Little Marrow’s port at coordinates 8K.
#8 – Sailfish (04:07 in the Video Guide)
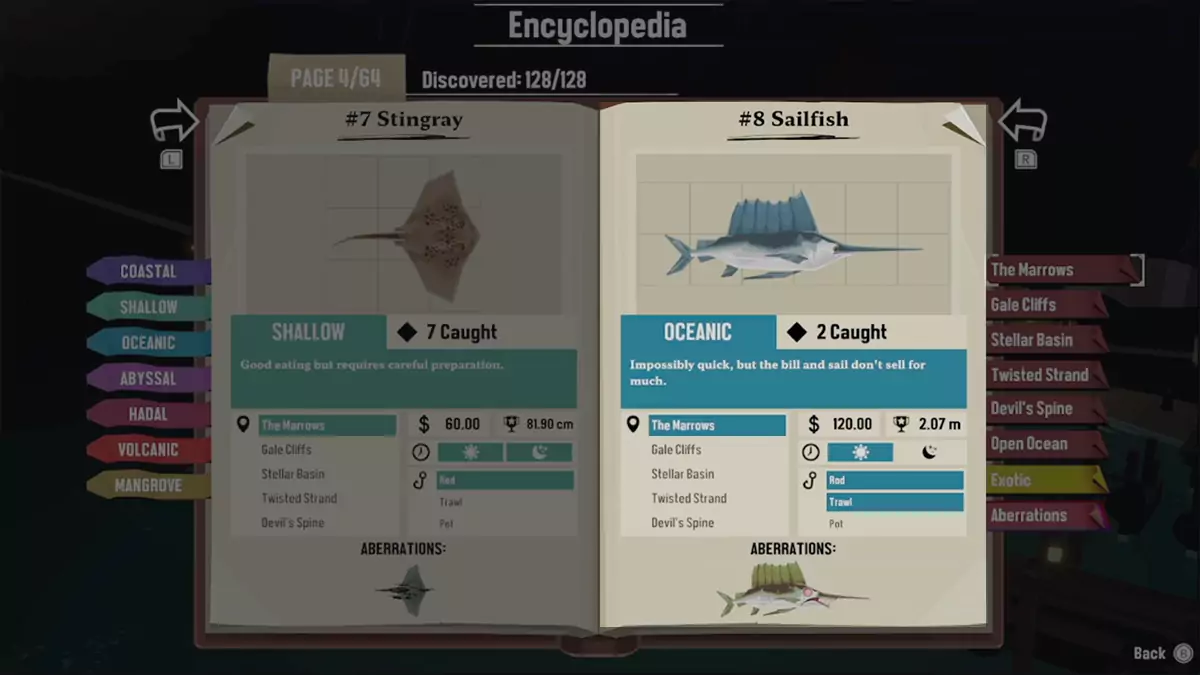
Here’s the first oceanic fish in the encyclopedia: the Sailfish! You’ll need either an Oceanic fishing rod or an Oceanic net to catch these powerful swimmers. Also, they only spawn during the day. They’re a fair deal rarer than most other fish species in The Marrows, however, you can find at least one spawn location at coordinates 8I; west of Greater Marrow.
#9 – Bronze Whaler (04:57 in the Video Guide)
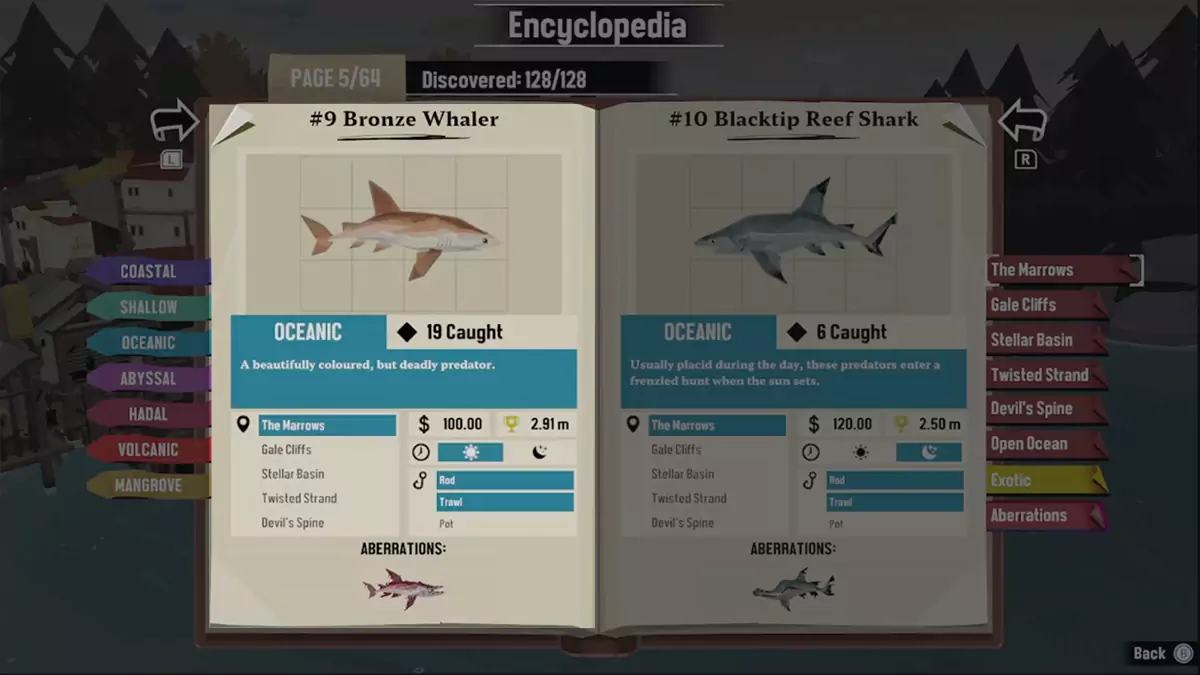
Behold, the first shark species you’ll likely encounter in the game: the Bronze Whaler. These fierce fish are a daytime species that you’ll need either an Oceanic fishing rod or an Oceanic net to catch. The coordinates of their closest spawn location is 8K, which is equally near to both Greater Marrow and Little Marrow.
#10 – Blacktip Reef Shark (05:48 in the Video Guide)

Similar in shape and habitat to the Bronze Whaler is another shark species: the Blacktip Reef Shark. This dark-finned fish only appears at night, and you’ll need either an Oceanic fishing rod or an Oceanic net to catch it. The coordinates where you can find some is 7K—a touch south of where the closest group of Bronze Whalers spawn.
#11 – Common Crab (06:19 in the Video Guide)
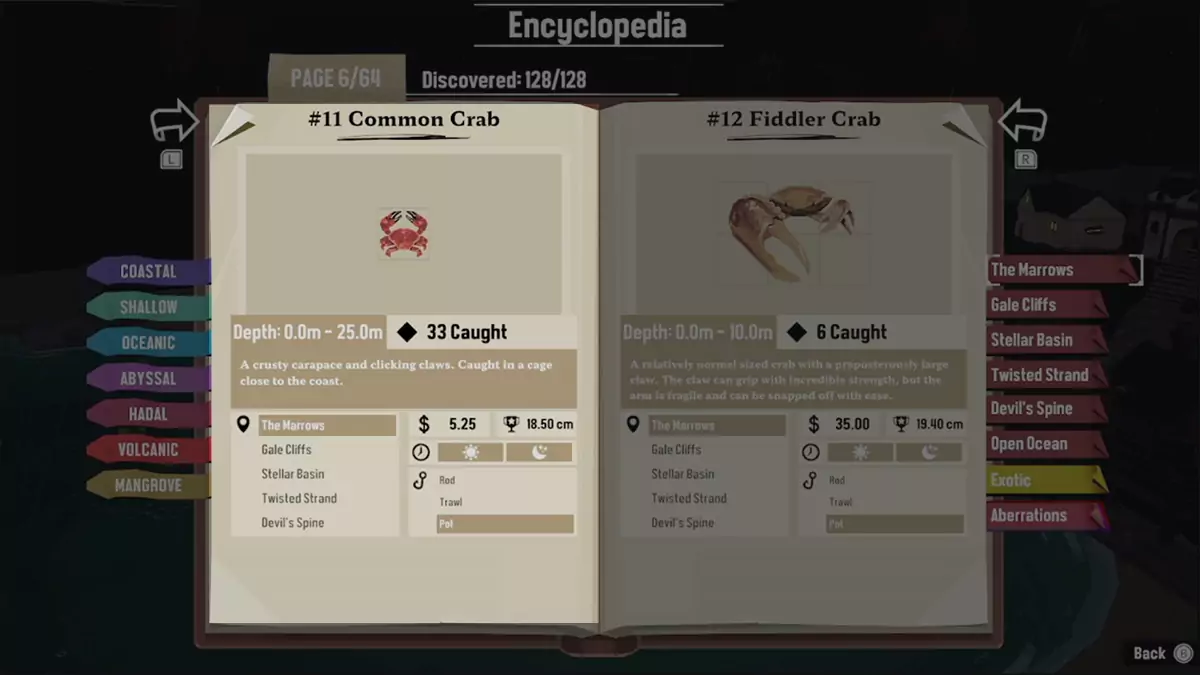
Next up, we have DREDGE‘s first crustacean: the Common Crab. To catch these many-legged fellows, you’ll need any kind of crab pot. Don’t worry about when to plop down your pots, as creatures caught through this method always appear during both the day and night.
What’s most important is where to place your pots. For the Common Crab, set down a pot anywhere between 0 to 82 feet deep (0 to 25 meters) within The Marrows. Come back in a day or two to collect your catch!
#12 – Fiddler Crab (06:19 in the Video Guide)
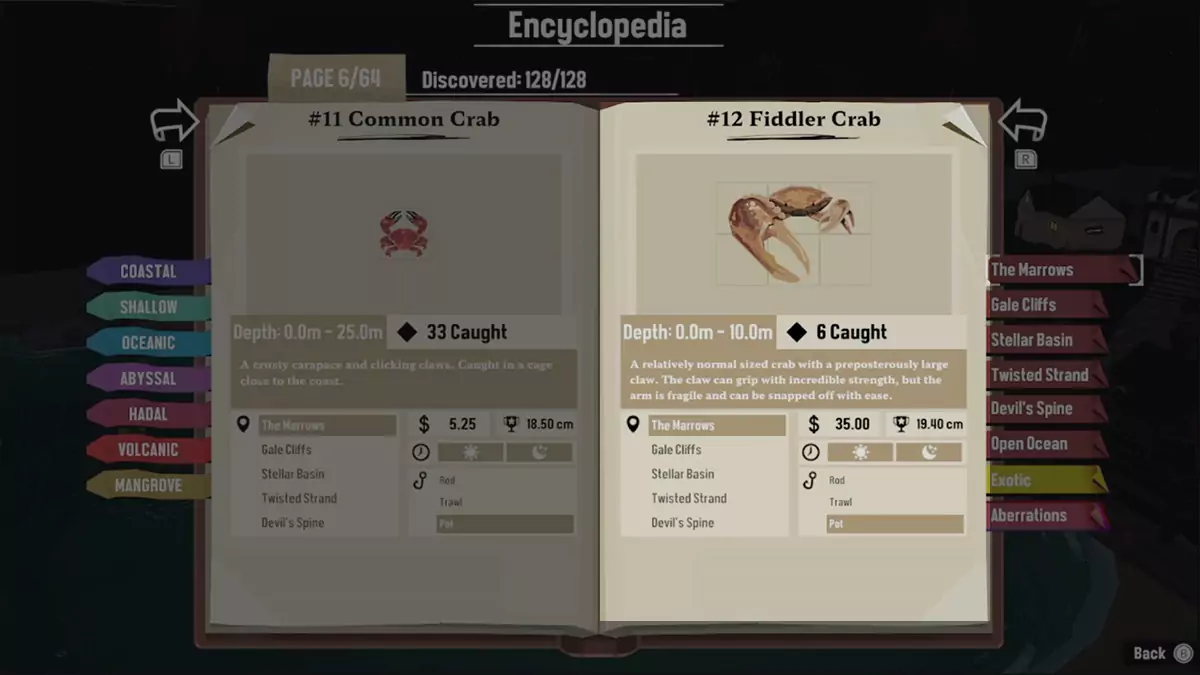
Fiddle Crabs are a bit harder to find. They spawn during both day and night in The Marrows, and you can catch them in the same kinds of pots as Common Crabs. However, they have some spawning overlap with Common Crabs. As such, you’ll often find your pots full of Common Crabs instead of finding any Fiddler Crabs.
The way around this is persistence, patience, and using multiple pots. As long as you place a pot between 0 to 32 feet deep (0 to 10 meters), you’re guaranteed to catch a Fiddler Crab eventually. Just be sure to repair your pots when they run out of durability!
Gale Cliffs Fish Locations
Overall, there are 11 fish species found in the dull waters of Gale Cliffs. Here’s what you need to catch all of them:
- Coastal fishing rod
- Coastal net (optional)
- Shallow fishing rod
- Shallow net (optional)
- Oceanic fishing rod
- Oceanic net (optional)
- Any kind of pot
#13 – Oceanic Perch (06:49 in the Video Guide)
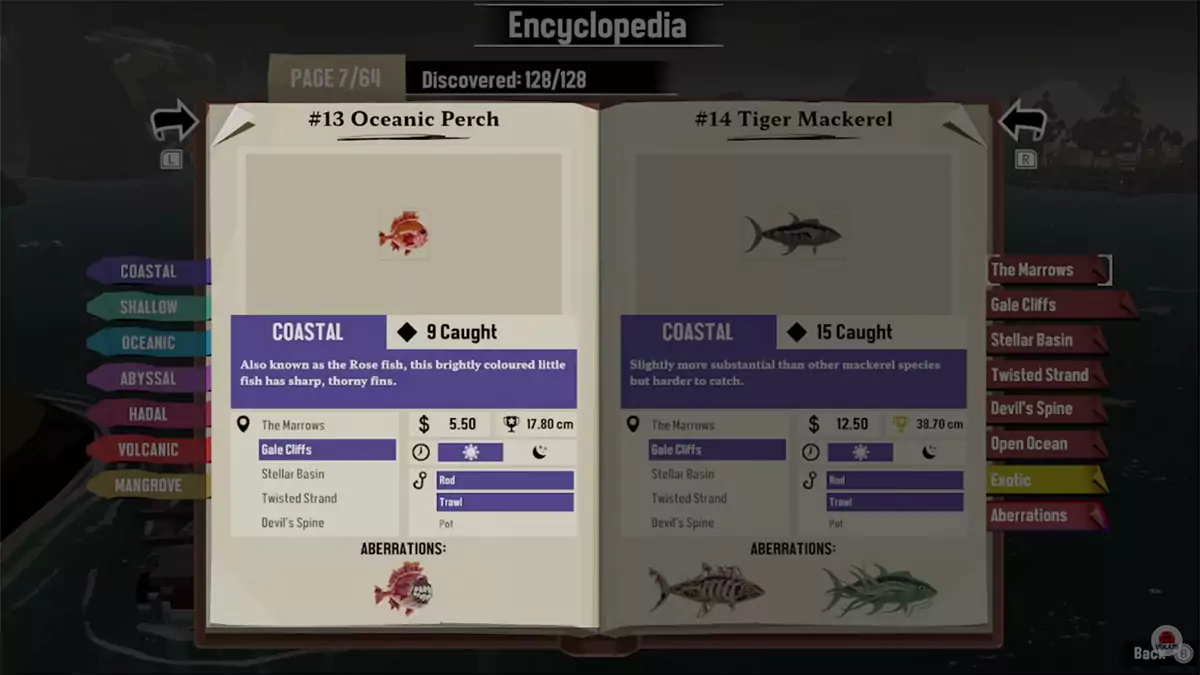
Oceanic Perch are tiny fish you can catch with a Coastal fishing rod or a Coastal net (despite their misleading name implying you need Oceanic equipment). They can only be found during the day, and an easy spot to find these fish is at coordinates 4M on the map.
#14 – Tiger Mackerel (07:12 in the Video Guide)
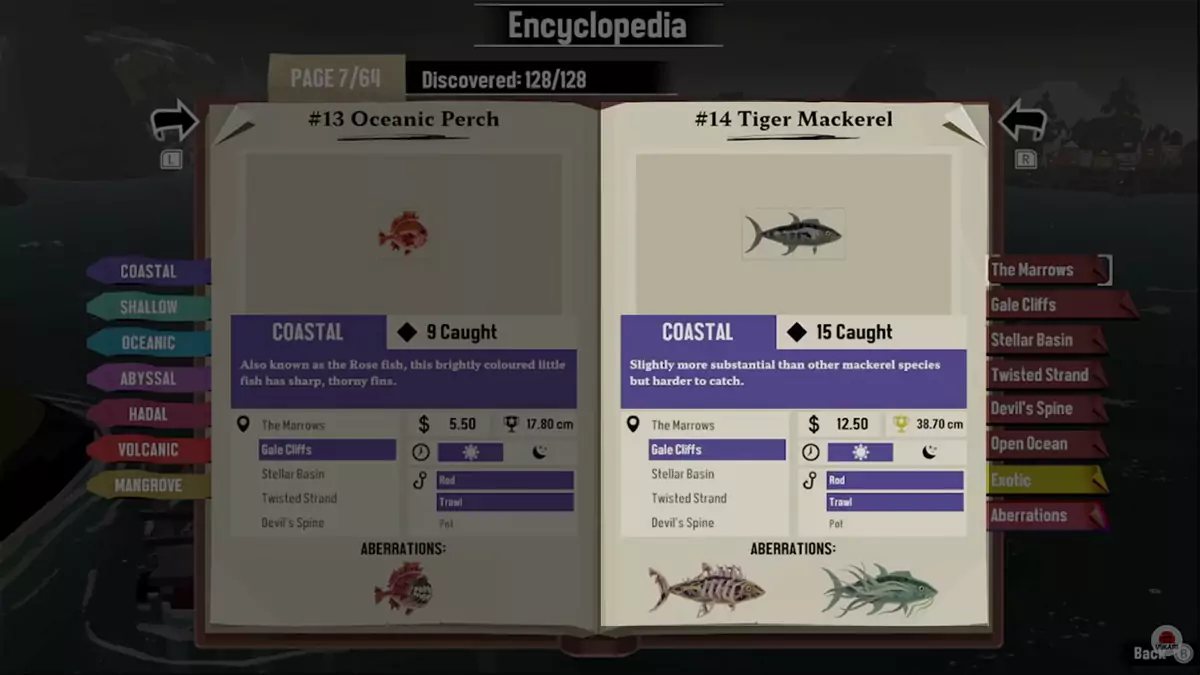
A fiercer cousin to the Blue Mackerel, you find Tiger Mackerel only by reeling them in with either a Coastal fishing rod or a Coastal net. They are a daytime species that can be found in plenty of spots around Gale Cliffs, but a convenient location for them is at coordinates 5O on the map.
#15 – Black Sea Bass (07:56 in the Video Guide)
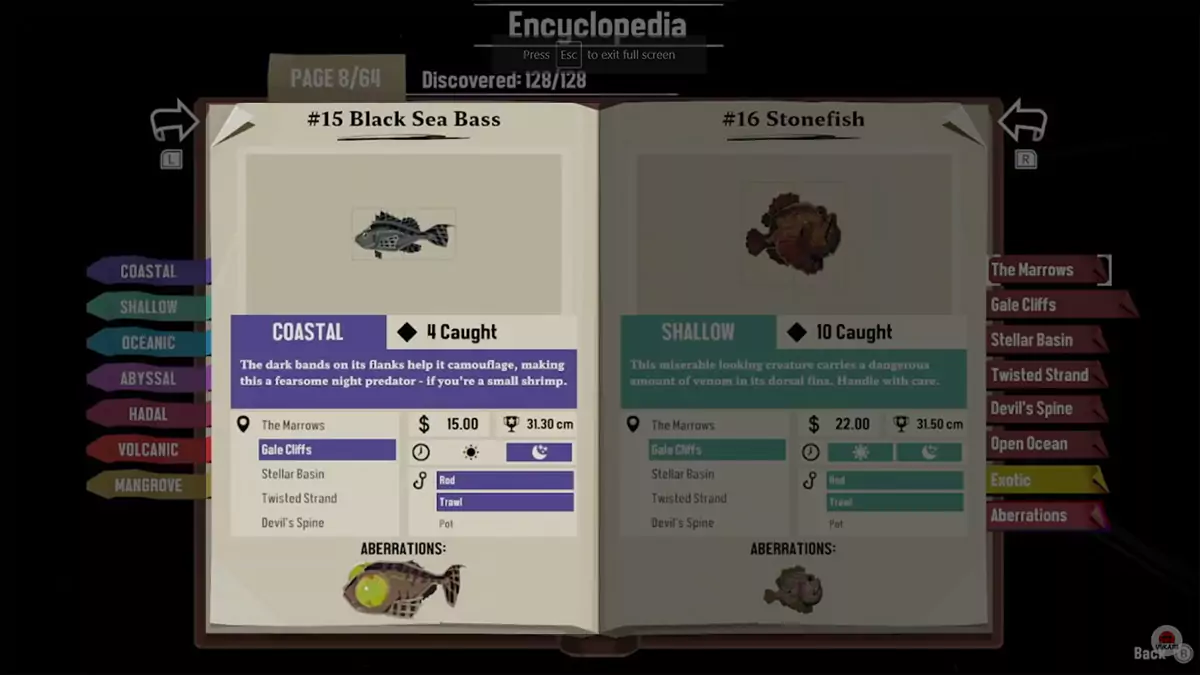
Black Sea Bass are skilled night predators that can only be found in Gale Cliffs after the sun goes down. They can be caught with either a Coastal fishing rod or a Coastal net. A quick and easy spot to catch some is at coordinates 4N.
#16 – Stonefish (08:33 in the Video Guide)
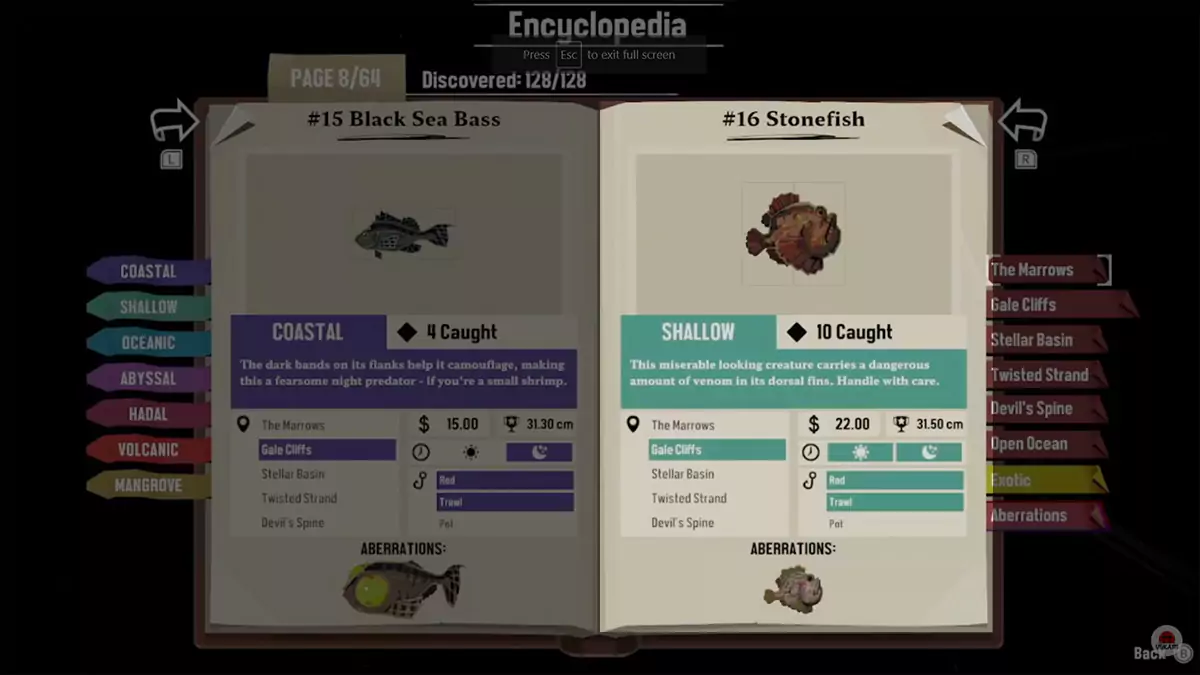
Lumpy and rather ugly (by conventional standards), the Stonefish can be found both day and night. You can catch them by using a Shallow fishing rod or a Shallow net. At coordinates 4M, you’ll find a nice spot to reel in a few of these venomous fellows.
#17 – Blackmouth Salmon (08:58 in the Video Guide)
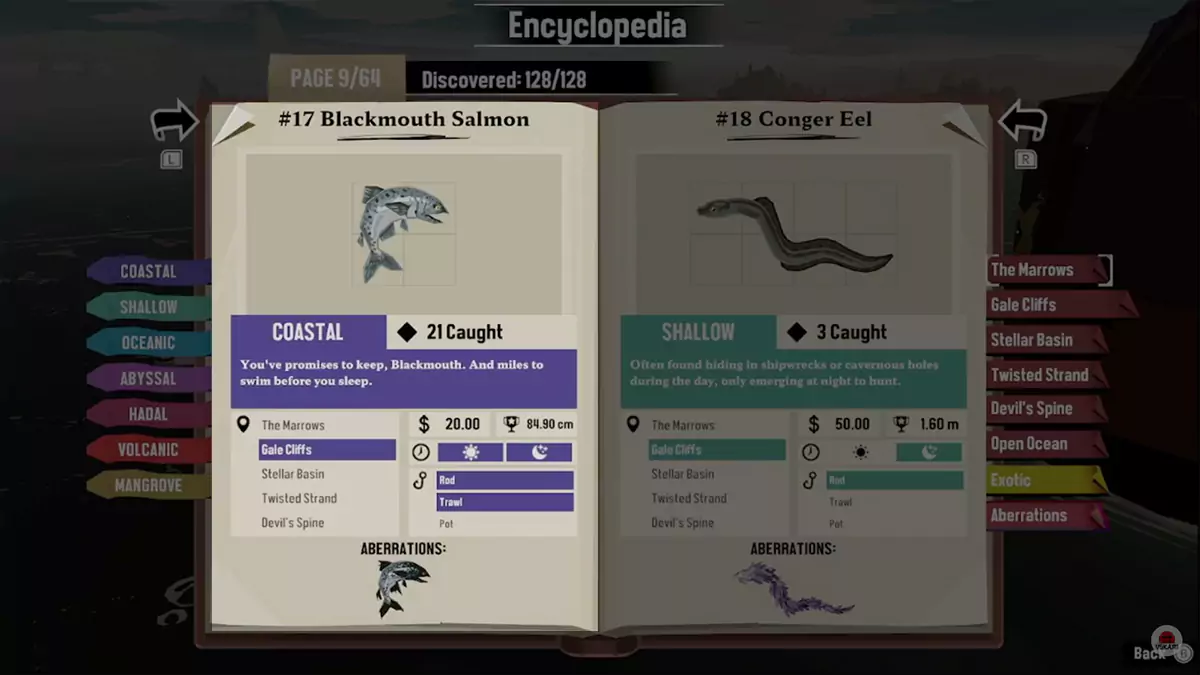
Blackmouth Salmon are fairly common at Gale Cliffs, as they spawn both during the day and night. You’ll be able to catch a bunch of them by using a Coastal fishing rod or a Coastal net. There’s a spawn location for them very close to Dusty Pontoon located at the northeast corner of coordinates 4N.
#18 – Conger Eel (09:22 in the Video Guide)
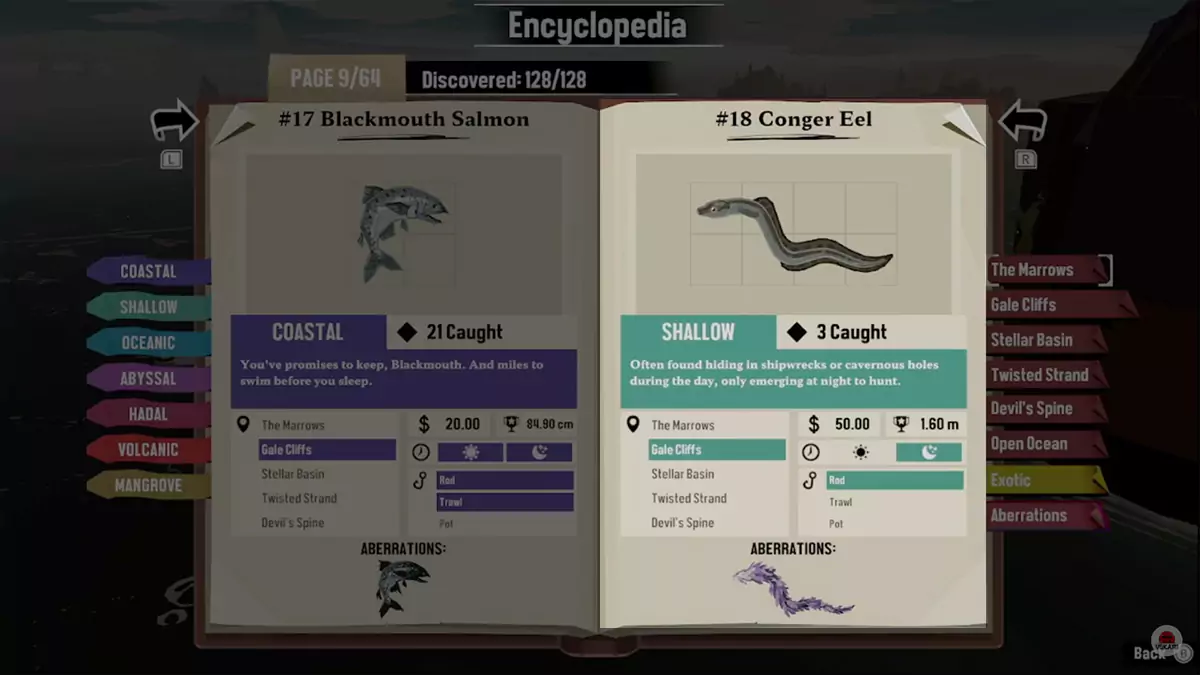
The slippery Conger Eel is a species that is only found at night. Also, you can only catch them with a Shallow fishing rod. One of the best places to find them is at coordinates 3O—in between a couple of shipwrecks on the south side of Gale Cliffs.
#19 – Devil Ray (10:24 in the Video Guide)
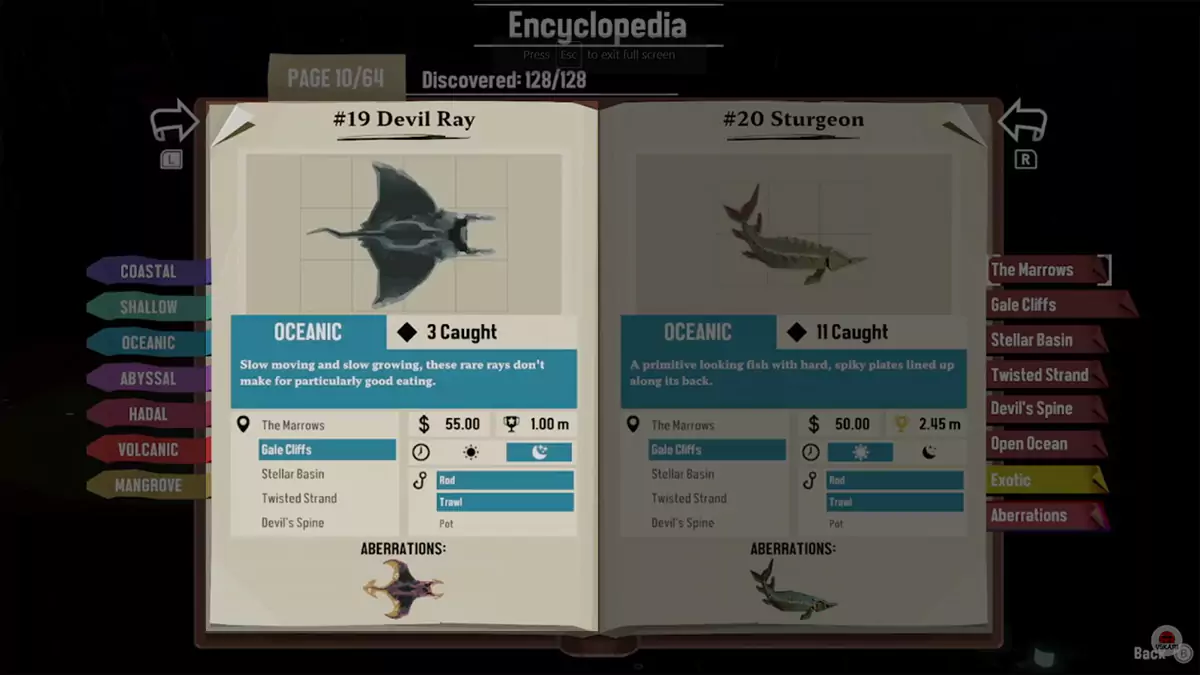
The intimidating (but harmless) Devil Ray can only be caught at night. Thankfully, you can use both an Oceanic fishing rod and an Oceanic net to capture them. There’s a confirmed fishing spot for Devil Rays on the border of coordinates 4O and 4P.
Be careful here, as this path will bring you to narrow and rocky passages. Alternatively, you can trawl anywhere in Gale Cliffs at night to catch these large rays.
#20 – Sturgeon (11:32 in the Video Guide)
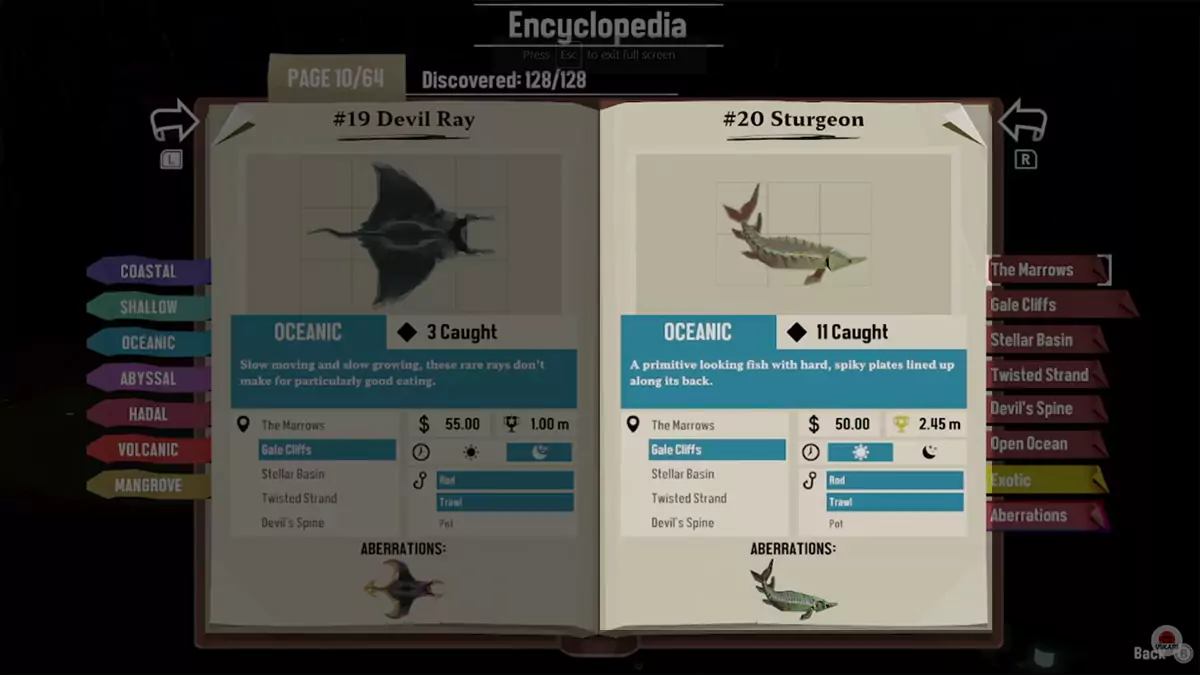
The armored Sturgeon can be found during the day around Gale Cliffs. You’ll be able to catch some with either an Oceanic fishing rod or an Oceanic net. There are a few fishing spots for them northeast of Gale Cliffs (before you get to open waters). One confirmed spot is found at the very northeast corner of coordinates 4P on the map.
#21 – Wreckfish (13:00 in the Video Guide)
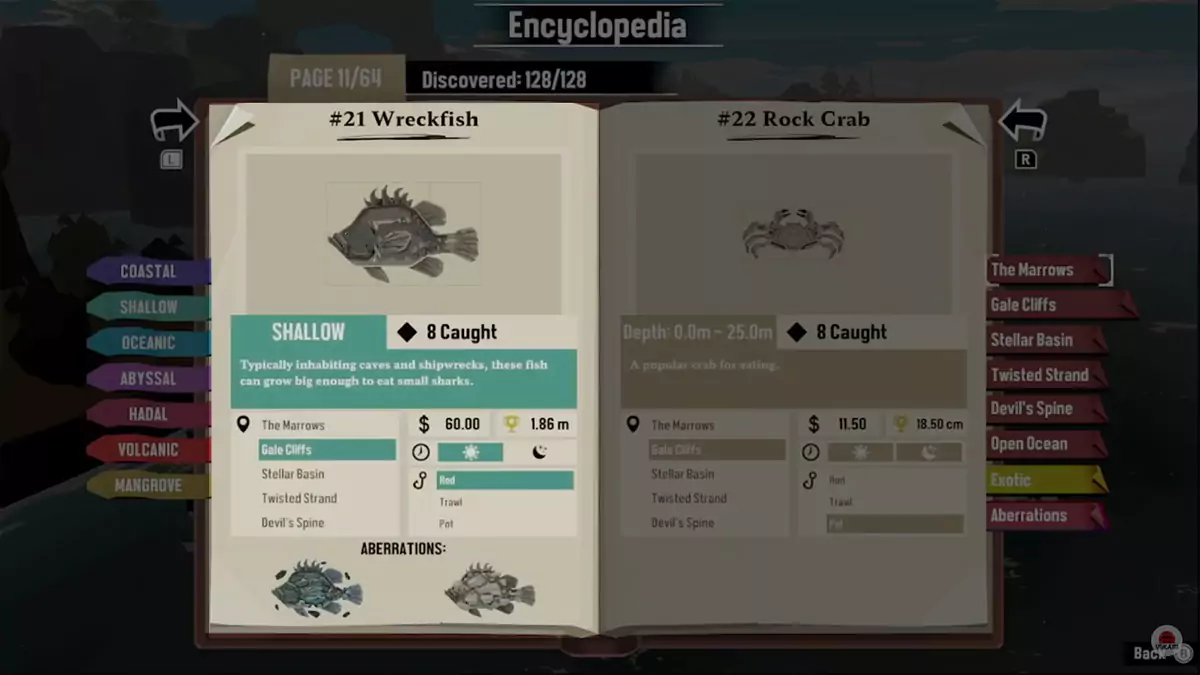
The aptly named Wreckfish likes to hang out near shipwrecks during the day. You can only catch these burly fish with a Shallow fishing rod. There’s a spawn location for them just south of Dusty Pontoon at coordinates 4N.
#22 – Rock Crab (13:29 in the Video Guide)
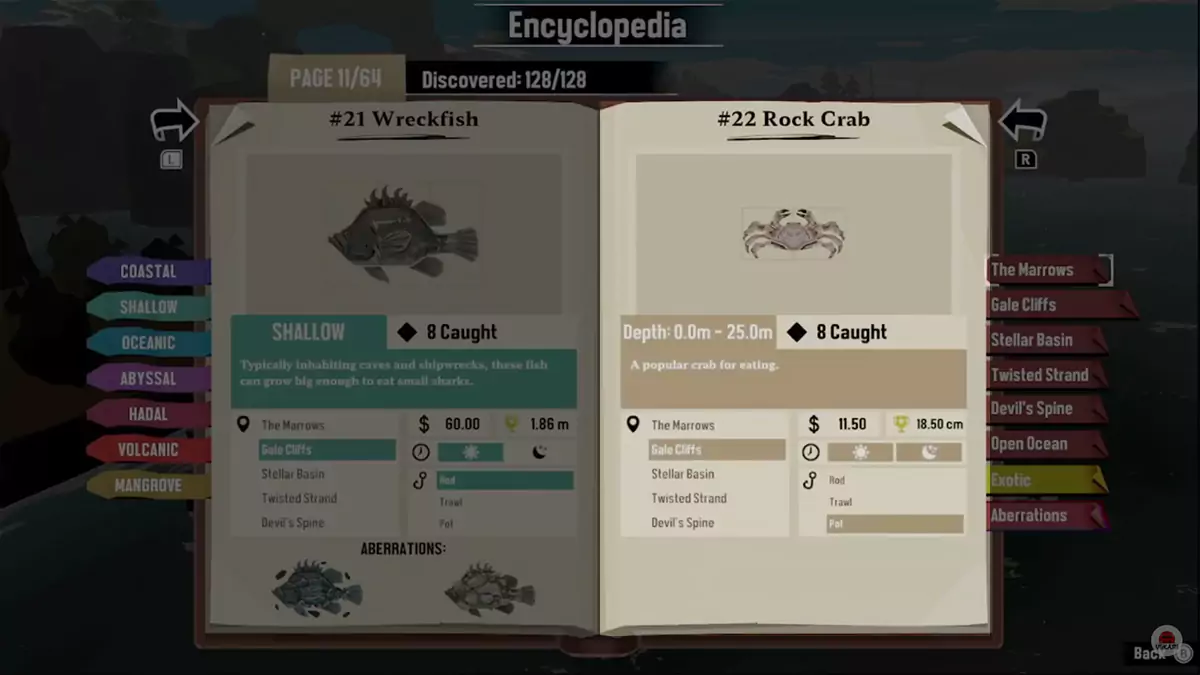
Apparently, Rock Crabs are quite tasty to the islanders in DREDGE. You’ll be able to harvest many of these crustaceans from the deep during either day or night by using any kind of pot. However, you need to set these pots at any depth between 0 to 82 feet (0 to 25 meters).
#23 – Decorator Crab (13:29 in the Video Guide)
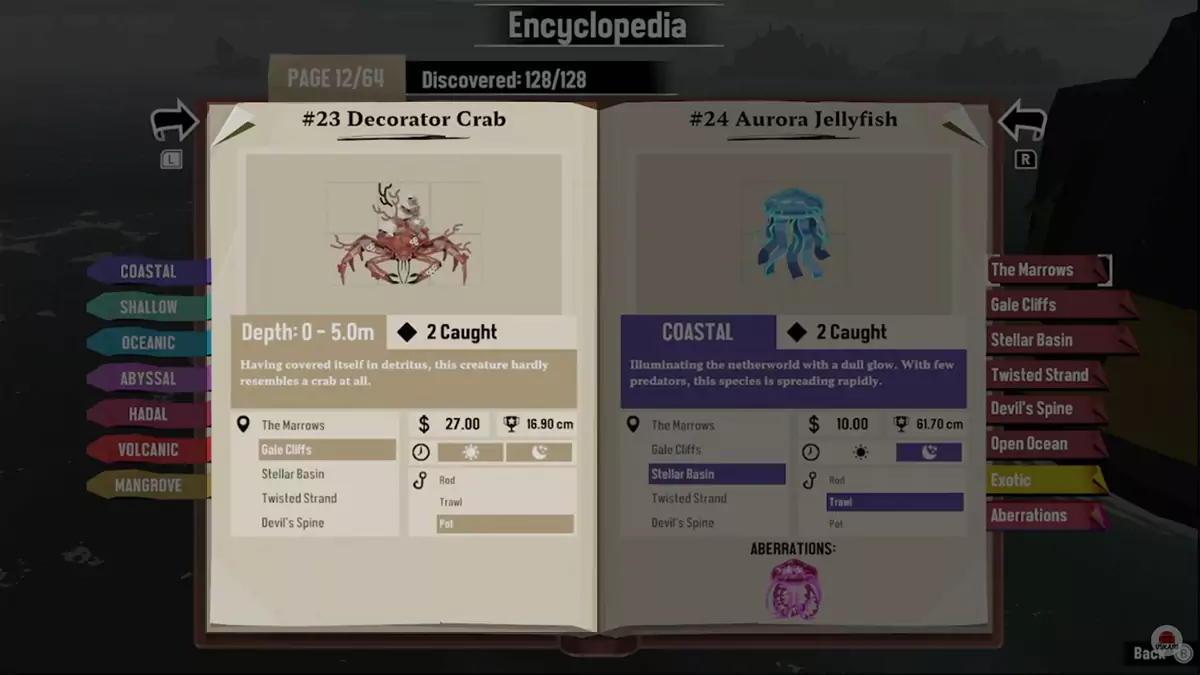
These fancy little fellows can also be caught during any time of day—and in any kind of pot—in Gale Cliffs. However, unlike the humble Rock Crab, Decorator Crabs prefer shallower areas. To snag a bunch of Decorator Crabs, be sure to set your pots at depths from 0 to 16 feet (0 to 5 meters).
Stellar Basin Fish Locations
The beautiful and deadly waters of Stellar Basin test your skills and force you to try new fishing methods. Here, you’ll need the following equipment to catch all 16 local species:
- Coastal fishing rod
- Coastal net
- Shallow fishing rod
- Oceanic fishing rod
- Abyssal fishing rod
- Hadal fishing rod
- Any kind of pot
#24 – Aurora Jellyfish (14:26 in the Video Guide)
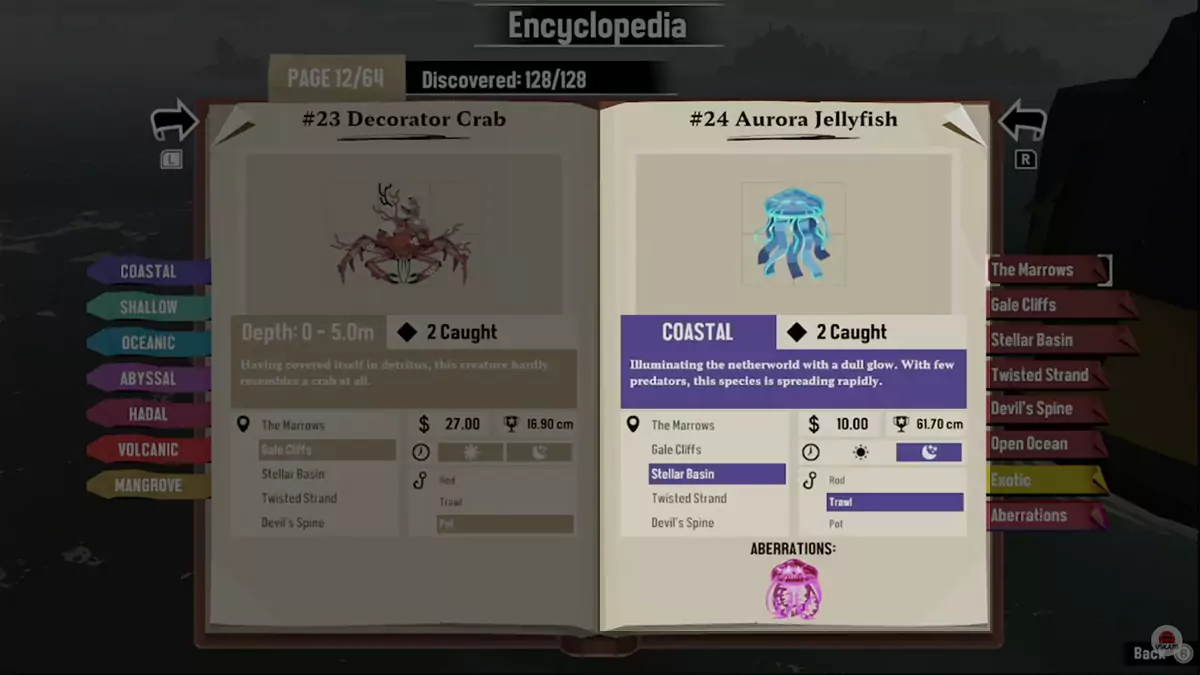
Aurora Jellyfish are one of the few species that you can only catch by using a Coastal net. Also, these beautiful creatures only appear at night. Since they are net-only captures, there’s no set spawn point for them; you simply need to sail around with your net deployed! What’s more, you don’t need to run into the pink jellyfish you see at night in Stellar Basin to catch Aurora Jellyfish.
#25 – Fangtooth (15:21 in the Video Guide)
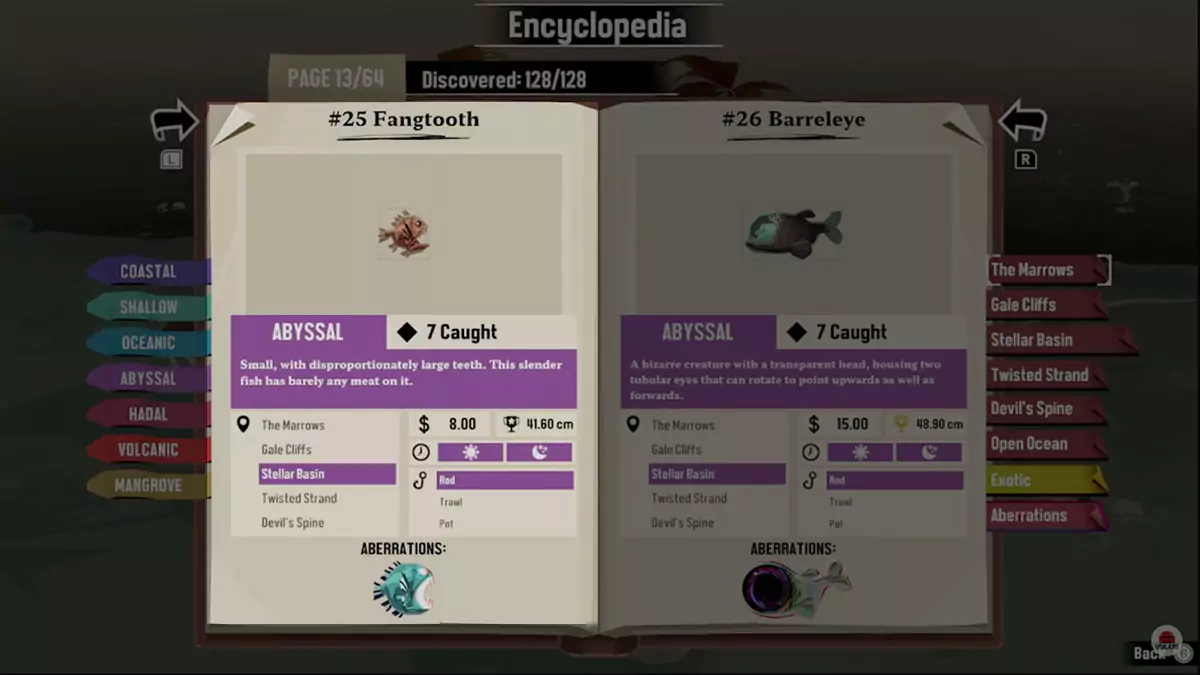
In order of encyclopedia entries, the Fangtooth is the first Abyssal species listed. As such, you’ll need an Abyssal fishing rod to catch these small, toothy predators. They spawn during both day and night, so finding them shouldn’t be too hard. Especially if you search the southwest corner of coordinates 3D for one of their spawn locations.
#26 – Barreleye (16:25 in the Video Guide)
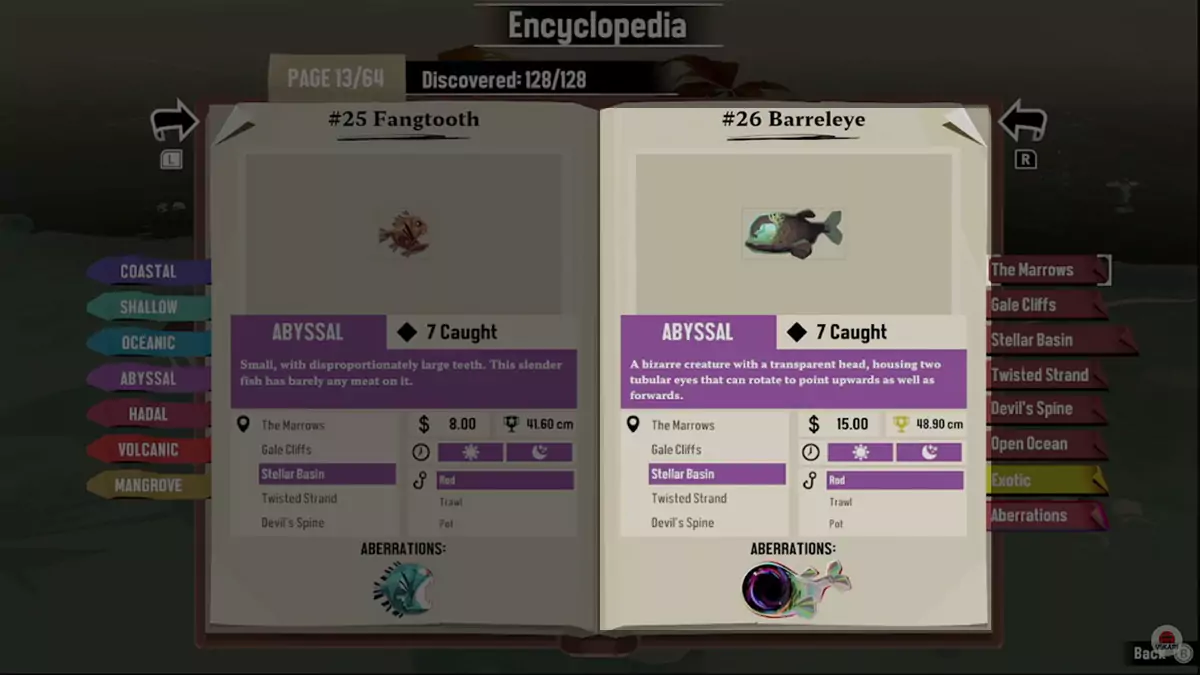
Similar to the Fangtooth, the Barreleye is a species that you can only catch by using an Abyssal fishing rod. They also spawn during both daytime and nighttime. A great spot to find this fish is at the northwest corner of coordinates 1E.
#27 – Firefly Squid (17:04 in the Video Guide)
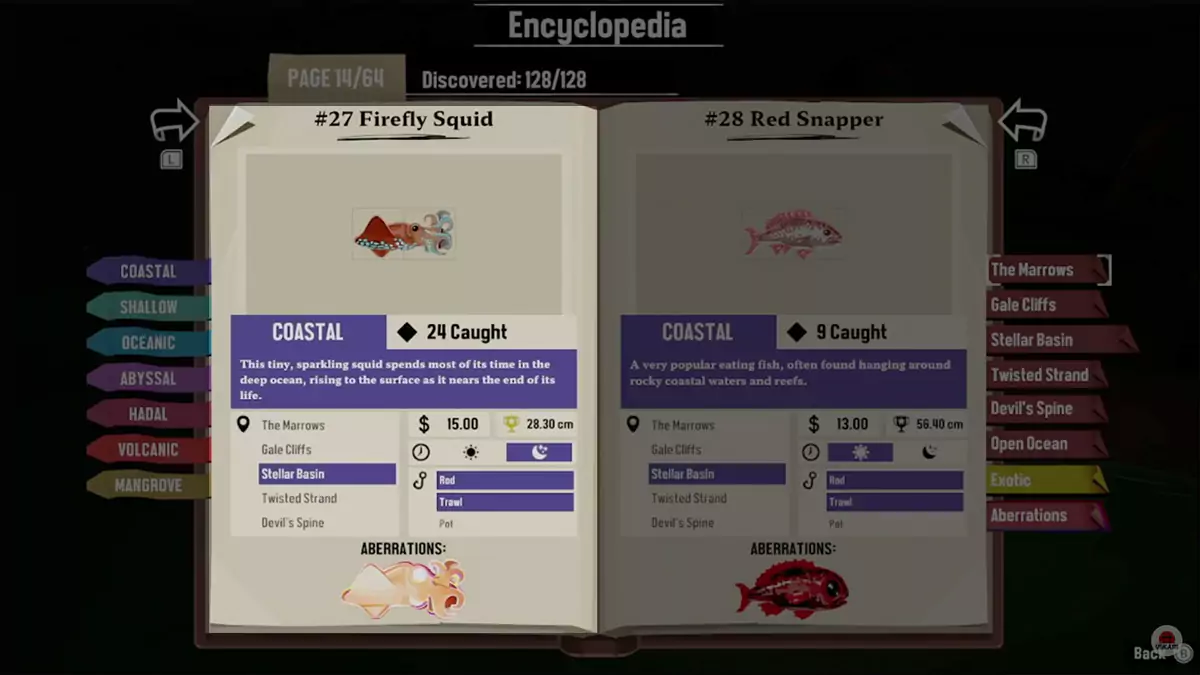
The fabulous Firefly Squid can only be found at night, however, thanks to their bioluminescence, they’re easy to spot in the dark. You’ll need either a Coastal fishing rod or a Coastal net to reel in these squids. One definite spawn location for them is at the southeast corner of coordinates 3D—which is a touch northwest of Starlight Pontoon.
#28 – Red Snapper (17:40 in the Video Guide)

One of the most common fish in Stellar Basin, the Red Snapper is a daytime species that you need either a Coastal fishing rod or a Coastal net to catch. You’ll easily find Red Snapper a bit west of Starlight Pontoon at coordinates 2D.
#29 – Giant Amphipod (18:05 in the Video Guide)
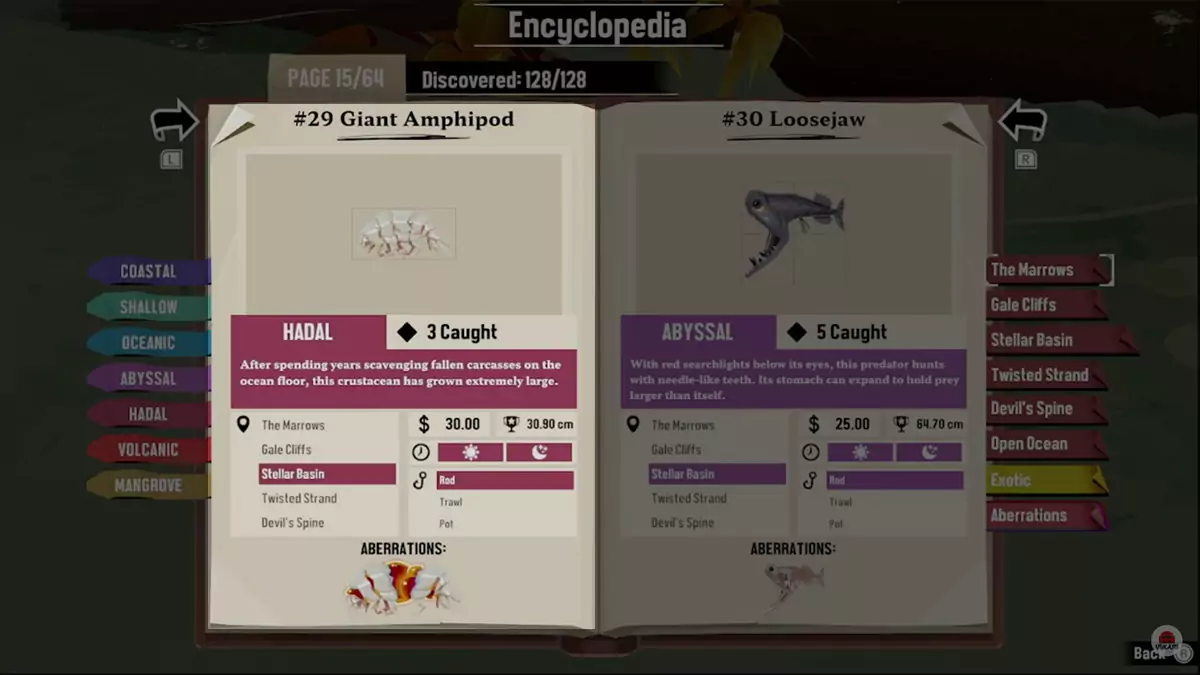
Here’s the first Hadal species in DREDGE‘s encyclopedia. Catching a Giant Amphipod requires you to have a Hadal fishing rod, though, they can be reeled in during both day and night.
With that said, they only spawn above the area with the Giant Squid, so you need to turn on Stellar Basin’s Generator to fish for this species safely. One guaranteed spawn location for the Giant Amphipod is in the northwest corner of coordinates 3F.
#30 – Loosejaw (19:18 in the Video Guide)

The terrifying Loosejaw is a species that you must catch with an Abyssal fishing rod. They spawn during the day as well as at night. There’s a guaranteed fishing spot for them at coordinates 1G on the map.
#31 – Snailfish (20:07 in the Video Guide)
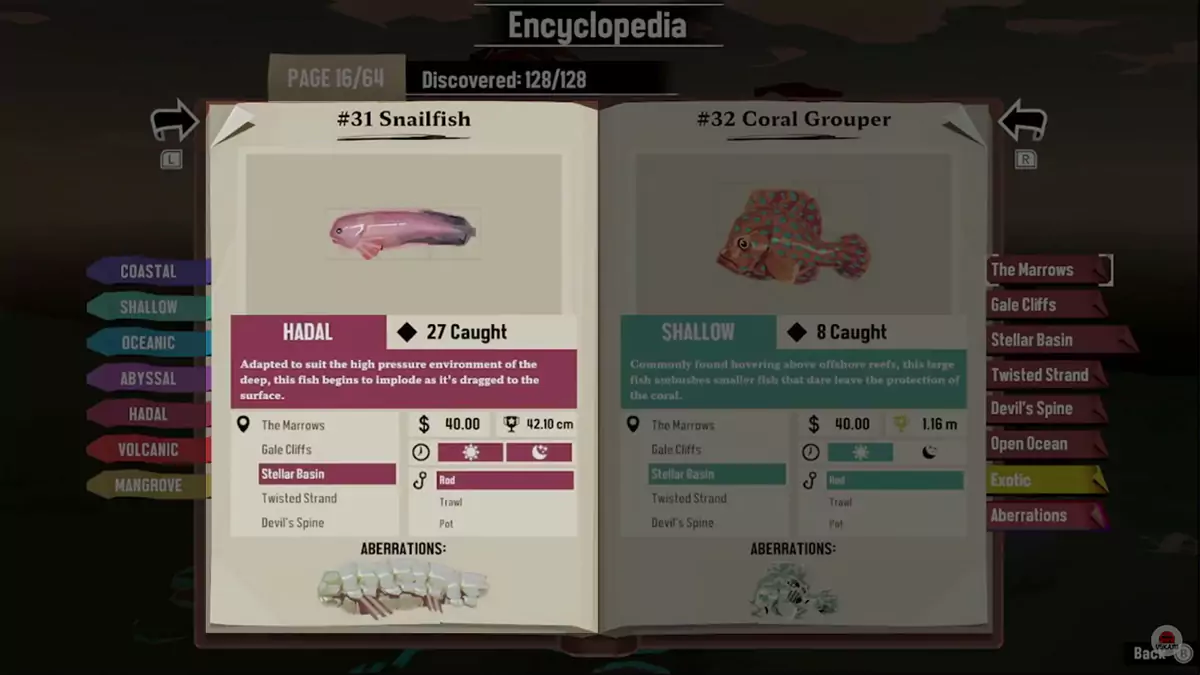
The squishy Snailfish are only found deep down—you need a Hadal fishing rod to catch them. With that said, they spawn during both the day and night, though, they like to hang out close to Stellar Basin’s giant squid.
To avoid getting attacked by the giant squid, make sure to turn on the generator before fishing for Snailfish. A great spot to find them is at coordinates 4F.
#32 – Coral Grouper (21:09 in the Video Guide)
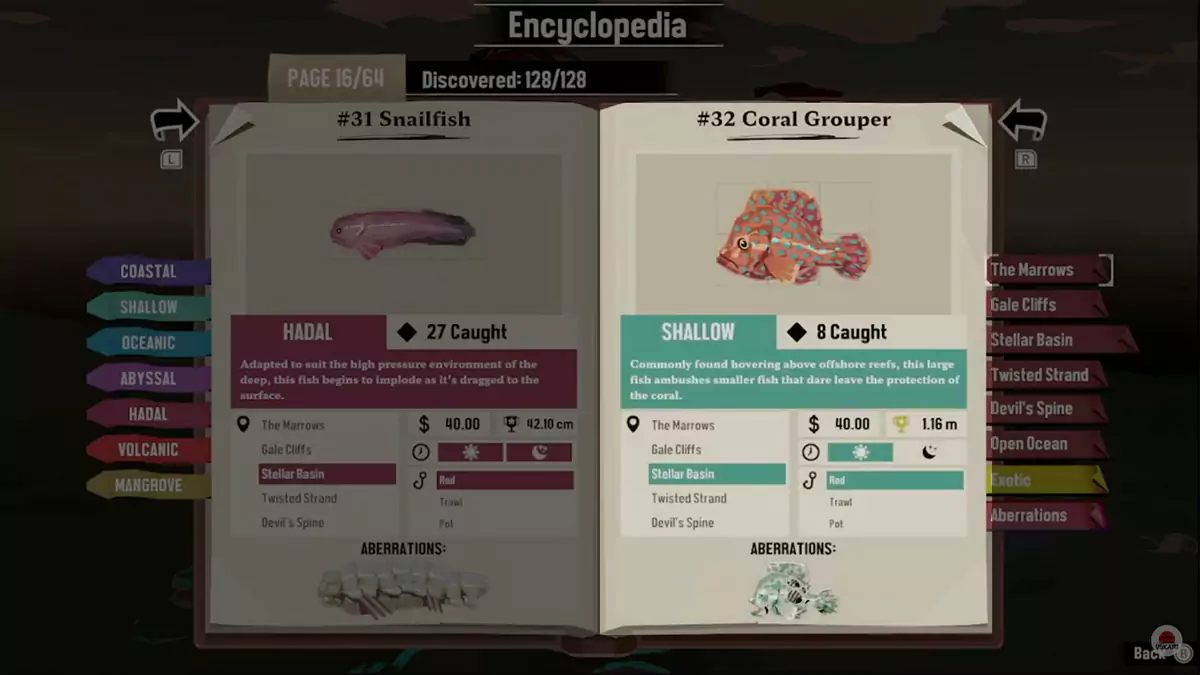
The brightly colored Coral Grouper is easy to find in Stellar Basin if you’re sailing around during the day. To catch them, you’ll need a Shallow fishing rod. A bit northeast of Starlight Pontoon—at coordinates 3E—there is a convenient fishing spot full of Coral Grouper.
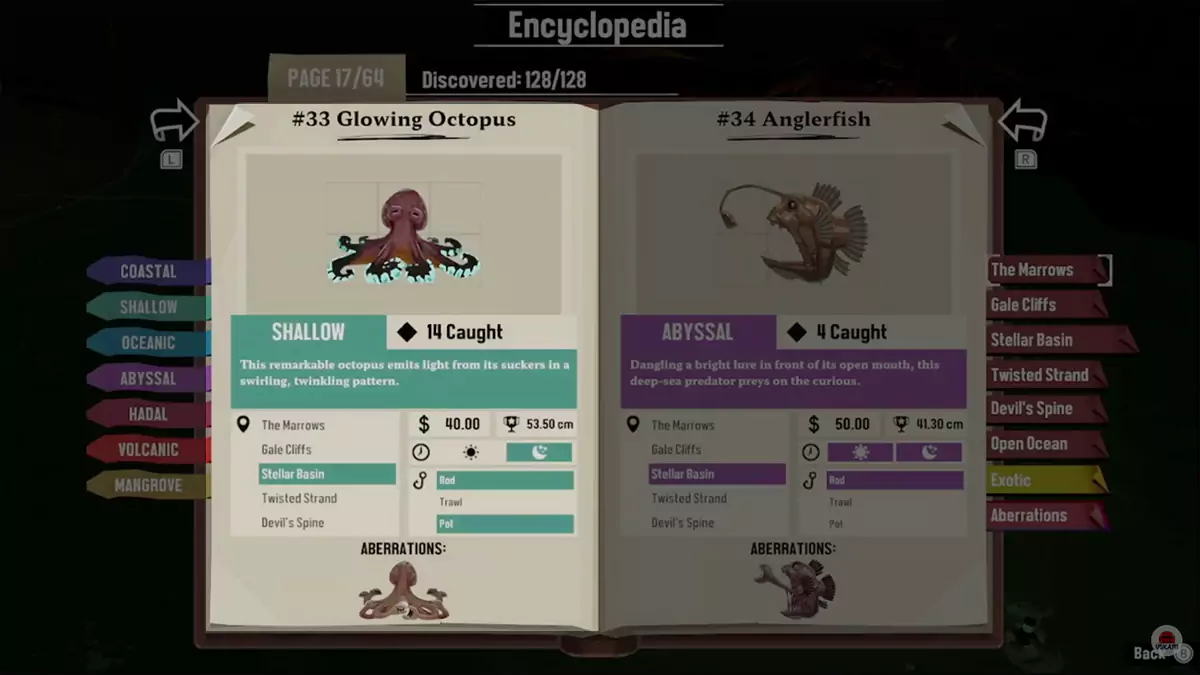
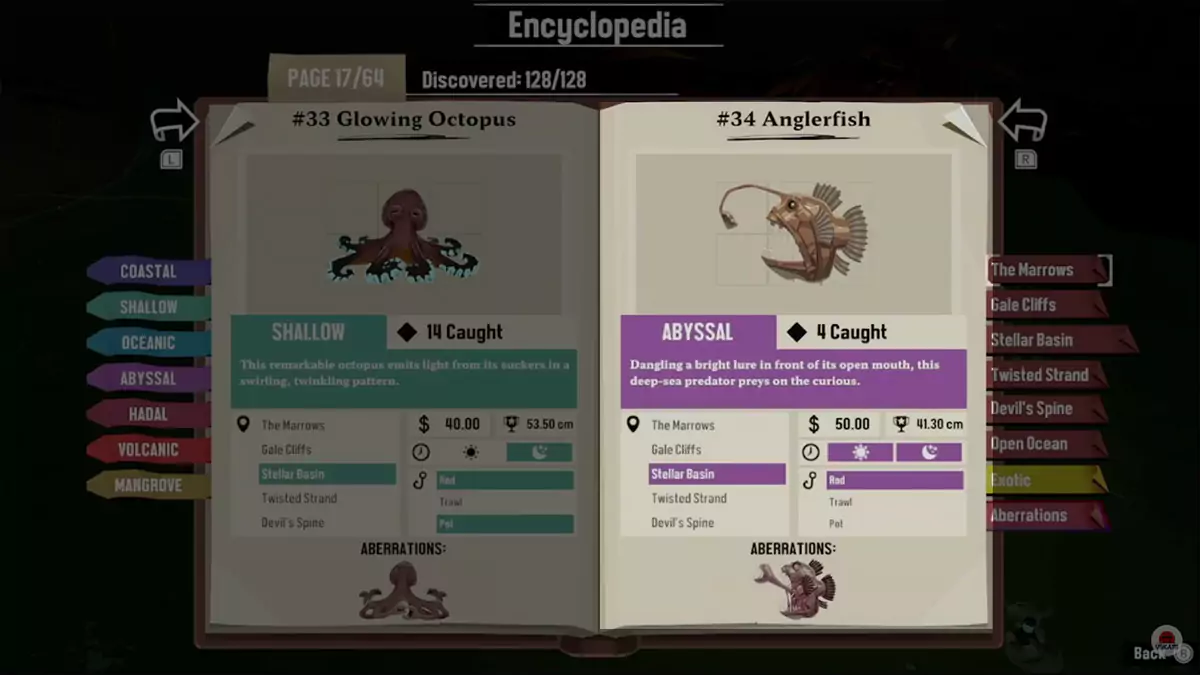
#33 – Glowing Octopus (21:43 in the Video Guide)
The Glowing Octopus is a nighttime species that you need either a Shallow fishing rod or any kind of pot to catch. Their bioluminescence makes them pretty easy to find, so actively fishing for them is quicker than catching them with a pot. Slightly northeast of Starlight Pontoon, at the northeast corner of coordinates 2E, there’s a guaranteed fishing spot for them.
#34 – Anglerfish (22:08 in the Video Guide)
As one of the most famous deepsea species, the Anglerfish is easily recognizable thanks to its fleshy lure. To catch this fish-fisherman, you need to use an Abyssal fishing rod during either the day or night. At the southeast corner of coordinates 2D, there is a confirmed fishing spot for them.
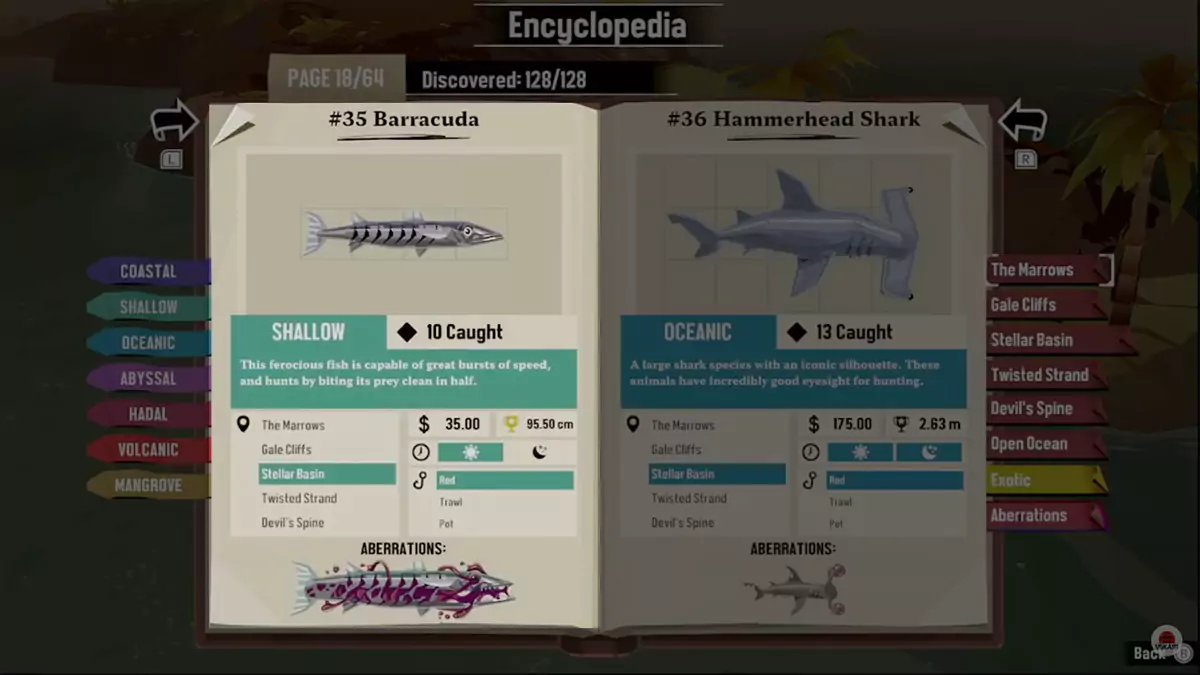
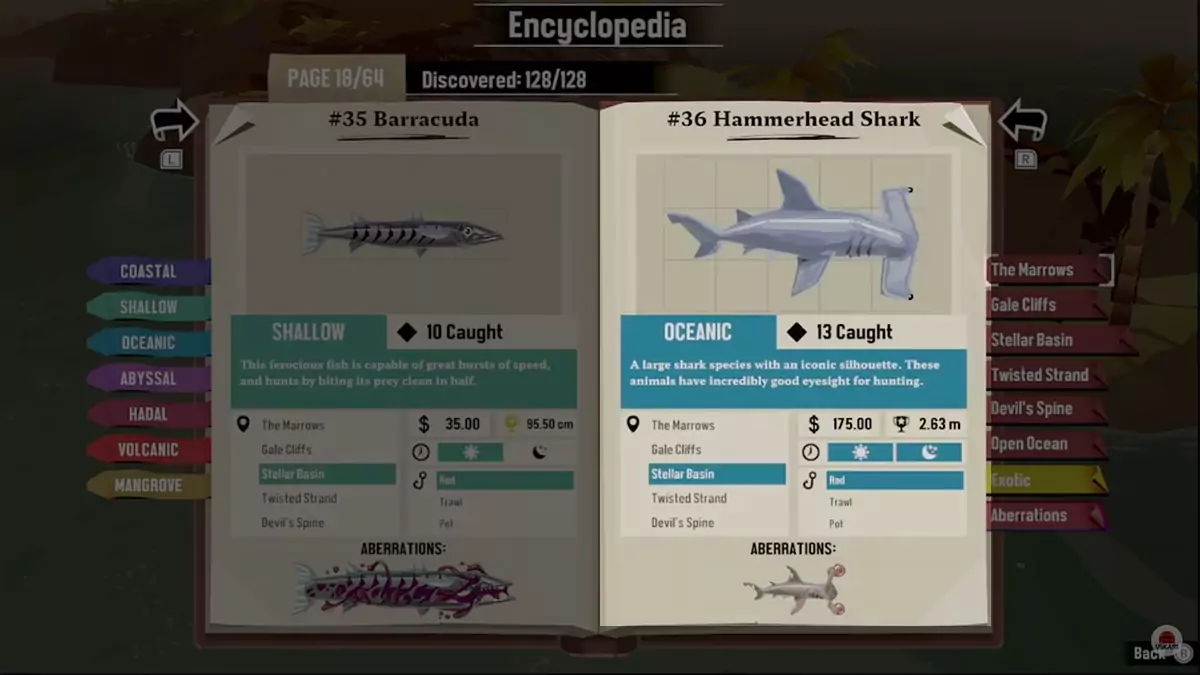
#35 – Barracuda (22:45 in the Video Guide)
The speedy Barracuda likes to show up during the day. A Shallow fishing rod is what you’ll need to catch these predators. There’s a spawn point for Barracuda pretty much right on top of Starlight Pontoon—all you need to do is look a bit north while the sun is up.
#36 – Hammerhead Shark (23:13 in the Video Guide)
As Stellar Basin’s only shark species, the Hammerhead Shark is a bit more common than most other shark species in DREDGE. You need an Oceanic fishing rod to capture these apex hunters. They spawn during both the day and night, so they won’t be too hard to find. There’s a definite spawn location for Hammerhead Sharks confirmed at coordinates 2D.
#37 – Crown of Thorns (23:55 in the Video Guide)
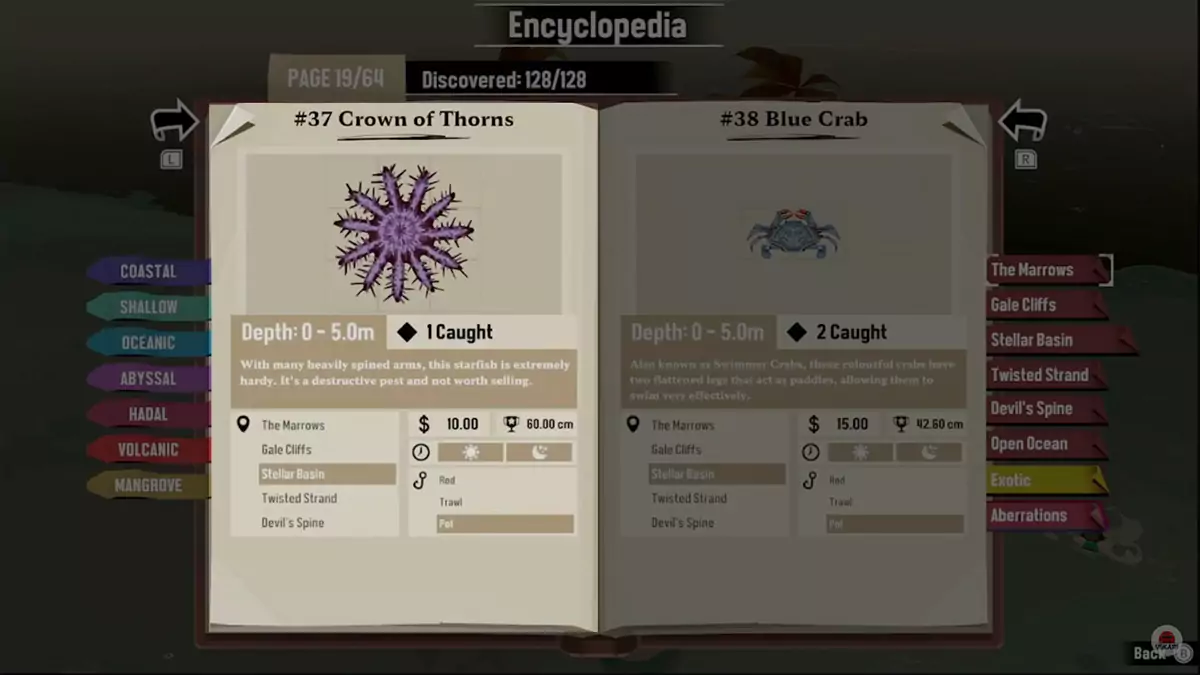
The spiky Crown of Thorns starfish are easy to catch in any type of pot. They appear during the day and night, so it doesn’t matter when you set up traps for them.
All you need to do is make sure that you set your pots at depths between 0 to 16 feet (0 to 5 meters). Also, since they are quite large, you should make sure your pot is empty to properly catch them (if you’re using a basic pot).
#38 – Blue Crab (23:55 in the Video Guide)
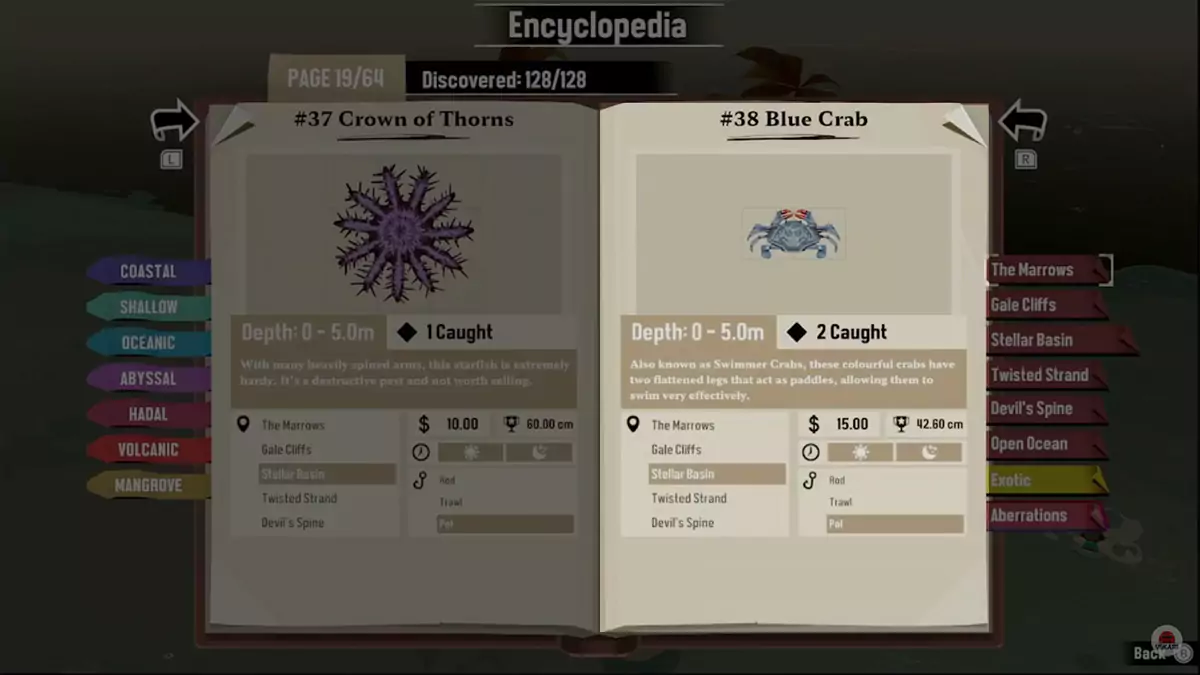
Catching a Blue Crab requires the same technique as catching a Crown of Thorns: set a pot at any time of day or night at a depth between 0 to 16 feet (0 to 5 meters). However, since Blue Crabs are a lot smaller, you’ll likely catch them more easily than the bulky Crown of Thorns starfish.
#39 – Spiny Lobster (24:36 in the Video Guide)
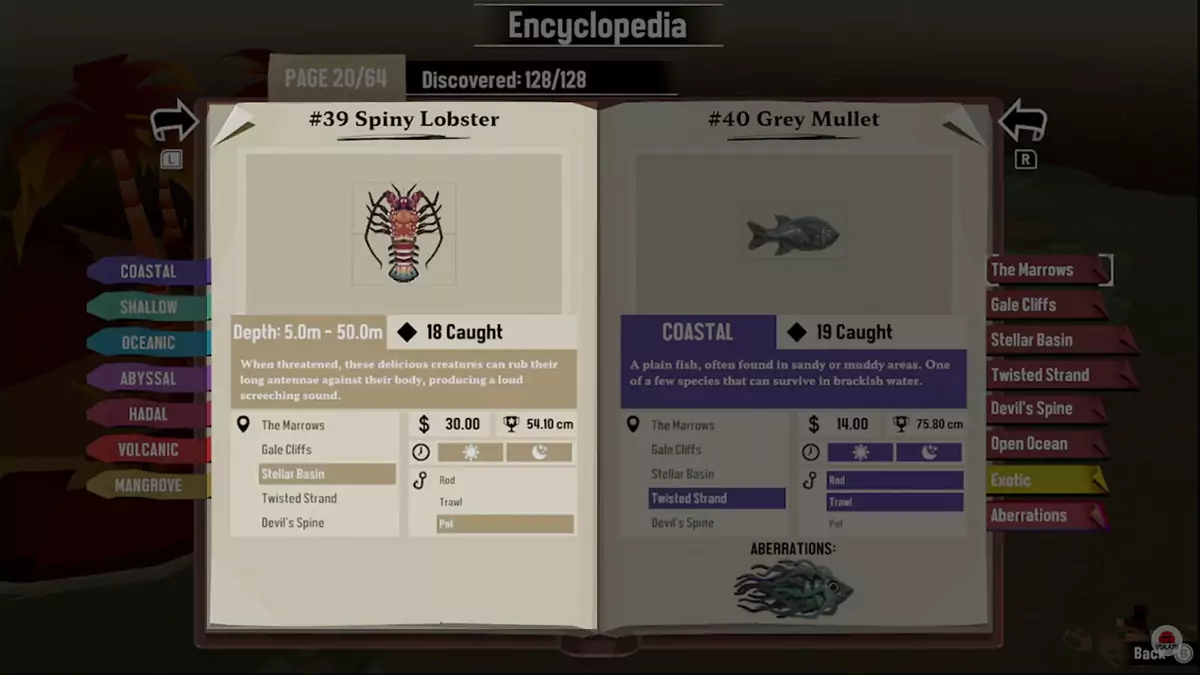
The final species you’ll find in Stellar Basin is the Spiny Lobster. This pointy crustacean is found deeper than the other two pot-only species in the area—but can be dredged up during the day or night. Simply set any kind of pot at a depth between 16 to 164 feet (5 to 50 meters).
Twisted Strand Fish Locations
The mysterious and murky waters of Twisted Strand are hard to traverse. This maze of dull yellow waves and brown vines will challenge your navigation skills. To find all eight regular fish species, you’ll need the following equipment:
- Coastal fishing rod
- Coastal net (optional)
- Shallow fishing rod
- Shallow net (optional)
- Mangrove fishing rod
- Mangrove net (optional)
- Any kind of pot
#40 – Grey Mullet (25:03 in the Video Guide)
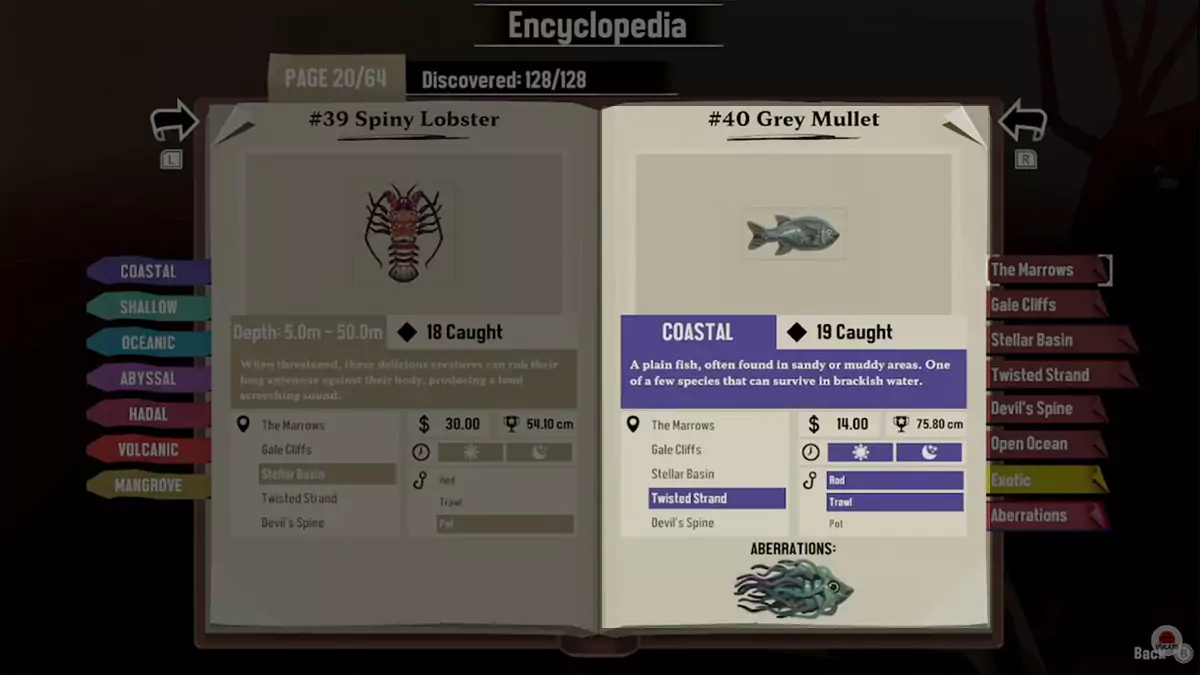
The Grey Mullet is a rather boring species that can be found in large numbers. It spawns both during the day and night, so you’ll always be able to catch some of these simple fish.
You can use either a Coastal fishing rod or a Coastal net to capture them. While they can be found in many areas of Twisted Strand, a convenient place to hunt them down is just south of Rickety Pontoon at coordinates 12G.
#41 – Tarpon (25:30 in the Video Guide)
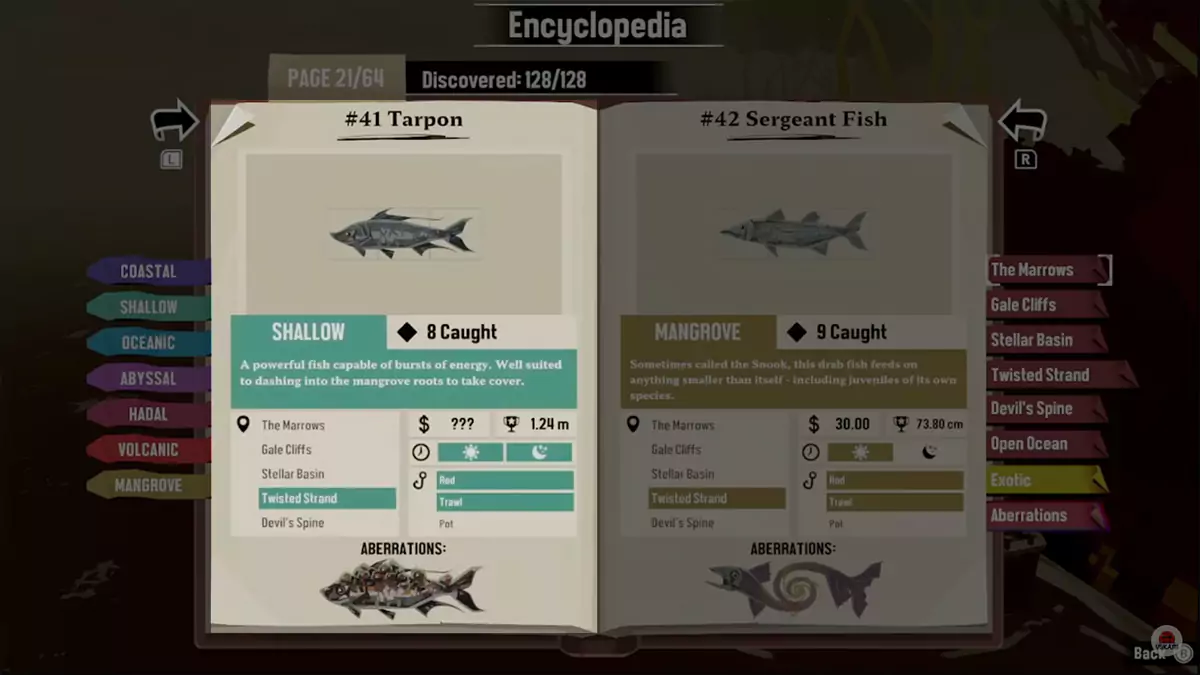
To catch the streamlined Tarpon, you’ll need either a Shallow fishing rod or a Shallow net. However, they are found during daylight and nighttime hours, so catching them won’t be a challenge.
A close spawn point of theirs to Rickety Pontoon is at the southern end of coordinates 13F—which is in the main entrance to Twisted Strand’s inner maze located a touch west of Rickety Pontoon.
#42 – Sergeant Fish (26:10 in the Video Guide)
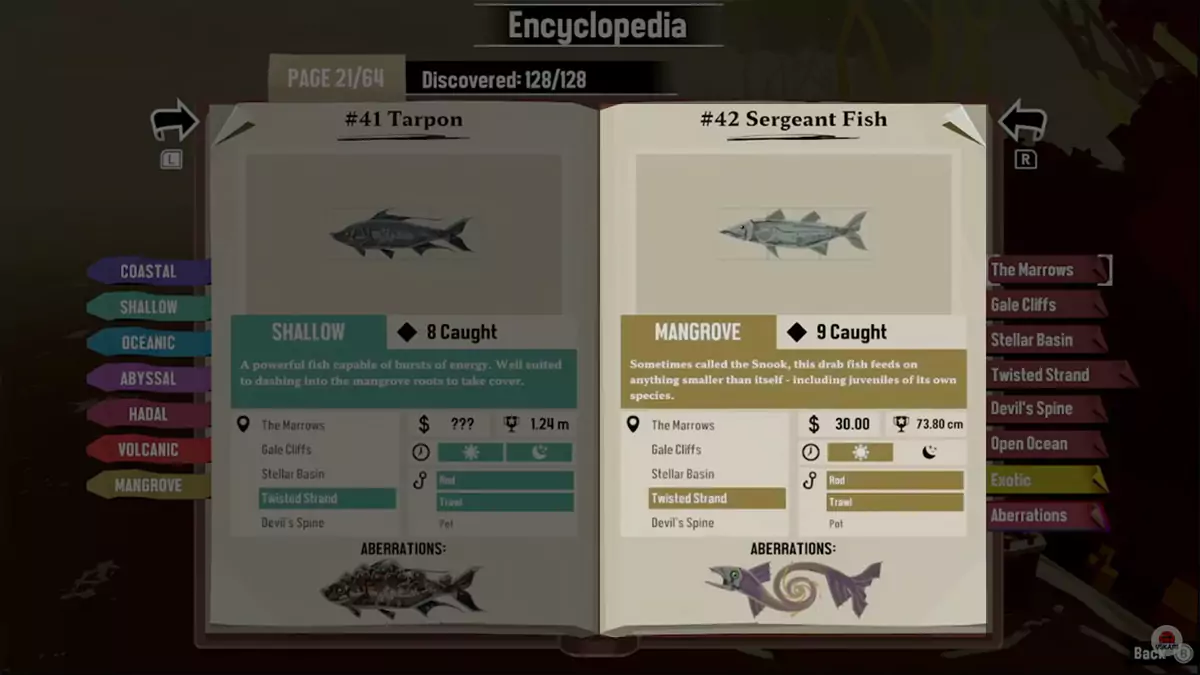
Despite looking rather calm, Sergeant Fish are savage beasts that will sometimes even eat their own kind. Thankfully, this daytime species isn’t a threat to you. To catch them, you’ll need either a Mangrove fishing rod or a Mangrove net. They have a nearby spawn point a bit west of Rickety Pontoon at the southwest corner of coordinates 13G.
#43 – Gar (26:44 in the Video Guide)
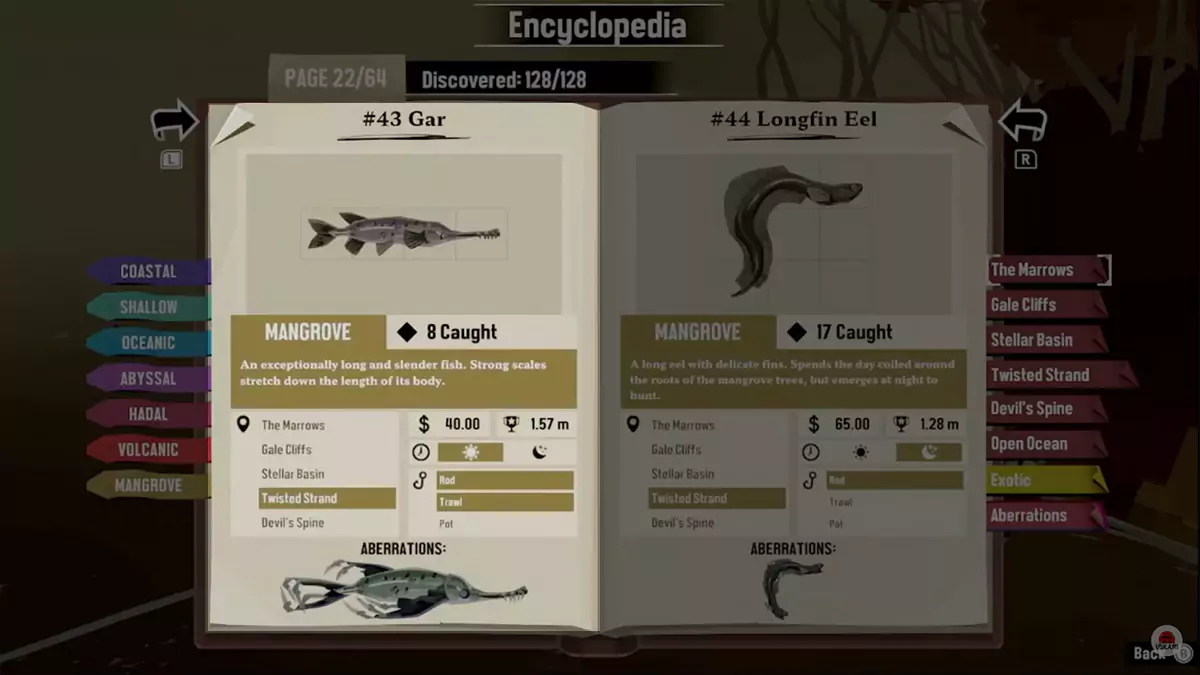
The wicked jaws of the Gar are intimidating but not harmful to fishermen. This species is only found during the day and you can catch them with either a Mangrove fishing rod or a Mangrove net. Like a lot of other common species in Twisted Strand, there’s a spawn location for them slightly west of Rickety Pontoon—at the east end of coordinates 13F.
#44 – Longfin Eel (27:22 in the Video Guide)
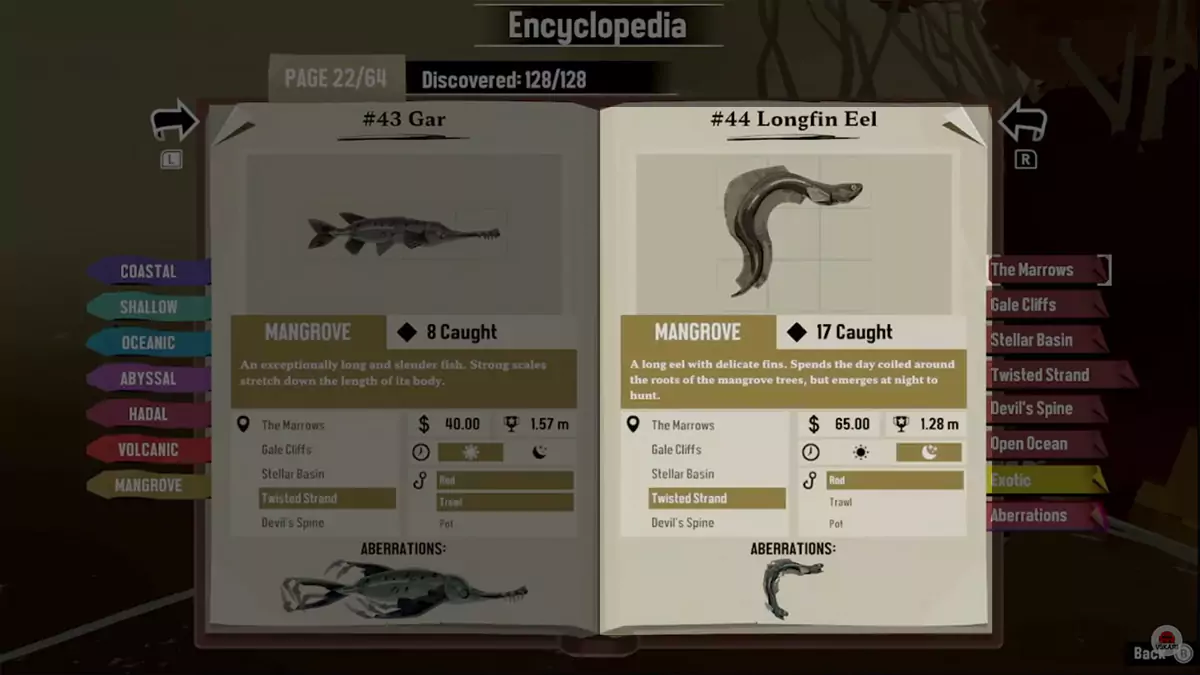
The Longfin Eel is a species that you’ll only find at night. To catch these slim fish, you must use a Mangrove fishing rod. A convenient place to capture a few of these eels is just southeast of the Airman’s Camp at the northwest corner of coordinates 13F. Look for the arch-shaped tree roots: there’s a spawn point for Longfin Eels under it.
#45 – Catfish (28:09 in the Video Guide)

The whiskered faces of Catfish can only be found at night. You need either a Mangrove fishing rod or a Mangrove net to catch this species. There are multiple spawn locations for the Catfish, however, there’s a convenient one located at the western side of coordinates 12F.
To find this spot, head to the very southern end of Twisted Strand. At the point where coordinates 11E and 11F meet, there is an entrance to a small area leading north into coordinates 12F. Here, you’ll find at least one spot to reel in Catfish.
#46 – Horseshoe Crab (29:21 in the Video Guide)
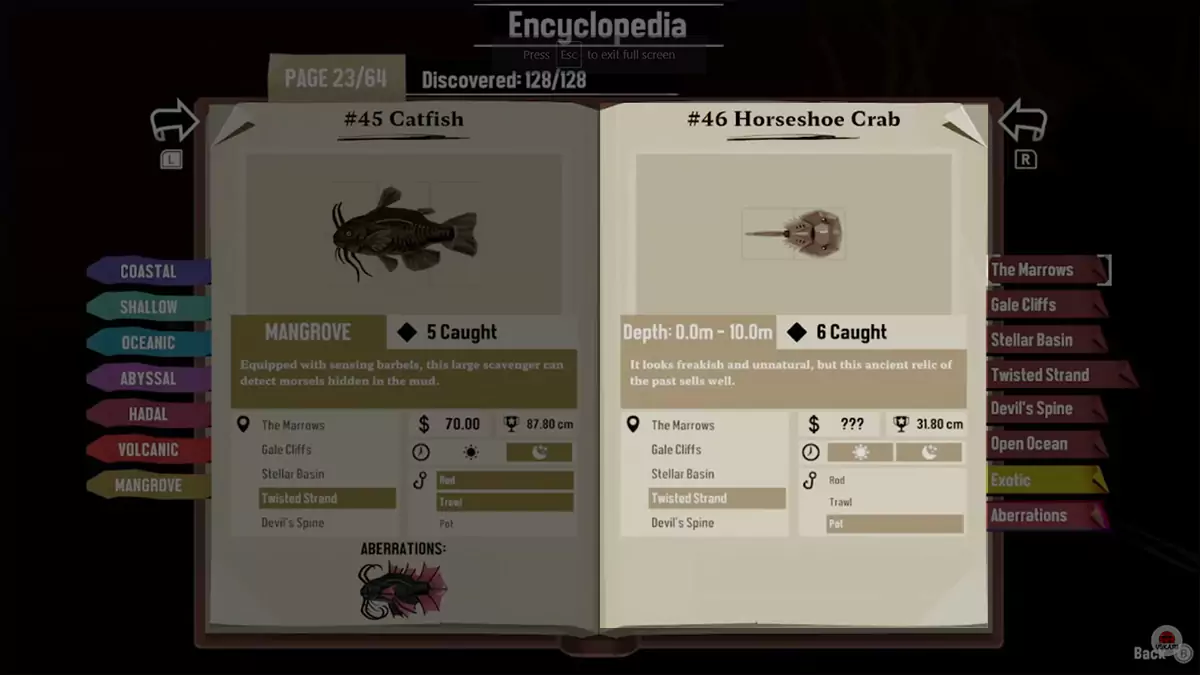
The humble Horseshoe Crab is a prehistoric species that still exists today. To catch them, you must place any kind of pot at a depth between 0 to 32 feet (0 to 10 meters).
However, to avoid accidentally catching other species (like the Giant Mud Crab), we recommend you set your pot down between 0 to 16 feet (0 to 5 meters). They’ll get caught at any time of the day or night, so, as usual, let your crab pot do the work for you.
#47 – Giant Mud Crab (29:45 in the Video Guide)
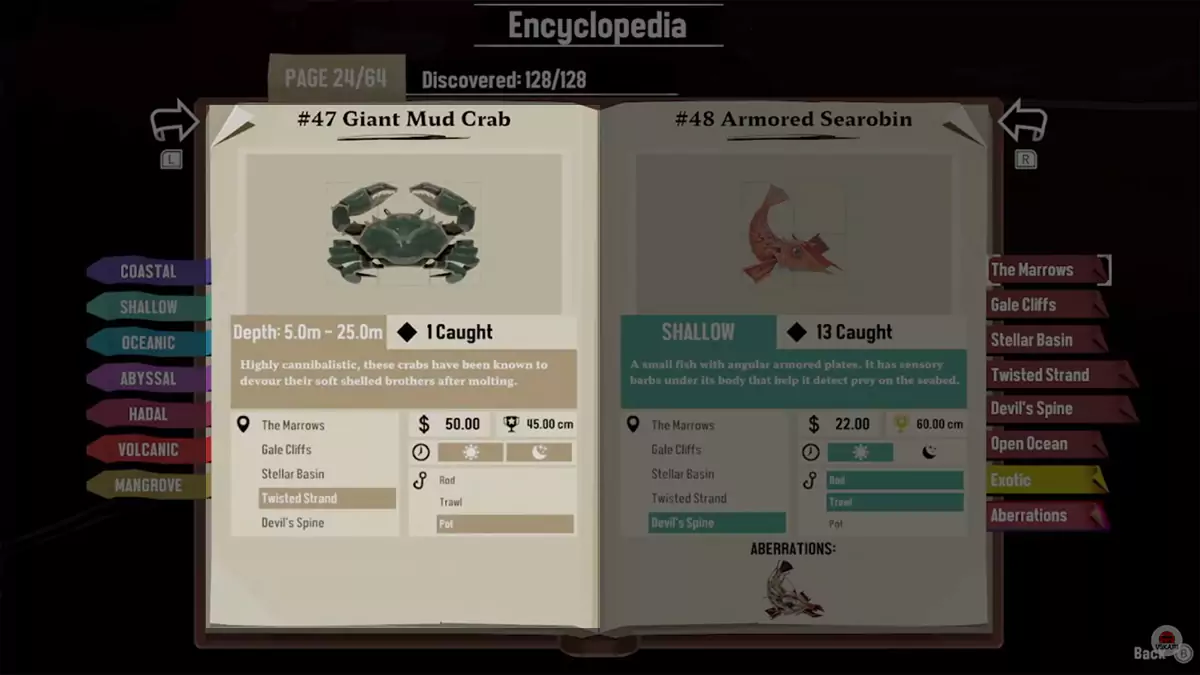
The Giant Mud Crab is a huge crustacean that is found deeper than Horseshoe Crabs—but still can be caught during the day or night. Even though its range is between 16 to 82 feet down (5 to 25 meters), we recommend you set your pot between 32 to 82 feet down (10 to 25 meters). The recommended depth helps you avoid accidentally catching Horseshoe Crabs.
Devil’s Spine Fish Locations
The reddish waters of Devil’s Spine are foreboding—as are the threatening cries of nearby enemies in this location. You’ll need to use the thermal vents to ward off threats in this location. In addition to constantly escaping foes, you’ll need the following equipment to catch all nine of the native fish species:
- Coastal fishing rod
- Coastal net (optional)
- Shallow fishing rod
- Shallow net (optional)
- Volcanic fishing rod
- Volcanic net (optional)
- Abyssal fishing rod
- Any kind of pot
#48 – Armored Searobin (30:26 in the Video Guide)
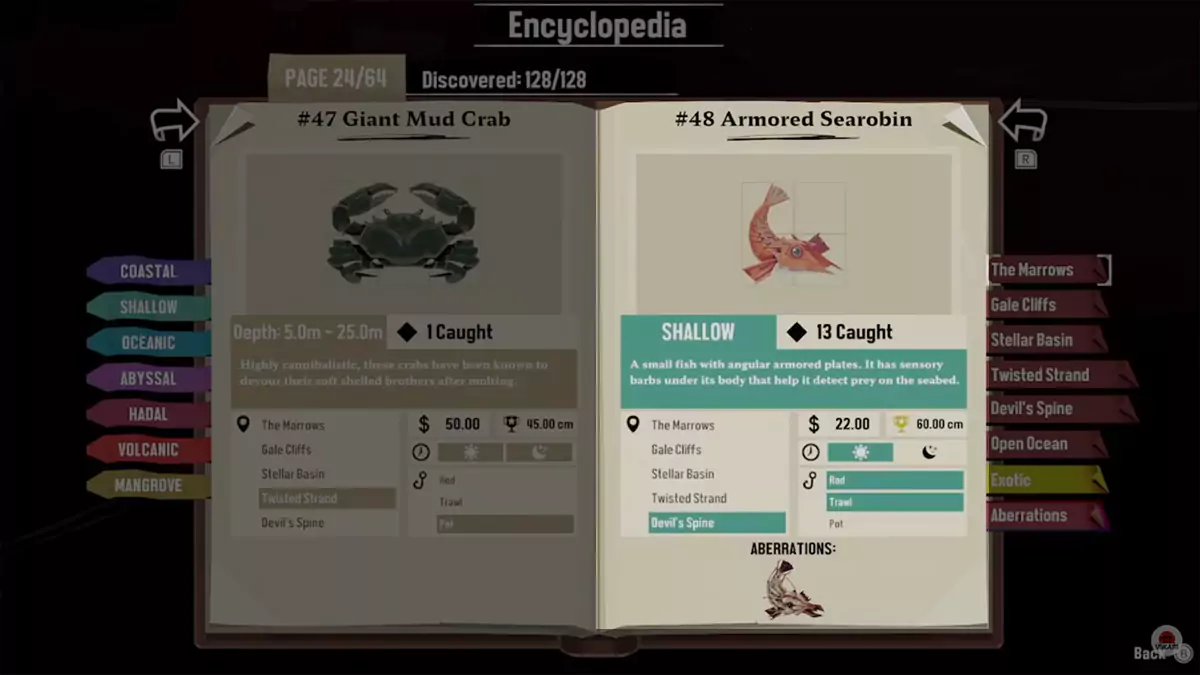
The Armored Searobin is a plate-scaled species that only spawns during the day. To catch them, you need to use either a Shallow fishing rod or a Shallow net. There is an easy place to find them a bit south of Charred Pontoon at the southeast corner of coordinates 12P.
#49 – Cusk Eel (30:53 in the Video Guide)
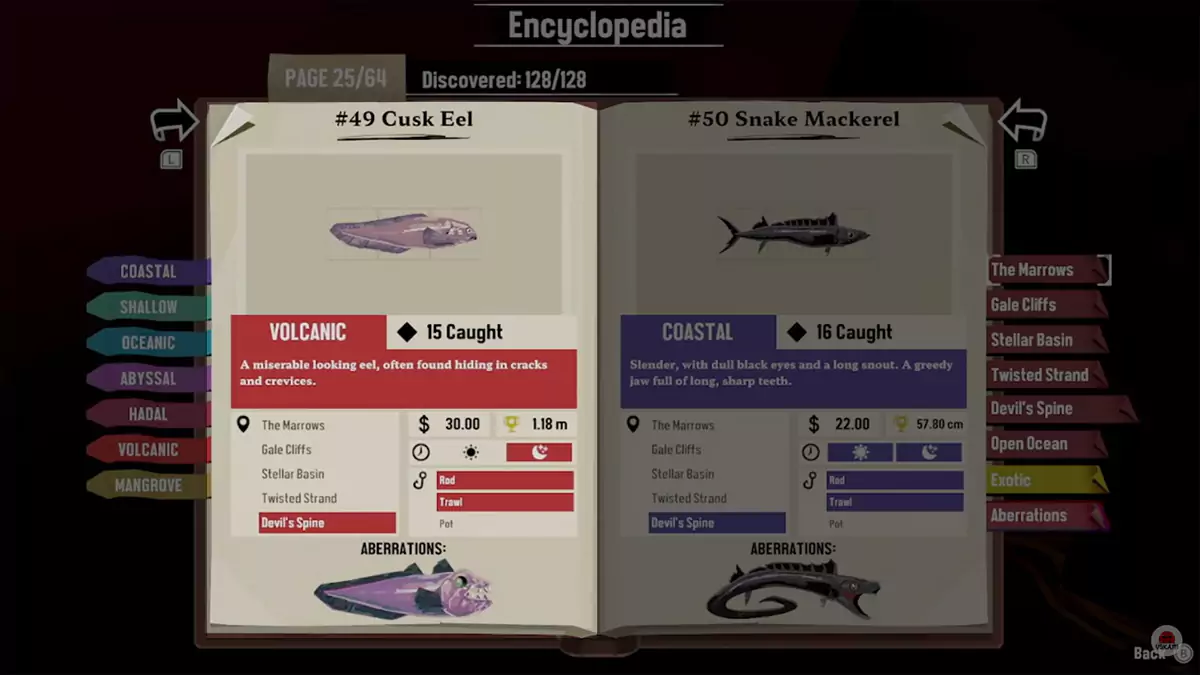
The unfortunately named Cusk Eel is a pathetic-looking fish that only spawns at night. To capture them, you’ll need either a Volcanic fishing rod or a Volcanic net.
It’s tricky to spot fish spawn locations at night, so make sure to upgrade your ship’s lights to make this task easier. With that said, there’s a reliable spot to fish for Cusk Eels slightly north of the Ancient Temple—on the border of coordinates 13N and 13O.
#50 – Snake Mackerel (32:08 in the Video Guide)
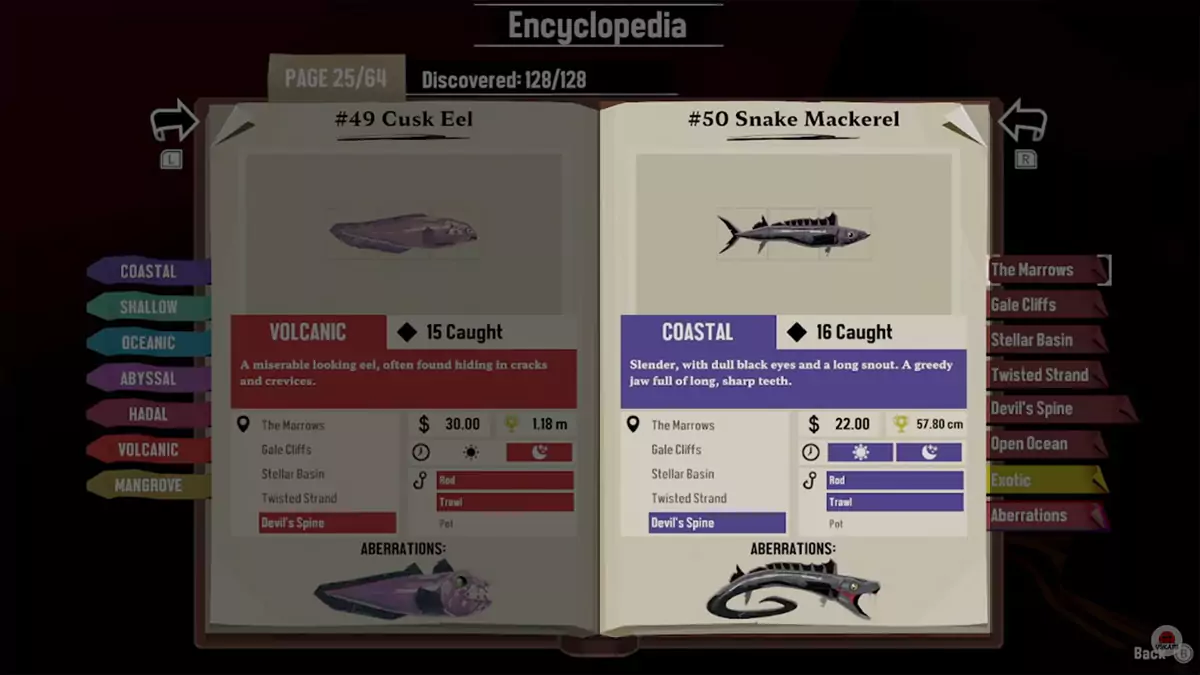
The serpentine forms of the Snake Mackerel can be spotted during any hour—day or night. To capture them, you can use a Coastal fishing rod or a Coastal net. Southeast of Charred Pontoon—in the northeast corner of coordinates 11Q—you can find a nice spawn point for Snake Mackerel.
#51 – Pale Skate (32:42 in the Video Guide)
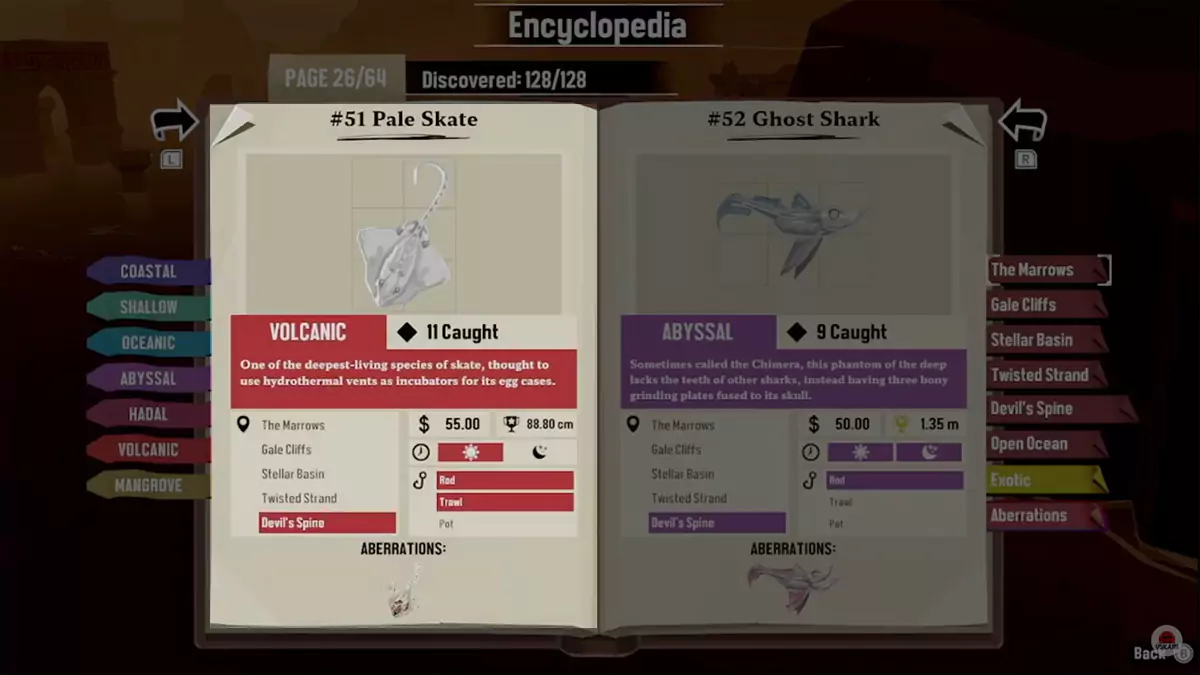
The Pale Skate is a small, white stingray that lives deep down. They only spawn during the day and can be caught with either a Volcanic fishing rod or a Volcanic net. Northwest of Charred Pontoon, in the center of coordinates 13P, there is a reliable place to spot them.
#52 – Ghost Shark (33:14 in the Video Guide)
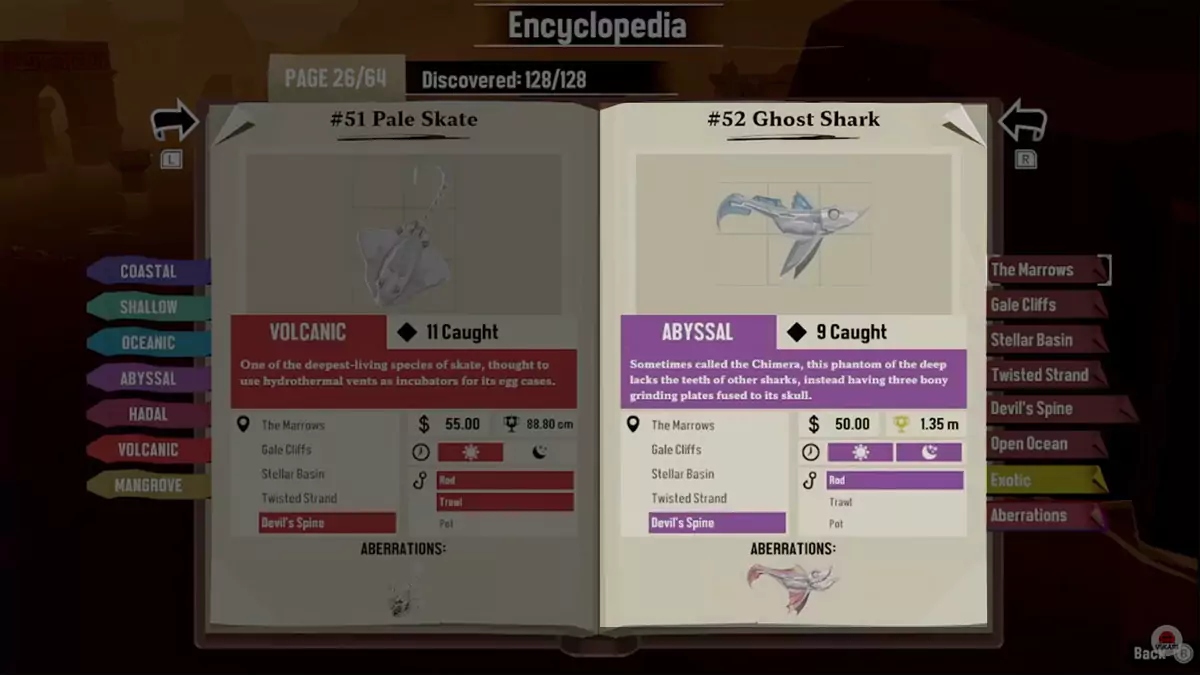
With a haunting name and appearance, the Ghost Shark is one of the most mysterious species in DREDGE. They appear during the day and at night, but can only be caught when you use an Abyssal fishing rod. East of Devil’s Spine’s biggest island, at the north end of coordinates 13Q, you’ll find a spawn point for the Ghost Shark.
#53 – Frilled Shark (34:03 in the Video Guide)
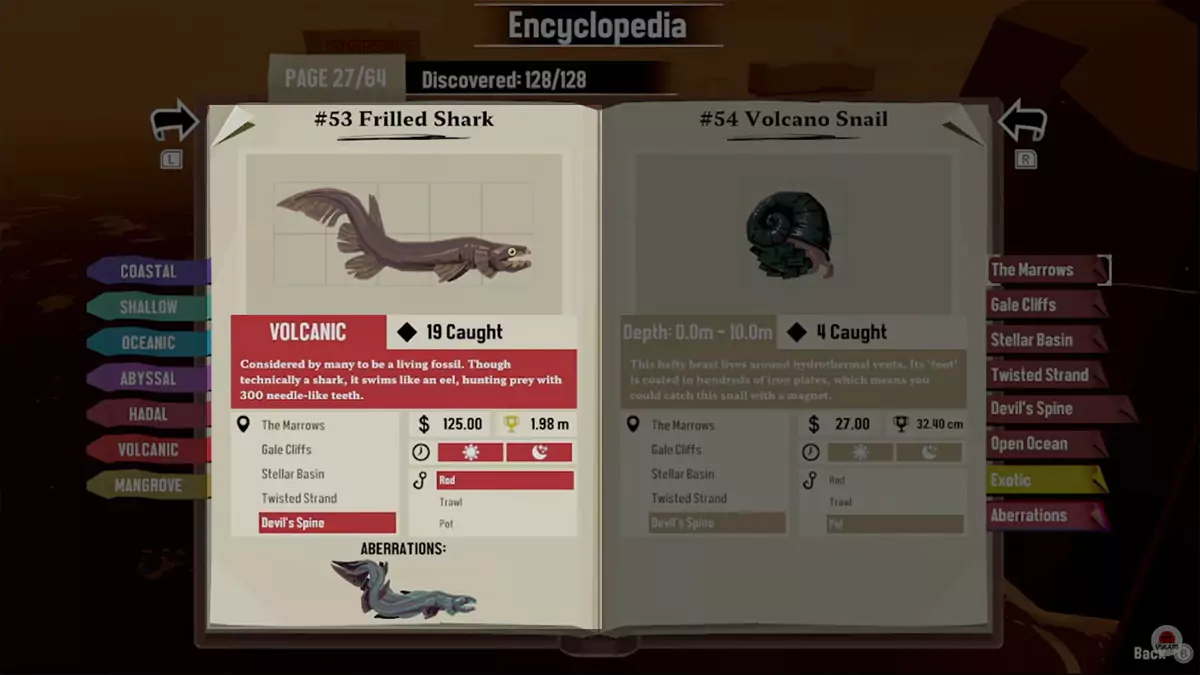
The Frilled Shark is one of the less common species at Devil’s Spine. Thankfully, it spawns during both the day and night, so that makes searching for them easier. With that said, you can only catch this prehistoric fish with a Volcanic fishing rod.
Halfway between Charred Pontoon and the Ancient Temple, there is a fishing spot for Frilled Sharks located at the northeast corner of coordinates 12O.
#54 – Volcanic Snail (34:33 in the Video Guide)
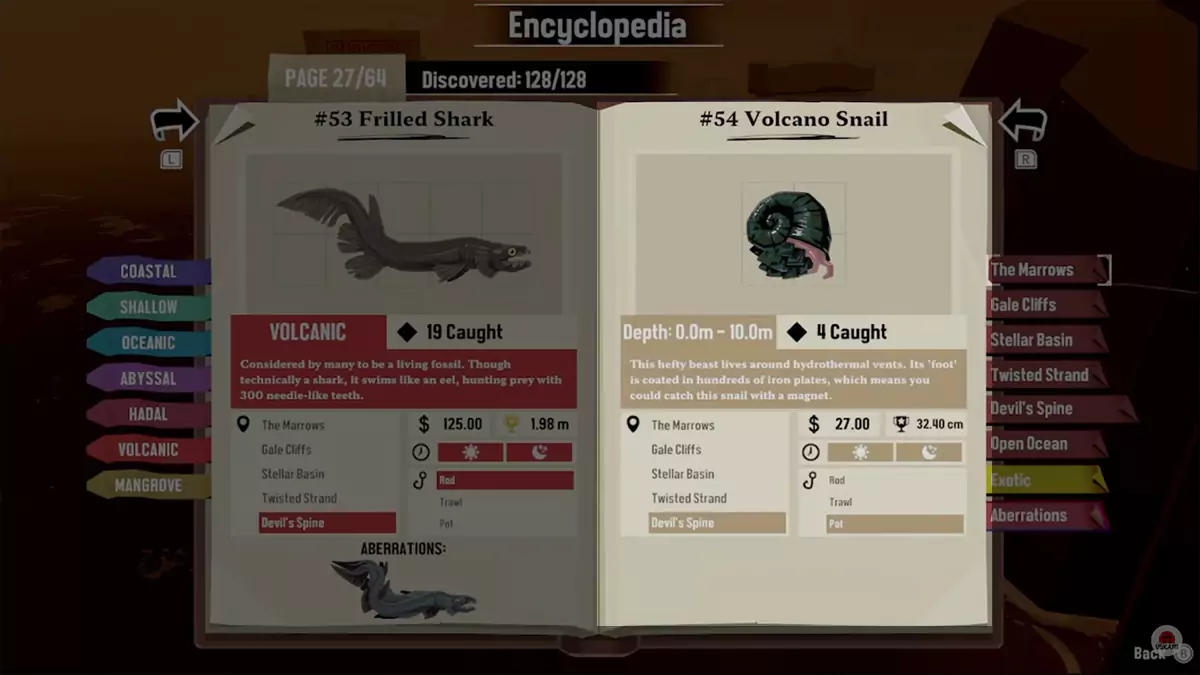
Volcanic Snails are pretty easy to catch, as they appear both during the day and night—plus you can use any kind of pot to trap them. Be sure to set your crab pot between 0 to 32 feet down (0 to 10 meters). However, this overlaps with the habitat of Squat Lobsters, so you may catch a bunch of them instead of Volcanic Snails.
#55 – Squat Lobsters (34:33 in the Video Guide)
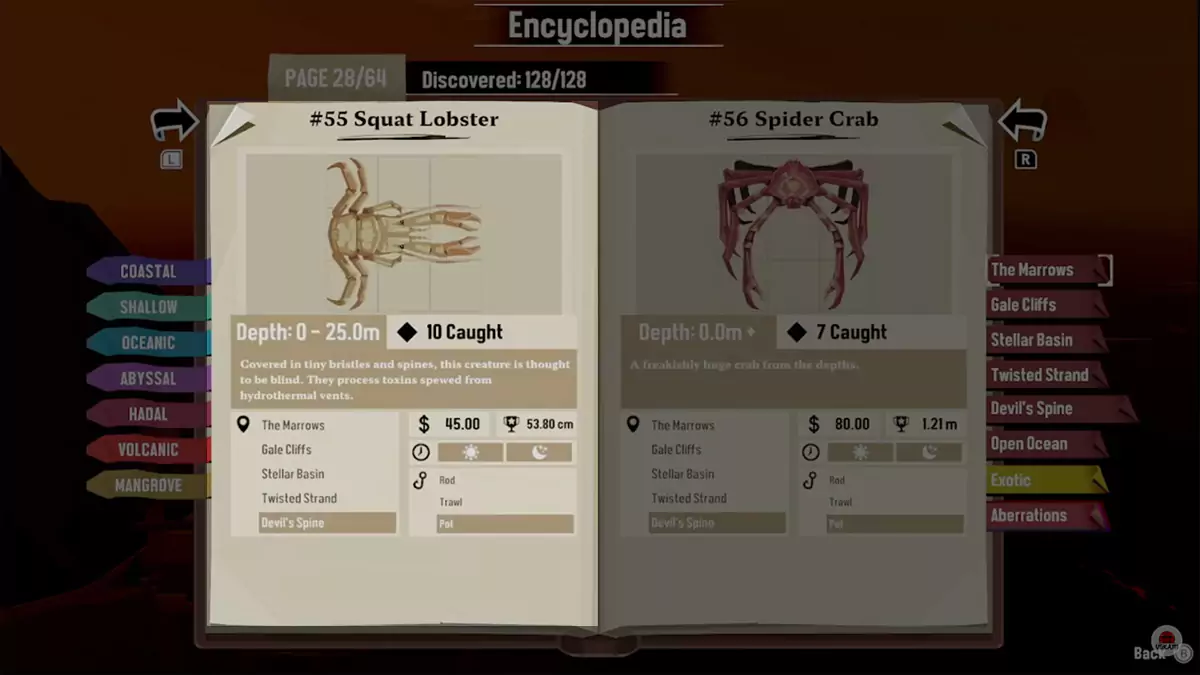
The short and thick Squat Lobster is appropriately named and easy to find—they can be caught at any hour; day or night. To do so, set your pot at a depth between 0 to 82 feet (0 to 25 meters). With that said, to avoid catching Volcanic Snails by mistake, it would be better to set your crab pot at a depth between 32 to 82 feet (10 to 25 meters).
Although, there will likely still be some unintended catches, as Devil’s Spine’s other crustacean species (the Spider Crab) spawns at any depth.
#56 – Spider Crab (34:33 in the Video Guide)
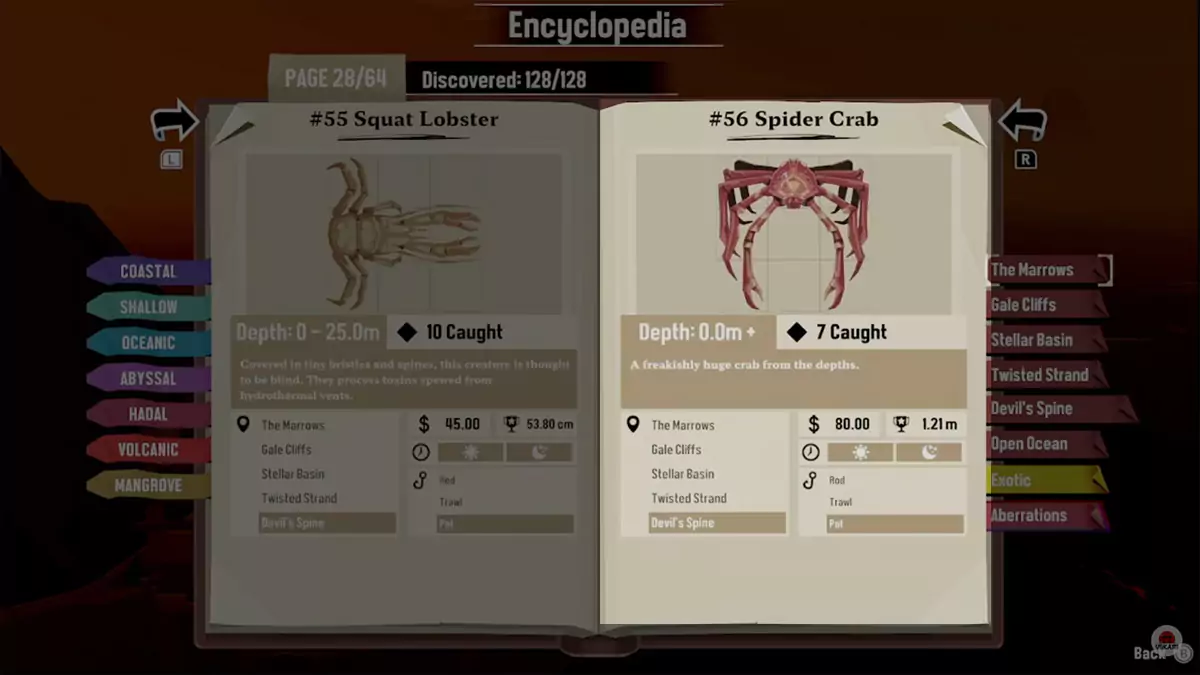
The monstrously big Spider Crab is a creature born straight from every sailor’s nightmares. This species will invade your crab pots at any depth—day or night—so you won’t need to try very hard to catch them.
Though, if you only want to catch Spider Crabs for their high market value, we recommend you set pots at a depth below 82 feet (25 meters), as this is beyond the habitable zone of Volcanic Snails and Squat Lobsters.
Open Ocean Fish Locations
The final seven normal fish species in the game can only be caught in the Open Ocean. The Open Ocean consists of every area that is not part of any of the five main locations (The Marrows, Gale Cliffs, Stellar Basin, Twisted Strand, and Devil’s Spine).
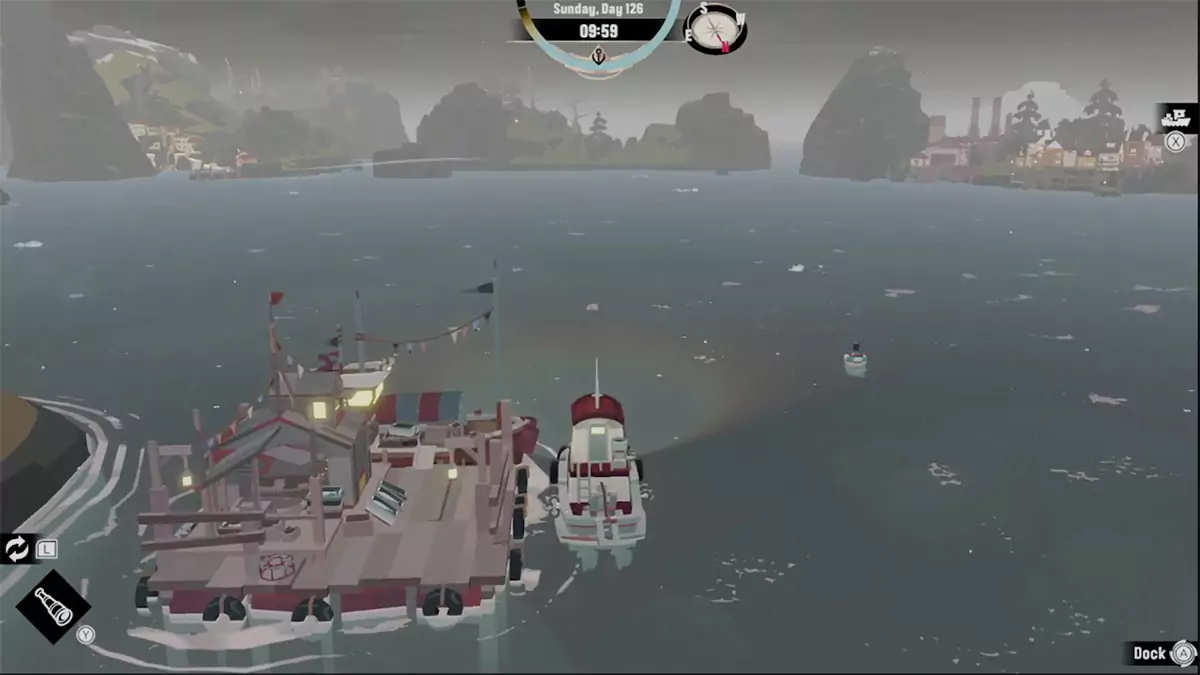
You can tell you are in the Open Ocean when the waters are grey and the skies are blue. You’ll need the following equipment to be successful in catching all the Open Ocean fish species:
- Oceanic fishing rod
- Oceanic net
- Abyssal fishing rod
- Hadal fishing rod
- Any kind of pot (optional)
#57 – Anchovy (35:29 in the Video Guide)
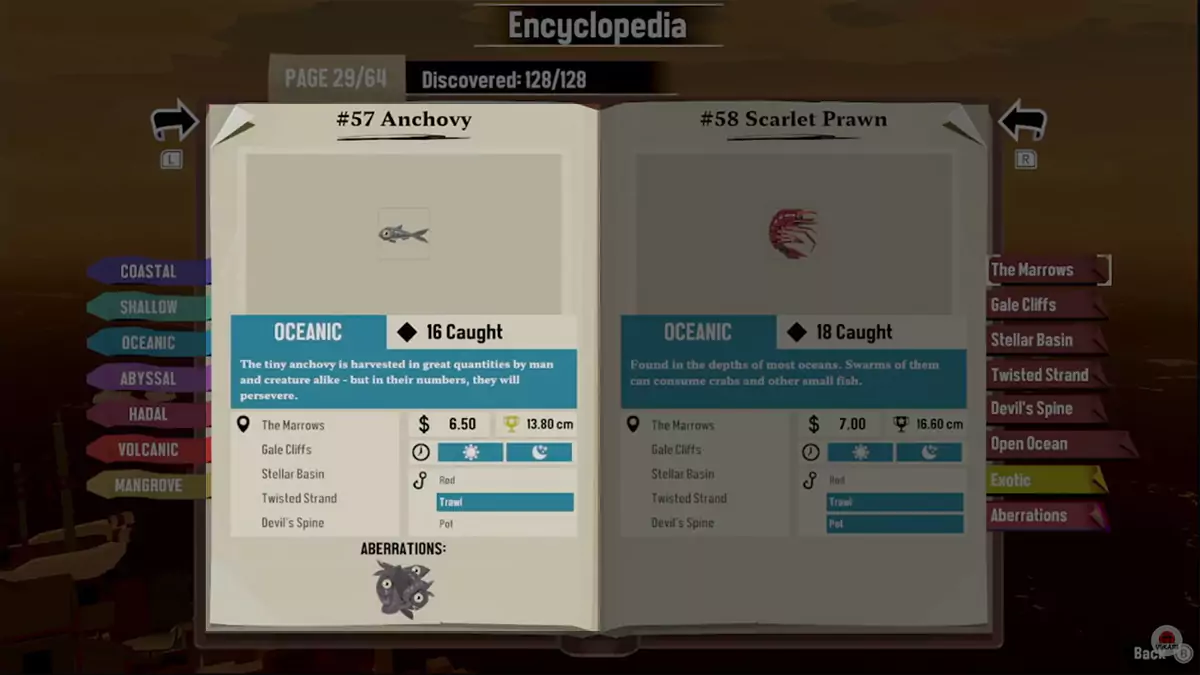
First up is the humble Anchovy. This tiny fish spawns during the day and night, but can only be caught with an Oceanic net. Don’t worry about where to trawl for them, as they are equally abundant in every part of the Open Ocean.
#58 – Scarlet Prawn (36:02 in the Video Guide)
Scarlet Prawns are relatively large shrimp that can be caught during the day or night. Like with the Anchovy, your best bet at catching them is to use an Oceanic net. It’s worth noting that you can also use a crab pot (at any depth) to catch them in the Open Ocean. However, it’s much faster to trawl for Scarlet Prawns than to use pots to capture them.
#59 – Blackfin Tuna (38:09 in the Video Guide)

While you’re trawling for Anchovy and Scarlet Prawns, you’ll likely catch a bunch of Blackfin Tuna as well. These powerful fish are pretty common both during the day and night.
In the Open Ocean, if you’re using an Oceanic net, you’re bound to capture plenty of Blackfin Tuna. Alternatively, you can fish for them by using an Oceanic fishing rod if you find one of their designated spawn locations—or use the Bait fishing method mentioned in entry #61 – Moonfish.
#60 – Viperfish (39:11 in the Video Guide)

Yet another species that looks like it emerged from a nightmare, the Viperfish is a predatory species with massive teeth for its body size. They appear during the day and night, but you can only catch them with an Abyssal fishing rod.
There are many spots in the Open Ocean where Viperfish spawn, but there’s a guaranteed location for them at the south end of coordinates 9F. To get there quickly, start from Rickety Pontoon in Twisted Strand and head south.
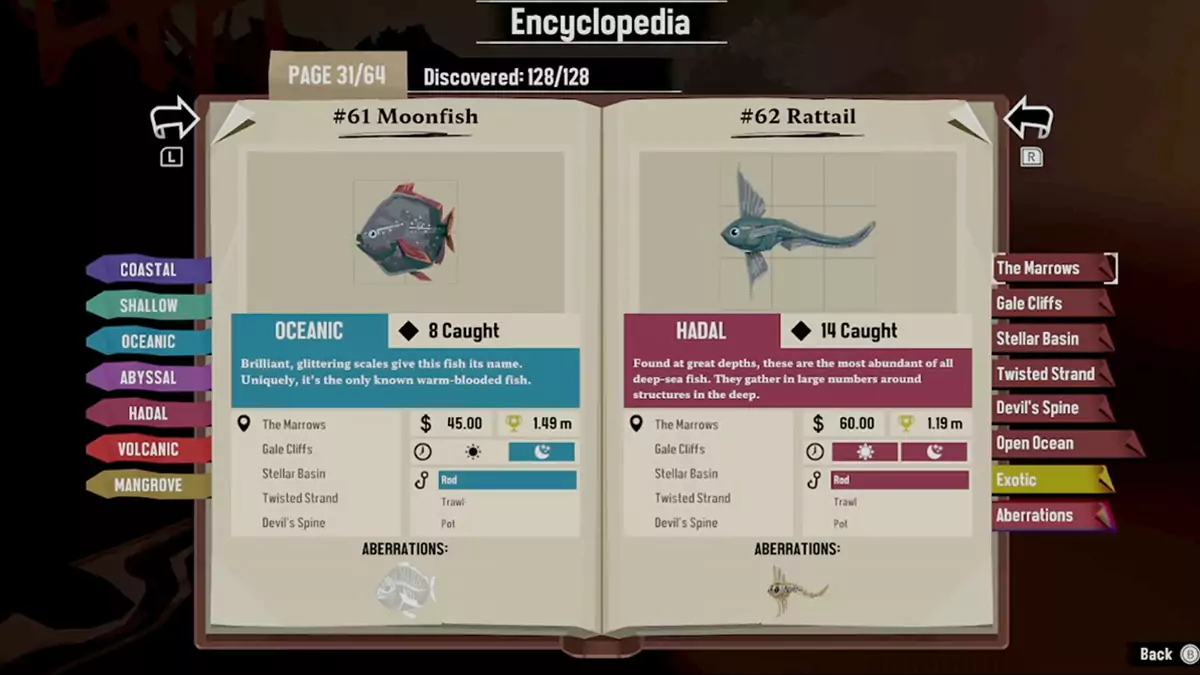
#61 – Moonfish (38:09 in the Video Guide)
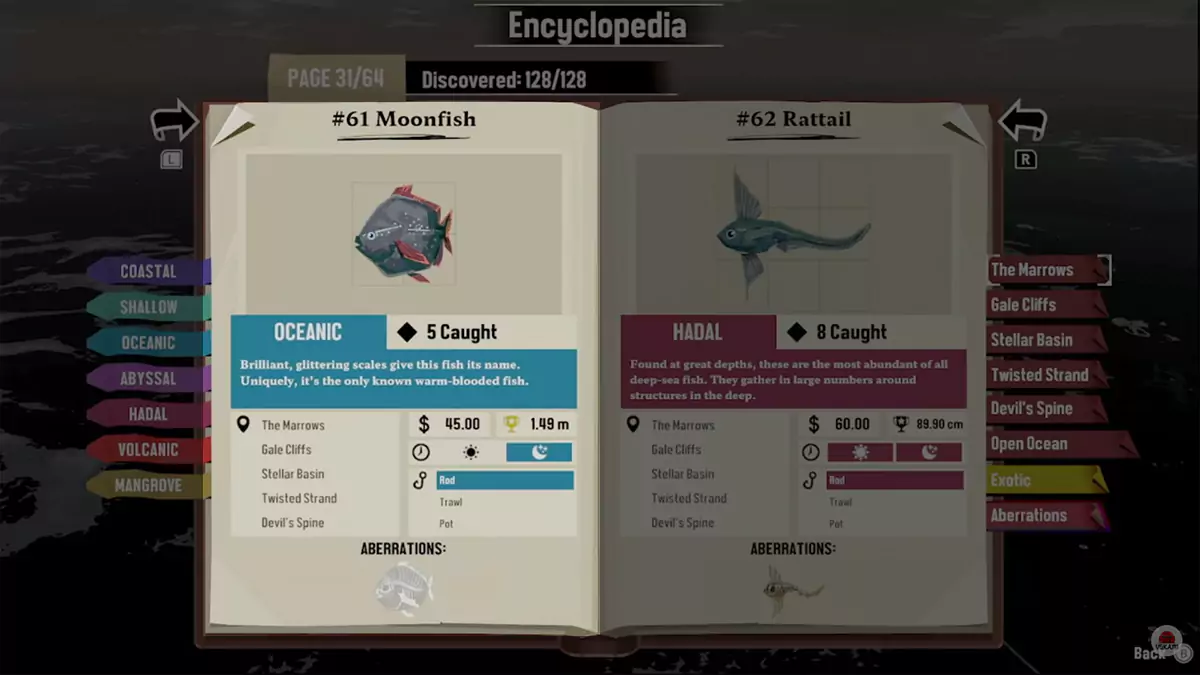
The Moonfish is a very elusive species, as it only appears at night and you can only catch it with an Oceanic fishing rod. However, instead of sailing around in the darkness looking for one of its few spawn locations, you’re better off using the Bait mechanic.
To make Bait, you must bring fish of any kind to the Airman at his Camp in Twisted Strand. He’ll give you one bait per fish you bring to him. To find the Airman’s Camp, start from Rickety Pontoon, head northwest into Twist Strand’s woody maze, and follow the signs. The path to the Airman is fairly linear, so it shouldn’t be too hard to locate him.
Once you have some Bait, head into the Open Ocean and toss some into the water. Regardless of whether it is day or night, Moonfish have a chance to appear this way. This method is much quicker than scanning the ocean at night for Moonfish spawn locations.
#62 – Rattail (38:09 in the Video Guide)
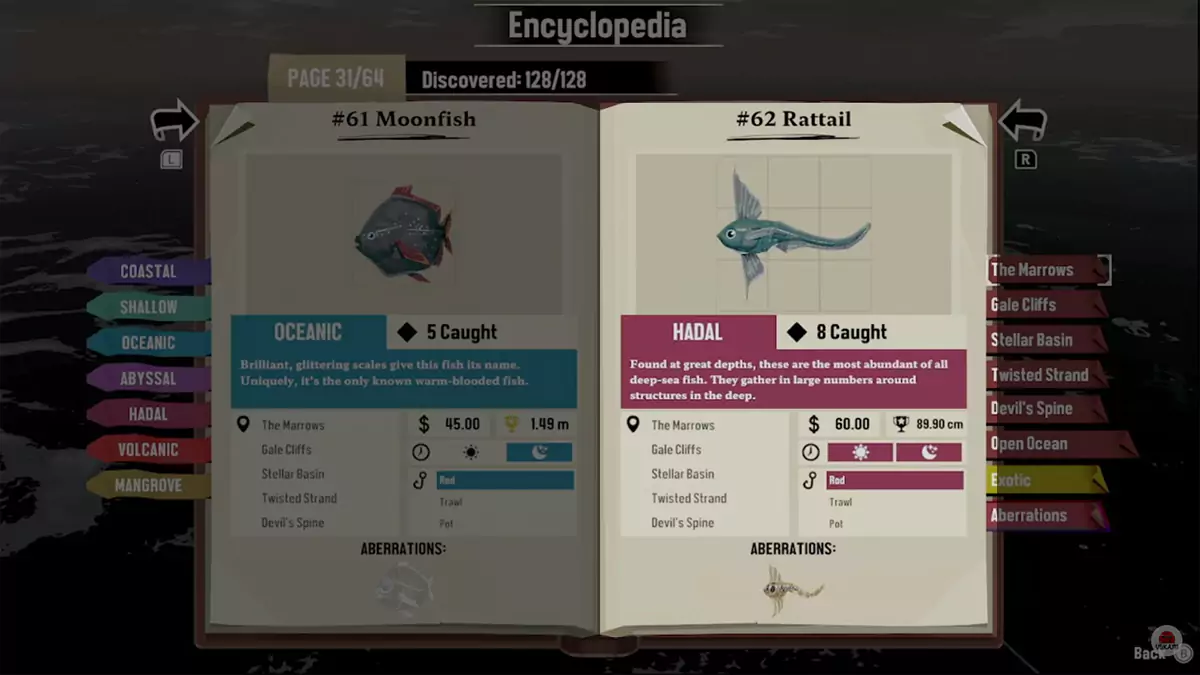
The odd-looking Rattail is a species that can be found during the day or night in the Open Ocean. Though, you need to use a Hadal fishing rod to catch them. Despite having definite spawn locations, you should use the Bait fishing method mentioned in the entry for #61 – Moonfish to catch Rattails.
Using Bait is much more efficient for catching Rattails than looking for their spawn locations. With that said, it’s possible to stumble across one of their spawn locations accidentally—which saves you from having to use any other method for locating Rattails.
#63 – Ocean Sunfish (38:09 in the Video Guide)
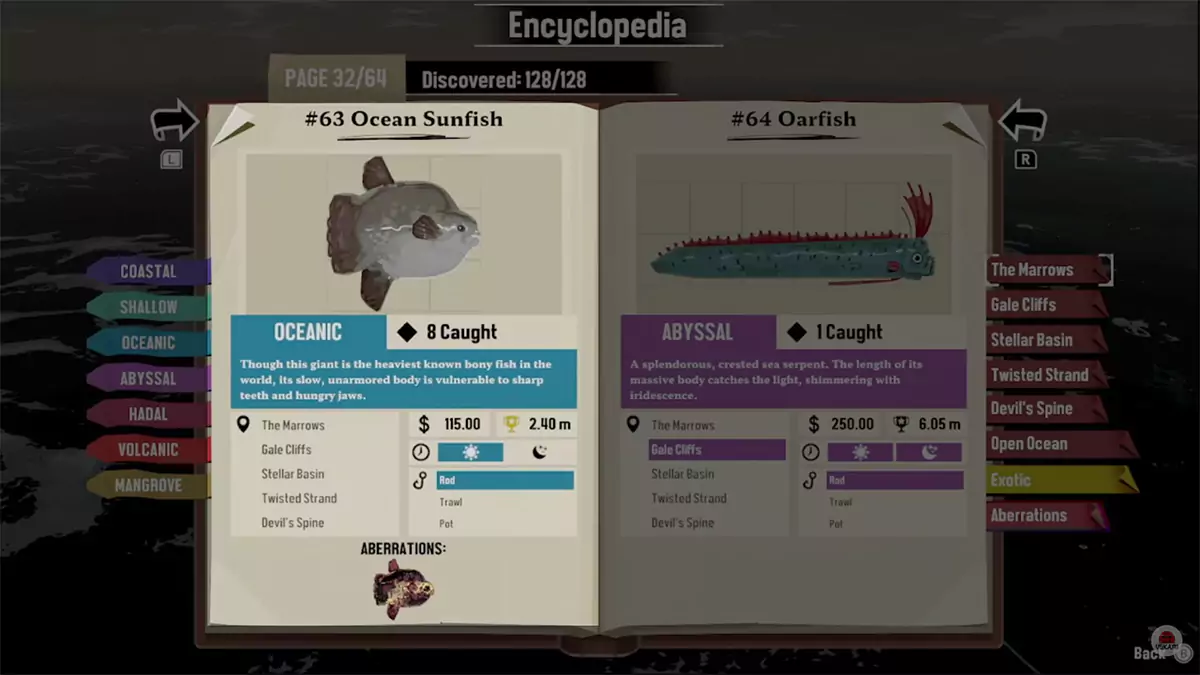
The last of the normal fish in the game is the Ocean Sunfish. This huge creature only spawns during the day and can only be caught with an Oceanic fishing rod. While there are a few fishing spots for them here and there in the Open Ocean, the Bait fishing method mentioned in entry #61 -Moonfish is a way easier method of catching Ocean Sunfish than seeking out their spawn points.