When you make your way into the grand library at the top of Raya Lucaria, you’ll meet a demi-god. In Elden Ring, Rennala, Queen of the Full Moon, is the legendary boss you encounter within Liurnia of the Lakes.
Table Of Contents
If you need more visual references for topics mentioned in this article, check out the video below:
How to Hurt Rennala, Queen of the Full Moon in Phase 1
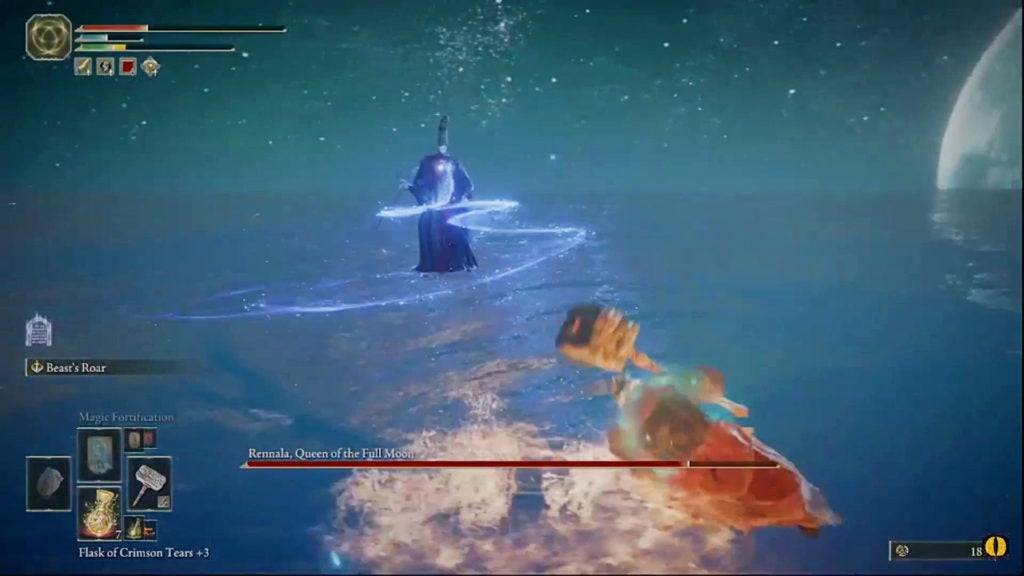
The first phase of your fight against Rennala will involve you having to deal with a relatively simple gimmick. The Queen of the Full Moon will constantly be floating above you in a translucent golden orb. This shield will block any attacks that you launch at Rennala, so you will have to take it down first.
When you drop the boss’ shield, you’ll have large openings for attacks. After you fully deplete Rennala’s HP bar, the second phase of this boss battle will begin—which is when the real fighting will happen (02:40 in the video).
How to Break Rennala’s Golden Shield
It’s thankfully pretty easy to figure out how to beat this gimmick. Among the many students in the grand library, there will be three that are singing to maintain Rennala’s shield. You’ll have to find these three specific students and take them out.
You can easily identify these special students as they will have golden auras around them. Regardless of the strength of your weapon, hitting each student once will be enough to defeat them. All melee weapons, ranged weapons, spells, and skills are all effective against the students.
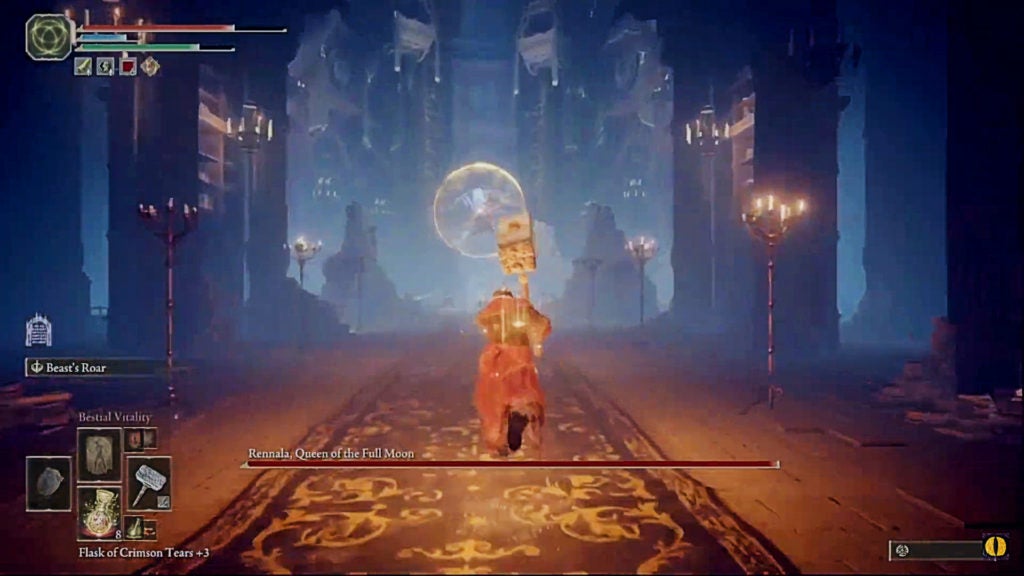
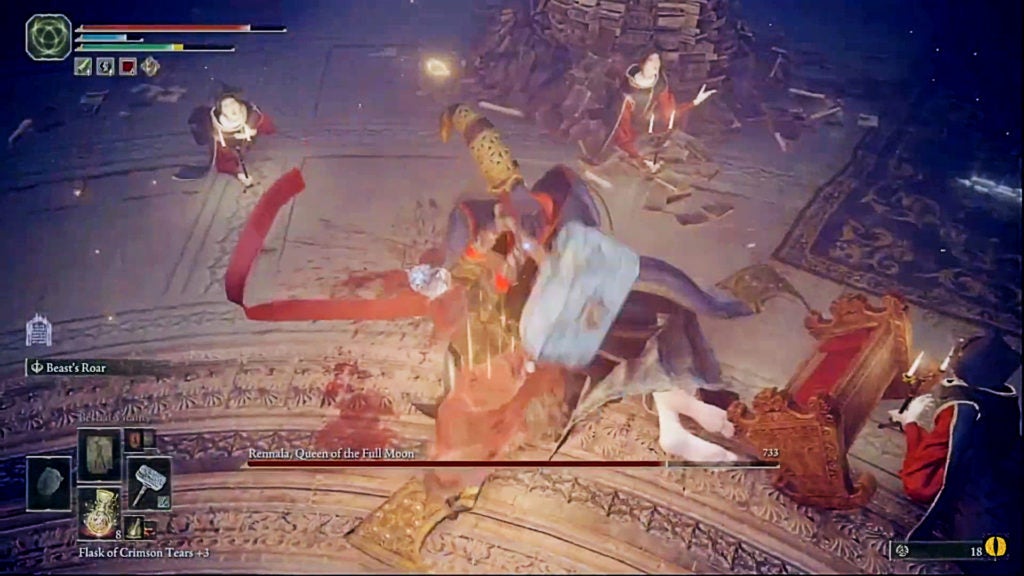
When you take down the three singing students, Rennala’s shield will break and she will descend to the ground for a few moments (01:30 in the video). This is your chance to strike! When you get a clear shot at the boss, unleash your heaviest-hitting attacks while she is vulnerable.
Rennala’s Attacks During Phase 1
Rennala does not have a ton of attacks in her first phase, however, knowing how to deal with them will allow you to enter the next phase with more HP and Flasks. The attacks below are mentioned in order of how dangerous they are:
- Golden Energy Beam
- Shield Blast
- Object Explosions
- Book Missiles
Golden Energy Beam
By far the most dangerous attack in this phase is the huge beam of golden energy that Rennala can shoot on occasion (02:18 in the video). The boss won’t use this move often, and, as such, if you’re quick, you can end Phase 1 without even seeing this attack.
However, when Rennala does use it, it will be hard to see coming. Throughout this part of the battle, you’ll be looking everywhere except at the boss, so it will be hard to see her charging this attack. The damage inflicted is huge and it’s also very hard to dodge due to the massive blast radius.
With that said, you can completely avoid this attack by keeping a wall between yourself and Rennala. Since you’re not looking her way, you’ll have to listen for the charging of her attack, which will be a wooshing sound that occurs about one second before the attack is launched. When you hear that noise, dodge roll behind a pile of books or a bookshelf.
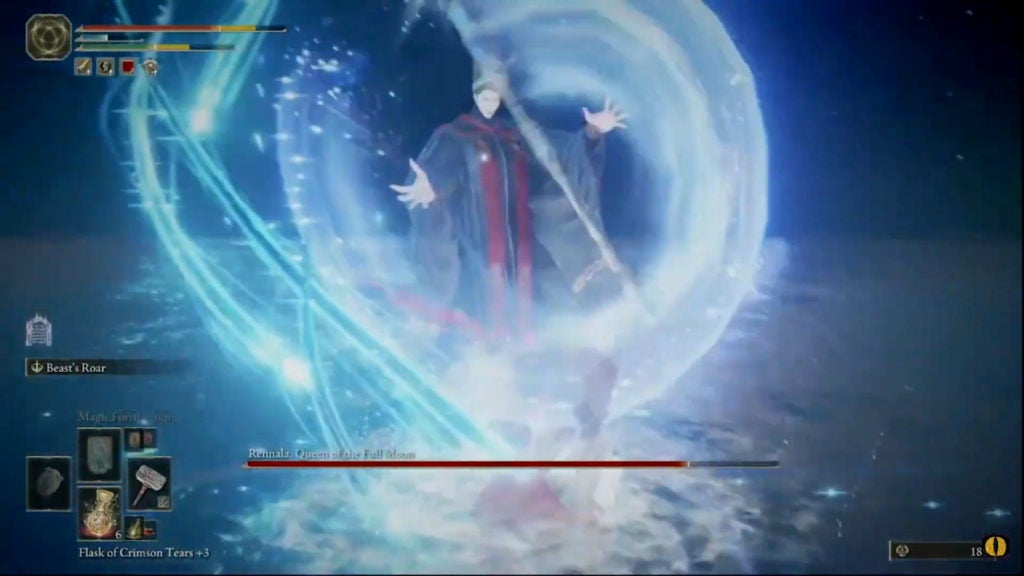
Shield Blast
After Rennala’s shield breaks and she becomes vulnerable, you have a wide window for attacks. However, as the sorceress recovers, she will unleash a blast of golden energy in an area of effect around herself (01:45 in the video).
You can see this blast coming by keeping your eyes peeled for when Rennala begins glowing brightly. From the moment she begins glowing to the blast, you’ll have about three full seconds to get clear.
After Rennala uses this attack, her shield will return and the boss will once more take to the air. You’ll have to take out another three singing students to break the shield once more.
Object Explosions
As you’re running around the grand library in search of glowing students, you’ll encounter a few exploding objects. Items, such as globes, will begin to glow purple and then explode if you get too close (02:22 in the video). These explosions have a relatively small radius and they don’t do much damage.
Furthermore, since you can easily avoid these glowing purple objects, this attack is one of the easier ones to avoid. Just keep your eyes peeled for them as you search for the singing students.
Book Missiles
Easily the most common attack in this phase, this is the one you’ll have to deal with the most. It’s not determined whether it’s actually Rennala using this attack against you or her students. Regardless, this move involves glowing purple books getting shot at you (02:15 in the video).
The books-turned-missiles are relatively fast and can home in on you to a certain degree. Though with that said, they are pretty easy to dodge if you just keep moving. Well-timed dodges can let you avoid them, although running perpendicular to their incoming path is often more stamina efficient.
Rennala, Queen of the Full Moon’s Weaknesses
As you may be able to guess, physical types of damage are the most effective against Rennala, Queen of the Full Moon. She seems to have no damage reduction or vulnerability to strike-type damage as she loses HP proportionate to the attack rating of weapons that deal strike damage. In this manner, strike damage is a good baseline to compare other types of damage.
Throughout both phases of the fight, it seems that Rennala maintains her weaknesses and resistances. As such, you can plan for both phases at once while deciding on the best weapons or spells.
The Best Damage Types to Use Against Rennala
On average, Rennala, Queen of the Full Moon, takes close to 10% more damage from weapons that deal standard, slash, or thrust-type damage. For this reason, the majority of the most common melee and ranged weapons can be effective against this boss.
The Worst Damage Types to Use Against Rennala
Rennala has moderate overall damage reduction against attacks that deal fire, lighting, and holy-type damage. And, most notably, she has very high defense against magic-type attacks. For this reason, you should not bother trying to use conventional sorceries against Rennala.
About Rennala’s Status Resistances
Like most major bosses, the Queen of the Full Moon is immune to the death status effect. Furthermore, you will have a hard time afflicting Rennala with either poison or scarlet rot, as her resistance to these statuses is high.
If you’re looking to use status effects against this boss, bleed and frost are your best options. While Rennala is not particularly vulnerable to these status effects, her resistance to them is moderate at best.
How to Fight Rennala, Queen of the Full Moon in Phase 2
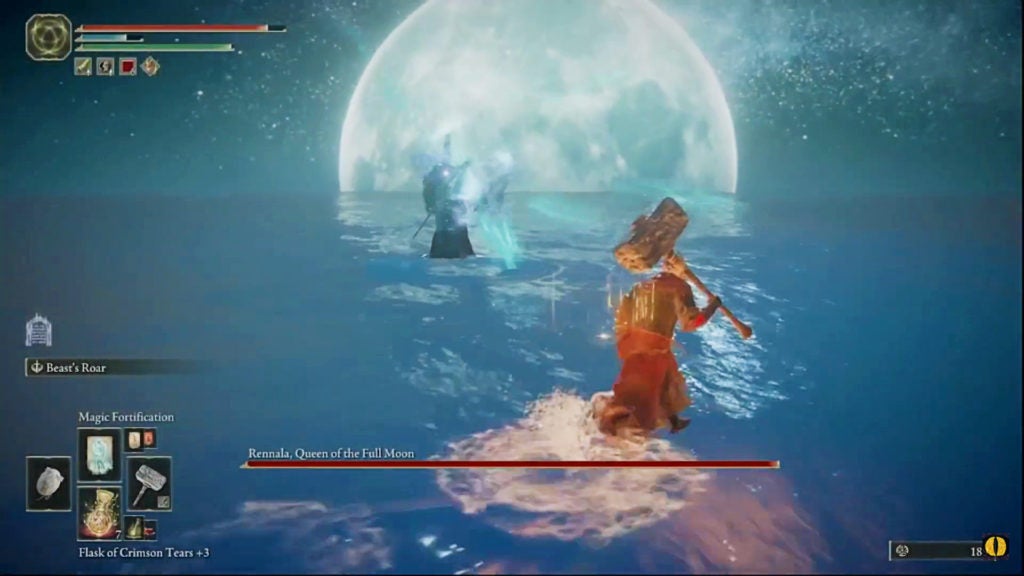
As soon as the second phase begins after the cutscene, Rennala will immediately launch a powerful spell at you. This sets the tone for how the second phase of this fight will go. Regardless of what build you’re using, you won’t succeed against the Queen of the Full Moon unless you can avoid her mighty sorceries.
Furthermore, all melee, ranged, and spellcaster builds need to find openings to attack. Even infamous one-shot builds will need to line up their singular attack with precise timing.
All of Rennala, Queen of the Full Moon’s Phase 2 Attacks
The first attack you should know about is the one Rennala uses immediately as Phase 2 begins. However, this is far from the only dangerous spell in this demi-god’s arsenal. Here’s a list of Rennala’s attacks in Phase 2 in order of video appearance:
- Comet Azur
- Star Shower
- Crystal Torrent
- Spinning Weapon
- Scepter Twirl
- Spirit Summon
- Rennala’s Full Moon
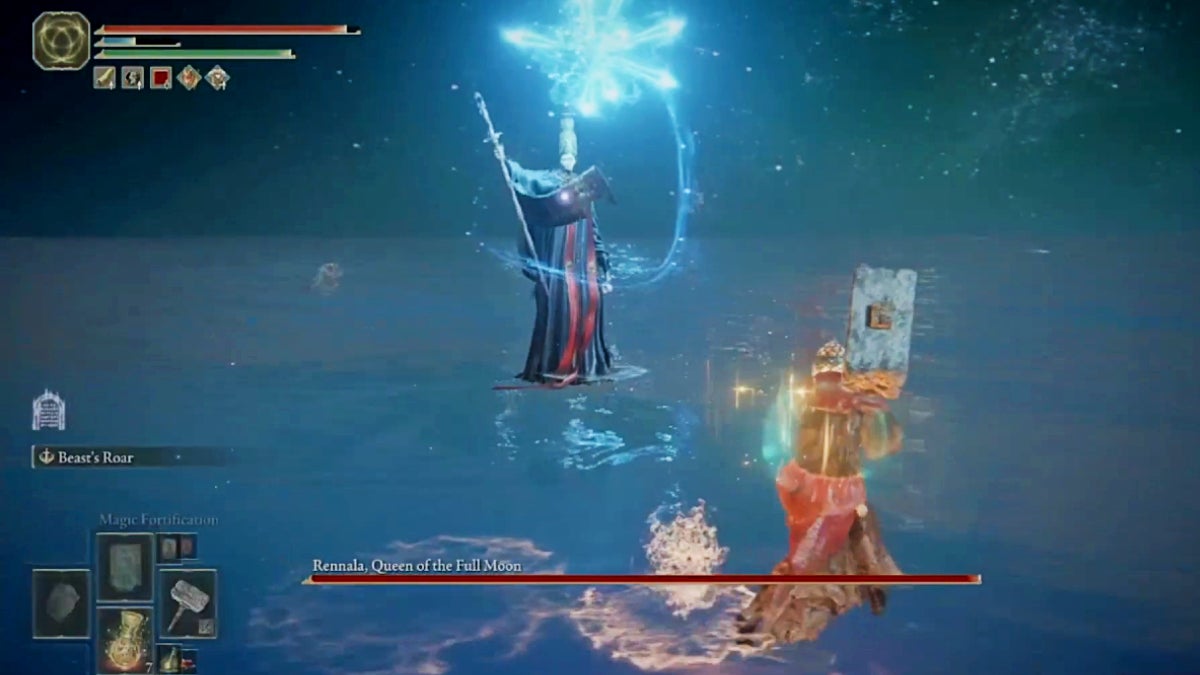
Comet Azur (03:00 in the Video)

Not unlike how many late-game intelligence builds will do, Rennala will try to one-shot you with the Comet Azur spell. It will take the boss three full seconds to charge up this attack, however, when it is unleashed, it’s truly a force to be reckoned with. The blast radius is large, though, the beam of energy thankfully does not move once fired.
To avoid this devastating attack, keep moving to the side. You’ll want to either run or dodge roll to the left or right. Running is more stamina-efficient and often safer. While you’re strafing around the beam, try to close the distance between yourself and Rennala if you’re a melee build. If you’re a ranged build of any kind, you should launch a few attacks at the boss the moment she misses with hers.
Alternatively, instead of counterattacking, it can be a good idea to buff yourself during the delay after Comet Azur is used. Incantations like Magic Fortification can be helpful against Rennala since she almost exclusively deals magic-type damage.
Star Shower (03:05 in the Video)
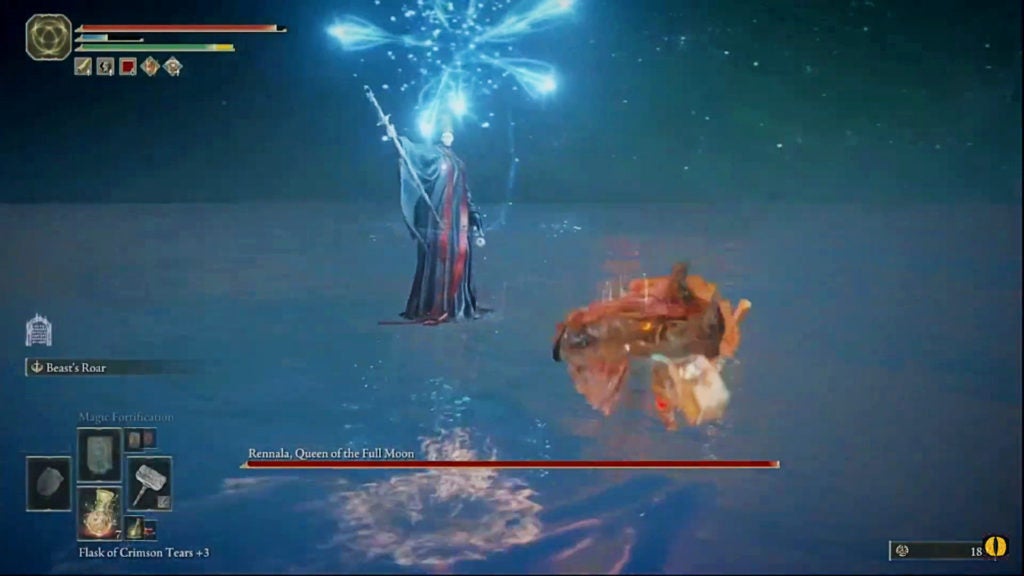
Often, Rennala will try to keep you on your toes with this spell. This attack looks very similar to the Star Shower sorcery that you can learn, although there are eight projectiles in Rennala’s version compared to the six of the player’s version. These blue orbs of light will linger above Rennala for a moment before they begin to chase you.
Depending on how far you are from the boss, the time it takes for the orbs to reach you will differ. However, the timing for dodging them is the same: roll right before they reach you. While there is a slight delay between each orb, they will all reach you at approximately the same time. Their spread makes it awkward to avoid all of them at once, as they have a slow speed and very good homing.
Spam-rolling to the left or right can be effective against this attack—unless Rennala casts this spell back-to-back. Having multiple waves of Star Shower coming at you can be tough to dodge. As such, using a shield with high magic damage negation to block or parrying this spell to deflect it can be potentially better options than dodging.
With that said, don’t stay on the defensive, as Rennala is prone to spamming this attack at you. Furthermore, she can cast Star Shower while jumping back or to the side, allowing her to dodge your attacks while casting this annoying sorcery frequently.
Crystal Torrent (03:10 in the Video)
Rennala can cast the Crystal Torrent sorcery as well, which will initially summon a crystal mass in the air. After a short delay, this mass will unleash a volley of crystal shards at you, which travel very quickly.
At close range, this attack can be very difficult to dodge due to the shards’ high velocity. However, at mid-range or long-range, you can avoid taking damage by dodging to the left or right as the crystal mass begins firing at you. The volley won’t last long, so two back-to-back dodge rolls should be enough to escape the worst of this attack.
As for melee builds: you can tank this attack fairly easily if your magic damage negation is high. The shards, while wickedly fast, don’t deal much stamina or poise damage. For these reasons, you can block this attack pretty easily with the right shield. Alternatively, if you’re attacking with a heavy enough weapon, you won’t even get staggered by Crystal Torrent.
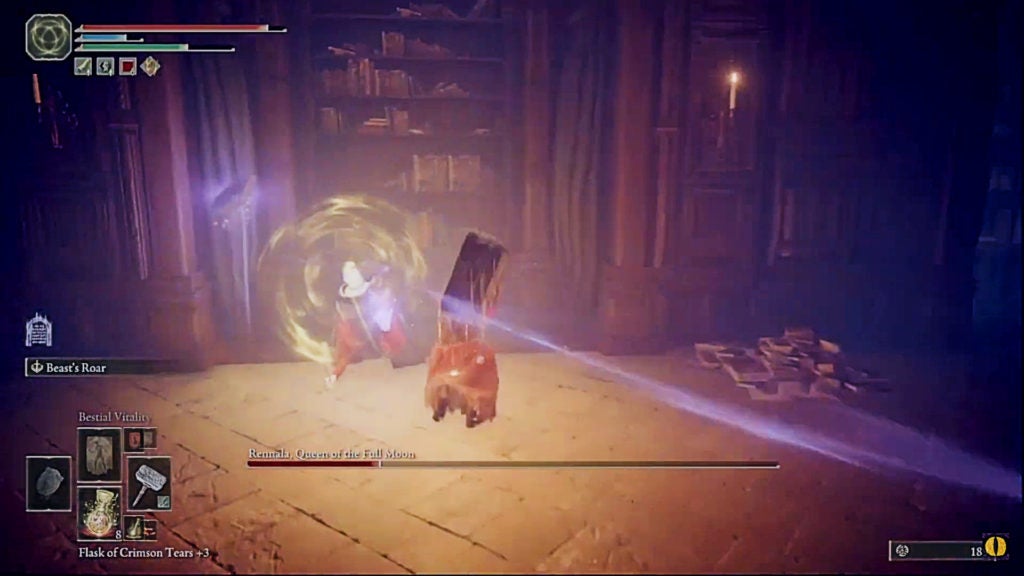
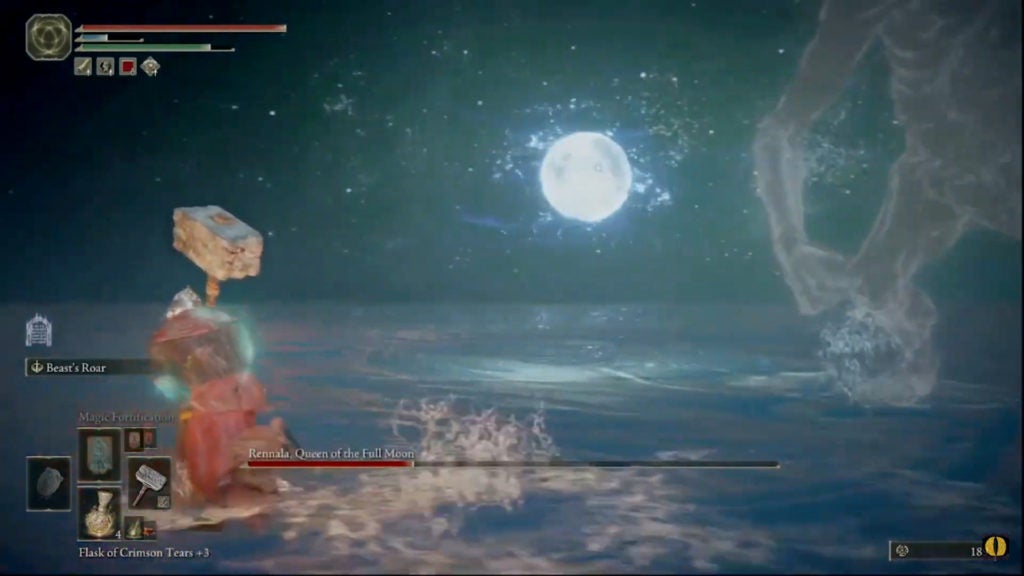
Spinning Weapon (03:14 in the Video)
Although this move is not a spell, it has a similar range to one. This attack occurs when Rennala uses the weapon skill of her Carian Regal Scepter: Spinning Weapon. For this maneuver, the boss will throw her weapon at you as if it’s a boomerang. It will spin around in front of her in a loose horizontal arc before returning to its master.
This is a defensive attack that Rennala will use as you get close to her, so it’s possible that ranged builds won’t see this attack at all while fighting the Queen of the Full Moon. Although, if you’re a melee build, you’ll need to dodge this unless you want to get hit multiple times in a row.
To avoid taking damage, you’ll want to avoid the path the scepter travels—though that’s easier said than done. Not only is the loose arc’s hitbox hard to define, but Rennala will also use Spinning Weapon while some of her spells are active, compounding the difficulty of avoiding damage.
The best method seems to be to roll as Rennala begins to use this skill and then wait for half a second to do the same as the scepter returns to her. In the delay between the beginning of this attack and its end, there is only a small window. This means that you won’t have much time to attack the boss and should focus on dodging the scepter spinning around you.
Scepter Twirl (03:28 in the Video)
This attack stands out as not being a variant of something that you can learn as a player. If you’re standing in melee range, Rennala will sometimes twirl her scepter vertically—not unlike a windmill—which will affect the area directly in front of her.
If you have a fair bit of HP, it’s recommended to tank straight through this attack and damage-trade the boss. The twirling scepter won’t deal too much damage and temporarily plants Rennala to the spot where she uses the attack. As this is one of the few moments when the boss will stay put, melee builds should capitalize on it.
For ranged builds: you won’t see this attack often—or possibly at all. Rennala only uses this move when you’re directly in front of her.
Spirit Summon (the First Occurrence is at 03:39 in the Video)
Once you get Rennala below 50% HP, she will begin to summon spirits on occasion. This will involve the boss creating a white symbol on the ground around her which can knock you down if you are close enough. The summoning circle itself does not deal damage to your HP and will only immobilize you temporarily if you are in melee range.
There are a total of four different spirits that Rennala can temporarily summon during Phase 2 while she is under 50% HP:
- A pack of four wolves
- One Bloodhound Knight
- One Troll
- One Dragon
What Each Spirit Does and How to Deal With Them
Each of these temporary allies can make the fight go from good to bad very quickly. Thankfully, the spirits only stick around for a few seconds each and multiple can’t be summoned at the same time.
The pack of wolves is relatively easy to avoid thanks to the wolves not having much attack range. They will try to lunge at you with savage bites, however, you can outrun them easily as you chase Rennala (04:20 in the video).
The bloodhound knight will be more difficult to deal with as their greatsword has a fair bit of reach and the knight themselves is quite fast and aggressive. Your best bet here is to dodge roll away from the hostile spirit warrior until it dissipates (03:39 in the video).
When Rennala summons the troll, you’ll want to back up immediately. Thankfully, Rennala audibly calls out to the spirit she is summoning, so you’ll have some warning. When the boss mentions a “giant”, she’s calling forth the troll spirit, who will slam the ground around Rennala with a heavy strike (03:59 in the video). The troll will continue to try and crush you for a few seconds after it is summoned.
Last but not least, the dragon Rennala can summon is also quite dangerous, despite not sticking around for very long. When summoned, the dragon will shoot a linear jet of fire to one side of Rennala and then sweep it through the boss to her other side. The fire will not hurt the boss and the dragon will vanish after its firebreathing attack. Thankfully, a single dodge roll through the flames is enough to negate damage (the dragon spirit does not appear in the video).
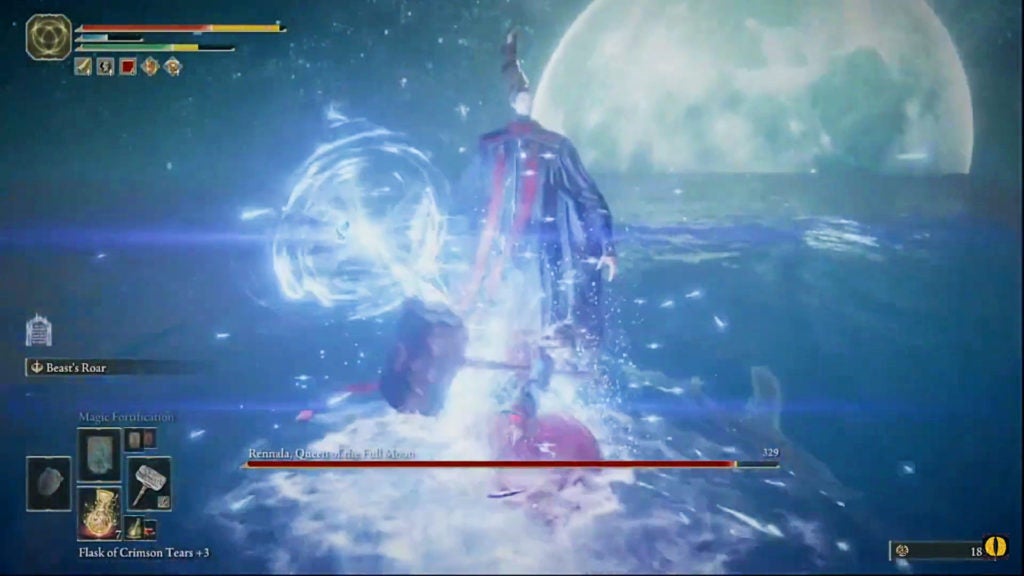
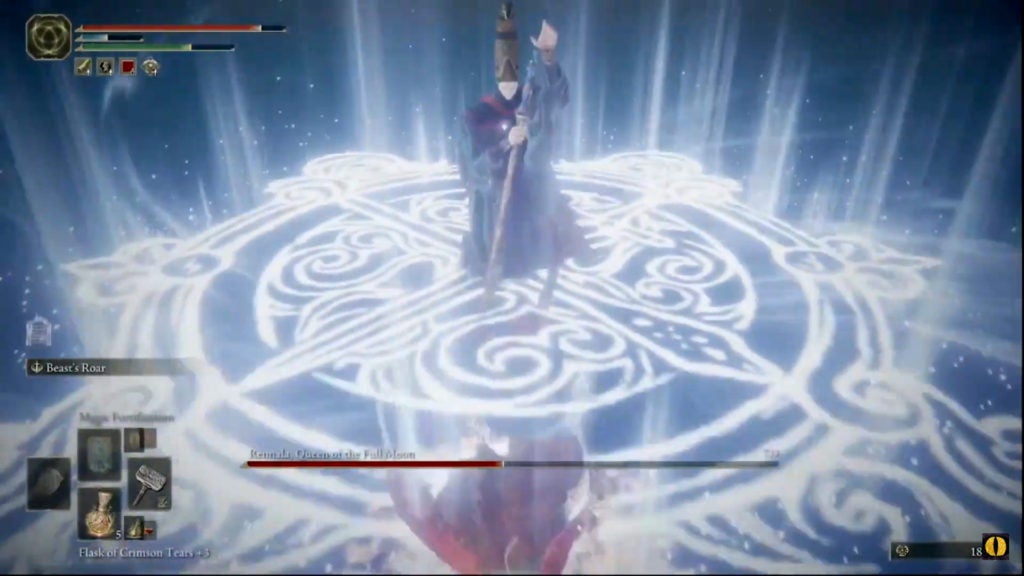
Rennala’s Full Moon (04:04 in the Video)
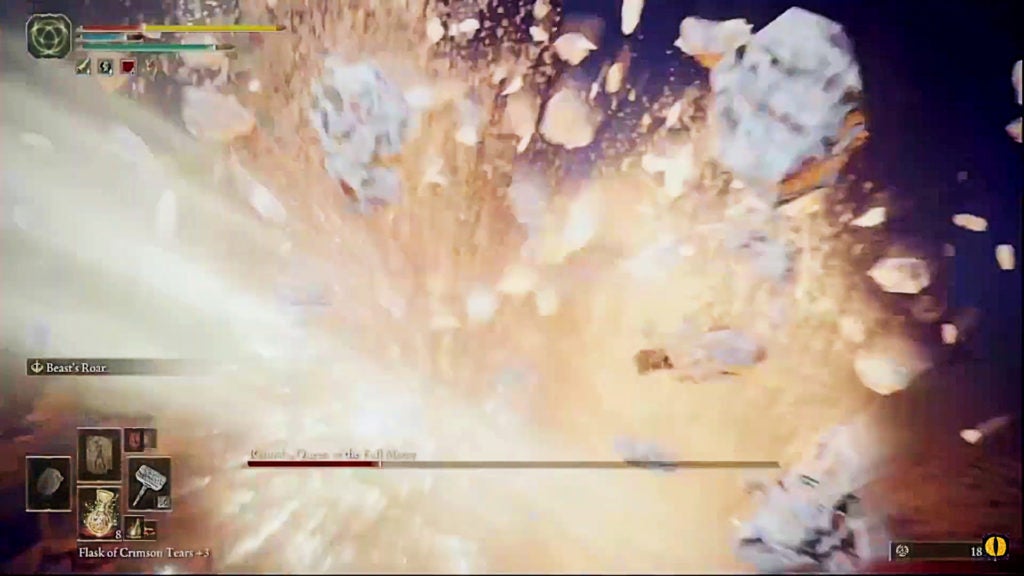
Also only after Rennala reaches 50% HP, she will begin using her trademark attack: the sorcery known as Rennala’s Full Moon. When the boss casts this spell, she will tuck herself into a moon-shaped projectile that she creates in the air. After a few moments, Rennala will exit the pale orb and send it at you.
Although intimidating, the huge ball of energy is very slow and easy to outrun. Pick a direction to run and you’ll be able to avoid both the projectile itself and the small explosion it creates when it hits the ground.
The Rewards for Beating Rennala, Queen of the Full Moon
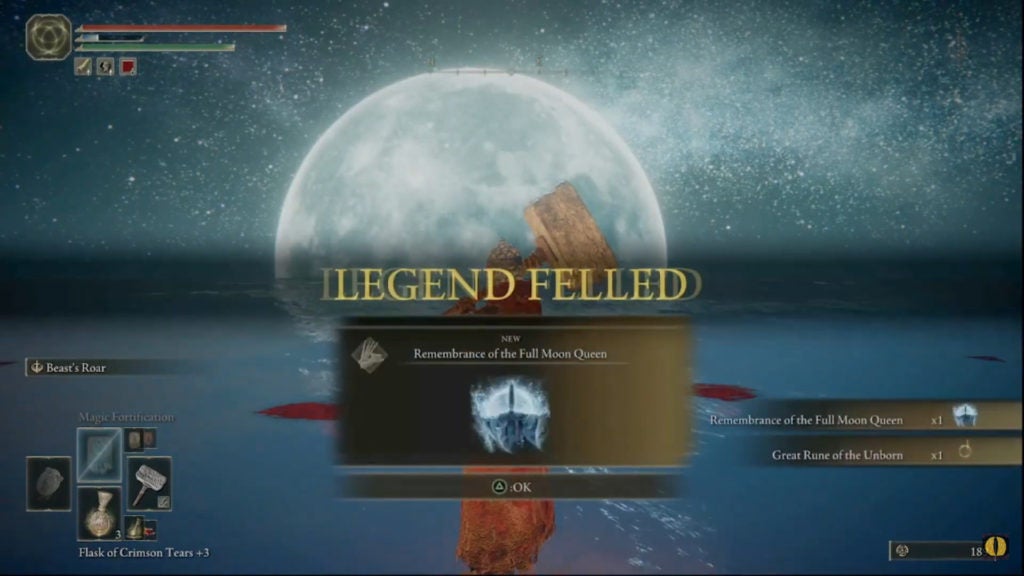
The Rune reward is self-explanatory as a drop from a boss, however, the other two rewards are more interesting:
- 40,000 Runes
- The Great Rune of the Unborn
- The Remembrance of the Full Moon Queen
However, if you don’t care for spellcasting, you can do something else with the Remembrance of the Full Moon Queen. If you use it, you can destroy this Rememberance and instantly gain 20,000 Runes.
About the Great Rune of the Unborn
This Great Rune is one of the few that does not need to be activated by a visit to a Divine Tower. It’s ready to use right away, as you don’t kill Rennala in your confrontation with her. This allows the Great Rune of the Unborn to keep its power. This key item will let you talk to Rennala and respecialize your character.
After the battle, Rennala becomes a friendly NPC that offers you this unique service. Put simply, this mechanic lets you redistribute all the attribute points that you have spent since starting the game. Although, it’s not free, as you need to pay the Queen of the Full Moon with one Larval Tear each time you want to respec.
About the Remembrance of the Full Moon Queen
If you bring the Remembrance of the Full Moon to Enia at the Roundtable Hold, she can turn it into either a spell or a staff. As such, you can potentially get a cool boss spell or a boss weapon. Furthermore, you can duplicate this item at any Walking Mausoleum, like all other Rememberances.
The first possible creation is Rennala’s Full Moon, which is the sorcery that the boss casts that resembles a full moon. You will need 70 Intelligence to cast this spell. Furthermore, it costs 55 FP and 32 stamina points to cast. In terms of function, it works similarly to Rennala’s version.
The other possible creation is the Carian Regal Scepter, which requires 60 Intelligence, 10 Dexterity, and 8 Strength to be wielded in one hand. Its scaling at its base level with Intelligence is B-tier, and it also scales with Dexterity and Strength at E-tier. The sorcery scaling starts off at a relatively high 162, making it an effective catalyst for magical spells. The weapon skill is Spinning Weapon, which is another move you may be familiar with from the fight against Rennala. The last noteworthy point about this glintstone staff is that it passively boosts the power of all Full Moon Sorceries.