Conjuration spells are abundant items in Hogwarts Legacy. So long as you play through the game, you’re bound to obtain and unlock a handful of these already. However, there may be certain spells you want for your Room of Requirement. These are the things you can do to obtain those.
Table Of Contents
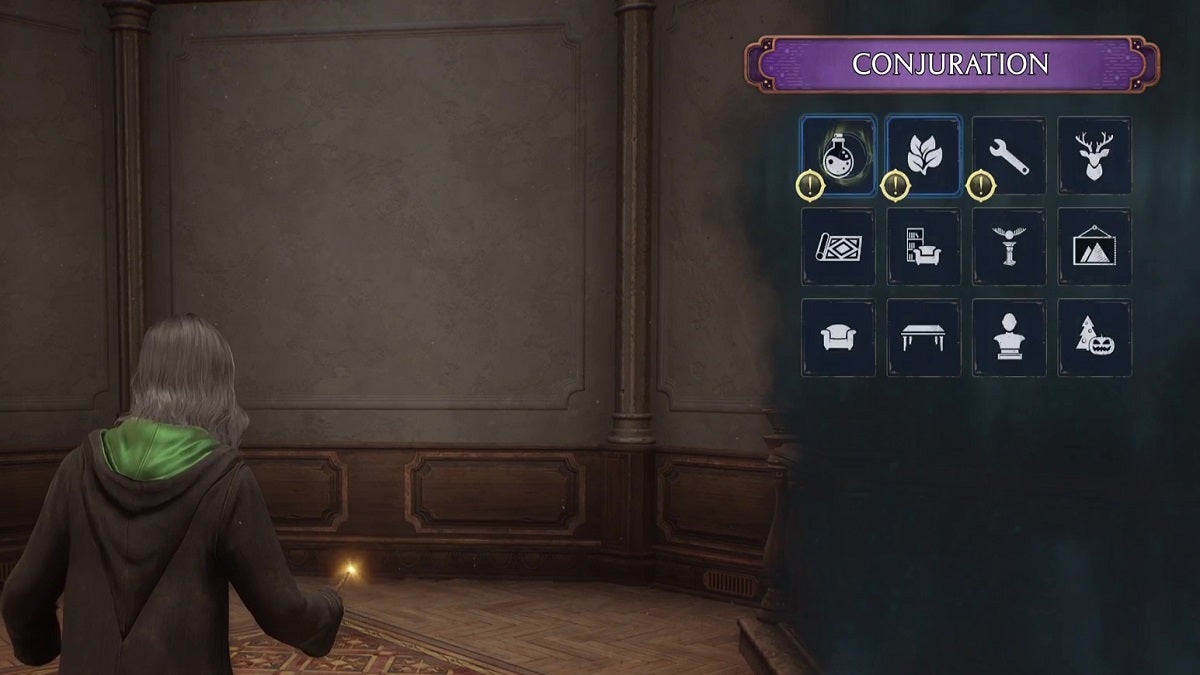
What Are Conjuration Spells?

Conjuration spells are used to “conjure” items for the Room of Requirement. You use this to place pieces of furniture, wall art, potion stations, potting tables, and more in the room. You learn the spell itself when you unlock the Room of Requirement during the main quest of the same name. To conjure certain items using the spell, however, you’ll have to find Conjuration spell scrolls.
There are multiple ways to obtain Conjuration spells in Hogwarts Legacy. If you collect all of them, not only will you have more options when you decorate the Room of Requirement, but you’ll also receive the Collector’s Edition trophy or achievement.
Conjuration Spells from Tomes and Scrolls
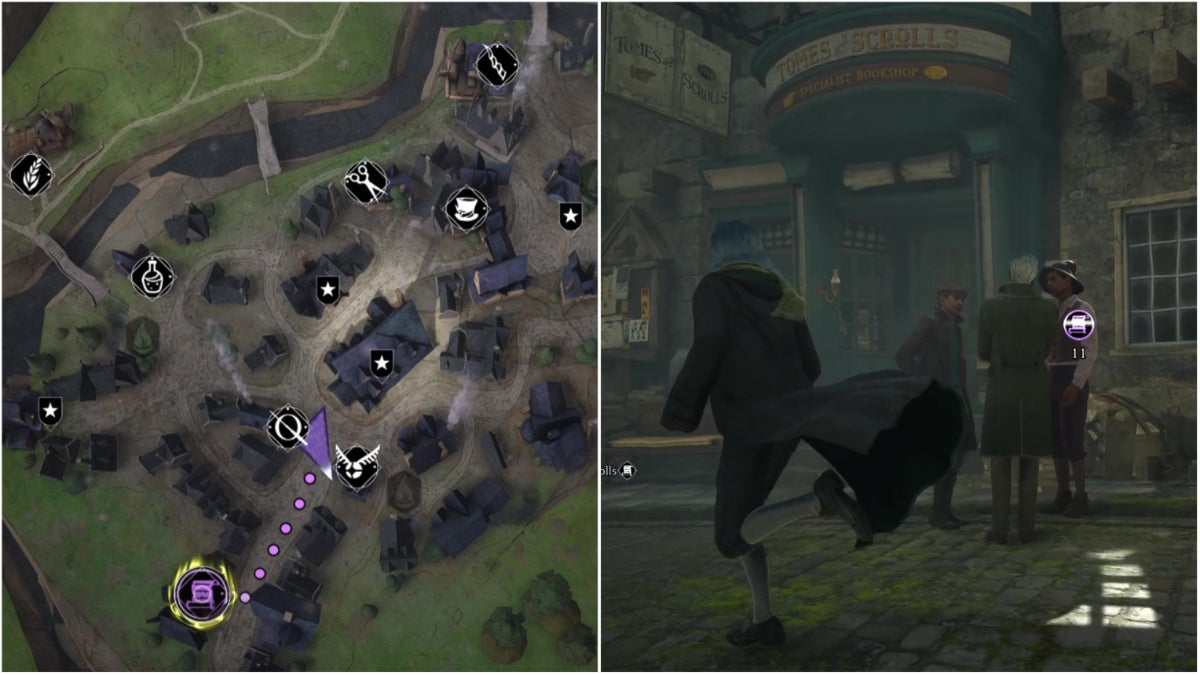
Tomes and Scrolls is the only merchant in Hogwarts Legacy that sells Conjuration spells. The spells you can buy here are Potion Stations, Herbology tables, Utility items, and Beast Care Items, which means they all have actual gameplay uses.
That being said, here are the Conjuration spells you can buy from Tomes and Scrolls and how much they cost.
| Conjuration Spell | Cost |
|---|---|
| Beast Feeder | 1,200 |
| Breeding Pen | 1,000 |
| Beast Toybox | 500 |
| Chopping Stations | 1,500 |
| Dung Composters | 1,000 |
| Hopping Pots | 3,000 |
| Material Refiner | 1,500 |
| Potting Table with a Large Pot | 1,000 |
| Potting Table with Two Large Pots | 3,000 |
| Potting Table with a Medium Pot | 750 |
| Potting Table with Two Medium Pots | 1,500 |
| Potting Table with Three Medium Pots | 3,000 |
| Potting Table with Three Small Pots | 400 |
| Potting Table with Five Small Pots | 2,500 |
| Medium Potion Station | 1,000 |
| T-Shaped Potions Station | 2,000 |
Quest Rewards
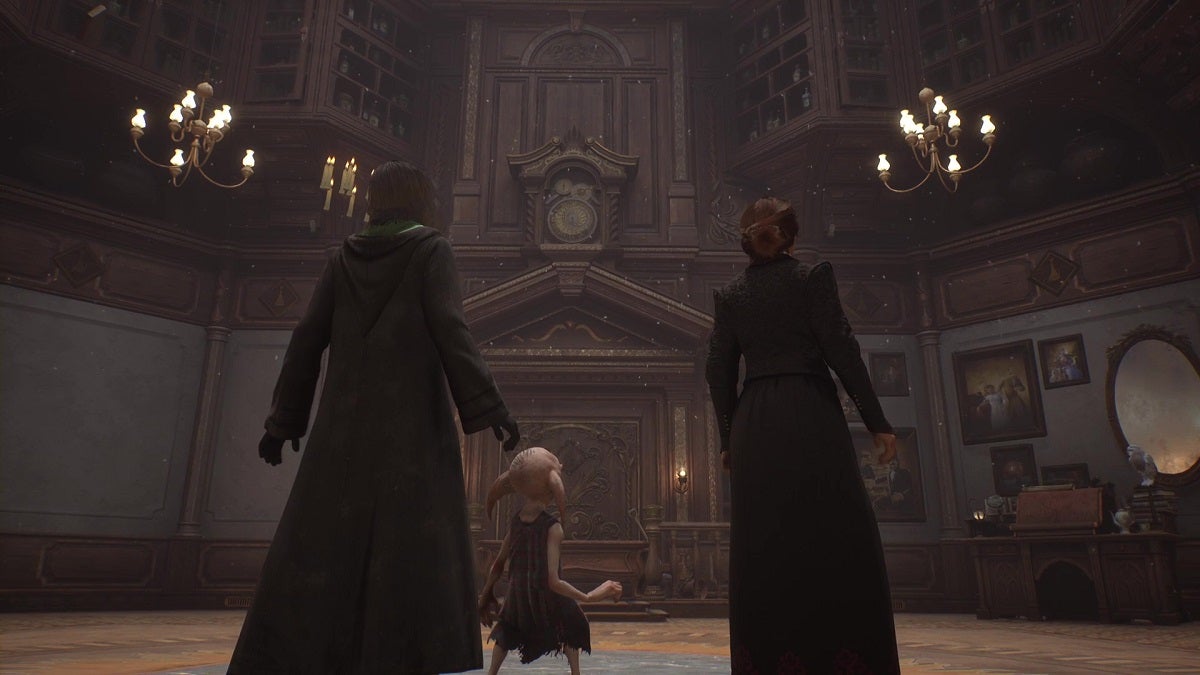
You can also receive Conjuration Spells for completing certain quests. You’ll have to veer off from the main story progression since you get these spells both from main quests and side quests.
| Conjuration Spell | Quest | How to Start |
|---|---|---|
| Potting Table with a Small Pot | The Room of Requirement | Part of the main quest progression. |
| Small Potions Station | The Room of Requirement | Part of the main quest progression. |
| Chairs | The Room of Requirement | Part of the main quest progression. |
| Desk of Description | The Room of Requirement | Part of the main quest progression. |
| Free Standing Light Fixtures | The Room of Requirement | Part of the main quest progression. |
| Wizarding Portrait | The Room of Requirement | Part of the main quest progression. |
| Medium Rugs | The Room of Requirement | Part of the main quest progression. |
| Small Tables | The Room of Requirement | Part of the main quest progression. |
| Mirrors | The Room of Requirement | Part of the main quest progression. |
| Benches | The Elf, The Nab-Sack, and the Loom | Part of the main quest progression. |
| Fences | The Elf, The Nab-Sack, and the Loom | Part of the main quest progression. |
| Enchanted Loom | The Elf, The Nab-Sack, and the Loom | Part of the main quest progression. |
| Breeding Pen | Foal of the Dead | Talk to Deek in the Room of Requirement after finishing Charles Rookwood's trial. |
| Sinister Oddities Shelf | Tangled Web | Speak to Crispin Dunne in the Three Broomsticks in Hogsmeade after completing Charles Rookwood's trial and the Absconder Encounter side quest. |
| Books and Cauldrons Shelf | History of Magic Class | Attend the History of Magic class after completing Njamh Fitzgerald's trial. |
| Stag Skull Decoration | Breaking Camp | Speak to Claire Beaumont in Upper Hogsfield after finishing the Tomes and Tribulations main quest. |
| Dressing Screens | Interior Decorating | Speak to Professor Weasley in The Room of Requirement after the main quest of the same name. |
| Gold Herbology Trophy | Interior Decorating | Speak to Professor Weasley in The Room of Requirement after the main quest of the same name. |
| Erumpent Horn | All's Well That Ends Bell | Speak to Evangeline Bardsley in the Astronomy Wing in Hogwarts after finishing the In the Shadow of the Mine main quest. |
| Flower Box | Follow the Butterflies | Speak to Clementine Willardsey in the Three Broomsticks after finishing the Potions Class main quest. |
| Herbology Tools | Kidnapped Cabbage | Speak to Eddie Thistlewood in Brocburrow after completing the Tomes and Tribulations main quest. Brocburrow is a village in the Hogswart Valley. |
| Keg Shelf | A Friend in Deed | Speak to Sirona Ryan in the Three Broomsticks after completing The Helm of Urtkot main quest. |
| Oddities Shelf | Portrait in a Pickle | Speak to the portrait of Ferdinand Octavius Pratt in the Library after completing the In the Shadow of the Mountain main quest. |
| Quidditch Board | 'Dissending' for Sweets | Speak to Garreth Weasley outside the Great Hall in Hogwarts after completing the Potions Class main quest. |
| Totem | 'Beeting' a Curse | Speak to Samantha Dale in the Greenhouses in Hogwarts after completing Charles Rookwood's trial and the Summoner's Court: Match 2 side quest. |
| Wooden Maiden | The Unique Unicorn | Speak to Betty Bugbrooke in Hogsmeade Square after completing Niamh Fitzgerald's trial. |
Rescue Beasts

You can unlock three Conjuration Spells for decorations by rescuing beasts. Rescuing beasts is a Challenge in Hogwarts Legacy. After you meet the conditions listed below, be sure to unlock the items by heading over to the Challenge menu.
- Billywig Hive – Rescue 10 Beasts
- Magic Chime – Rescue 20 Beasts
- Phoenix Statue – Rescue 30 Beasts
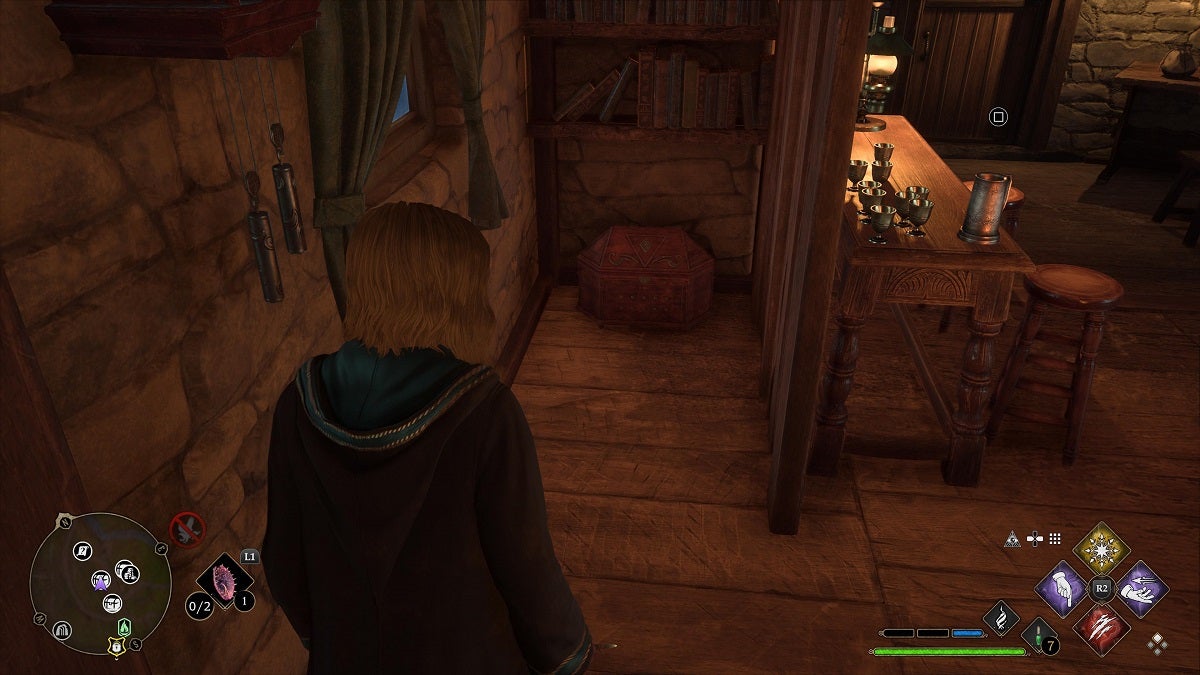
Conjuration Spells from Collection Chests
This is the tricky part when it comes to collecting every Conjuration Spell in Hogwarts Legacy. The rest of the spells are looted from Collection Chests. However, the items inside the Collection Chests are randomized. You cannot find one specific item inside a specific chest.
There are also different kinds of Collection Chests in Hogwarts Legacy. The ones that always contain Conjuration Spells are the ones that have an A-Frame cover.
The following are the items you can receive by opening Collection Chests.
- Bushes
- Medium Ground Covering
- Dwellings
- Ruins
- Medium Constructed Decorations
- Small Vivarium Decorations
- Lights
- Floor
- Lower Wall
- Low Raised Floor
- Low Stone Stairs
- Low Wall
- Low Arch
- Archway
- Medium Raised Floor
- Short Pillar
- Wall
- Ruined Stairway
- Medium Raised Floor Corner
- Short Stairs
- High Archway
- Ruined High Stairway
- High Raised Floor
- Tall Pillar
- Tower
- Tower Spire
- Large Natural Terrain
- Natural Terrain
- Medium Ground Surfaces
- Trees
- Framed Portraits
- Moving Portraits
- Arm Chair
- Armillary Spheres
- Vivarium Landscape Paintings
- Bookcases
- Bookstand
- Cabinets
- Christmas Tree
- Circular Paintings
- Crests
- Desk
- Magical Diagrams
- Diricawl Statue
- Stuffed Toy Dragon
- Feline Plates
- Blank Square Frame
- Footstools
- Free Standing Clocks
- Frog Choir Stand
- Fwooper Statue
- Globes
- Giant Purple Toad Statue
- Graphorn Statue
- Jack-O-Lanterns
- Hippogriff Statue
- House Standing Banners
- House Wall Banners
- Mounted House-Elf Heads
- Four or Six Rules Placards
- One or Two Rules Placards
- Jobberknoll Statue
- Kneazle Statue
- Landscape Paintings
- Painting
- Large Tables
- Huge Table
- Huge Decorated Table
- Large Decorated Tables
- Witch Mannequins
- Wizard Mannequins
- Medium Tables
- Medium Decorated Tables
- Wide Mirror
- Mooncalf Statue
- Totems
- Niffler Statue
- Ornamental Stands
- Decorated Ornamental Stands
- Magical Paintings
- Potioneer Tools Shelf
- Puffskein Statue
- Quidditch Equipment Shelf
- Large Square Rugs
- Large Rugs
- Small Rugs
- Skull and Candles Shelf
- Small-Framed Paintings
- Small Game Tables
- Square Shape Paintings
- Suits of Armour
- Taxidermy Wall Hangings
- Telescope
- Thestral Statue
- Three-Seater Sofas
- Unicorn Statue
Given that the item you’ll receive from the Conjuration Spell Collection Chests is randomized, the best option is to open every single one. That said, here’s where you can find every Collection Chest that contains a Conjuration Spell.
Here’s a quick tip before you go out there to seek out these chests. Be sure to cast Revelio when you’re nearing the places described below. It will help you pinpoint the location of the chests.

Conjuration Spell Collection Chests in Hogwarts
The Collection Chests in Hogwarts are usually found inside Arithmancy Doors, locked doors you can open with Alohamora, and secret doors.
| Section | Location |
|---|---|
| The Astronomy Wing | Behind the Arithmancy Door found outside the Charms Classroom. |
| The Astronomy Wing | Behind the Arithmancy Door in the west wing of the Library Annex Central Hall. |
| The Bell Tower Wing | During the Hero of Herodiana side quest, you'll be taken to a secret room located next to the Sphinx statue behind the History of Magic classroom. You can open this secret room by casting Depulos on the protruding block above the painting. The chest is inside the room. |
| The Bell Tower Wing | On the balcony on the higher floors of the music tower. |
| The Bell Tower Wing | Interact with the frog next to the previous chest to get transported to another balcony. There are two Collection Chests here. One of them will give you a Wand Handle, and the other will give you a Conjuration Spell. |
| The Bell Tower Wing | Back in the music tower, you'll find a locked door after climbing five flights of stairs from the ground up. This can be opened by a level one Alohamora. Behind the locked door is an Arithmancy Door. Solve the puzzle to find the chest inside. |
| The Grand Staircase | Behind the Arithmancy Door near the Ravenclaw Tower. |
| The Grand Staircase | Make your way up the Grand Staircase and you'll find another Arithmancy Door on the higher levels. Solve the puzzle to find another chest. |
| The Grand Staircase | Behind the Arithmancy Door near the Grand Staircase, on the floor where the house hourglasses are. |
| The Grand Staircase | In the secret room on the corridor outside Headmaster Black's office. You can open this door with the Key of Admittance, which you can get in Black's study. You can only access this place after completing The Polyjuice Plot main quest. You'll also need level 3 Alohamora. |
| The Grand Staircase | Behind the Arithmancy Door in the Faculty Tower. |
| The Great Hall | Behind the Arithmancy Door in the northeast end of the Great Hall. |
| The Library Annex | Behind the Arithmancy Door on the rafters above the Central Hall. Inside, there are two more Arithmancy Doors. There are Collection Chests behind those doors as well. |
| The Library Annex | Behind the Arithmancy Door in the Bell Tower Courtyard. |
| The Library Annex | Beneath the floor of the bridge between the Library Annex and the Great Hall. Solve the puzzles by using the braziers on the railings, and use the symbols on the circular plates on the ground as reference. |
| The South Wing | Behind the locked door on the ground floor of the Clock Tower. This door is opened by suspending the pendulum as it covers the symbol that match the one on the door. |
| The South Wing | Behind a locked door on the third floor. This door is opened similarly as the previous one. You'll need level 3 Alohamora to get to this door. |
Conjuration Spell Collection Chests in the Vivariums
The Vivariums are havens in the Room of Requirement for the animals you rescue. Vivariums will begin popping up in the room as you complete the side quests Deek gives you.
| Vivarium | Location |
|---|---|
| Open Green Field | Inside a cave to the south. |
| Open Green Field | On the area above the previous cave. |
| Open Green Field | On the cliffs to the north. |
| Coast | On the cliifs to the north overlooking the coast. |
| Coast | On the rocks by the sea. You'll need to swim over to the rocks to the northeast to get to where the chest is. |
| Coast | Inside the cave, located on the northwestern section of the coast. |
| Nighttime Forest | On a cliff on the southeastern end of the forest. You'll have to cross a swamp to get here. |
| Nighttime Forest | On top of a cliff northwest of the previous location, next to a tree. |
| Nighttime Forest | Inside a cave to the northeastern section of the forest. |
| Mountaintop | On top of a cliff to the southwest, next to three Ashwinder Eggs. |
| Mountaintop | From the previous chest, jump down and pass under the archway. Go all the way down and you'll find the next chest. |
| Mountaintop | Inside the ruins to the northwest. |
Conjuration Spell Collection Chests in Hogsmeade
The Collection Chests in Hogsmeade are inside locked houses and rooms. Be sure to have Alohamora unlocked.
- On the top floor of a locked house south of the South Hogsmeade Floo Flame. Opened with level 3 Alohamora.
- On the ground floor of a locked house east of the South Hogsmeade Floo Flame. Opened with level 3 Alohamora.
- Inside a locked room on the top floor of the Three Broomsticks. Opened with level 1 Alohamora.
- On the ground floor of the locked house northeast of the North Hogsmeade Floo Flame.
- Inside the Ashwinder Hideout. You can enter this area during the “A Basis for Blackmail” side quest for Natty.
Conjuration Spell Collection Chests in the Open World
Here’s where the rest of the Collection Chests are.
| Region | Town or Sub-area | Chest Location |
|---|---|---|
| North Ford Bog | Pitt-Upon-Ford | In the house west of the Pitt-Upon-Ford Floo Flame. |
| North Ford Bog | Pitt-Upon-Ford | In the house next to the merchant in the southeastern section of the town. |
| Forbidden Forest | Horklump Hollow | At the end of a path you get to by crawling under a small gap. The entrance to the gap is on the base of the short drop you make after jumping over a gap. |
| Forbidden Forest | Forbidden Forest | Do the "Follow the Butterflies" side quest. |
| Hogsmeade Valley | Upper Hogsfield | Inside the house next to Dorothy Sprottle's. |
| Hogsmeade Valley | Upper Hogsfield | Inside the house behind Claire Beaumont. Requires level 1 Alohamora. |
| Hogsmeade Valley | Overlook Cave | After you slide down the first slope, head east to find the chest. |
| Hogsmeade Valley | Overlook Cave | After you slide down the second slope, make your way past the spiders and head southeast to the area covered with Devil's Snare. Use Lumos or any fire-based spell to fend the vines away. |
| North Hogwarts Region | Korrow Ruins | Do "The Tales of Rowland Oakes" side quest. The chest is behind a secret room to the right of the big area where you fight multiple enemies. |
| North Hogwarts Region | The Collector's Cave | You can open this chest during "The Helm of Urtkot" main quest. Past the area where there's a hole in the ground you can hop onto, keep heading north and move the box to the climbable ledge close to it. The chest is on the ledge. |
| South Hogwarts Region | Aranshire | Inside the house north of the Floo Flame. |
| South Hogwarts Region | Aranshire | In the locked house east of the Floo Flame. You'll need level 3 Alohamora to open the door to the house. |
| South Hogwarts Region | Lower Hogsfield | Inside the house south of the Floo Flame. |
| Hogwarts Valley | Brocburrow | In a locked house west of the Floo Flame. |
| Hogwarts Valley | Brocburrow | On the northern side of the pond, found on the northern section of the town. |
| Hogwarts Valley | The Mine's Eye | There are two Conjuration Spell Collection Chest in The Mine's Eye. One is at the end of a tunnel barred by a grate, and the other is behind a locked door near the lift to the exit. You'll have to climb a flight of stairs to get to the door. |
| Hogwarts Valley | The Gilded Perch | You can enter this chamber during the "A Bird in Hand" side quest with Poppy Sweeting. The chest is on a higher ledge which you can jump onto by pulling down a crate and casting Levioso on it. |
| Hogwarts Valley | Dale Family Tomb Chest | Past a small passageway right of where the Devil's Snare is. |
| Feldcroft | Feldcroft Catacomb | You enter this catacomb for the first time during the "In the Shadows of Time" side quest with Sebastian. There are two chests here that contain Conjuration Spells. One is to the right of the first circular area and the second is past a Devil's Snare-ridden passageway, which leads to a section of the catacomb where you'll need to use bones to form a bridge. |
| Feldcroft | Moonstone Garden | You enter this catacomb during "The Centaur and the Stone" side quest with Poppy Sweeting. One chest is behind one of the doors that are marked with symbols and are opened by using Accio on a handle above the doors. Another chest is in the part of the ruins you get to after diving down on a whirlpool. |
| Feldcroft | Feldcroft | In the house behind Bernard Ndiaye's shop. |
| Feldcroft | Feldcroft | On the second floor of a locked house on the eastern side of the village. You'll need level 2 Alohamora to unlock the door to the house. |
| Feldcroft | Irondale | Behind the merchant on the western side of the town. |
| Coastal Cavern | Tomb of Treachery | While following through the main path, one path will break to the left. Take this path and you'll find a chest at the end. |
| Poidsear Coast | Phoenix Mountain Cave | Make your way down the cave and find a path on the left that's covered by webs. Break through the webs to find a chest at the end of this path. There's also another chest south of where arena where you face multiple enemies. |
| Marunweem Lake | Marunweem | Inside the house on the northernmost side of the village. |
| Marunweem Lake | Marunweem | In the house south of the Marunweem Floo Flame. |
| Marunweem Lake | Marunweem | Inside the house that's on an elevated cliff on the eastern side of the village. |
| Marunweem Lake | Tower Tunnel | You enter this place during the "In the Shadow of the Mountain" main quest. The chest is close to the rune door you find in this area. |
| Marunweem Lake | Coastal Mine | You enter this area during the "Lodgok's Loyalty" main quest. There are two chests here. One is in the are after the gap you cross using a platform, head west and climb up, using Levioso on a small grate. The other is behind a door you open by using Accio on a lever. You'll find this door around the area you get to after riding a cart. |
| Manor Cape | Bainburgh | In the locked house south of the merchant. You'll need level 2 Alohomora to open the lock. |
| Manor Cape | Bainburgh | In a locked house on the eastern side of the village. |
| Manor Cape | Herietta's Hideaway | There's an area here where you'll fight multiple enemies. After clearing them out, make your way behind the statue on the right. You can oepn the path here by placing the cube in the room on the plate and lighting it. You'll find the chest past this path. |
| Cragcroftshire | Cragcroft | Inside a locked house in the northern side of the village. You'll need level 2 Alohamora to unlock the door. |
| Cragcroftshire | Cragroft | Inside a house in the southern side of the village. |