First off, let’s explore the continent. We went to Shadow Forest, Hydra Marshes, and all the rest for just walking. Next, let’s go to the Viper Manor Bluffs.
Table Of Contents
Viper Manor Bluffs (Home)
Elements: #Capsule
Materials: @Mythril, @Mythril, @Mythril, @Mythril, @Mythril
Enemies: Gobledygook (Red), Loch Nest (Green)
Head east and go up the ladder, then go west and try not to get blown off when you climb this ladder. Up here, there’s a @Mythril. Go down and get blown off. Grab the @Mythril. Go down the vine to the southeast and go up this ladder here. Follow the ladders up to a water jet. Get blown off and grab the #Capsule. Go down the vine and back up the ladder. Go up the ladder here and don’t get blown off. Up here, the right ladder is a dead end, the left leads to another @Mythril, and the middle leads to the next area.
Go up this ladder one section, then go west and up this ladder. Don’t get blown off, and get the @Mythril at the top. Go back down to the beginning of this screen and take the right ladder all the way to the top with one more @Mythril. Go all the way back down and leave.
Go to Guldove next.
Guldove (Home)
Elements: #Tablet
There may be only one item here, but if you go to the element shop, they have some very RARE elements. They are very nice, but the really good ones only work on those who have that innate, like the summoning elements. If you can afford them, help yourself. After that, leave the element shop and head northeast to the residential area. Go behind the tent like we did in Another World, and get the #Tablet out of the chest in this hidden room. That’s it, so you can leave Guldove now.
Now let’s make our way to Hermit’s Hideaway.
Hermit’s Hideaway (Home)
Equipment: Resistance Ring, Energizer Suit
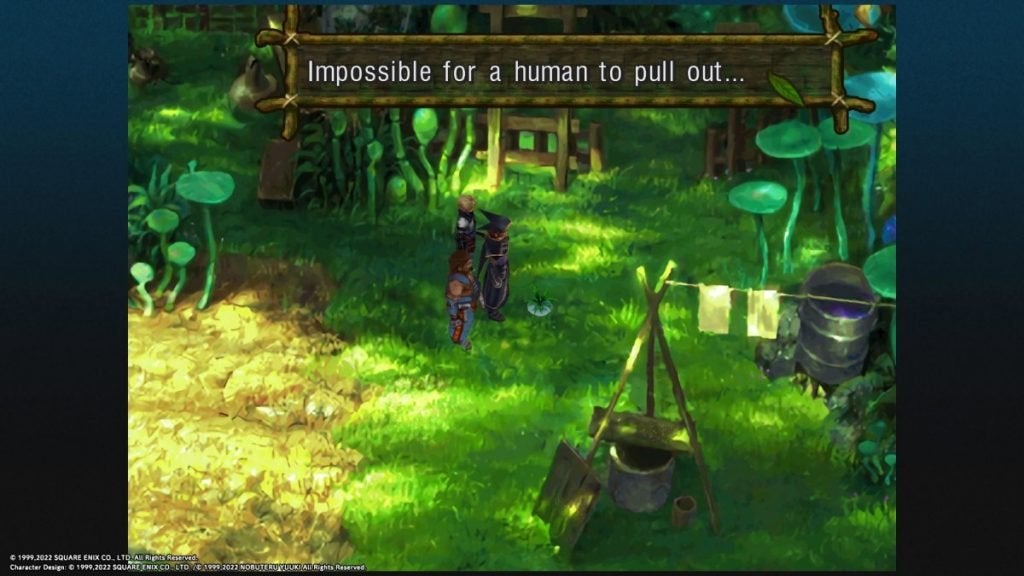
If you froze the ground in Another World, you’ll see some sort of vegetable wobbling around in the ground here, but no human can pull it out. Sounds like we need Poshul.
Anyway, climb up into the hut. You’ll see Razzly here, but you can’t do anything with her. There’s a Resistance Ring to the northwest, then climb the ladder and grab the Energizer Suit. Leave Hermit’s Hideaway.
Now let’s stop at the Isle of the Damned.
Isle of the Damned (Home)
Elements: Earthquake
Materials: @Carapace
Enemies: WillO’Wisp (Red), Dead Beat (Black), Dead Head (Black), Airframe (Black)
Follow the path to the WillO’Wisp. Defeat it, and it will blow up, clearing the path to the next area. Don’t go in here, go to the place where you previously found the Mixed Bones (northwestern corner). Wait for a WillO’Wisp to get there, or if it doesn’t go, lure it to it. Defeat it, and it will clear the way to an Earthquake.
Go to where you previously found the @Eyeball (southeastern corner), and wait for the WillO’Wisp. After you defeat it, grab the @Carapace. If you want, keep fighting the WillO’Wisps, because I was able to accumulate a few Infernos, which can be pretty handy. Unless you want to fight some more monsters, leave here.
Let’s go to Mt. Pyre.
Mt. Pyre (Home)
Materials: @Denadorite, @Mythril
Enemies: Lava-boy (Red), Hot Doggity (Red), Cat Burglar (Red), Taurminator (Red)
Freeze the lava here, and then go north to the next area. We’re warning you, the Taurminators are pretty tough. Go north and follow the path to the next area. Freeze the lava and head east. Go up the stairs and grab the @Denadorite, then go east and get the @Mythril. Go back and go north and follow the path to the next area. Go across the bridge (we can’t get those chests yet) and exit.
Now, let’s go to Fort Dragonia.
Fort Dragonia (Home)
Records/Fate: The elevator room
Elements: #Nostrum, #Nostrum, Volcano, Thunda Storm, #Nostrum, #Nostrum, Tornado, Iceberg, #Nostrum, Anti Black, #Nostrum, Anti White
Materials: @Denadorite, @Denadorite, @Denadorite, @Denadorite
Equipment: Flame Charm, Earth Charm, Sea Charm, Angel Charm, Daemon Charm
Recruitable Characters: Draggy (Red)
Enemies: Cybot (Yellow), Gurgoyle (Yell0w), Chamellion (Blue)
You can read the plate here, and then go north to the next area. Go northeast to the next area, and use the Record of Fate here if you want. There are four places to go from here. First, go to the one that is to the east.
Go east two screens and you’ll run into a statue. See which way it is facing, which is north. I’ll try to make a diagram to show where to go.

The letter (Left/Up/Right/Down) shows the direction that the watchkeeper is looking.
The left section has a red pyramid that heals you.
The top section has two Cybots you can battle.
The right section has the red pillar that you lower to continue.
The bottom section has four chests you can access. They contain a #Nostrum, a #Nostrum, a @Denadorite, and a Volcano.
Once you are done at that certain section, you’ll slide down the path and you have to climb up the side to get back to the screen before. When you have lowered the pillar, go back to the elevator room with the Record of Fate.
Now let’s go to the western room.
Go west into the next area, and find your way through the path to get to the room at the end. Note the blue panel outside of the room.
The trick to this here is to be in a certain order for a block to move. Move on to the footprint panels to find out you are in the head, body, tail order. To get the treasures and the yellow pillar, you have to be in these orders. Press SELECT to change the order, and use the blue panel outside to switch two characters’ order. You have to examine the footprint panels to make the block move.
- Head, Body, Tail – Lets you push a blue button that lowers some stairs.
- Body, Tail, Head – You can get to the @Denadorite.
- Tail, Head, Body – You can get to the Thunda Storm.
- Head, Tail, Body – Nothing.
- Tail, Body, Head – Lets you press a switch that lowers the yellow pillar.
- Body, Head, Tail – Blocks you from going anywhere else.
You must lower the stairs with the Head, Body, Tail combination before you can reach the switch that lowers the yellow pillar.

After you lower that pillar, head back to the elevator room. Go to the northeastern path.
Okay, this one’s a little confusing. First, head north and keep going north to the next area. Follow the path and go down the stairs. Go under the archway and then go under the next archway to the southwest. Go up the stairs to two chests, one containing a @Denadorite, and the other containing a #Nostrum.
Go back down the stairs and under the archway, then head north and follow the path to the next area, where there’s an #Nostrum at a dead end. Go back to the first area and go up the stairs to the west. Follow the path to the next area. Follow the path around to a branch. Head south and follow the spiral to the chest in the middle containing a Tornado.
Go back to the branch and head north and follow the path to the next area. Go south and down the stairs and you’ll find a @Denadorite. Go back and up the next set of stairs. Follow the path to a blue switch, which will lower a set of stairs. Head north to the next area.
Follow the path into a room and lower the green pillar.

Head back to the elevator room and then take the northwestern path.
Go forward to the next area. In here, follow the path to two treasure chests that change direction of the bridge. Open the lower right chest and follow the bridge to the other side. Make sure both of these chests are closed, and then head west to the next two chests. Close the left one and open the right one. Follow the path into the room. There will either be a Cybot or a chest. Open the chest to find an Iceberg.
Go back to the previous two chests, and close them both. Go east and open the left one. Follow the path and go into the room. There will either be a Cybot or a chest. Open the chest to find an Iceberg. Now, go back to the chests, close the left one and open the right one. Go west and open the right chest. Follow it to the blue switch and press it to lower some stairs.
Enter the room here and lower the blue pillar.
When that happens, the elevator will rise in the elevator room. Head back there, open the elevator, and go in. Turn off the white pillar, then go down a floor instead of going up.
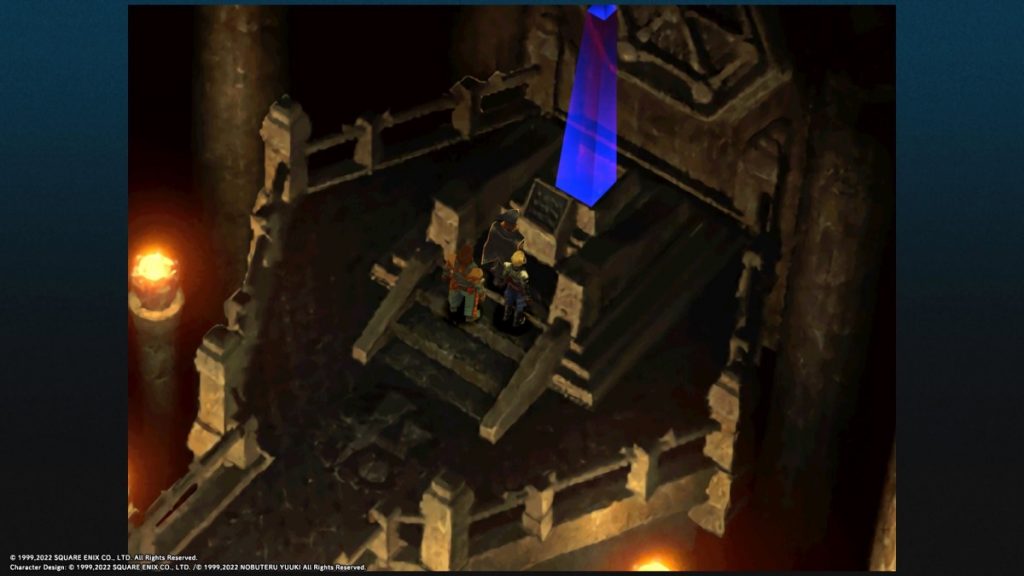
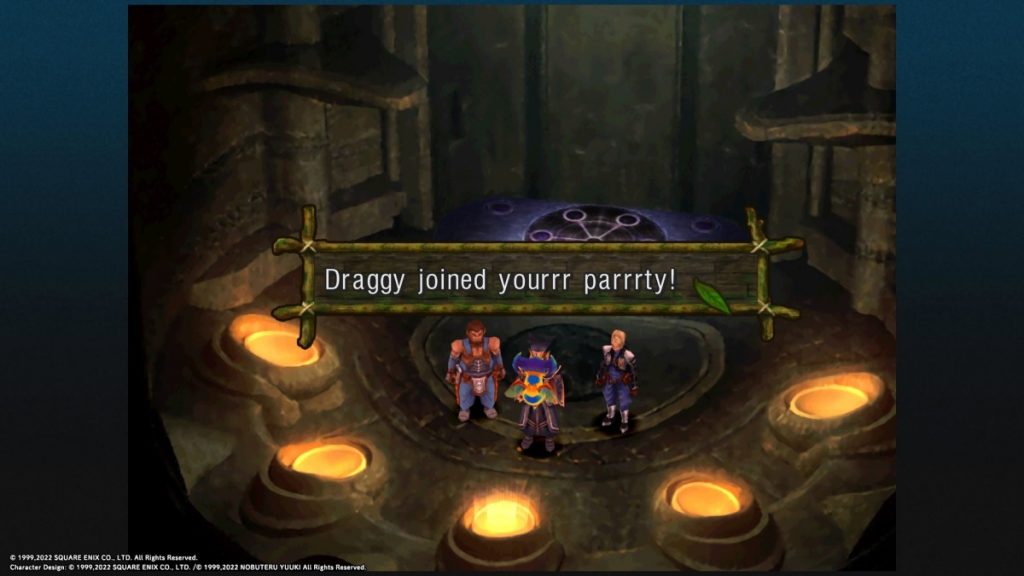
Go south and place the Big Egg on the glowing spot. It will hatch and Draggy will appear. He’ll look around to find his family, but he doesn’t find them. He thinks you’re his parent, so he’ll join your party!
Go back up and then up again.
Go southeast to the next area. Follow the path to a branch, and then go southeast and get the #Nostrum. Go back to the fork and go northwest and follow the path here to the next area. Go up the stairs and to the next area. Take a step or two forward, then go south.
Down here, go west and get the Anti Black, and then go east to the next area, where there’s an #Nostrum at the dead end. Head back a couple of screens and follow the path until you can see a chest to the northeast, which contains an Anti White. Go northwest to the next area.
Here’s the black pillar, so lower it. That should activate the transporter panel. For now, that’s all we need to do. Leave Fort Dragonia and go back to the World Map.
We’ve already been to Water Dragon Isle. There’s a place in between Mt. Pyre, Marbule, and Water Dragon Isle called The Bend of Time. The pillars here let you fight monsters around the world. You can fool around there if you want. It’s a great place to take Sprigg so she can learn more Doppelgangs.
Next stop, the El Nido Triangle.
El Nido Triangle (Home)
Materials: @Mythril, @Mythril
Equipment: Star Fragment
Key Items: Star Fragment
Enemies: Schoolmates (Blue), Puffy (Yellow)
Go to the glowing light, and press X. You’ll appear underwater, and you can magically breathe! Follow the path to a fork. Go northeast until you reach another fork. Go northeast to find a @Mythril. Go west and follow the path until you reach a ladder. Go down.
Go south and follow the path to another @Mythril. Go back and follow the path to a Star Fragment.

That’s all down here, so head back to the surface. Leave the El Nido Triangle.
Now let’s go to Sky Dragon Isle. Make sure to equip an Ultra Nova to catch that element when the next enemy uses it.
Sky Dragon Isle (Home)
Window Frames: Our Favorite Martian
Recruitable Characters: Starky (White)
Enemies: Mega Starky (White)
Go west and then north at the branch. Go up the stairs here to the next large area. Go to the middle of the area and open the chest. It’s empty, and a huge alien will attack you.
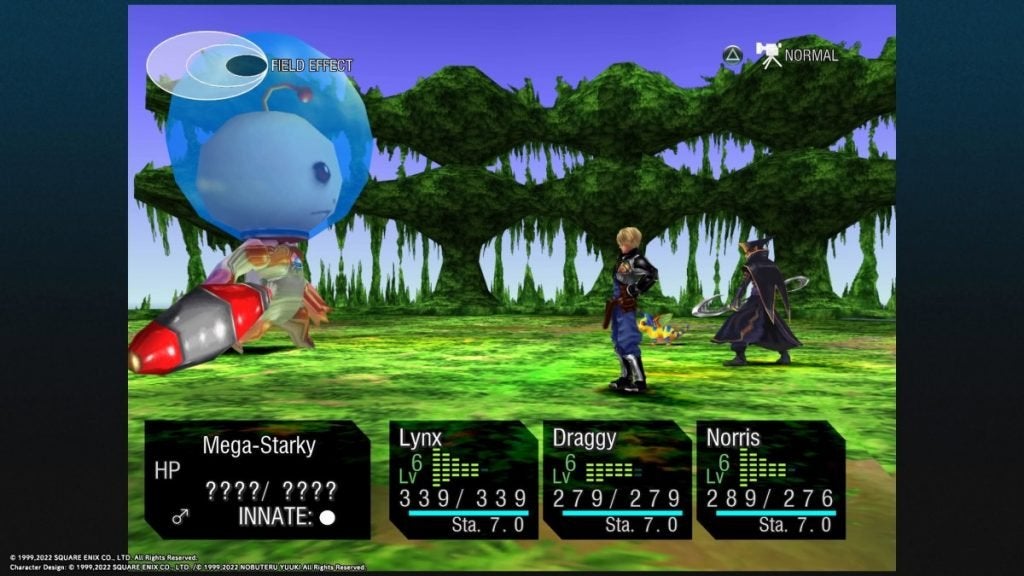
Start by casting Ultra Nova just in case he uses it, which he normally does when he’s closer to death. Use your best attacks and black elements such as Free Fall and Feral Cats. It’s a long battle, but not a hard one.
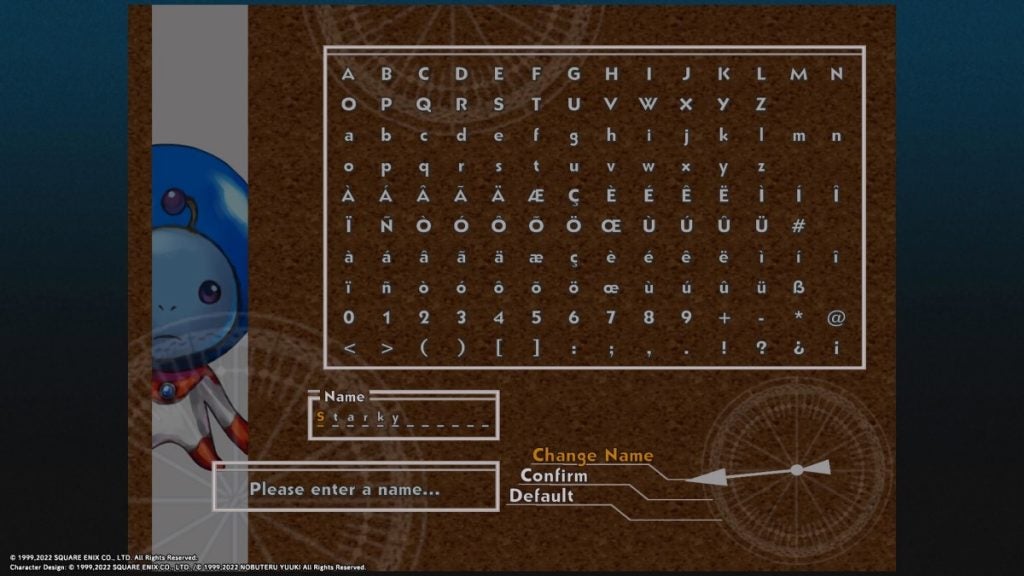
After the battle, you have to catch Starky. Once you catch him, he’ll tell you that his ship fell from the sky and the Star Fragment is the ship fragment. Starky will join your party to see if his ship is intact in the other world.
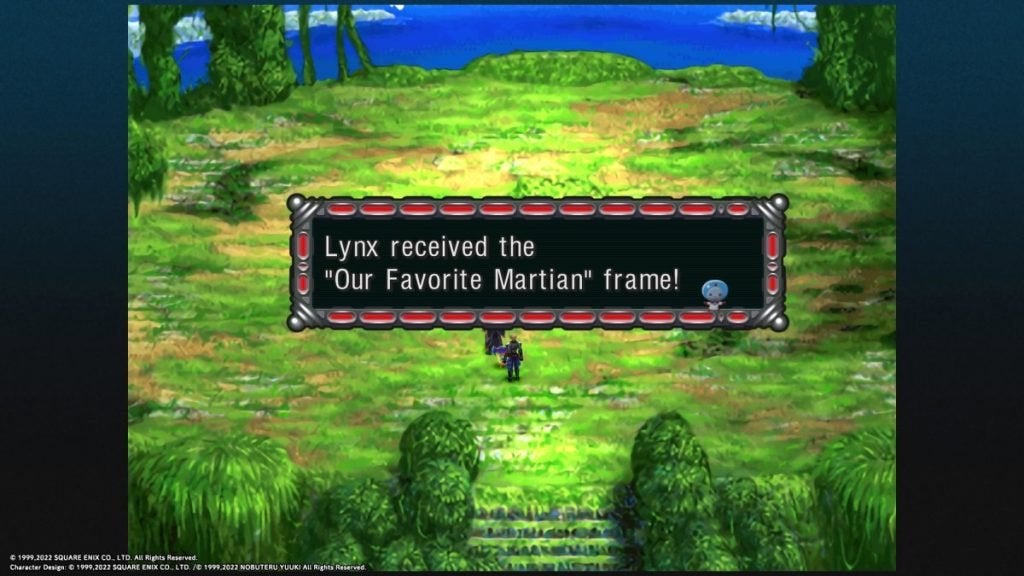
Leave Sky Dragon Isle, then come back. Go to the large area and talk to the guy here. He’ll give you the Our Favorite Martian window frame.
Now that’s all for Sky Dragon Isle… for now. Leave here.
Okay, now we go to Earth Dragon Isle. After that, Marbule!
Earth Dragon Isle (Home)
Elements: #Capsule
Materials: @Mythril, @Mythril
Enemies: Fossicker (Yell0w), Bomber (Black), Yellow Bellow (Yellow), Rock Roach (Yell0w)
As you enter, go east up some stairs and you’ll reach a #Capsule. Go back down and go north. Do not heed their warnings and jump into the quicksand…
As it turns out, just like in Another World, there’s a cave down here. Hold to the right and go down the ladder to the southwest. Get rid of the Fossicker and grab the @Mythril. Go back up the ladder and go southeast. Don’t jump down the sand boil, but keep going south down the ladders, then go southwest to find a gigantic turtle. You’ll try to push it, but it’s no good. Leave here by the sand boil.
The people here will see that you are okay, and figure out the transportation method for this place. They say that with some time they will get rid of the thing blocking the entrance.
Go back down one more time, but this time hold to the left and you’ll find another @Mythril. Go down the sand here and go back up to the sand boil. Leave by that and then leave Earth Dragon Isle.
The S.S. Zelbess is for later, and on Forbidden Island, the door is locked but someone looks out the window as you leave…
Okay, let’s go to Marbule now.
Marbule (Home)
Weird. There are only two people here, Toma and Ash. There are a bunch of Lagoonate spirits walking around here. You can ask Toma questions, and he’ll tell you that all of the demi-humans are on the S.S. Zelbess, and you can use the hut by the entrance to spend the night. You’ll see some events through the night if you choose to check out the voices. Go to the bridge for some more events, then you’ll go back to sleep.
The next morning, the mermaid from before will ask to go with you, since you’re boarding the S.S. Zelbess. Before you go, I recommend going around the world and getting Sprigg some strong Doppelgangs. You’ll need them if you want to recruit Janice. The Bend of Time is a good place for moderately strong monsters. After you’re aboard the Zelbess for a while, you won’t be able to leave, so do it now.
S.S. Zelbess (Home)
Records/Fate: Inn
Equipment: Frypan Ag47, Stamina Belt, Resistance Belt, Dreamer’s Scarf
Key Items: Handle, Fiddler Crab
Window Frames: Monster Mouth
Recruitable Characters: Janice (Red), Irenes (Blue), Sneff (Yell0w)
Bosses: Sage (White)
Follow the path up to the deck, and then go east and down the stairs into the cabin. While going west, go in the first door and you’ll see Miki by the balcony. You can please her by telling her you aren’t fans of Nikki. You can’t enter the kitchen, so keep going past the ladder and go up the stairs into Fargo’s cabin.
Watch the events in here, then leave and go to the door under here. Here’s a Casino. Play for 100G, and we suggest you do so. Here’s what you do to win. When the spinner spins, pause the game. If the red end of the spinner is between south and west, hold X and press START. That’s the way to win this game. At first, you’ll receive a @Rainbow Shell, but from then on, you’ll receive @Denadorites.
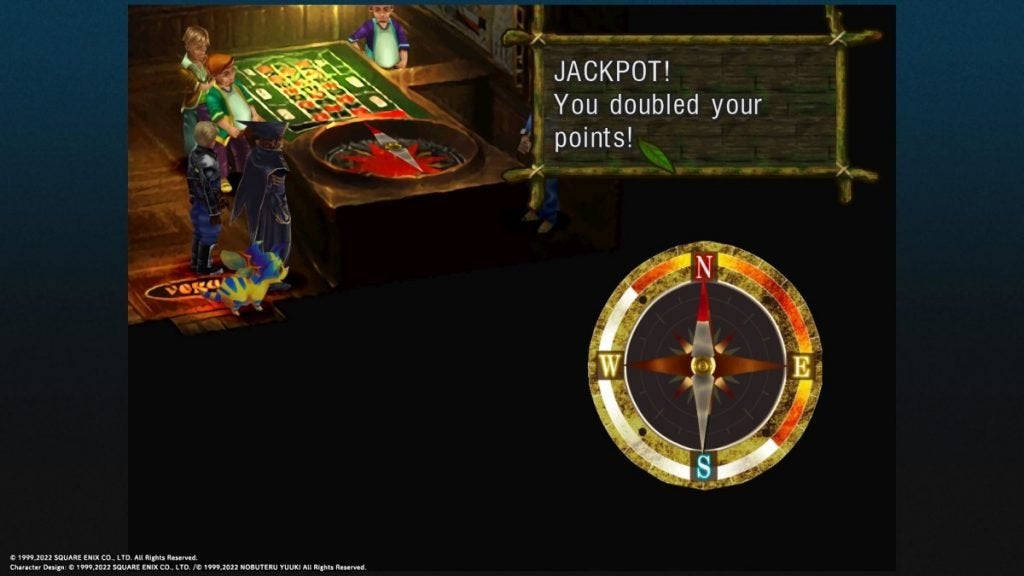
Thanks to the many people who sent this helpful hint to us.
- Rank 4 Prize – @Bone
- Rank 3 Prize – @Iron
- Rank 2 Prize – @Mythril
- Rank 1 Prize – @Rainbow Shell, then @Denadorite
When you’re done here, leave and go east to the ladder. When you go down, to the west is the Inn, and go east one door from the ladder to the bar. You’ll see Sneff’s magic show. Afterward, leave here, and go east two doors. In here’s an old man that needs to get through to get to work.
Back outside, the old man goes through the door to go mopping. The pirate says that he used to be the leader of Marbule. The pirate is guarding the Grand Slam, and you need Fargo’s permission to enter.
Go back and talk to Fargo. He won’t grant you permission, then he’ll change his mind and give you permission if you beat him in the casino. If you lose, he’ll take your boat. Agree to it, since there’s nothing else we can do.
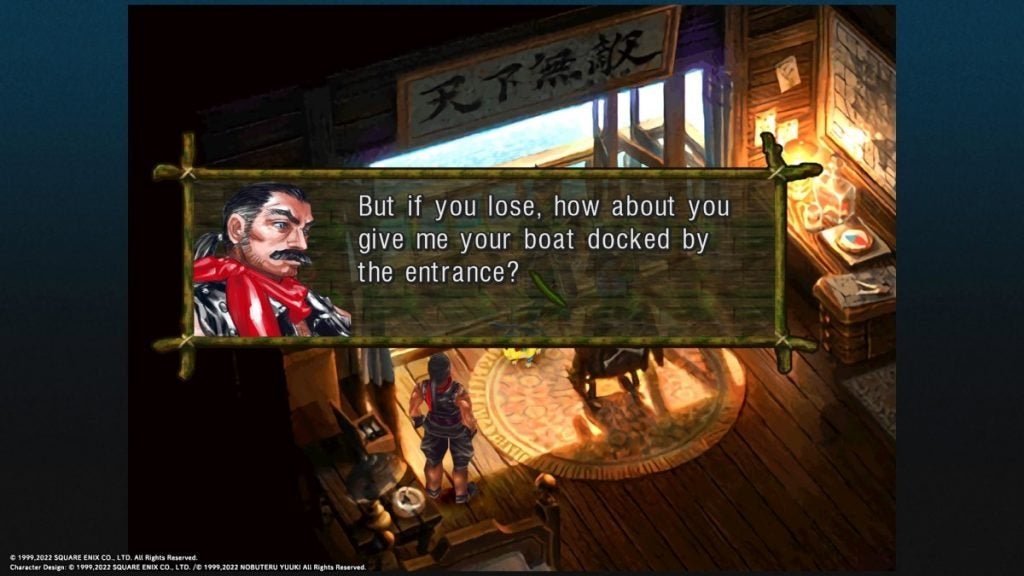
Down here, you must lose, because no matter how long you go, Fargo will always win. To lose first thing off, pause the game and when the arrow is between north and east, hold X and press START.
Well, we’re stuck here for a while, so head down to the inn. You’ll see a guy come down a ladder, and he’ll scold his cat for going up the steps. Hmmm… The casino is right above this inn, and we could check it out if we could move freely like that cat…
Go back to Sneff’s magic show, and Sneff will come out again. He’ll start with his cat trick, so volunteer. As soon as you turn into cats, quickly run south out the door. First, go up the ladder, and then go east into the hole in the kitchen. Talk to the cat in here as fast as you can before he leaves, and he’ll give you the Monster Mouth window frame.
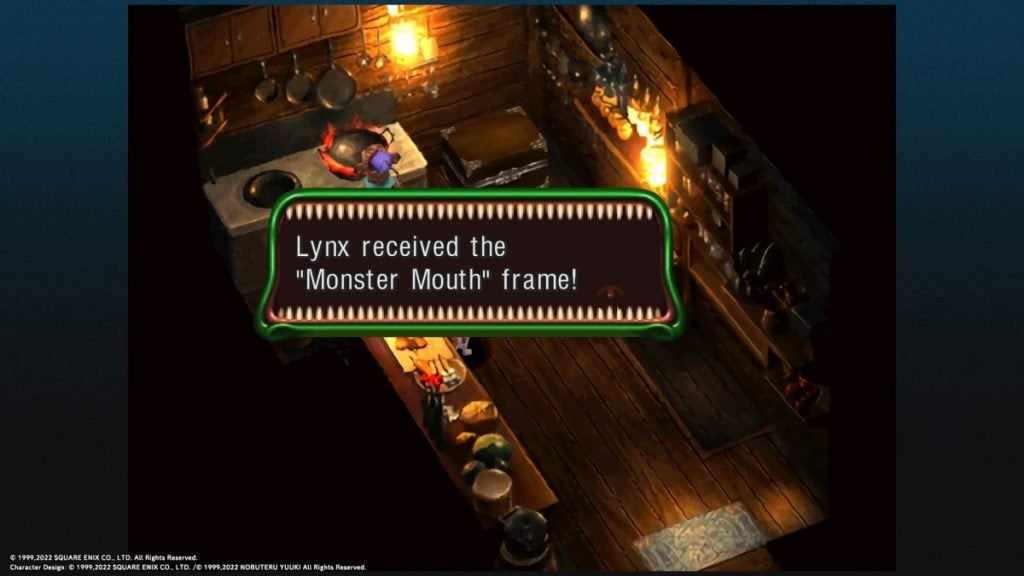
If he leaves, just wait around a bit for him to come back, then talk to him. Open the chest in here to find a Frypan AG47, then leave here and go east to the deck.
Go west and up the ladder, and keep going past the guy. You’ll see the cat walk the tightrope. Do the same, and you’ll end up on Nikki’s ship. Go in the door on the second floor.
Talk to Irenes, and she’ll talk to Nikki about Marbule. That’s all here, so leave Nikki’s ship and head back to the inside of the Zelbess.
“While aboard the S.S Zelbess, and while still in cat form, after overhearing Nikki and Irenes’ conversation, but before being turned back into demi-human form, you can witness an extra scene as cats, by visiting Fargo and talking to him. He reflects on how Zelbess loved cats, and he opens the dressing table and talks to himself about what Zelbess used to say about mirrors. A nice little scene to witness.“
Go down the ladder and go into the inn. Go under the desk and up the stairs. The guy here will be controlling the spinner, so Sneff loses again. Anyway, the guy here will go to sleep, so take the Handle that controls the magnet. Leave here and go back to Sneff’s magic show. Go east into the little hole and you’ll be in the staff’s room.
Go talk to Sneff and he will turn you back into humans/demi-humans. Sneff says that he will help you whenever he gets off of this ship. Go back to Fargo’s room.
You’ll see Nikki talking to Fargo. Afterward, talk to Fargo again and challenge him once more. Head down to the casino, and on his first spin, Fargo will lose! You’ll show him the Handle to the magnet down below, and he’ll admit that he was cheating. You’ll get the boat back, and access to the Grand Slam. As he leaves, he wonders how you got a hold of that handle…
Head over to the Grand Slam, and the pirate will permit you to go through. Head through there.
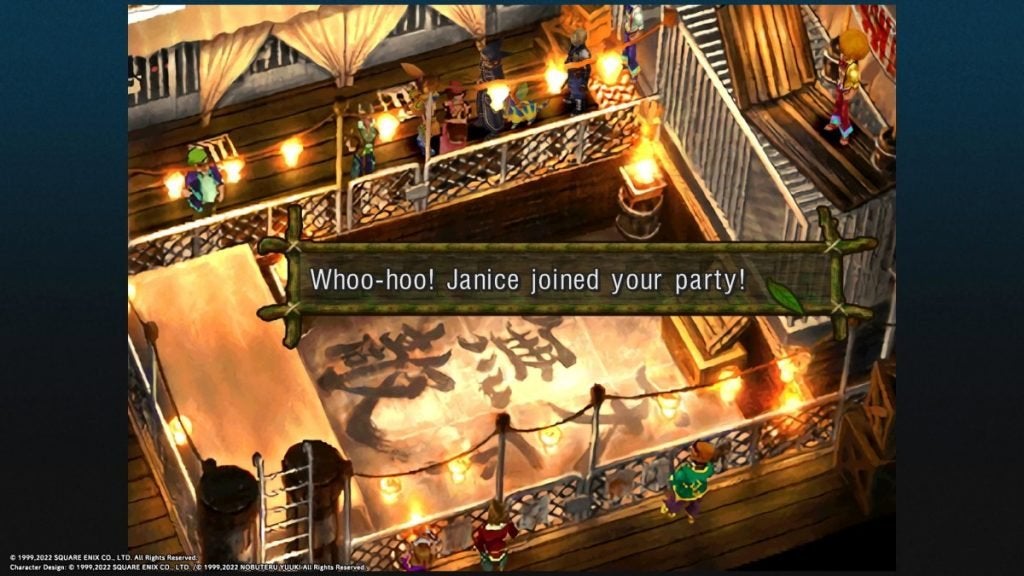
Before seeing the Sage, we recommend going down the ladder here and participate in the Grand Slam, hoping that your monsters are good enough. Go around the arena and talk to the guy blocking the entrance. Enter the contest and you’ll have to battle your monsters that Sprigg has learned against the monsters that Janice has.
Save your best for last. We’ll show you the monsters I use and the ones that she uses.
- Round 1 [Our Monsters] Man-At-Arms, Taurminator, Total Chaos [Her Monsters] Gloop, Taurminator, Beeba
- Round 2 [Our Monsters] Cat Burglar, Lagoonate, Snib Goblin [Her Monsters] Spearfisher, Cybot, Gobledygook
- Round 3 [Our Monsters] Airframe, Cybot, Dwarf [Her Monsters] Cuscus, Cassowary, Airframe
You’ll receive a Dreamer’s Bandana when you win the contest. This item will start you off with a level 1 element grid in battle!
Janice will see that she has been beaten, and she’ll join your party so she can search for stronger monsters.
Leave the Grand Slam arena and go south through one of the doors.
You’ll see the Sage go through one of the doors. Go through the left door back inside, and he’ll go through the middle. Go through the middle back outside and you’ll see him go in the left. Go right back through the middle to meet him. Ask him where the Dead Sea is, and then tell him that you’ll use force against him. You’ll have to battle him.
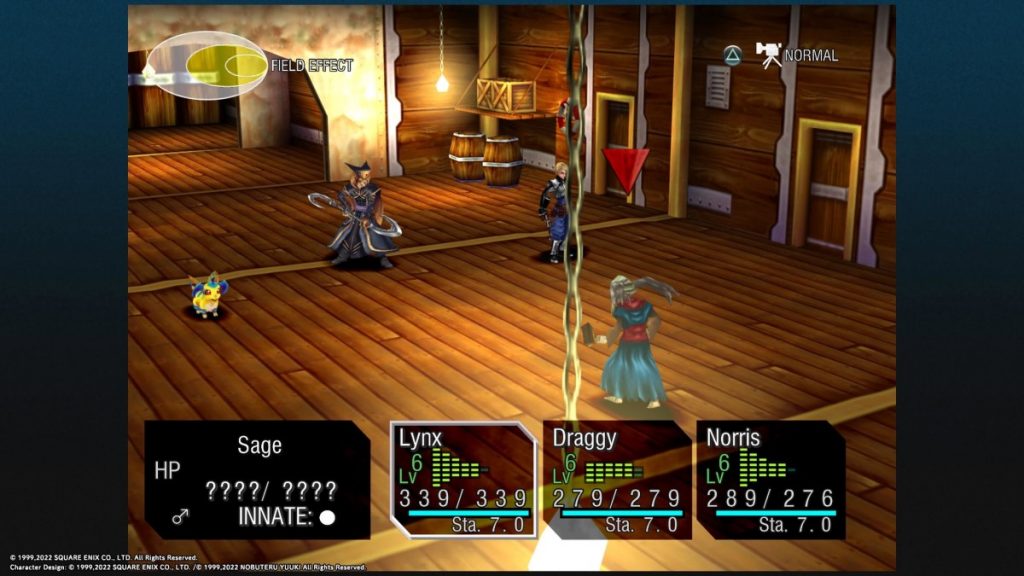

Boss: Sage
Spoils: Summon Star #23, 634G, Mythril Helmet
He is not hard. Just use attacks like Free Fall and Feral Cats He’ll go down after some time. Just beware of the white elements he’ll use on Lynx, and make sure to keep everyone healed.
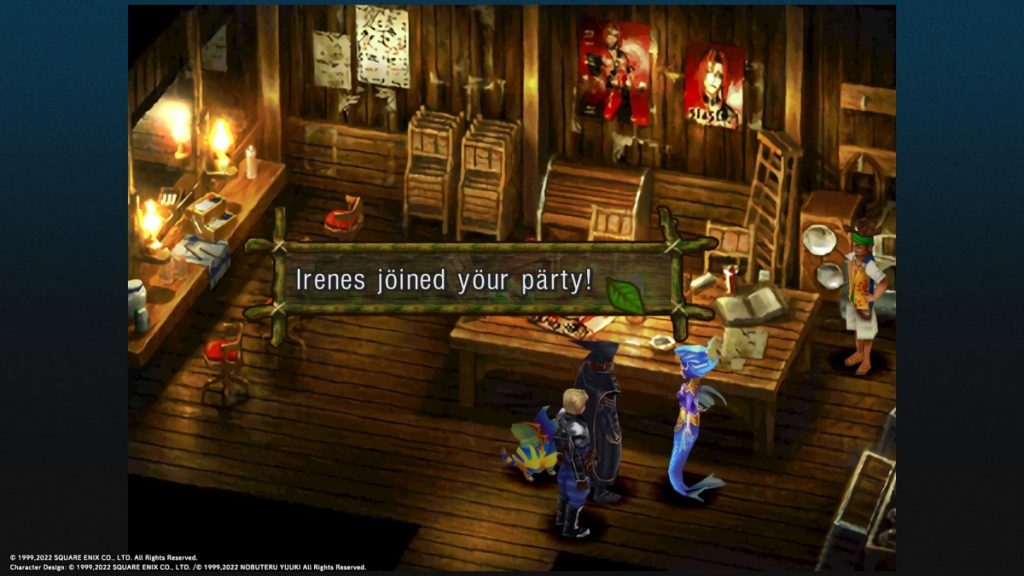
The Sage will see that you are determined, and will give you the Fiddle Crab. Nikki will then come in and talk to the Sage, then will want to talk to you in his ship. Go up to the deck and go to Nikki’s ship. Go inside the first floor door and you’ll see all of the Magical Dreamers in here. Nikki will ask for your help.
- Of course!
- No, we can’t.
Choose 1 to agree to it. Everyone will leave, and Irenes will offer to join your party, so accept.
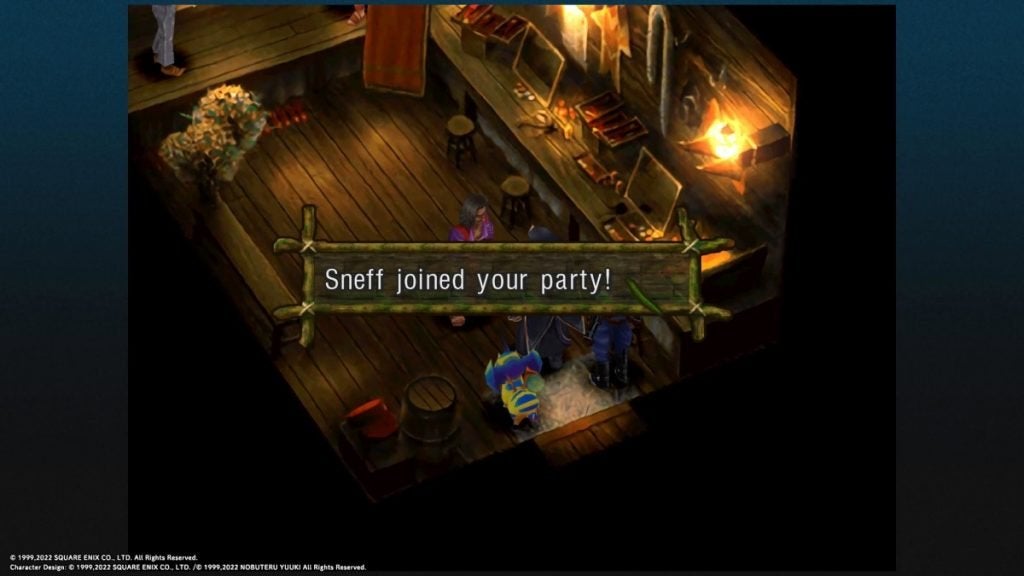
Go to the casino and you’ll see Sneff winning big time. He can now pay off Fargo! Go over to the staff’s room beside the bar, and you’ll see Sneff saying goodbye to his friends, then he changes his mind and decides to go whenever you call upon him. He’ll offer to join your party, so let him!
Sadly, that’s all we can do aboard the S.S. Zelbess for now, so the next stop is the Dead Sea. On the World Map, use the Fiddler Crab where you see the purple Dead Sea text. Enter Death’s door.
Death’s Door
Radius will accompany you here. Head north and you’ll see the evil sword, the Masamune. It will let off an evil vibe, and you cannot go past it. Radius says that only the sword Einlanzer can break the seal of the Masamune, and that we need to go to the Isle of the Damned to get the sword. Before that, we need to get an item that used to belong to Garai at a hut they used to train in. That means we need to go to Hermit’s Hideaway.
First, stop at the Bend of Time and bring Janice along.
Termina