![]() Key Takeaway
Key Takeaway
The higher your gear level, the easier the combat trials will be. For the first nine challenges, you should be at gear level five or higher. However, for the last six challenges, it’s highly recommended to be at gear level six or higher before you attempt to conquer them. Also, what build you use will determine how easy things will be for you. Putting together a sensible build can help you overcome the tougher challenges.
After you gain access to Muspelheim in God of War Ragnarök, you can face up to 15 different combat trials. These are not for the faint of heart and will challenge your skills. You need to get good or go home.
Table Of Contents
Trial Breakdown and Explanation
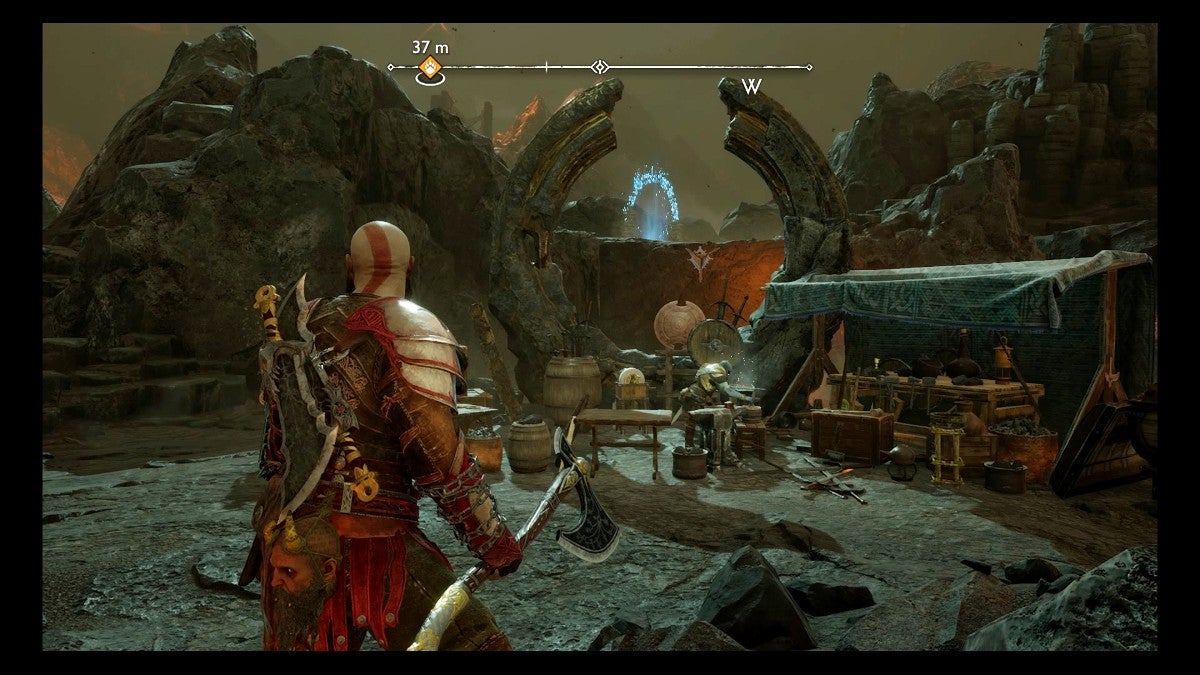
Overall, there are 15 different combat trials in Muspelheim. Initially, you will have access to two trials at each of Surtr’s three giant swords—which all have their own arena.
Each massive blade has a rune on it: the northmost arena has a sword with a rune that looks like an “F”, the westmost arena has a sword that has a rune that looks like an “N”, and the southmost arena has a sword with a rune that looks like an “R”.
For simplicity, when these swords are mentioned, they will henceforth be referred to as the “F-Sword”, “N-Sword”, and “R-Sword”. After completing the initial two trials of each sword (all six), you gain access to another trial at each sword. This means that there will now be three trials per sword—nine total.
How the Final Trials in Muspelheim Work
To enter the final six combat trials, you will need to complete all six initial trials. Afterward, you need to complete two trials of the three arena swords in varying orders.
The final trials take place in the central area of The Crucible where a fourth giant sword is located. On this fourth great blade, up to two runes will appear on it depending on the lesser trials you complete.
For example, to access the FN final trial, you need to complete one trial from the F-Sword arena and then one from the N-Sword arena (in that order). Here’s a list of all the final trial combinations to help you keep track of which ones you’ve completed:
Suggested Build for Tackling Muspelheim’s Combat Trials
A great build to use when trying to complete Muspelheim’s trials is one that focuses on poison, stun, and sonic. Combining poison status and stunning tactics can give you an advantage in almost every trial. Also, you can enhance such strategies with Atreus’ sonic arrows.
Suggested Armor Set
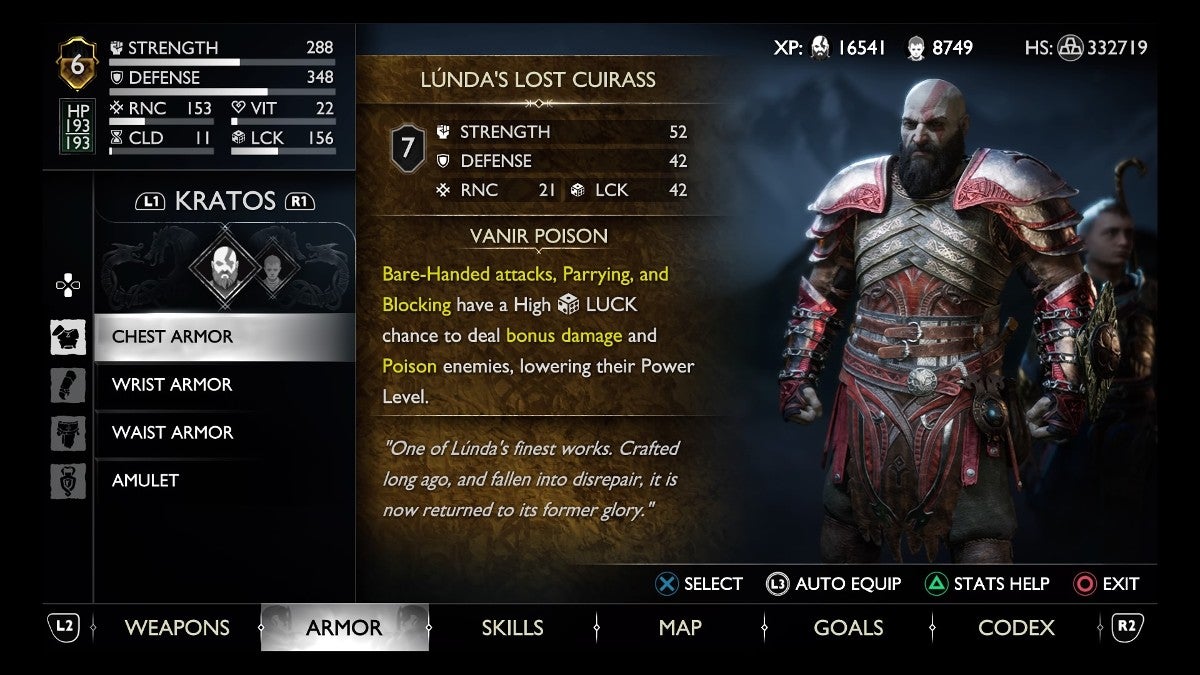
The best armor for this is Lúnda’s Set, which is composed of Lúnda’s Lost Cuirass, Lúnda’s Lost Bracers, and Lúnda’s Lost Belt. The chest armor grants a high Luck-based chance to poison enemies, which reduces their level by one.
This is extremely useful, as it brings otherwise overwhelmingly powerful foes down to a level where you can take them out more easily. Lúnda’s Lost Bracers and Lúnda’s Lost Belt both increase damage dealt against poisoned foes. When both the bracers and belt are equipped, you get a consistent +40% damage against all poisoned enemies—which, in combination with decreasing their level, lets you cleave through their health bars.
To get the most out of this set, you need to attack while unarmed. Since the unarmed light attack combo is very fast, you can frequently poison enemies and get the most out of this armor set’s effects. Be sure to parry and block when possible as well for even more poisonous action!
It’s also worth mentioning that unarmed attacks build up the stun meter of foes more quickly than most weapon attacks. Use this to disable enemies and to get chances to instantly kill them with stun grabs. Such maneuvers can help you defeat high-level enemies quickly and efficiently.
The Best Amulet of Yggdrasil Enchantments for This Build
The Vanaheim enchantments are the best for a poison build, as, if you have three equipped, Kratos’ melee damage against status-afflicted enemies increases based on his Luck stat. This synergizes well with Lúnda’s armor set. With this combo, enemy health bars will veritably melt away with just a few punches and shield bashes.
Another set of enchantments worth equipping is the Svartalfheim ones. When three of these are equipped, Kratos’ stun damage will increase based on his Defense stat. This works well with the stun-related tactics that go well with the poison-related ones.
What Accessories and Weapon You Should Equip to Atreus
You want to focus on sonic and stun-related equipment for Atreus. Sonic Aftershock lets Kratos deal massive stun damage against foes afflicted with the sonic status (which can be applied at the same time as poison).
Sonic Attunement helps you build up the sonic status more quickly, which helps to increase stun damage indirectly. Finally, Runic Potency is also great to use here, as, when a Runic Summon is on cooldown, this accessory massively buffs how much status is applied from runic arrows.
In terms of which bow you should get Atreus to wield, the Talon Bow is the ideal choice, as it gives a base increase to stun applied from both melee and arrow attacks.
Other Helpful Additions for This Build
The Pommels of Brutal Might is an attachment for the Blades of Chaos that grants a Gift of Strength (short Strength stat buff) whenever you use a stun grab on a foe. This lets you gain a nice passive damage bonus after making use of stun-related instant kills—which you will use a lot with this build.
Another helpful addition is the Rönd of Deflection attachment for your shield. This simply increases the timing window on your parries. While not the most useful asset to this build, it makes things easier for unarmed and shield-related tactics. Parrying applies a lot of stun damage to foes and will interrupt their attacks, so make use of this technique often!