![]() Key Takeaway
Key Takeaway
- Start from the Oromuwak Shrine and glide northwest to the Lucky Clover Gazette
- From the Lucky Clover Gazette, climb northwest towards the Skyview Tower in the distance (Rospro Pass Skyview Tower)
- On the way, you may encounter a fallen rock—use Recall on it to get into the air
- Glide or climb northward to Sahirow Shrine
- Then glide west from Sahirow Shrine to the Rospro Pass Skyview Tower
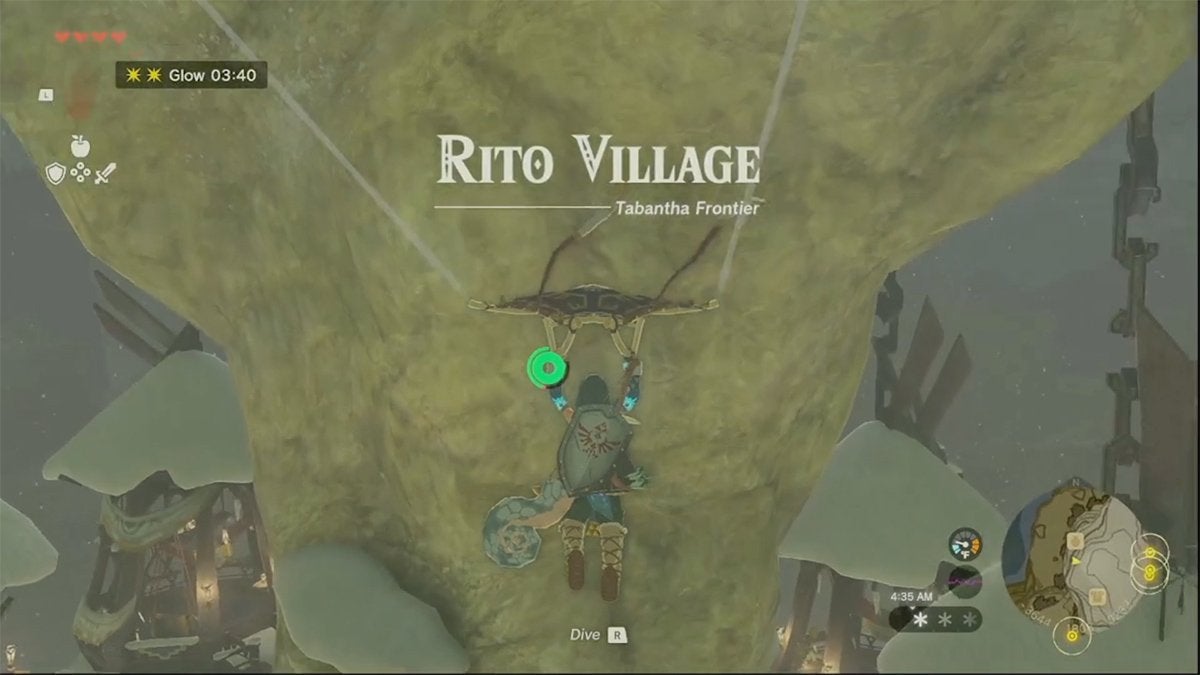
- Afterward, glide south from the Rospro Pass Skyview Tower to Rito Village
You’ll need to know how to get to Rito Village if you want to progress with the main quest in The Legend of Zelda: Tears of the Kingdom. Since the bridge leading there is broken, you have to go around.
Table Of Contents
How to Get to Rito Village in Zelda: Tears of the Kingdom Video Guide
Start From Oromuwak Shrine Near the Lucky Clover Gazette (00:20 in the Video Guide)
The closest fast travel point to the broken bridge leading to Rito Village is at Oromuwak Shrine. If you’ve been here before, this is a great place to start your journey to Rito Village. However, if you haven’t, it’s worth seeking out as doing so lets you get back to the Lucky Clover Gazette efficiently in the future.
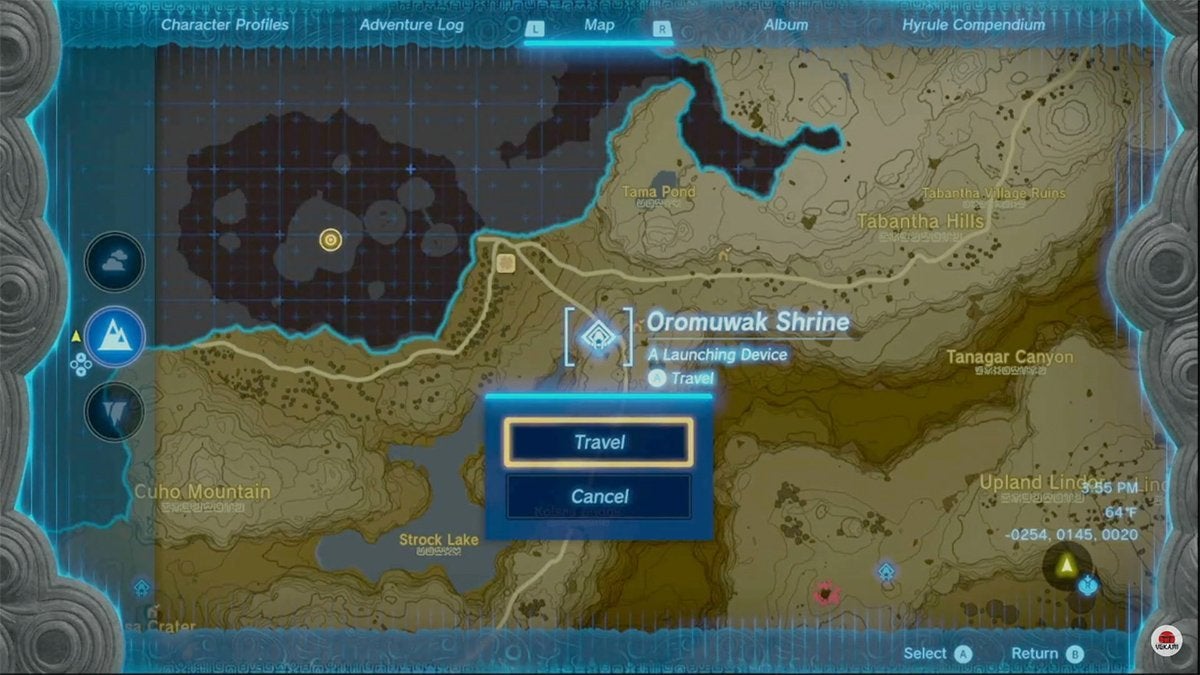
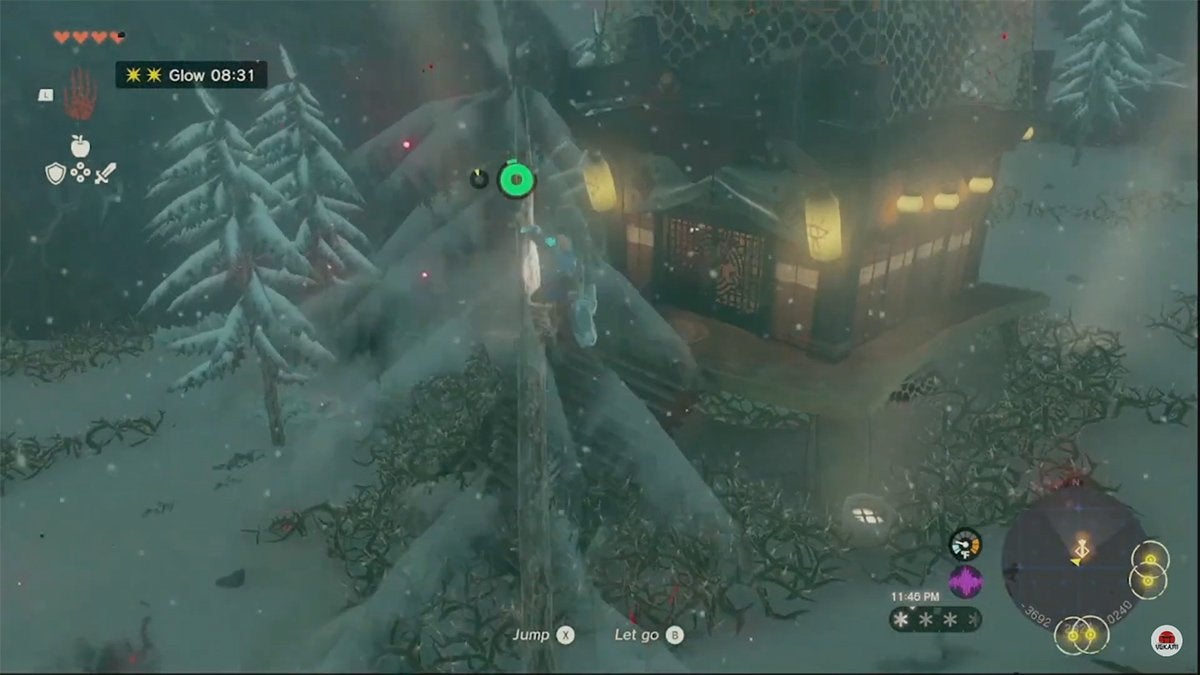
Once you’re here, complete the shrine and then glide down to the Lucky Clover Gazette. Slightly northwest of the building, you’ll find the broken bridge. Sadly, you can’t fix it with any of your powers unless you cut down and attach a bunch of tree trunks—which isn’t worth the time.
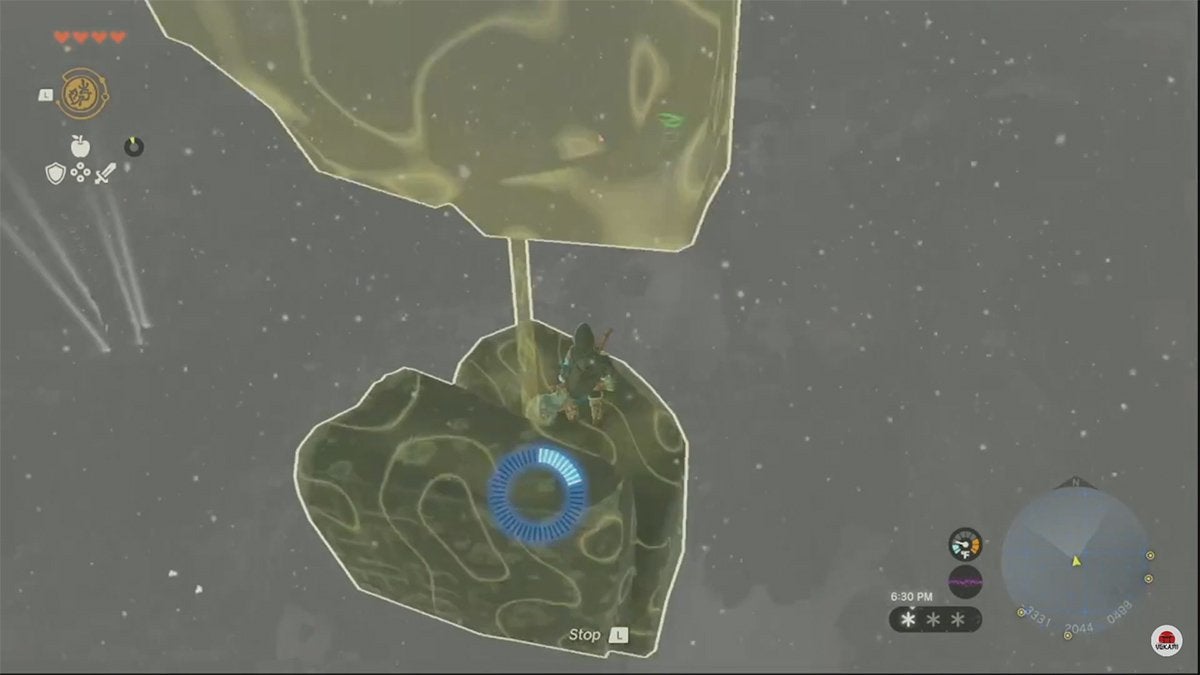
From here, head north and start climbing around the snowy mountainscape (01:35 in the Video Guide). You want to head towards the Rospro Pass Skyview Tower to the northwest. Keep heading in that direction until you come across a fallen rock. Use Recall on that fallen rock to take a trip into the air (02:37 in the Video Guide).
Complete Sahirow Shrine (03:40 in the Video Guide)
To the north, you’ll see a Shrine. It’s a bit of a detour, but won’t take you too far out of the way.
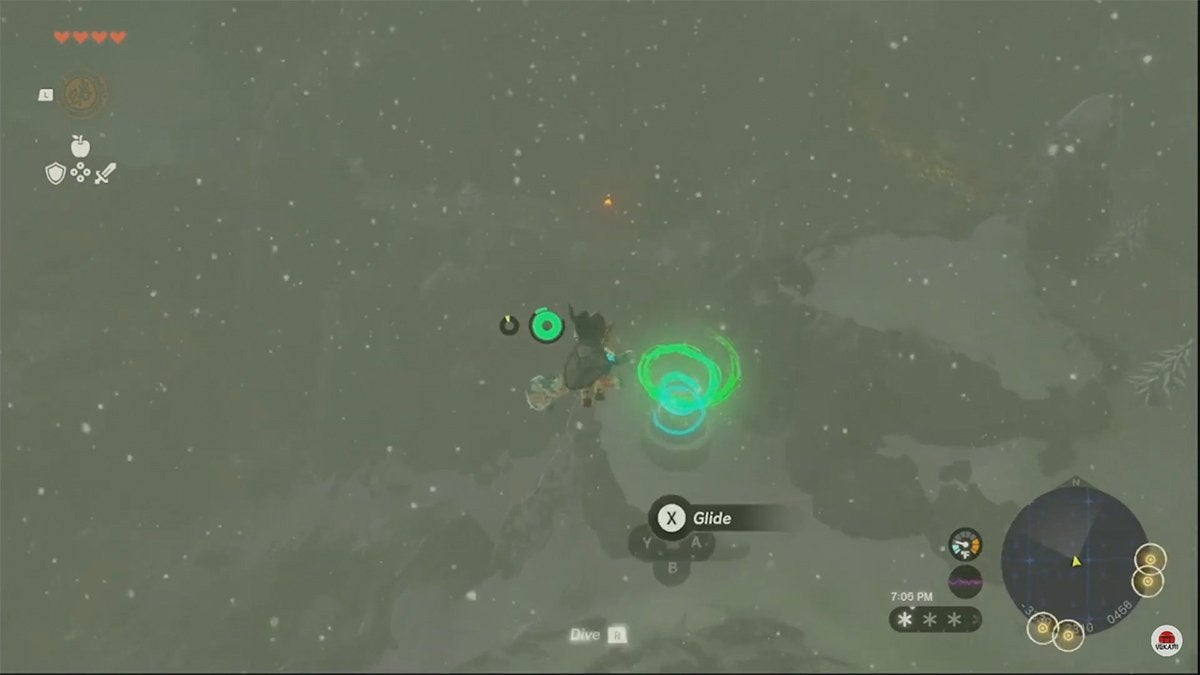
Inside are a few obstacle courses featuring motion-sensor laser puzzles. Overall, this is a pretty straightforward Shrine to complete. Check out 03:40 in the Video Guide if you want some help getting through it.
Glide From Sahirow Shrine to the Rospro Pass Skyview Tower (07:07 in the Video Guide)
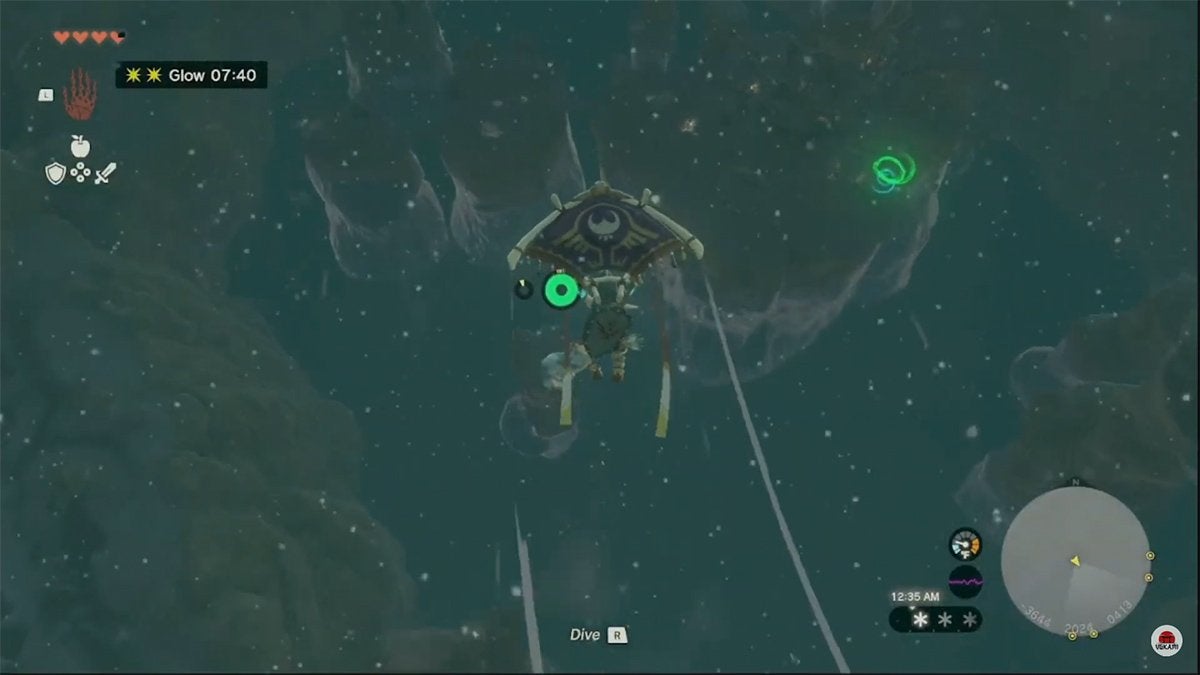
After making your way to Sahirow Shrine, leap off the ledge to the west and glide to the Rospro Pass Skyview Tower. Once you get to the base of the tower, you’ll notice that it’s surrounded by thorns. To get over them, climb any nearby tree, jump off, and use the Paraglider to reach the tower’s entrance (07:58 in the Video Guide).
Following this, activate the tower so that you can both uncover this part of the map and start gliding toward Rito Village.
Glide From Rospro Pass Skyview Tower to Rito Village (09:50 in the Video Guide)
Rito Village is south of the Rospro Pass Skyview Tower. As you glide that way, ignore the smaller islands surrounding the largest one in the center—there’s nothing worth exploring on the outer islands except for a Korok or two.
Ideally, you want to land on the east part of the large central island. This brings you to the base of Rito Village and lets you progress upwards in an efficient way that allows you to find all the main points of interest easily.
A Tour of Rito Village
Besides the quest marker that leads you to the top of Rito Village, there are five points of interest here that you should check out. One of them is a Goddess Statue, three are stores, and the last is a Shrine.
Where to Find the Goddess Statue in Rito Village (10:56 in the Video Guide)
As you make your way into the village from the east, you’ll find the main set of stairs that leads upwards through the village. Near the base of these stairs is a Goddess Statue in an alcove within the large central spire of the village.
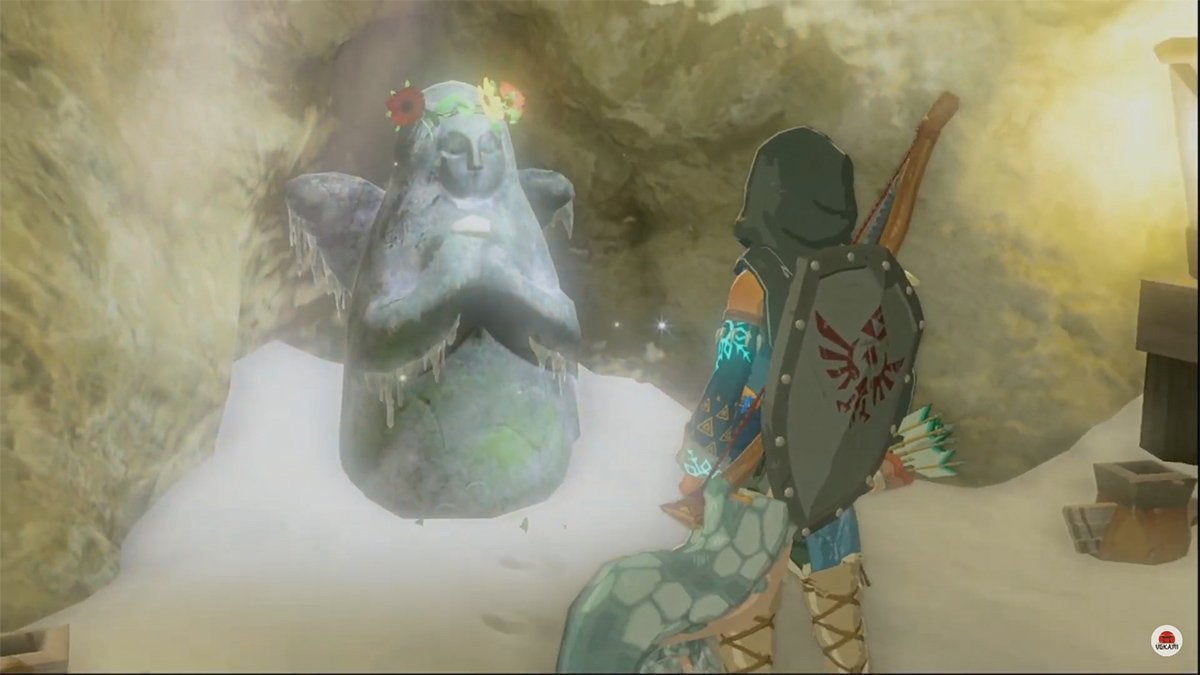
Use this Goddess Statue to turn your Lights of Blessing into Heart Containers and Stamina Vessels. Once you’ve offloaded a bunch of glowing orbs, continue up the stairs to reach the shops.
Rito Village’s Swallow’s Roost Inn (11:56 in the Video Guide)
There’s a quaint little inn within Rito Village. Slightly up the stairs from the Goddess Statue, you’ll find the Swallow’s Roost.
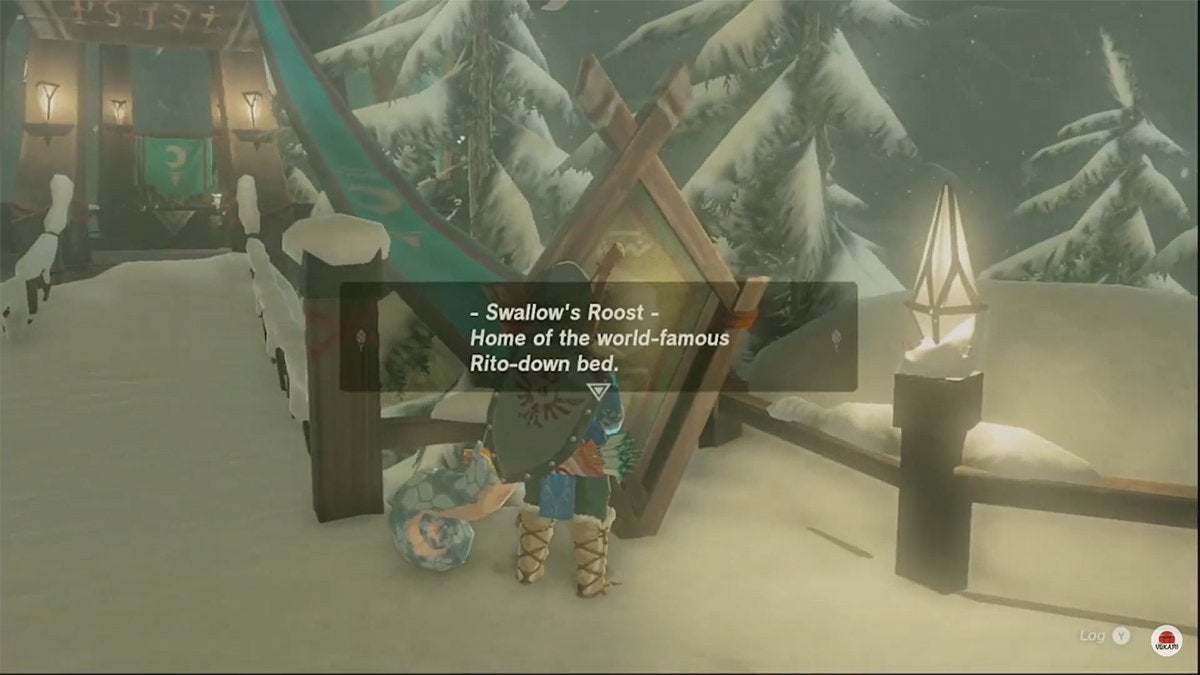
Here, you can rent a regular bed for 20 Rupees or a Rito-down bed for 50 Rupees. A regular bed fully heals you whereas a Rito-down bed does the same but also gives you three additional temporary Hearts of maximum health and one temporary ring of maximum Stamina.
Rito Village’s The Slippery Falcon Ingredient Store (13:35 in the Video Guide)
The next building up the stairs from Swallow’s Roost is The Slippery Falcon—an ingredient store. This is the place to stock up on a few rare food materials as well as find some recipes.
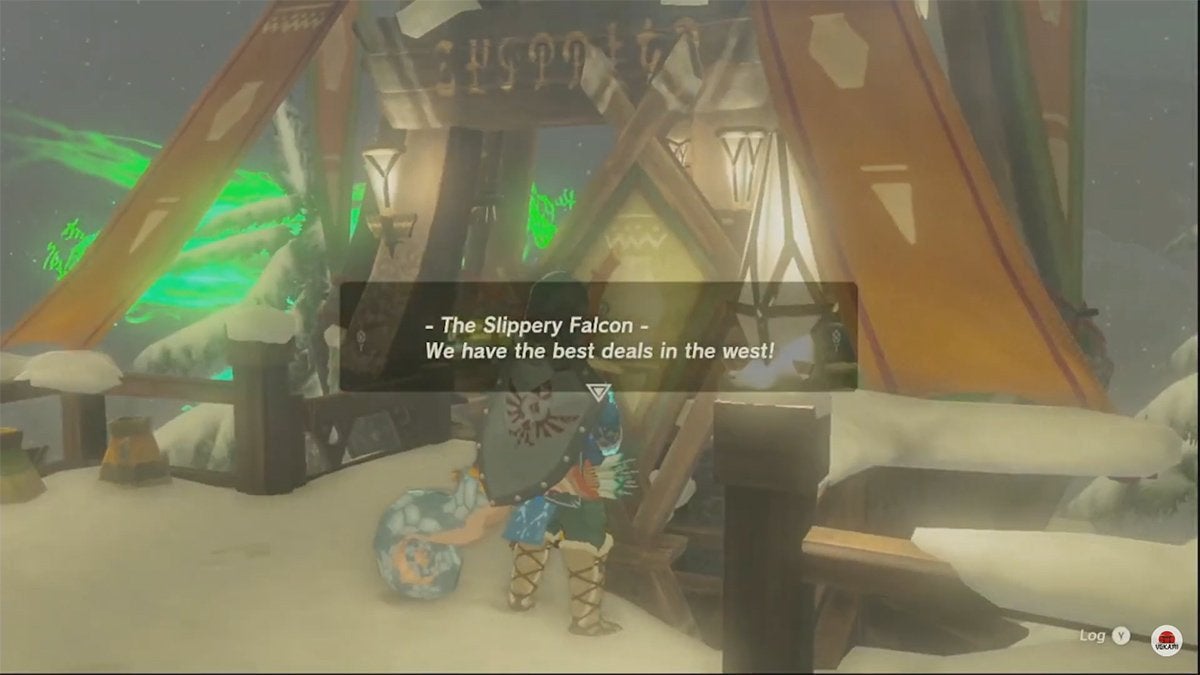
On your first visit to the shop, you’ll find the following goods for sale:
- Goat Butter x3 (costs 12 Rupees each)
- Cane Sugar x2 (costs 12 Rupees each)
- Oil Jar x3 (costs 12 Rupees each)
- Bundles of 5 Arrows x3 (costs 20 Rupees each)
In addition to the store’s wares, you’ll find a book on the eastern side of the small store (15:05 in the Video Guide). This book contains the recipes for Hot Buttered Apples, Nutcake, and Fish Pie. However, Link won’t absorb these recipes into his brain—you have to manually create them once each to learn the recipes.
Rito Village’s Brazen Beak Armor Store (16:07 in the Video Guide)
Last but not least is Rito Village’s armor store: the Brazen Beak. It’s found a bit up the stairs from The Slippery Falcon.
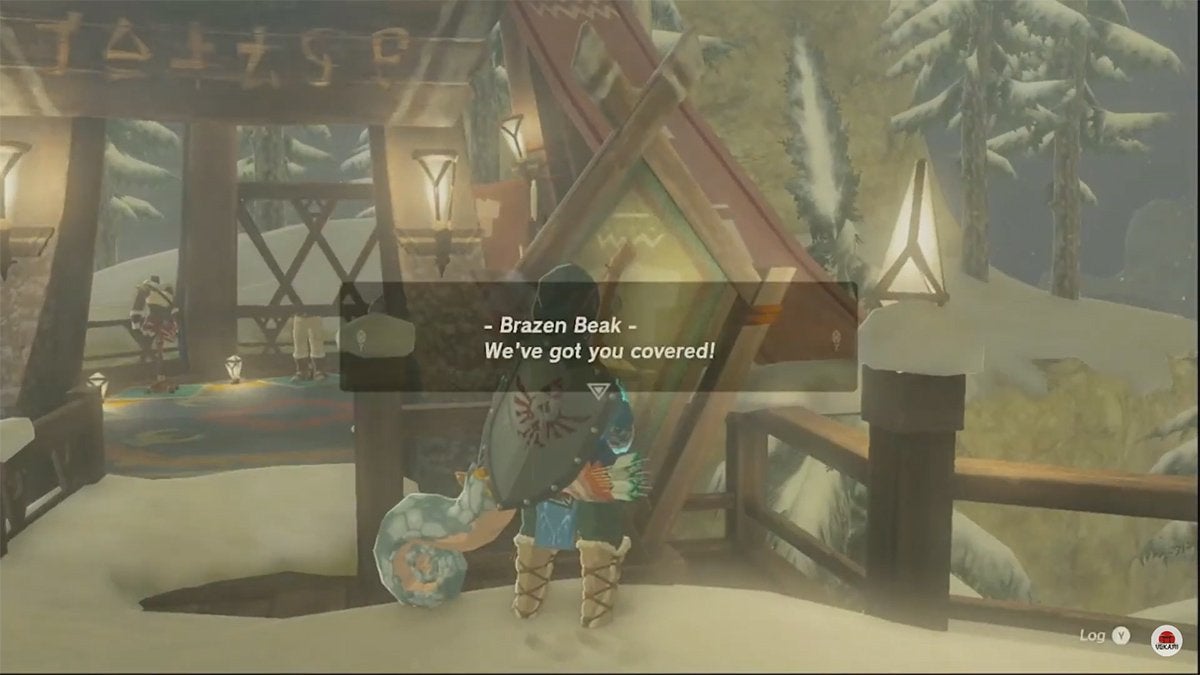
Within, you’ll find a set of armor for sale that each gives you one tier of cold resistance. These aren’t the only pieces of armor that have cold resistance—one can be found in the tutorial area of the game—but, if you missed getting the Archaic Warm Greaves on the Great Sky Island, this is a chance to bundle up and stay a bit warmer.
Here’s what the Brazen Beak sells:
- Snowquill Trousers (3 armor points and 1 tier of cold resistance) which costs 1,000 Rupees
- Snowquill Tunic (3 armor points and 1 tier of cold resistance) which costs 500 Rupees
- Snowquill Headdress (3 armor points and 1 tier of cold resistance) which costs 650 Rupees
It’s worth mentioning that this part of the map is cold—but not that cold. Tier 1 cold resistance is more than enough to prevent you from losing Hearts at ground level. With that said, there are definitely colder areas in Tears of the Kingdom, so it may be worth getting more pieces of this set at some point.
Completing Gatakis Shrine (17:10 in the Video Guide)
The Shrine in Rito Village is the Gatakis Shrine. Within, there are Paraglider puzzles—which are relatively simple. Since there aren’t any other fast travel points in Rito Village, you should complete this Shrine so that you can warp back here later on. If you need help, check out the chapter for this in our Video Guide (17:10).
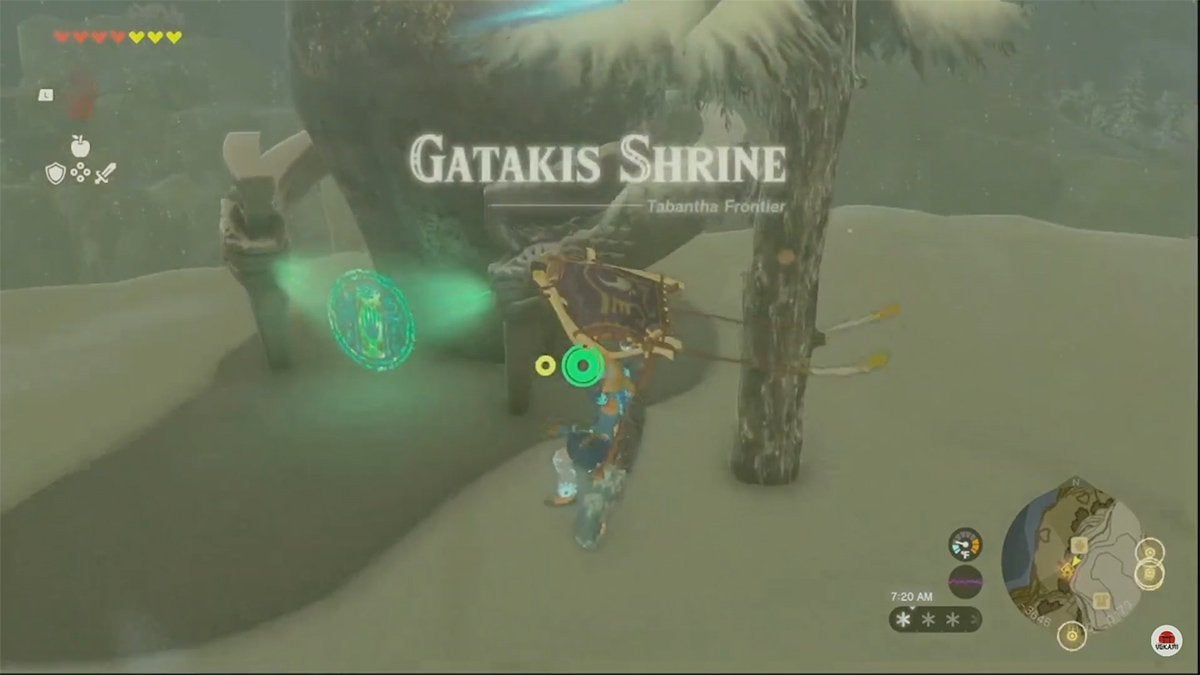
It’s also worth mentioning that east of Gatakis Shrine’s entrance there’s a small rock on the ground. Under it is an easy-to-find Korok—which comes in handy if you’ve met Hestu and want to increase your inventory space.
Once you’ve explored these five points of interest, you’ve found most of what Rito Village has to offer! All that’s left now is to take care of the quests in this area (if you haven’t already done so).
After doing everything you want to, set off from the village to seek out your next goal! We recommend learning how to shield surf, as the snowy slopes of this region are just begging for you to shred some powder. This lets you get downhill even faster than using the paraglider—but comes at the cost of shield durability. Enjoy the winter wonderland, adventurers!