
![]() Key Takeaway
Key Takeaway
On the ground floor, head to the north corner of the labyrinth. Here, there’s a corridor that leads you into the heart of the maze. Once you’re there, use the circular statue to unlock the way into the North Lomei Labyrinth’s Top Floor. Also, melt some nearby ice and enter the Mayaotaki Shrine for a Diamond and a Light of Blessing.
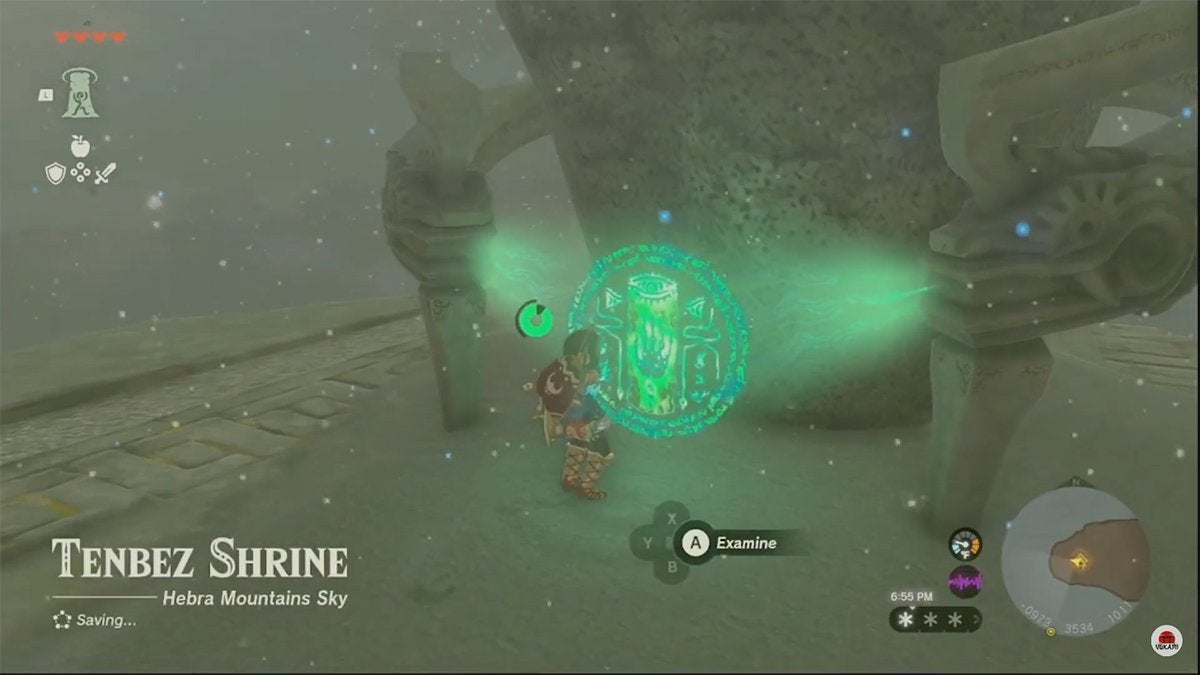
Head up to the North Lomei Labyrinth’s Top Floor by using the stone chunks above the center of the maze’s ground floor or by traversing the East Hebra Sky Archipelago (via the Pikida Stonegrove Skyview Tower). When you reach the entrance, complete the nearby Tenbez Shrine. Then, examine the circular statue in front of the labyrinth to open the way.
For an easier time, climb the walls outside the North Lomei Labyrinth’s Top Floor to access and activate the four terminals. Warp back to Tenbez Shrine between each terminal activation to avoid navigating the maze the “proper” way. Activate the three outer terminals first and end by activating the one in the center of the sky maze.
Once all terminals are activated, jump off the ledge near the center of the sky maze and descend into the North Lomei Chasm where you’ll meet the boss: Flux Construct III. Use Ultrahand, Recall, and terrain abuse to beat this boss and then collect the rewards.
The North Lomei Labyrinth is a large location in the northwest section of the map. In The Legend of Zelda: Tears of the Kingdom, you’ll find this three-layered structure—and its hot loot—in the northeastern part of the Tabantha Tundra. Epic adventure and valuable treasures await!
Table Of Contents
North Lomei Labyrinth Complete Guide in Zelda: Tears of the Kingdom Video Guide
How to Find the North Lomei Labyrinth (Ground Floor)
The North Lomei Labyrinth is in the North Tabantha Snowfield (the northern part of the Tabantha Tundra). Specifically, it’s on the peninsula in the northeast. It’s tricky to navigate an area without updating your map first. To get around this, go to the Pikida Stonegrove Skyview Tower to uncover the map of this part of the game.
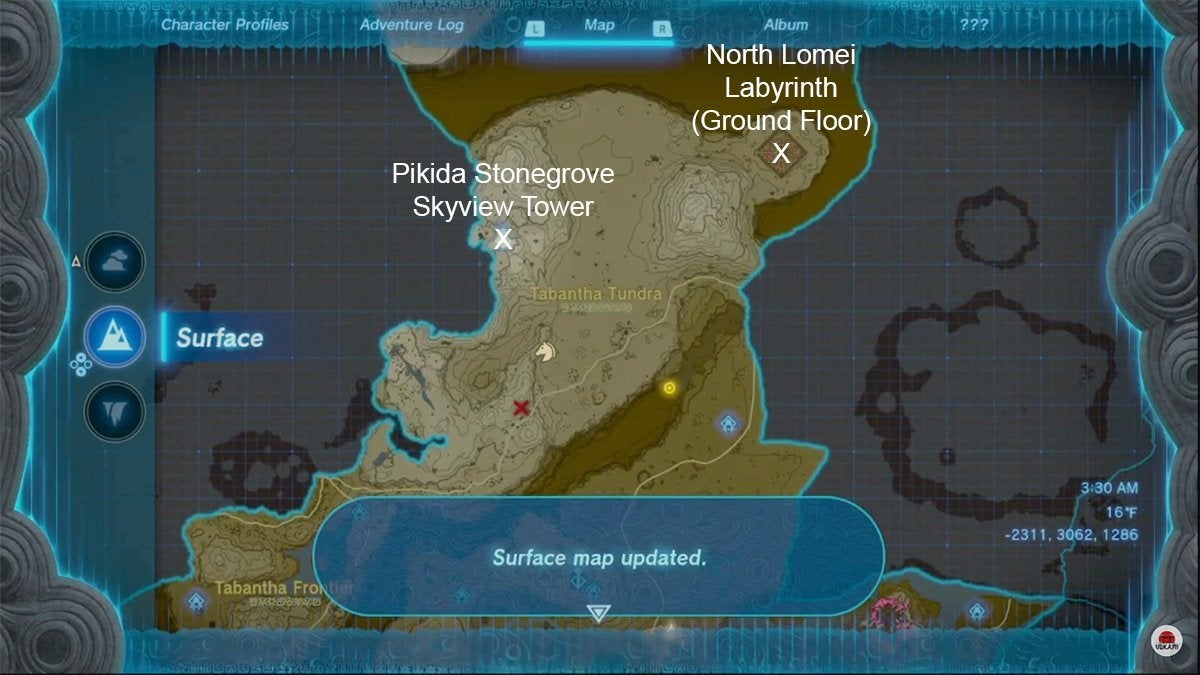
After getting launched into the sky by the Pikida Stonegrove Skyview Tower, glide eastward for an easy way to approach the North Lomei Labyrinth. The entrance to this maze is on the west side.
How to Get to the Center of the North Lomei Labyrinth Ground Floor (00:15 in the Video Guide)
Sadly, you can’t access the center of the labyrinth by dropping in from above. You need to make your way to the north part of the maze to do so. Follow the image below if you need help:
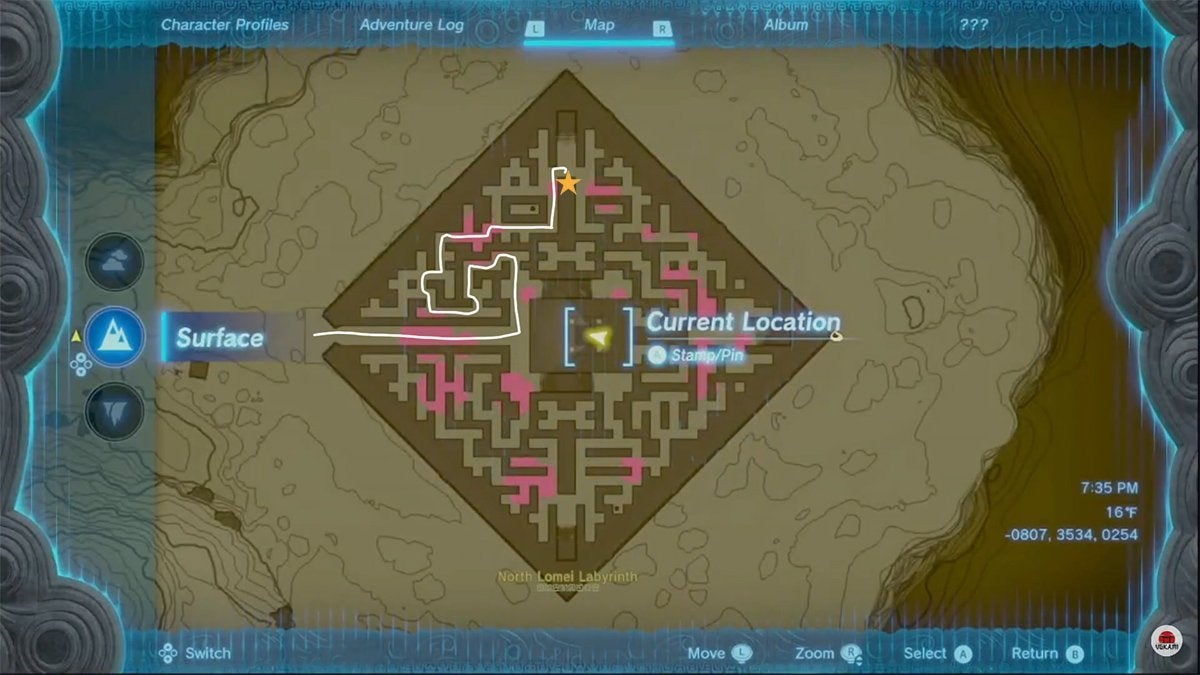
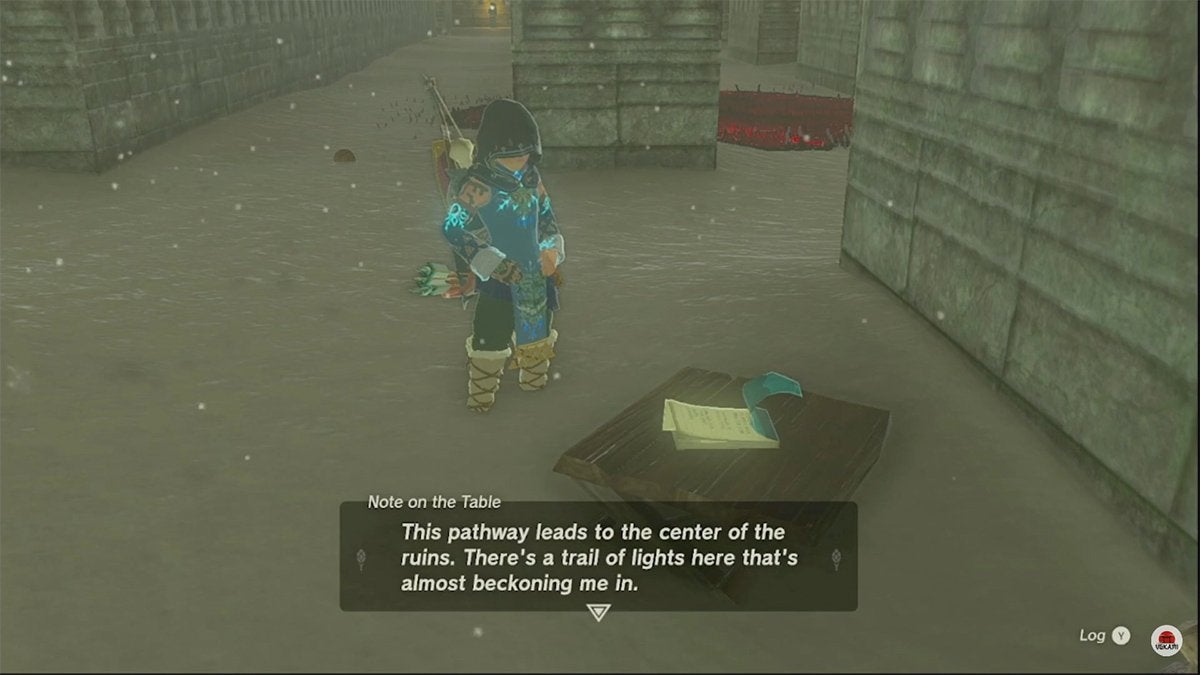
Once you make it to the north of the labyrinth, you’ll find a journal entry. When you read it, you’ll get a hint about heading south to follow the light that you see at the end of the corridor. Follow this hint to start making your way towards the labyrinth’s heart.
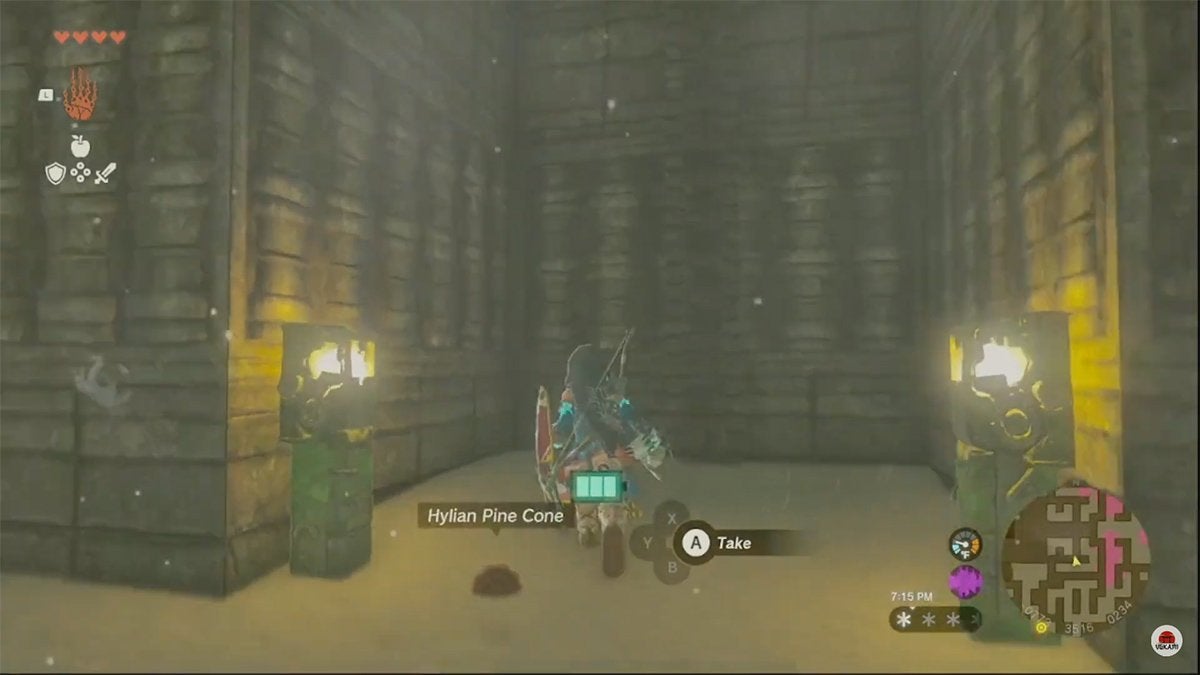
There’s also a chest with some decent loot (like powerful weapons) located at each corner of this maze. Feel free to gather them up before heading to the center of the labyrinth.
The path from here to the center of the maze is pretty linear, so you are unlikely to get lost. As you progress, avoid any Gloom patches by climbing around them. Keep going until you see two lights flanking a ladder. Climb this ladder to reach a short path that leads to the middle of the labyrinth.
Unlock the Western Entrance to North Lomei Labyrinth’s Top Floor (03:33 in the Video Guide)
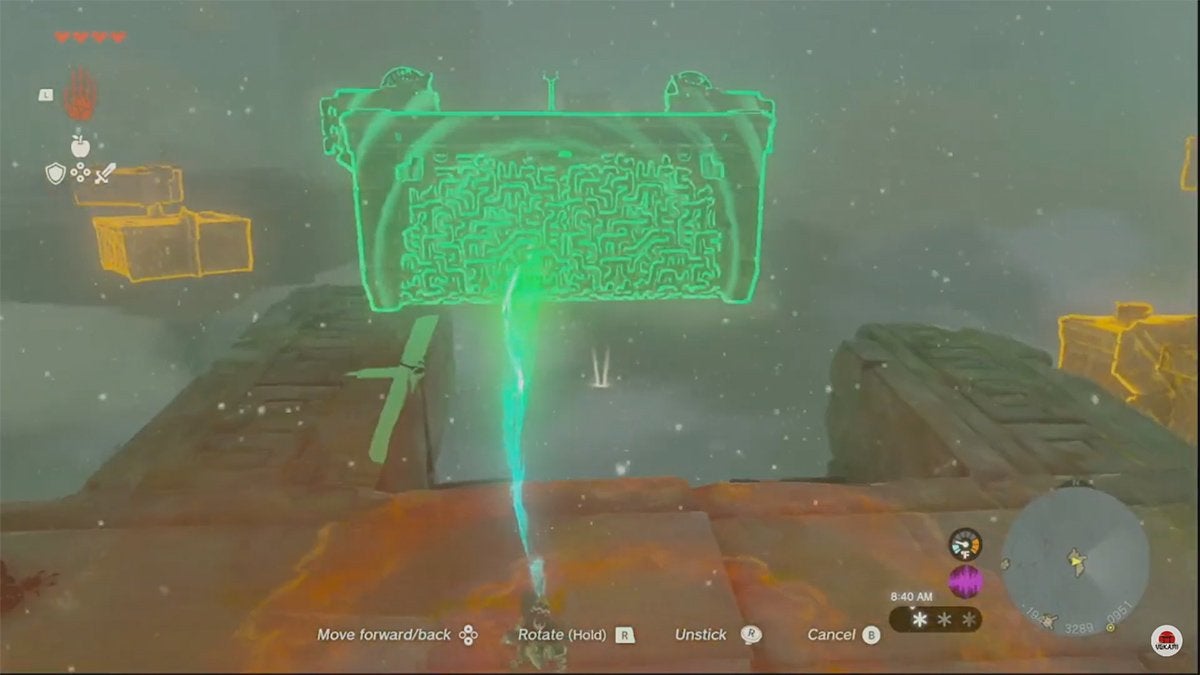
While you’re in the center of the labyrinth’s ground floor, you should examine the circular statue on the east side. When you approach it, a familiar green light and the shape of a handprint appear. Interact with it to unlock the entrance to the North Lomei Labyrinth’s Top Floor.
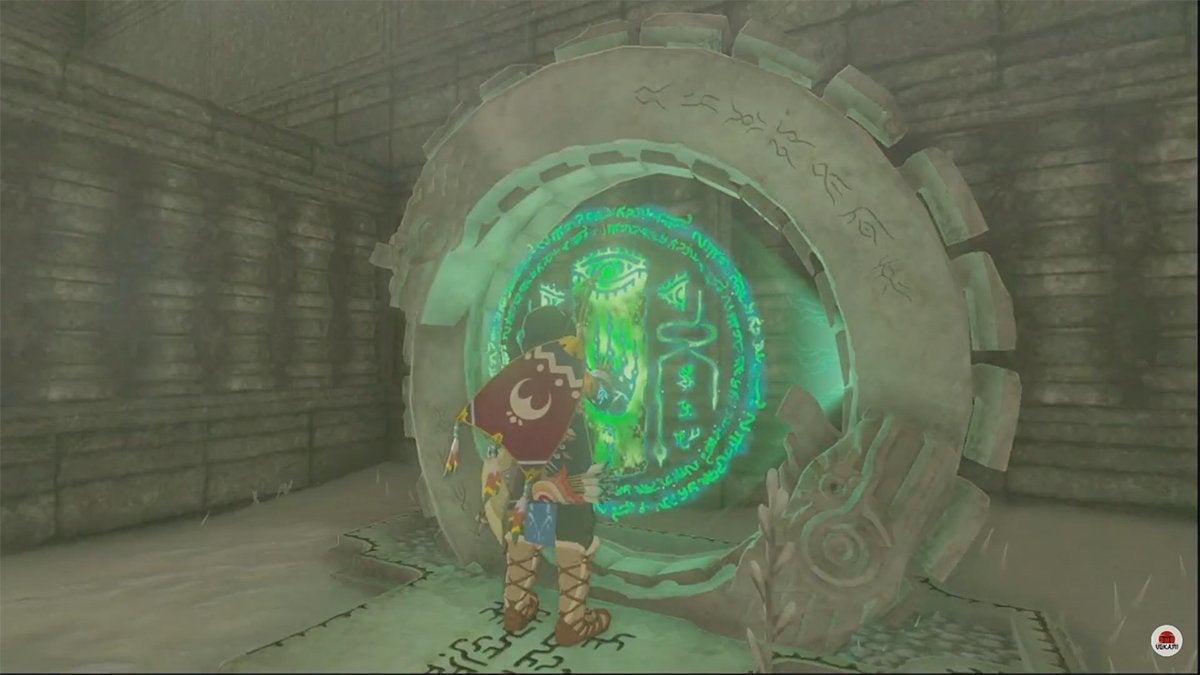
Enter Mayaotaki Shrine (04:03 in the Video Guide)
You’ll also notice a large Shrine in the center of the maze’s heart. However, the way into this Shrine is blocked by ice. The only way to get the ice out of the way is to melt it with any sort of fire attack.
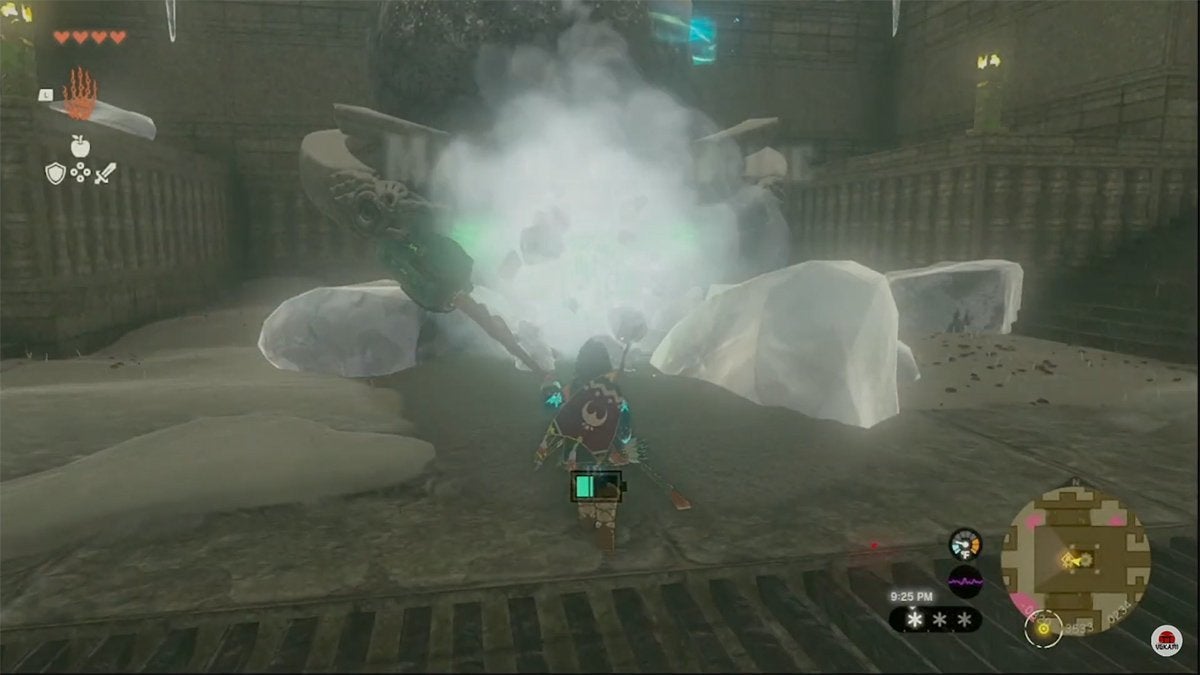
If you have a Zonai Flame Emitter attached to any of your weapons or shield, this would make quick work of the ice. Alternatively, you can use arrows fused with Flame Fruit to melt the ice.
After you break the ice and introduce yourself to the Mayaotaki Shrine, head inside for some loot! There are no puzzles in this Shrine—only a Light of Blessing and a chest containing a Diamond. Once you’ve gathered the goods, slide out of the Shrine.
How to Get to the North Lomei Labyrinth in the Sky (Top Floor) (07:22 in the Video Guide)
There are two ways you can get to the North Lomei Labyrinth’s Top Floor. Above the center of the labyrinth’s ground floor, there are floating chunks of rock. If you have Zonai parts that can give you a lift, you can use them to reach these rocks.
This vertical path eventually leads you into a low-gravity area. At that point, use a combination of Ascension, jumping, and gliding to make your way to the labyrinth in the sky.
If you’d rather take a different way, you can! Head back to the Pikida Stonegrove Skyview Tower and launch yourself into the air again. This time, however, glide to an island in the sky to the northeast.

As you land, the game tells you that you’re on the East Hebra Sky Archipelago. You can use this archipelago to reach the entrance to North Lomei Labyritnth’s Top Floor. We recommend you save early and often while traveling these sky islands, as falling off at any point means you’ll have to start over.
Crossing the East Hebra Sky Archipelago
On the northeast side of the sky island you land on, there’s a moveable platform and a few Zonai parts. Attach the two fans, two energy canisters, and the control device onto the platform. This creates an airship that you can fly across most of the archipelago (09:30 in the Video Guide).
Once you’re ready, activate the airship and fly in a straight line to reach the next sky island. Then, once your airship presses up against the next island, jump off and take out the construct enemies nearby. After that’s taken care of, use Ultrahand to move your airship to the other side of the sky island—you want it facing northeast (10:23 in the Video Guide).
To the northeast is the next island in the archipelago. If you want to get there a bit faster, there are some Zonai rockets nearby that you can attach to your airship. Be warned that rockets make your airship much harder to steer—but cooler and more fun.
Use the Device Dispenser and Find the Korok
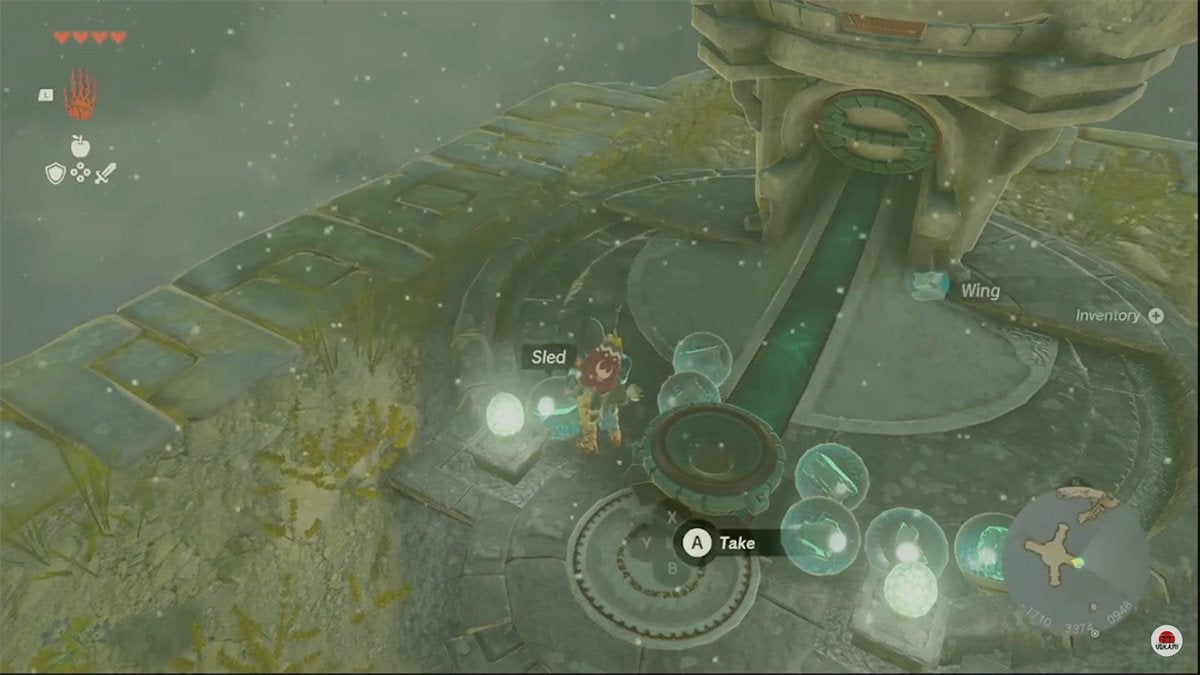
When you reach the sky island to the northeast, you’ll find a Device Dispenser on it. This dispenser has a few useful parts, like Lights, Sleds, and Carts, so grab a bunch of them by putting Zonai parts you don’t need into the dispenser’s bowl (12:24 in the Video Guide).
Next, go to the center of this sky island and adjust the pushable lever with four handles so that it points the pusher to the north. The next sky island you want to visit is that way.
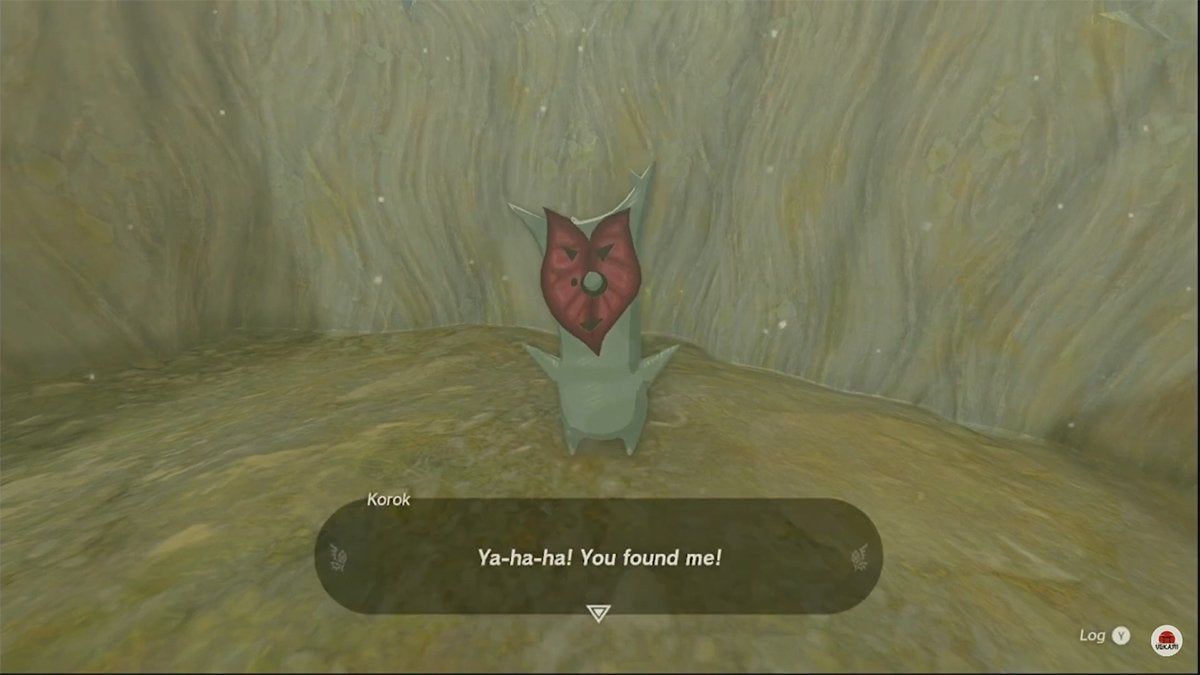
Once you launch yourself and land safely on the island to the north, check out the large tree stump (13:16 in the Video Guide). There’s a yellow flower here that, if you touch it, moves. Follow and touch the flowers until a Korok appears (13:42 in the Video Guide).
Make Another Airship and Go East
From here, look around the east side of this sky island to find another platform and a fan. Attach the fan to the platform to make another simple airship. Point this one east and it should take you most of the way to the North Lomei Labyrinth’s Top Floor (13:53 in the Video Guide).
However, you need to be careful here. The fan loses power long before it pushes you to the labyrinth’s entrance. This means you’ll have to wait for it to recharge. You can’t afford to wait around too long, as the platform despawns after a few minutes.
To avoid issues here, attach more Zonai parts to your airship to make it go faster and give it more energy. If you’re going the wrong way, reposition some of your fans to push the platform in the correct direction.
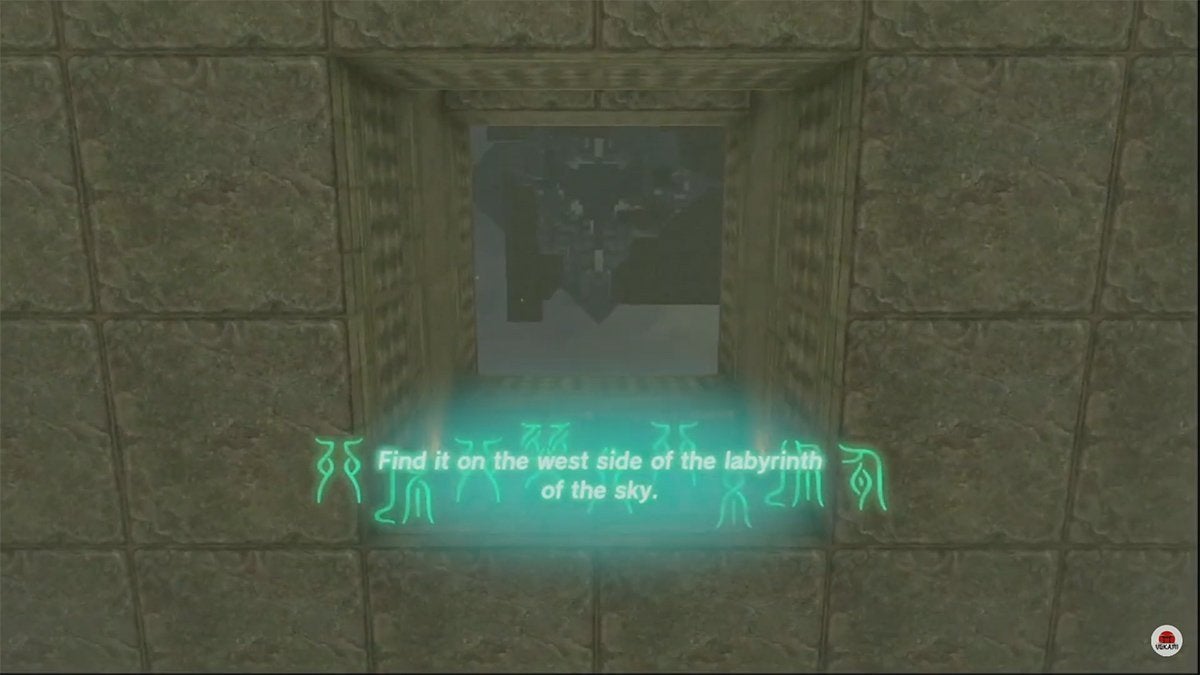
If done correctly, you’ll reach the western side of the North Lomei Labyrinth’s Top Floor. The Tenbez Shrine is also here, so be sure to enter it for a quick and easy Light of Blessing.
Completing Tenbez Shrine (17:02 in the Video Guide)
In the first part of this Shrine’s puzzle, you need to face the two pushers launching a ball back and forth. There’s also a yellow switch in the center of the room. The last thing to note (besides the chest containing a single Zonai part) is the big target on the left wall.
Wait until the ball is resting on the right-side pusher. Then, hit the switch (smack it with your weapon) to turn on low gravity. When the right-side pusher launches the ball, it flies high enough to hit the target on the left wall (17:48 in the Video Guide). When hit, the target opens a door high up on the right wall.
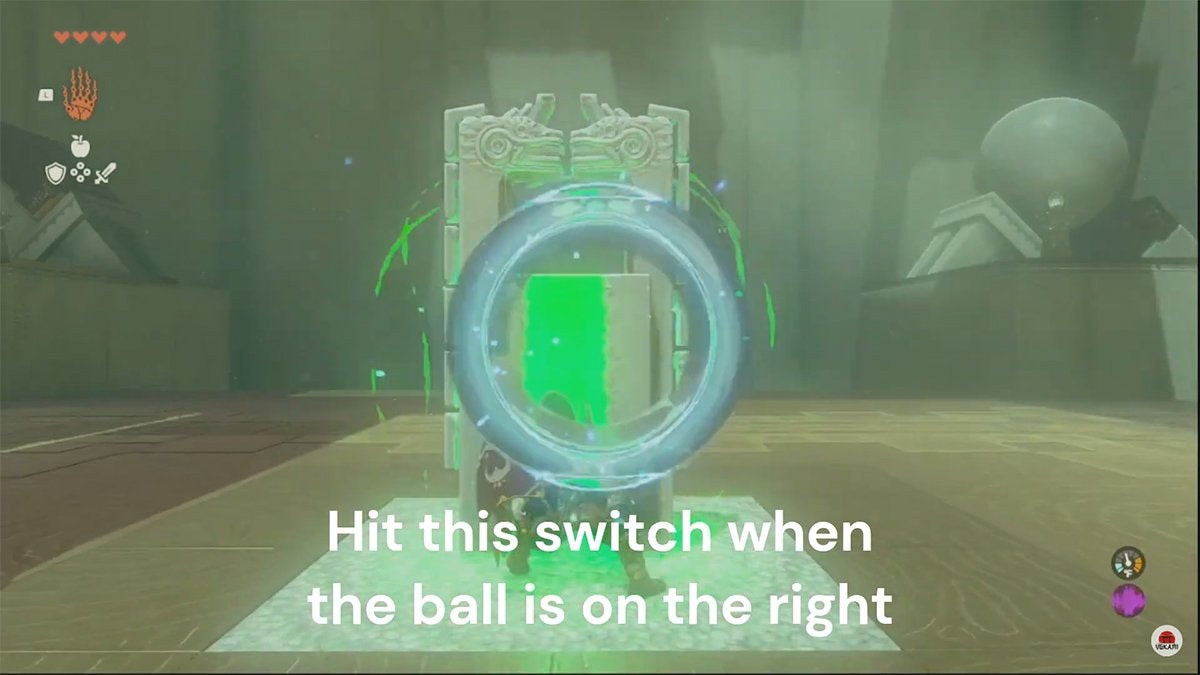
Afterward, the ball respawns on the left-side pusher. Leave the switch on and this pusher launches the ball through the newly-opened door on the right wall. Next, hop onto the left-side pusher and follow the ball through the doorway (18:15 in the Video Guide).
Once you’re in the next room, you’ll find another switch—but this one’s already on. In front of the switch is an enclosed area that can only be entered from above. There’s another pusher in this room as well, which is to the right of the enclosed area.
When the ball enters this upper room, it lands on the pusher. Since low gravity is still on, the pusher launches the ball over the enclosed area. As the ball is over the middle of the enclosed area, hit the switch to turn off low gravity. This causes the ball to fall and land on a button in the enclosed area (18:41 in the Video Guide).
Afterward, a door leading to the end of Tenbez Shrine opens. Proceed through it to get a Light of Blessing then exit the Shrine.
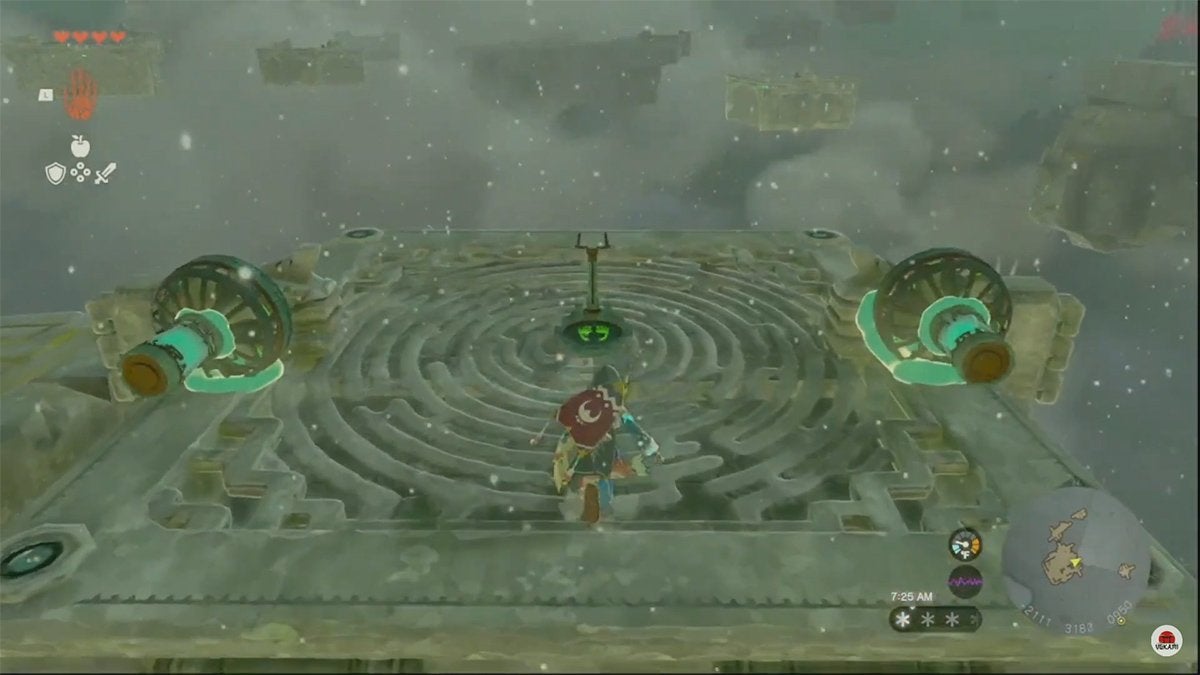
Entering North Lomei Labyrinth’s Top Floor (19:39 in the Video Guide)
To open the entrance to the labyrinth’s top floor, use the circular statue in front of it. After some cryptic dialogue about activating four terminals, the stone door opens. The game expects you to use the Paraglider, low gravity, air currents, and Zonai parts to navigate the maze—but we found a better way.
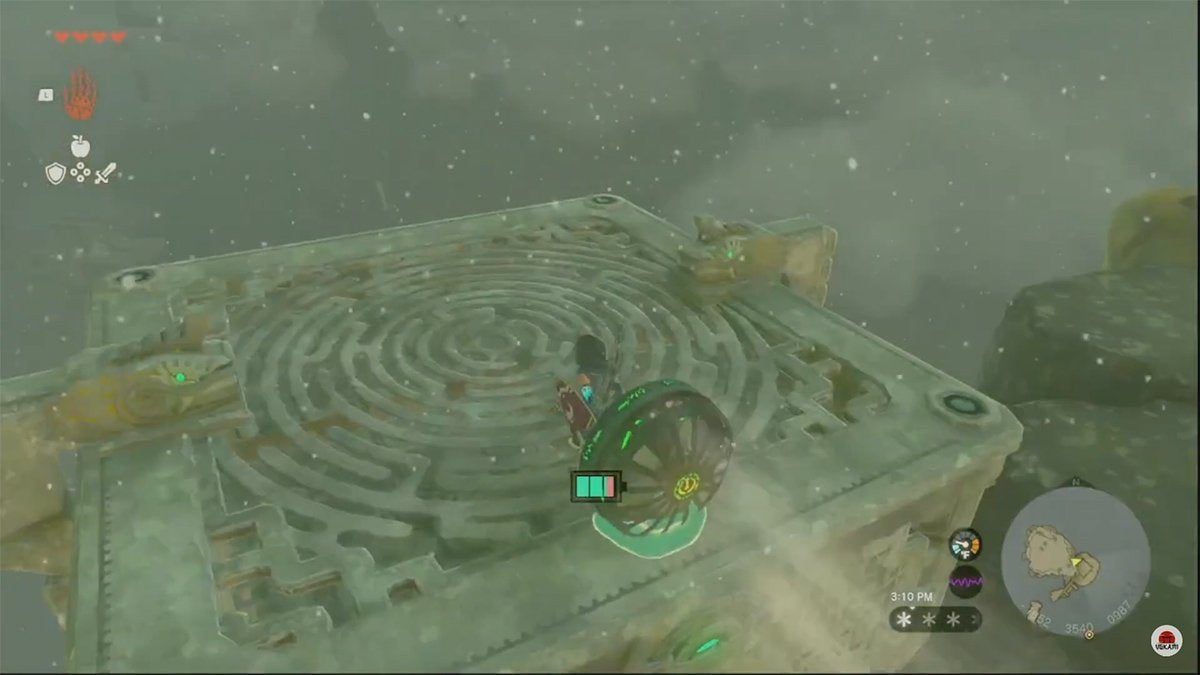
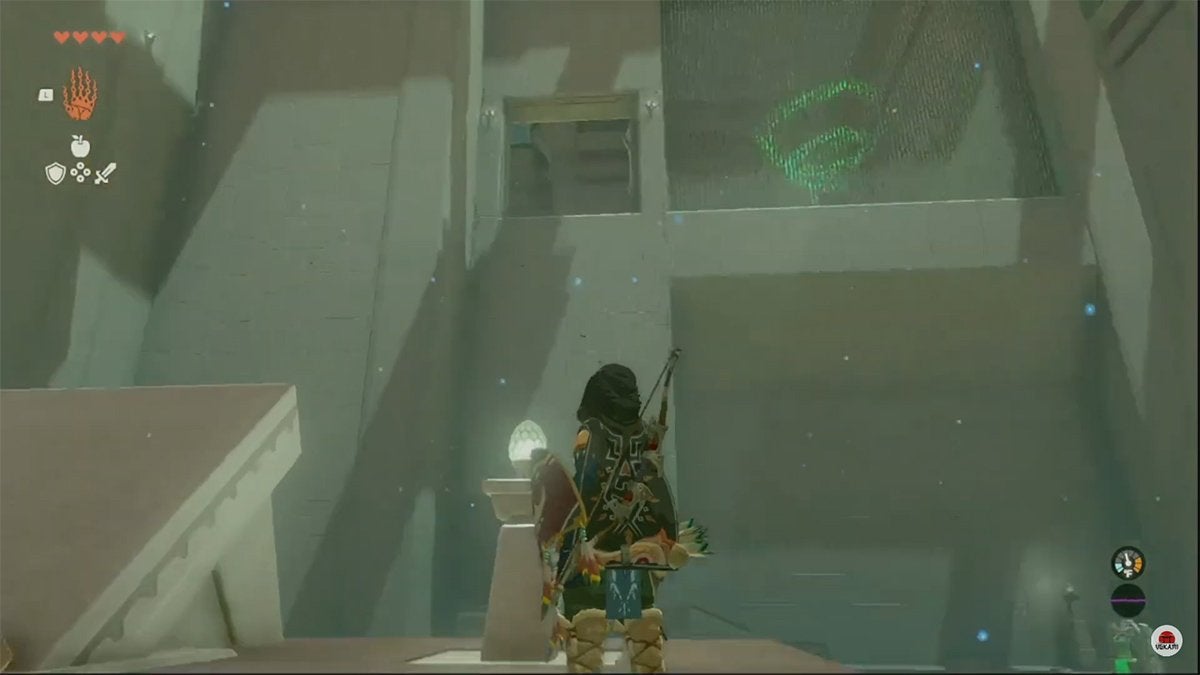
The walls flanking the entrance are adorned with carvings of dragon heads. You can climb these easily thanks to there being ledges on top of each that let you rest and recover your stamina (20:32 in the Video Guide).
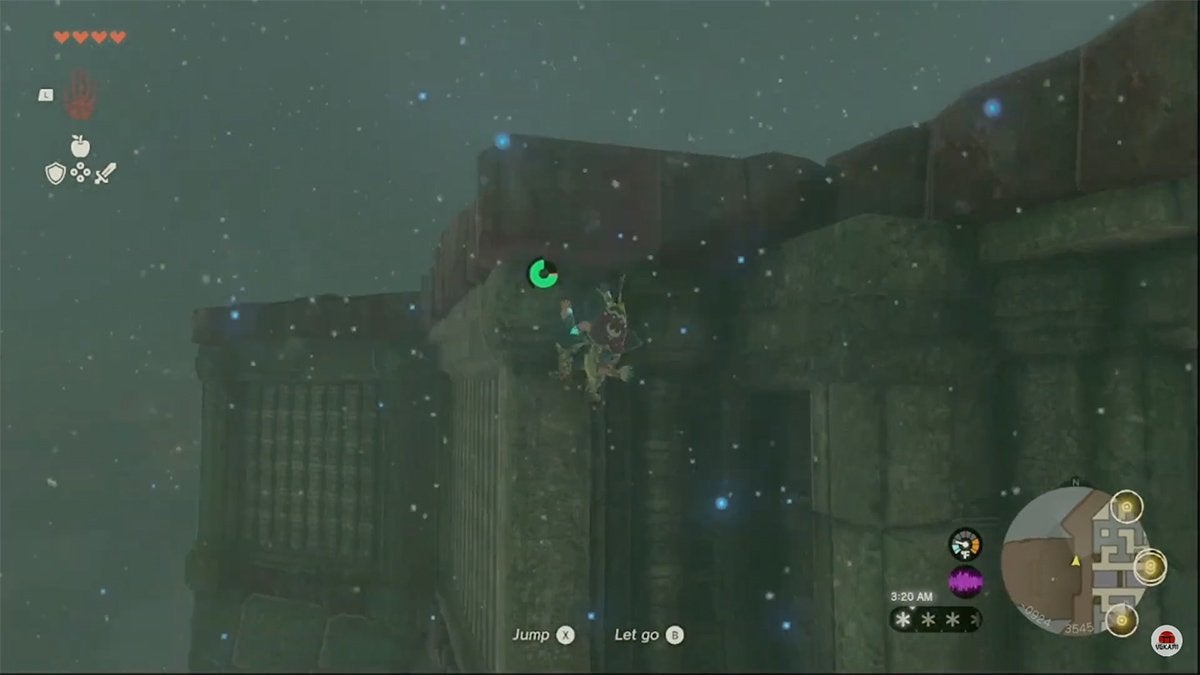
From on top of the maze, you can make your way to all of the terminals without much issue. Simply run to their location and glide down to them with the Paraglider. After you activate a terminal, warp back to Tenbez Shrine and climb the labyrinth’s outer wall again. Rinse and repeat until the outer terminals are all active.
We recommend activating the three terminals around the edges of the labyrinth first, as the central terminal opens up a new path once all the terminals are activated. It’s most efficient to do things this way.
After the central—and final—terminal is activated, the labyrinth gives you an easy way to fly up to a ledge overlooking a big drop (23:36 in the Video Guide). This big drop leads into the North Lomei Chasm. Before diving off the ledge, make sure to explore the top floor of the labyrinth if you want to find some loot.
Beating the Boss (Flux Construct III) in the North Lomei Chasm
Once you dive into the North Lomei Chasm, you’ll be in near-complete darkness. Use Brightbloom Seeds to light the way. You can do this by either dropping Brightbloom Seeds and hitting them or by fusing them into arrows and shooting them.
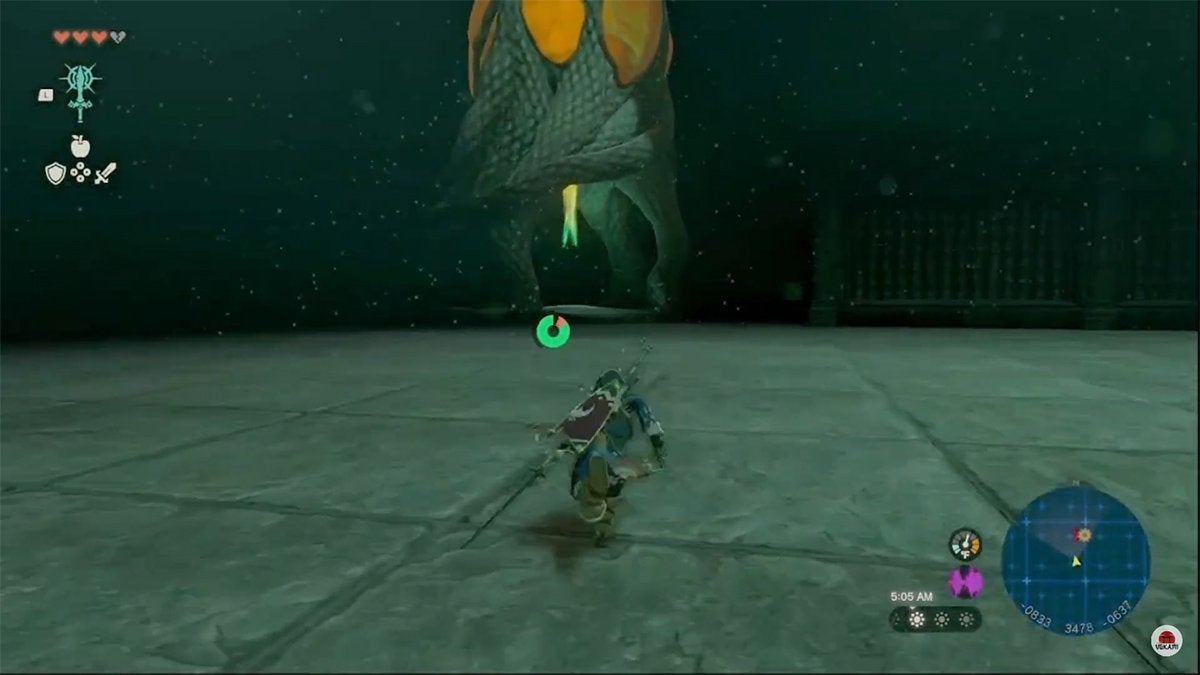
When you descend the stairs, you’ll find a large Zonai enemy waiting in an obvious boss arena. This is the boss of the North Lomei Labyrinth. After you’ve prepared yourself, jump into the arena or shoot the boss with an arrow to begin the battle (26:58 in the Video Guide).
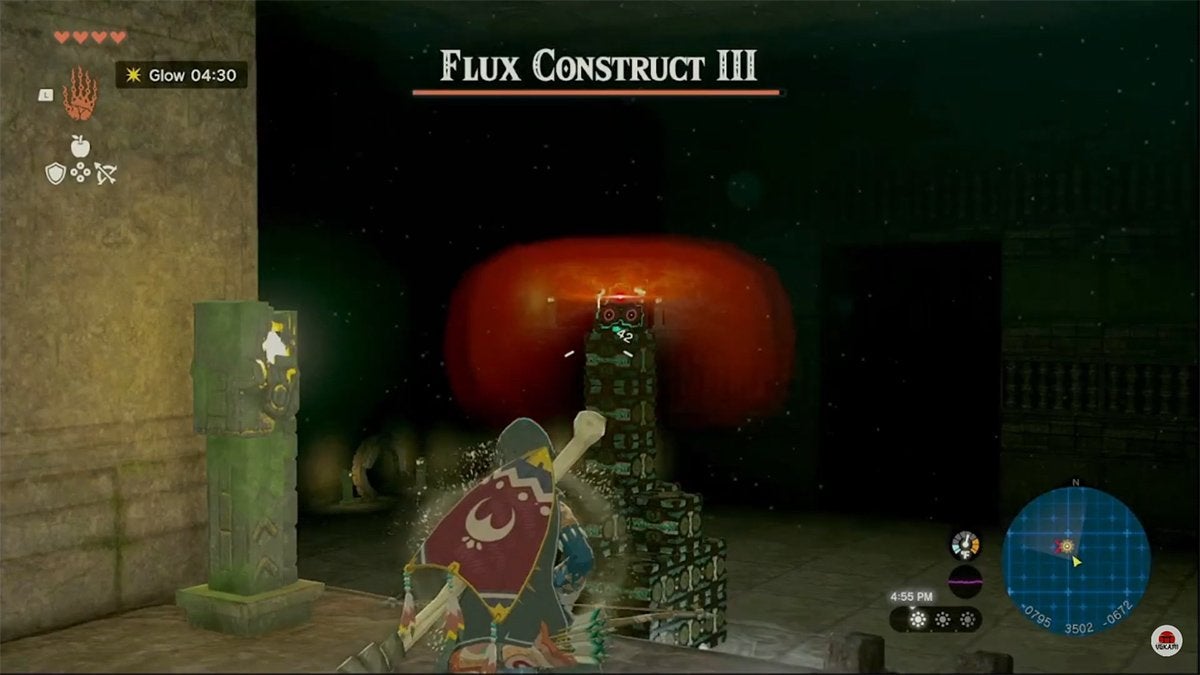
Tips for Hurting Flux Construct III
The easiest way to beat this boss is to stay on the ledge above the boss arena for as much of the fight as possible. In most of its forms, Flux Construct III can’t hit you while you’re on a ledge. The only attack that lets it do so is the one where it becomes a floating platform and launches five of its cubes at you.
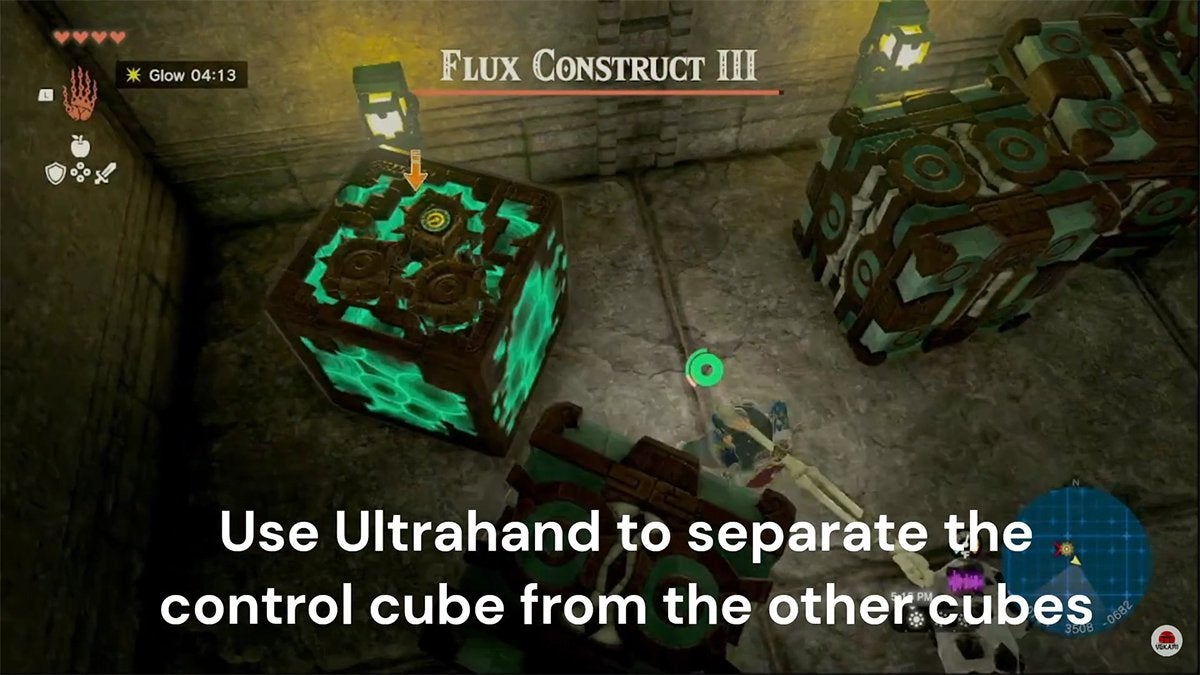
To hurt the boss, your best bet is to use Ultrahand on the control cube (the one that glows) and separate it from the rest of its body (27:15 in the Video Guide). This causes the boss to fall to pieces for a few seconds. During this time, get close to the temporarily vulnerable control cube and deal as much damage to it as possible.
How to Avoid and Counter the Cube-Launch Attack
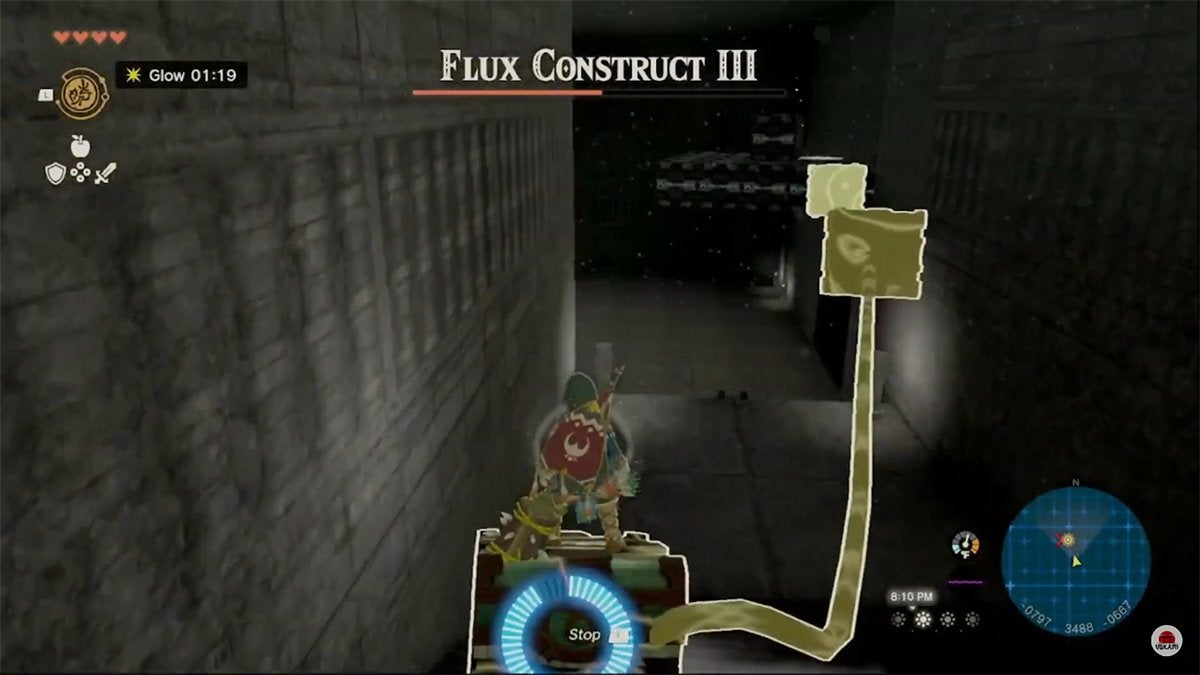
As mentioned before, the only way that Flux Construct III can hurt you while you’re on a ledge is with its cube-launch attack. You can see this coming when, in platform mode, the boss separates its front line of cubes and creates green lines of energy attached to each. When you see this, run around the corner of the stairway to get out of harm’s way.
Once all the cubes have been launched, jump on one and use Recall. This forces the cube you’re standing on to rejoin with the boss’ platform form (27:47 in the Video Guide). As such, this makes it easy to reach the control cube on the platform.
Keep up the attack until the boss goes down for good. Afterward, you can collect a lot of rare Zonai parts and complete the North Lomei Prophecy quest.
Rewards for Beating Flux Construct III
Once the boss is defeated, you’ll get the following Zonai items and devices:
- Zonai Charges x9
- Large Zonai Charge x1
- Large Crystalline Charge x1
- Time Bomb x1
- Portable Pot x1
- Rocket x1
- Flame Emitter x2
You can also fuse the spiky gears that dropped from the boss to any of your weapons to increase its power by 32. Last, and, honestly, least is the armor you get from completing the North Lomei Prophecy quest.
Go to the circular statue in the northeast corner of the boss arena and examine it. Following some final cryptic dialogue, the quest gets completed and a chest rises in the center of the room (30:17 in the Video Guide).
Within the chest is the Evil Spirit Greaves: leg armor that increases your stealth. They give you four points of armor when equipped—which isn’t much. Also, the Stealth Up effect isn’t that good either, as you can make food and elixirs from relatively common ingredients that give you the same effect.
Exiting the North Lomei Chasm
Before you warp back to the surface, we recommend that you activate a fast travel point that lets you get back here. Exploring underground is the only way to get lots of Poes to spend at Bargainer Statues, so having an easy way back down here saves you time in the future.
Head south out of the room and stop by the exit. Here, you’ll see familiar dragon carvings that you can climb to reach the area above. Once you climb up, you’ll find the Ikatoayam Lightroot (31:26 in the Video Guide).
Run up to the Lightroot and activate it to illuminate the area, uncover a part of the underground map, restore Hearts decayed by Gloom, and create a warp point. After that, you’re welcome to leave or explore the Depths.
Be sure to use the hot loot you found to your advantage in the future. Anything fused to the spiky gears dropped by Flux Construct III can be a great weapon for slaying a Stalnox or beating down a Battle Talus. We hope this adventure above and below the surface was as exciting and fun for you as it was for us!