In Elden Ring, the Divine Tower of Liurnia is located above the Carian Study Hall. However, to get there, you’ll have to obtain a special item during Ranni’s questline. Within the tower, you’ll find something incredible…and dark.
Table Of Contents
If you need more visual references for topics mentioned in this article, check out the video below:
Get the Inverted Carian Statue From Ranni (00:45 in the Video)
Before you try to enter the Divine Tower of Liurnia, it’s recommended that you clear the Carian Study Hall of all its loot first. Inverting the study hall will cause the area to change. As such, any items not collected prior to inverting the tower will become inaccessible.
However, if you’ve cleared the Carian Study Hall of all treasure, you’re ready to ascend to the Divine Tower above it. First, you’ll need to get the Fingerslaying Blade from Nokron, Eternal City. Afterward, you’ll need to meet up with Ranni in her rise at the Three Sisters.
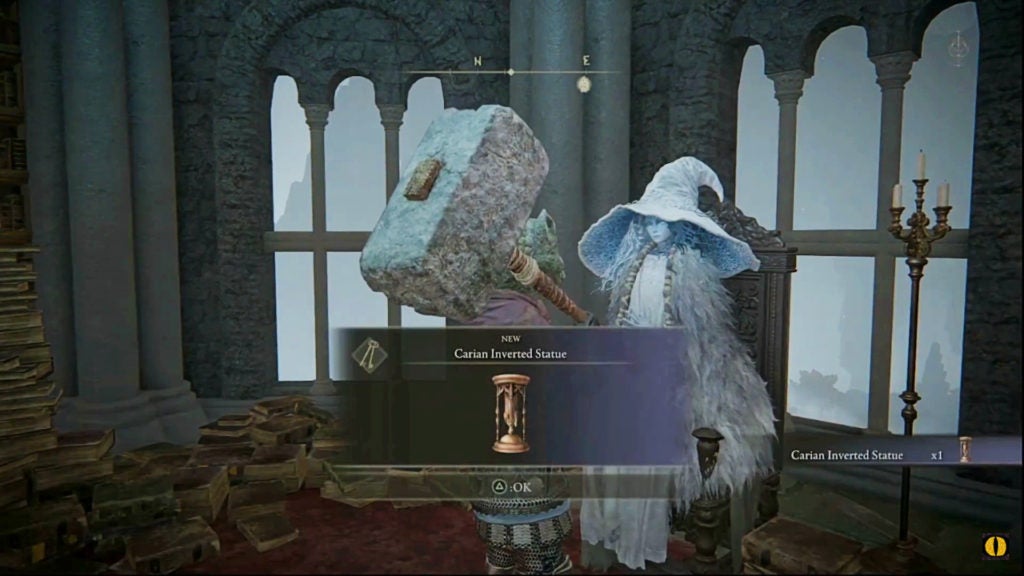
When you speak to the white-robed witch, she’ll have some quest dialogue for you that explains some of her goals. Additionally, Ranni will give you the Carian Inverted Statue, which will be in your key items inventory menu.
Read the Item Description of the Carian Inverted Statue (02:00 in the Video)
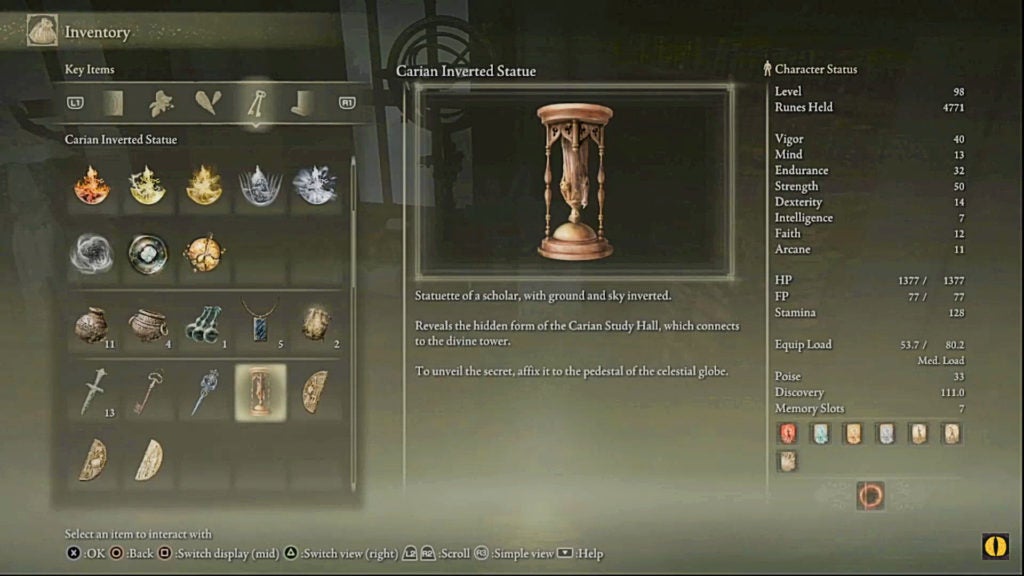
In a very direct manner, you can find out how to use this statue by reading its item description. Put simply, you’ll need to put the Carian Inverted Statue on the pedestal at the entrance of the Carian Study Hall.
This will flip the tower and will allow you to use the lift at the bottom of the study hall. This, in turn, will reveal a path leading to the Divine Tower of Liurnia. However, there will be plenty of obstacles along the way.
Descending the Inverted Carian Study Hall
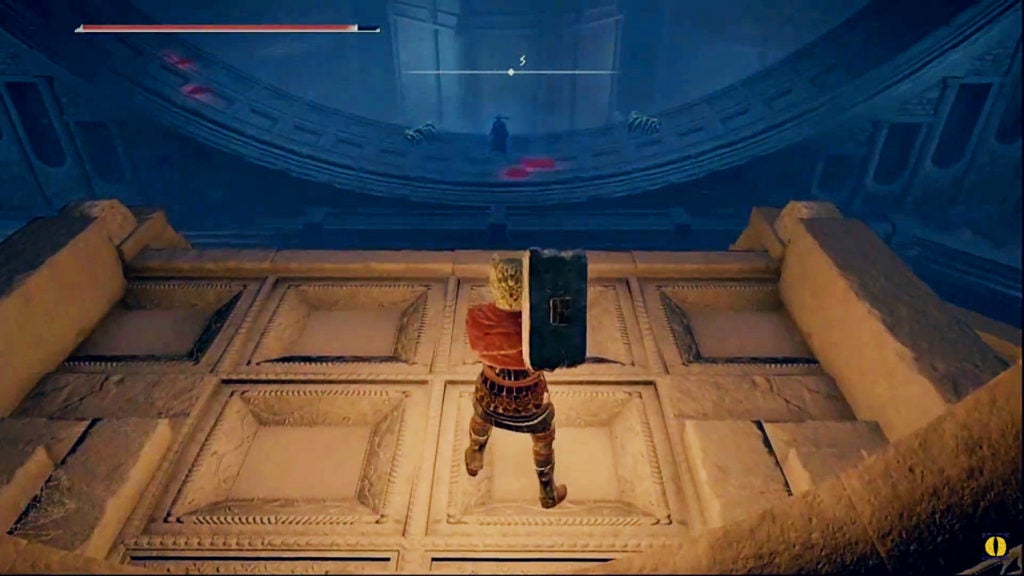
When you reach the Carian Study Hall and place the Inverted Carian Statue on the pedestal at the entrance, you’ll be treated with a short cutscene. This will show the large gold and white globe before you shift, and you’ll notice a great rumbling. Afterward, when you explore beyond, you’ll notice everything inside the tower has been flipped upsidedown.
As such, you’ll need to progress through the tower while ascending an inverted landscape. While this can be a bit disorienting, just remember that you need to go down.
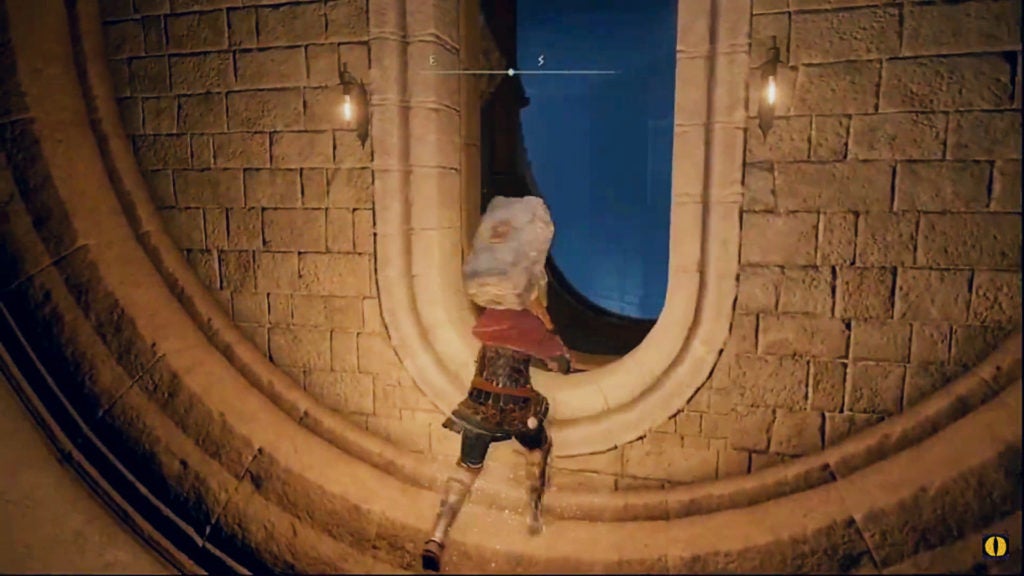
Get By the Elevator Shaft (04:25 in the Video)
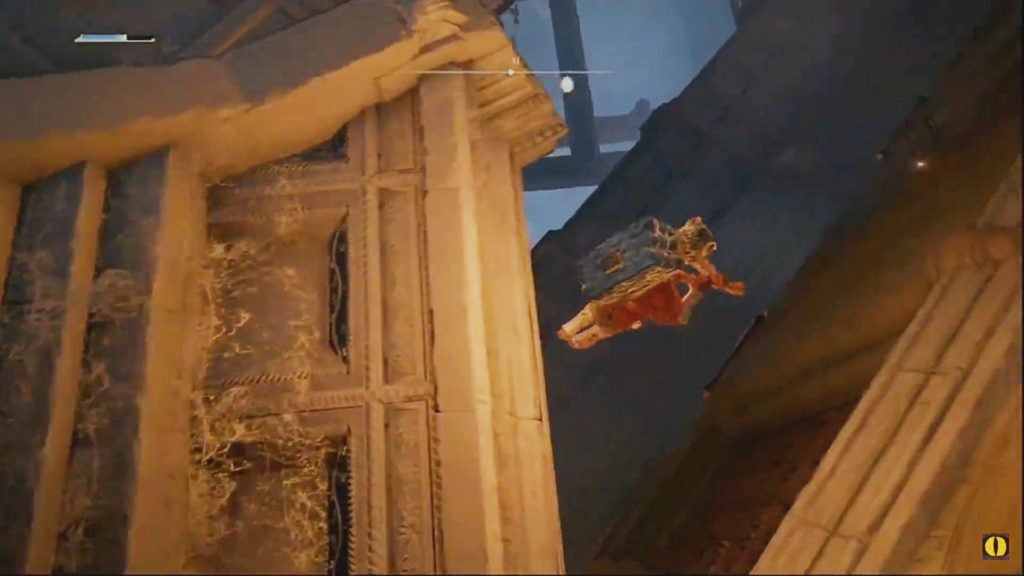
Where there’s usually an elevator will now be a shaft of empty space. You’ll need to walk and jump around the sides of the shaft to get to the upsidedown doorway beyond. However, be careful when you do, as a few hand enemies will immediately ambush you! Thankfully, these are the small hand foes and can be dispatched pretty quickly.
Fight Preceptor Miriam Again (06:00 in the Video)
Much like the first time you cleared the Carian Study Hall, Preceptor Miriam will appear to attack you. Also, like before, she’ll use sorceries to assault you from long and close range.
However, thankfully, she will not begin attacking until you get near the inverted archway that she is standing on. This area is very open and makes it easy for her to line up a shot and cast Loretta’s Greatbow. This spell is the one that shoots a powerful magic greatarrow.
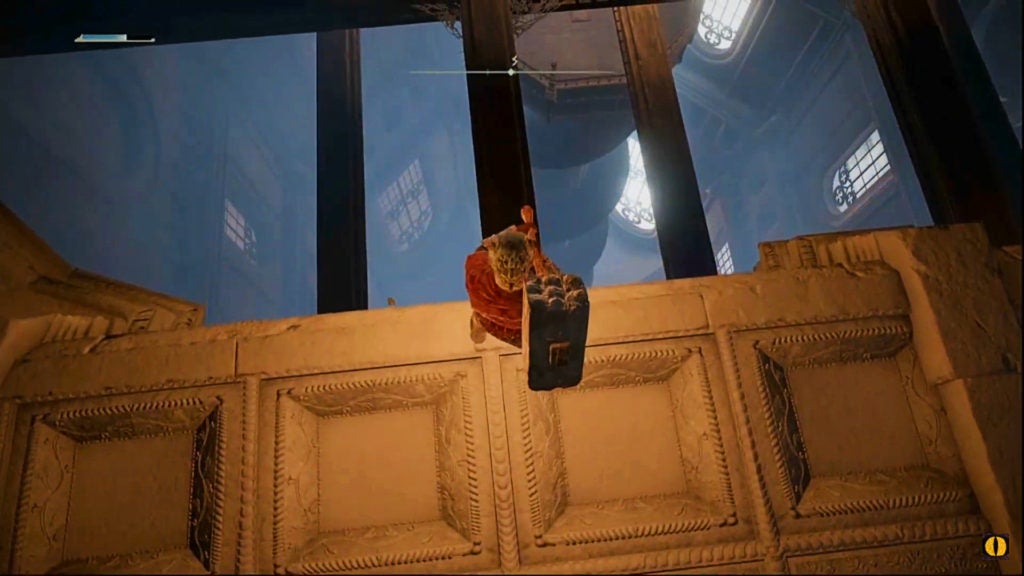
Before you can do battle with the preceptor, you’ll have to circle around the huge gap. Go either east or west and use the inverted ledges as walkways to reach the archway housing Preceptor Miriam. Just be careful, as more small hand enemies will drop down from above to attack you along the way.
As you approach the archway, Miriam will notice you and will likely meet you on the narrow path beside the curving structure. Here, she’ll begin firing spells—especially Loretta’s Greatbow.
To dodge Loretta’s Greatbow, you can roll through it with few issues if you get the timing right (06:25 in the video). Due to the confined space, it can be awkward to fight here. Furthermore, Miriam doesn’t seem capable of falling or rolling off the ledge nearby (06:29 in the video), which gives her an unfair advantage.
It’s recommended for you to increase your magic damage negation for this fight. Using talismans, incantations, and consumables can all be great tactics—especially if stacked together. However, when the foe reaches around 33% HP, they will teleport a bit further into the inverted study hall.
Chase Down Preceptor Miriam
While the preceptor will teleport away, they won’t go far. They’ll be across a gap on the other side of the inverted archway. However, before you can approach them, you’ll have to deal with some small hand enemies and a few blue summoned soldiers.
It’s recommended to stay in the middle of the archway as you deal with minor threats. Since Miriam is below you, she won’t be able to hit you with Loretta’s Greatbow if you’re away from the ledge closest to her. This will make dealing with the hands and soldiers much less dangerous.
After you’ve dealt with the lesser foes, scale either slope of the ramp and drop down carefully (07:06 in the video). This will bring you to some ledges that curve around to the other side of the gap; where Preceptor Miriam is located.
There will be more summoned blue soldiers that will try to rush you. As you approach the steps leading to Miriam, you’ll notice that she is likely on them and is spamming Loretta’s Greatbow (07:15 in the video). You’ll want to stay against the northwest wall and let the soldiers come up to meet you. This will allow you to take them out while staying out of range of Miriam’s spells.
When it’s down to just you and the preceptor, you’ll be in a better spot to finish her off for good. When you do, you’ll get the Lucidity spell (removes sleep and madness build-up) and some peace of mind knowing that Miriam will no longer be harrying your every step through the inverted study hall.
Drop Down to the Elevator and Ride It
After you defeat Preceptor Miriam, progress down the stairs and around the ledges. Here, you’ll find that you can only drop down to an area surrounding some upsidedown chandeliers (09:00 in the video).
From here, you’ll then have to drop down onto any of the wooden crossbeams below (09:40 in the video). The last time you explored the Carian Study Hall, this was the apex of your exploration above which was an unreachable wooden elevator.
This time, however, you can relatively easily make your way to the wooden lift below. Drop down to the closest wooden beam and navigate towards the noticeable structure below. On the way, you can loot 8 Glintstone Fireflies from a corpse. When you’re close enough, jump to the lift platform!
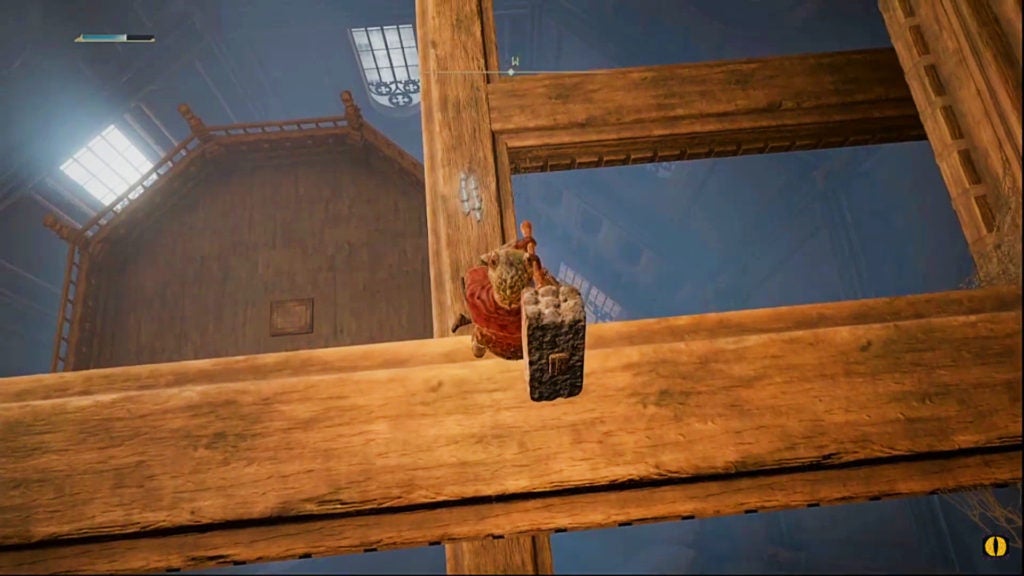
Be sure to jump from the lowest level of wooden beams to avoid fall damage (10:15 in the video). Afterward, step onto the square pressure plate in the middle of the platform and the elevator will descend to the bottom of the structure.
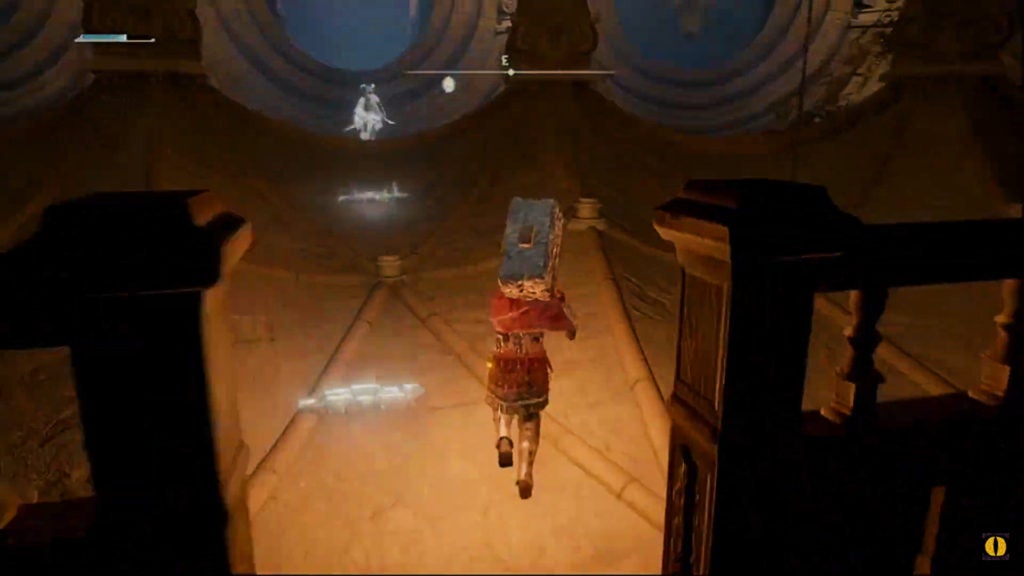
When you reach the bottom, exit the lift and head east to find a huge pair of upsidedown wooden doors (11:20 in the video). Opening these doors will unlock the path to the Divine Tower of Liurnia. There will also, thankfully, be a Site of Grace nearby. It’s highly recommended that you rest at it now, as there is a powerful foe ahead.
How to Beat the Godskin Noble
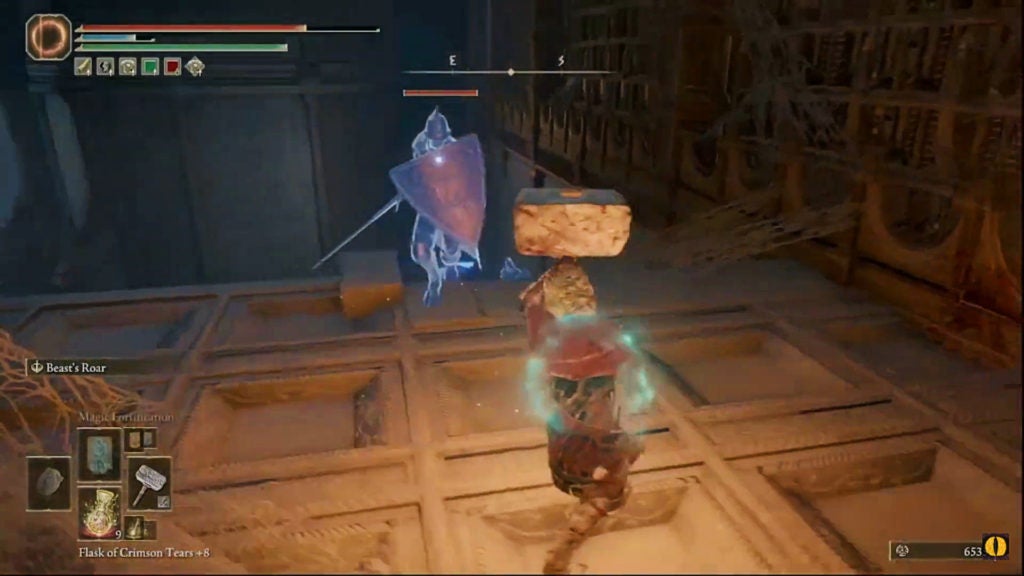
As you approach the tower, your path will be blocked by the appearance of a Godskin Noble. This plump enemy is quite strong and surprisingly fast, so don’t underestimate them! They will use a combination of thrusting sword attacks, black fire spells, and some more unusual techniques. Furthermore, they’ve got great defensive stats, though, they also have some weaknesses.
The Godskin Noble’s Weaknesses
The Godskin Noble seems to be most weak to slash-type physical damage. This damage type appears to do 10% more damage to this enemy.
Apart from this, weapons that deal standard and pierce-type damage are the best to use against the Godskin Noble. While the foe doesn’t take increased damage from these two sources, it also does not have damage negation against them. This result is standard and pierce-type damage both being viable to use in this fight.
Magic and lightning damage appear to get reduced by around 20%. While not ideal for an offense against this foe, 20% damage reduction isn’t too much of a disadvantage. This is especially true if you’re a ranged build, as the Godskin Noble has almost no ranged attacks.
Out of all the damage types, the Godskin Noble is most resilient versus strike, fire, and holy damage. The damage reduction against strike weapons is around 35% while the damage reductions against fire and holy damage are about 40% respectively. For these reasons, builds using such damage types will have a hard time against this foe.
In regards to resistances, the Godskin Noble has moderate stats for everything (except the death status, to which they are immune). With that said, this thick adversary is a bit more susceptible to bleed and frost than they are to poison or scarlet rot.
Black Fireball (12:03 in the Video)
If you are far away from the Godskin Noble, the attack they will use the most is their black fireball. This burning projectile will travel forward at moderate speed, which will let you dodge it fairly easily.
Be sure to avoid this attack as much as possible. Not only will the initial projectile do damage, but there will be a short lingering damage-over-time effect. This is a trademark of many black fire spells.
Slash and Thrust (12:16 in the Video)
When you’re in front of the foe, they will sometimes perform a quick slash with their sword before then doing a thrust. This move is pretty fast, though, keep an eye on the noble’s main hand for the subtle telegraphing. The enemy can also change things up and use the thrust first at times. Additionally, sometimes only one of these two moves will occur without the other, making predicting when to counterattack difficult.
While swift, such attacks can be dodged or blocked fairly easily. The damage from the thrust is more than the slash, so be especially wary of that part.
Black Fire Barrier (12:19 in the Video)
If you’re close to the enemy on any side, they may summon a ring of black flames around themselves. You can see this coming when the noble leans towards the ground and touches it with a hand coated in black flames.
At this point, you’ll need to get back to avoid taking damage. The range isn’t huge, so a single dodge roll should be enough to get away from harm. If you get touched by the flames, you’ll take some initial damage and suffer some damage over time. Annoyingly, this barrier will last for 10 full seconds. During this time, you should not approach the Godskin Noble. Worst yet, the flames can obstruct your view so that you can have a hard time seeing the Godskin Noble preparing for another attack.
Great Lunge (12:23 in the Video)
At times when you are just out of melee range, the noble may lift their sword above their head. This is a sign that they are about to perform a fast and powerful lunging thrust. The fiend will hold their sword above their head for about a second before striking forth.
Due to the range and speed of this lunge, it can be hard to dodge. However, rolling to either the left or right when you see the noble lift their blade can let you avoid this strike.
Hilt Slam (12:36 in the Video)
While close and in front of the Godskin Noble, they may slam you once or twice from above with the hilt of their sword. There is a one-second wind-up for this move that will involve the noble tilting to one side and lifting up one of their feet.
When you see this posture, dodge to either the left or right to get out of the attack zone. While coming out of your roll, do a rolling attack for some easy damage.
Backhand Strike (12:45 in the Video)
On occasion, the foe will raise their offhand in front of their chest. This is an indication that they are about to whip their arm out in an attempt to backhand you with one of their bulbous arms.
This attack has very little reach, however, can hit you even if you are just behind the noble, as the attack pattern causes the foe to rotate. As such, you should dodge away from the boss when you see this move coming.
Belly Bash (13:48 in the Video)
If you are in front of the wide warrior, they can sometimes stun you with a bump from their large stomach. This is a pretty quick move, though, it is telegraphed when the enemy briefly pulls their hands inward.
Although pretty fast, this attack has a small reach and doesn’t deal any damage. The biggest danger is if the Godskin Noble follows up their belly bash with another attack—which is pretty common. You can block a belly bash to negate its effect. Since it doesn’t deal damage, you’ll only lose a bit of stamina, even if blocking with something that has very low damage reduction stats.
Phase Change (14:05 in the Video)
When you get the Godskin Noble down to 60% HP, they will rise up into the air briefly before coming back down amidst a shockwave of black fire. The phase change animation itself will do damage and knock you back. However, this also indicates that the powerful foe has gained some new attacks.
You can avoid taking damage by rolling back at least twice or running out of range. However, immediately following the phase change, you’ll need to get ready for some crazy moves.
Rollout Attack (14:09 in the Video)
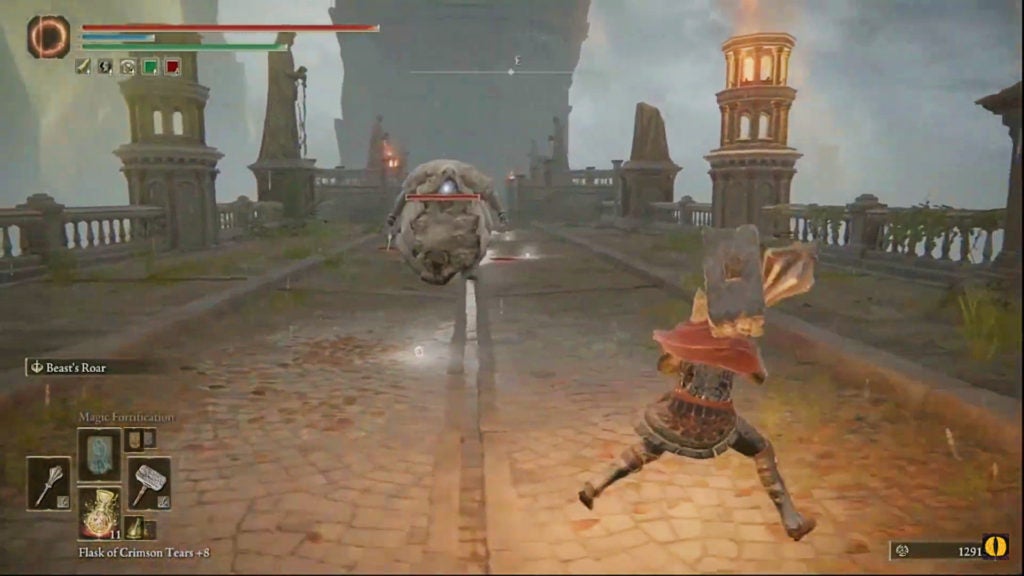
Only during phase two, the noble may inflate their body and then roll at you like a giant boulder. This will be very easy to see coming, as the fiend will puff out their body before rushing towards you.
However, despite being easy to see coming, this attack can be hard to dodge thanks to its speed and large hitbox. You’ll need to dodge twice in a row while moving either right or left for your best chance of avoiding damage. Alternatively, you can use the terrain to your advantage here by putting a railing between yourself and the Godskin Noble when you see them puff up their body. This will cause the enemy to roll into the railing in front of you for a few seconds. At this point, it would be good to heal or buff if you can.
Great Ground Pound (14:20 in the Video)
Also only during phase two, this adversary may puff out their body before jumping high into the air for a heavy slam attack. The impact of this move can hurt a lot but can also stun you even if you are out of the damage zone.
To avoid both the damage and stunning effect of this attack, you’ll want to jump into the air as the Godskin Noble hits the ground. As you come down, it would be good to use a jumping attack for some easy damage on the foe and to give them a taste of their own medicine.
Flaming Belly Bash (14:29 in the Video)
In a phase two variation of their belly bash attack, the foe will try to bump you with their huge gut while also shooting some black flames ahead of themselves. Unlike the non-flaming variant, this attack will deal damage—though thankfully not a great deal of it. Worst yet, a flaming belly bash will launch you into the air if it connects, making you pretty vulnerable to follow-up attacks.
As the telegraphing for this attack is very subtle, you’re better off avoiding the foe’s front instead of trying to dodge or block this attack. You should continuously flank the Godskin Noble to avoid triggering this move.
Thrusting Combo (14:37 in the Video)
While not an exclusive phase two move, this thrusting combo can be one of the deadlier attacks you’ll face. The noble will lift their sword up in front of themselves for merely a moment before commencing their assault. This string of attacks will start with three rapid thrusts followed by a brief pause and then another three rapid thrusts. There is then another brief pause before a lunge. After that, there is, yet again, another brief pause before a final upward thrust. Overall, there are 8 attacks in this combo, with the noble being able to reposition themselves during all of the pausing portions.
There are two ideal strategies for dealing with this assault: circling or parrying. If you can, get really close to the noble and then continuously circle around them to avoid letting them track you. Alternatively, if you’re a parrying-focused build, parry one of these many strikes to break the enemy’s guard and then land a critical attack.
Tail Swipe (15:13 in the Video)
Any time you are behind the noble, they may use their long tail to slap you as they rotate to face you. This sneaky move will hurt a bit more than you’d expect due to it being a repositioning maneuver.
To avoid getting hit, jump over this attack. As with other jump-dodges, be sure to use a jumping attack on your way down for an easy hit.
The Rewards for Beating the Godskin Noble
For being this Godskin Noble, you’ll get 4,810 Runes and a full set of Godskin Noble armor. While the Rune reward is rather lackluster for a foe this strong, the armor set has fairly good defensive stats. More importantly, the way to the Divine Tower of Liurnia will now be clear of threats.
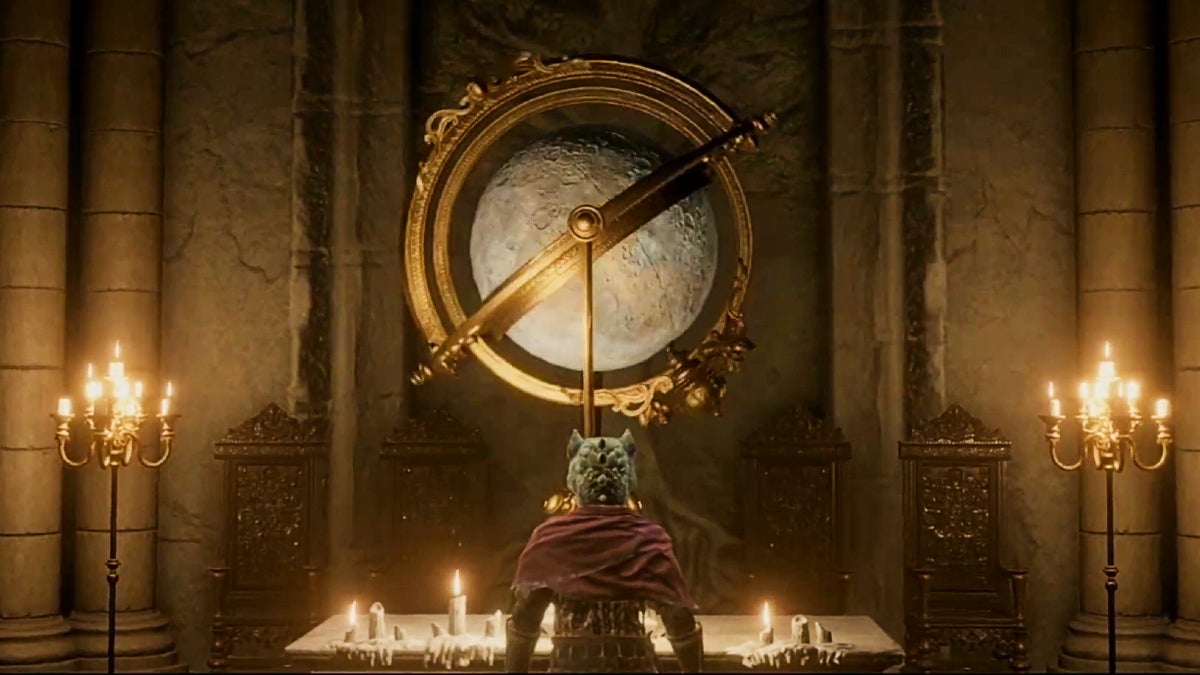
Ascend the Lift to the Top of the Divine Tower
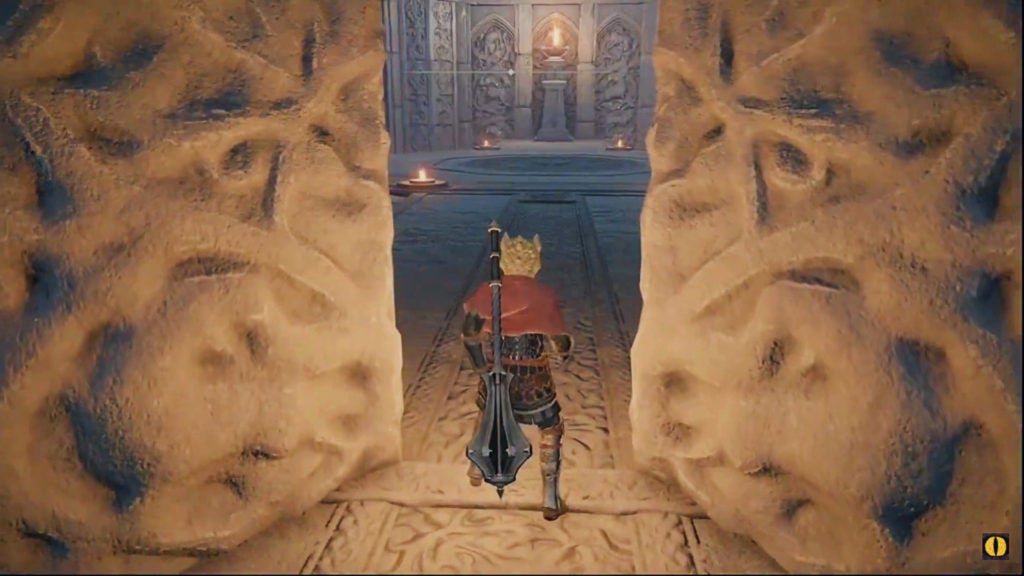
Now that your path is clear, you can make your way to the end of the long path. There, you’ll find a pair of large stone doors that lead into the base of the Divine Tower of Liurnia. The only thing here worth mentioning is the central lift that will take you upwards. Ascending will bring you to a Site of Grace as well as the valuable treasure located at the top of the tower.
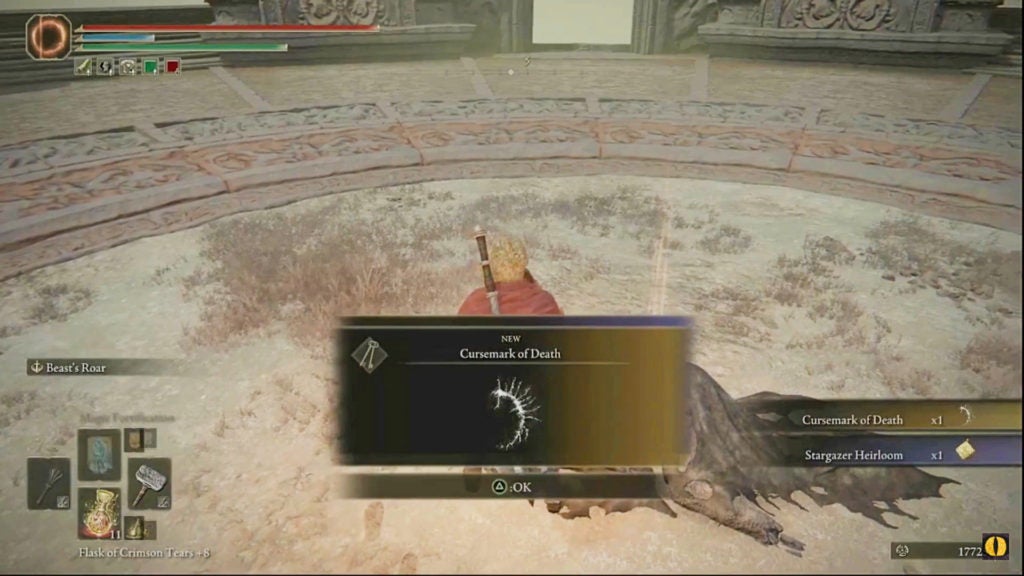
When you loot the corpse you find at the top of the tower, you’ll get two items. Both the Stargazer Heirloom (a talisman) and the Cursemark of Death (a key item) will be yours. The former is a talisman that increases one of your attributes while equipped and the latter is a special quest item.
About the Stargazer Heirloom
In addition to the five-point boost to your intelligence attribute, you can also get some lore about Rennala, Queen of the Full Moon from this talisman. Before Rennala was a queen, she was an astrologer who loved gazing up at the stars. This eventually led her to great power and to the full moon, which became her symbol and most iconic spell.
The following portion of this article contains spoilers for Ranni’s questline and some endings of Elden Ring.
About the Cursemark of Death
This quest item will allow you to get the “Age of Duskborn” ending for Elden Ring and will also tell you some demigod lore. The Cursemark of Death was supposed to be a circle, but it was broken in half because two demigods died at the same time, splitting the mark between them. However, they died in different ways. Ranni the Witch sacrificed her flesh while the Prince of Death apparently “perished in soul alone”.
To actually use the Cursemark of Death for its real purpose, you’ll have to travel to the Deeproot Depths and then use it to summon the Lichdragon Fortissax boss in order to get the Age of Duskborn ending|| of the game.