Embarking on a quest to defeat all 12 superbosses in Final Fantasy X isn’t an errand for the faint of heart. Ample preparation and having a solid strategy are key to emerging victorious, and while a bit of grinding is unavoidable, the payoff–and bragging rights–are well worth the effort.
Table Of Contents
Preparing for Superboss Fights
Most superbosses become available once you unlock the Airship, but that doesn’t mean you should rush to take them on right away. You’ll need to spend time properly preparing your party by filling out the Sphere Grid as much as possible. You’ll also need to equip them with the best possible weapons and armor if you want to stand a chance against these baddies.
The Omega Ruins are a great place to grind–once you can defeat monsters there with little difficulty, you’re ready to take on at least the first few superbosses. In fact, both Omega Weapon and Ultima Weapon can be found within this optional dungeon.
To unlock The Omega Ruins, you’ll need to input the coordinates 72x, 35y manually on the Airship. This can only be done once Yuna’s pilgrimage is complete.
Weapons
Some of the more powerful superbosses have incredibly high defense. Without each character’s Celestial Weapon, you’ll have trouble doing any damage to them at all. The Celestial Weapons have an automatic Piercing effect, meaning that they ignore an enemy’s defense entirely. These ultimate weapons also ignore an enemy’s defense stat overall and do bonus damage based on a character’s HP or MP.
If you don’t have every Celestial Weapon, ensure that you do have them for your main party. The easiest ones to get are for Rikku, Yuna, Auron, and Wakka.
Stats
In Final Fantasy X, the HP cap is 9,999. However, by using the Break HP Limit passive effect, you can max it out to 99,999. Depending on the option you choose, you’ll need to equip different armor on the characters you intend to use in battle.
No matter which of these options you choose, you’ll want to have as close to 999 MP as possible.
All stats in the game cap at 255, and you’ll need to max out a majority of them before taking on the superbosses. Strength, Magic, Defense, and Magic Defense are the most important, and having Luck to 205 will ensure that your attacks connect with every boss. Your Agility stat should be around 170, while Evasion and Accuracy aren’t worth stressing over.
Armor
As armor can be customized in Final Fantasy X, you’ll want to create pieces that will help your characters survive against each specific superboss. If you decide to stick to the HP cap of 9,999, you’ll need two sets of armor, with one exclusively used for the most difficult superboss, Penance.
Having armor pieces with four blank customization spots will make things much easier. You can buy some from Wantz, who hangs out in the Macalania Forest near the entrance to the Thunder Plains.
The effects you’ll want to add to your armor can be found below, along with the necessary items needed for customization.
| Effect Name | Effect Description | Items Needed for Customization | Item Location |
|---|---|---|---|
| Auto-Haste | Permanently maintains a Haste status on the user. | Chocobo Wing x80 | Stolen from Cactuar King or bribed from Machea in the Omega Ruins |
| Auto Phoenix | Automatically has the user use a Phoenix Down from the player's inventory after a party member is Knocked Out to immediately revive them. | Mega Phoenix x20 | Found at Djose Temple, Stolen from Dark Ifrit, Dropped by Extractor, Mech Defender, Mech Hunter, YAT-97, and YAT-99 |
| Auto-Protect | Permanently maintains a Protect status on the user. | Light Curtain x70 | Dropped by Fafnir, Stolen from Gemini, Iron Giant, Ironclad, Tanklet |
| Ribbon | Makes the wearer immune to Zombie, Petrification, Poison, Confusion, Berserk, Sleep, Silence, Slow, Darkness, and Doom. | Dark Matter x99 | Rare drop from Abaddon, Abyss Worm, Bomb King, Cactuar King, Catastrophe, Catoblepas, Chimerageist, Coeurlregina, Don Tonberry, Earth Eater, Espada, Fafnir, Fenrir, Greater Sphere, Hornet, Ironclad, Jormungand, Juggernaut, Jumbo Flan, Kottos, Malboro Menace, Nega Elemental, Nemesis, Neslug, One-Eye, Ornitholestes, Pteryx, Shinryu, Sleep Sprout, Stratoavis, Tanket, Th'uban, Ultima Buster, Vidatu, and Vorban. Also dropped by Dark Aeons and Penance's arms. |
Once you reach Penance, you’ll want to change some of the passives on your armor. Keep Auto-Haste and Auto-Protect, but add Auto-Potion and Defense+20. Auto-Potion, which will cause a character to use a potion each time they take damage, requires four Stamina Tablets, which are dropped by Abyss Worms and can be stolen from Catoblepas, Dark Yojimbo, and Machea.
Defense+20 requires four Blessed Gems, which can most easily be stolen from One-Eye, Coeurlregina, and Barbatos.
If you do decide to break the HP limit and waltz into battle with 99,999 HP, you’ll simply want your armor equipped with Auto-Regen, Auto-Haste, Ribbon (or Stoneproof), and Break HP Limit.
Gil
Buying armor from Wantz is pricey, at 100,000 gil per piece. Bribing monsters will also take its toll on your wallet, so you’ll need to farm plenty of gil on your quest for power.
If you’ve strengthened Godhand, Rikku’s Celestial Weapon, you’ll have easy access to Gillionare. Make sure that Rikku is active on the battlefield when an enemy is defeated and you’ll get double the gil reward.
Gillionare is also an effect that can be added to other pieces of armor by using 30 Designer Wallets. Unlocking Vorban at the Monster Arena will reward you with 60 of these fancy items.
The quickest way to farm gil is to head to The Omega Ruins. Make sure that one party member has Gillionare on their weapon, and keep entering random battles until you start a fight with a treasure chest on the field. Steal from the chest to open it. If it turns into a Mimic, winning the fight will net you 100,000 gil.
The Zanmato Option
While this guide provides strategies and helpful tips for defeating each superboss, you can also utilize an easier option. Each boss can be defeated instantly if you managed to get Yojimbo from the Cavern of the Stolen Fayth. The Aeon’s Zanmato attack instantly kills any enemy in the game, with the exception of Braska’s Final Aeon and Yunalesca.
The more gil you give to Yojimbo, the higher chance that he will use Zanmato. The best option is to save your game before heading into battle–if he fails to use it, reload and try again.
Ultima Weapon
Location: The Omega Ruins. Ultima Weapon appears about halfway through this optional dungeon, which can be located by inputting the coordinates 72x, 35y manually on the Airship.

Details: The boss’s first heavy-hitting normal attack deals around 2,500 damage and has a chance to inflict Stone, so any piece of armor with protection against this is preferred. Its next attack is randomized, with a chance to cast either Break, Confuse, or Silence.
Ultima Weapon’s Core Energy attack will hit a random character for anywhere between 3,000 and 9,999 damage, so be sure to have plenty of Phoenix Downs on hand.
On its fourth turn, the boss will cast either Sleep, Confuse, or Holy, followed by another regular attack. Shimmering Rain, its ultimate attack, will deal around 2,500 damage to the entire party.
Strategy: If you’re challenging Ultima Weapon before fully powering up your characters, you don’t need to worry. The weakest of the superbosses, it has only 99,999 HP.
Cast Reflect to protect yourself from negative status effects and Holy. Casting Shell is also helpful, as it will reduce the damage taken by the Core Energy attack. Doublecasting Flare is also a great way to deal massive damage quickly.
Ultima Weapon is vulnerable to Silence and Doom.
If you use Ifrit’s Hellfire or Ixion’s Thor’s Hammer, you’ll see alternate animations during this fight.
Rewards: 40,000 AP (50,000 for Overkill) / 20,000 gil
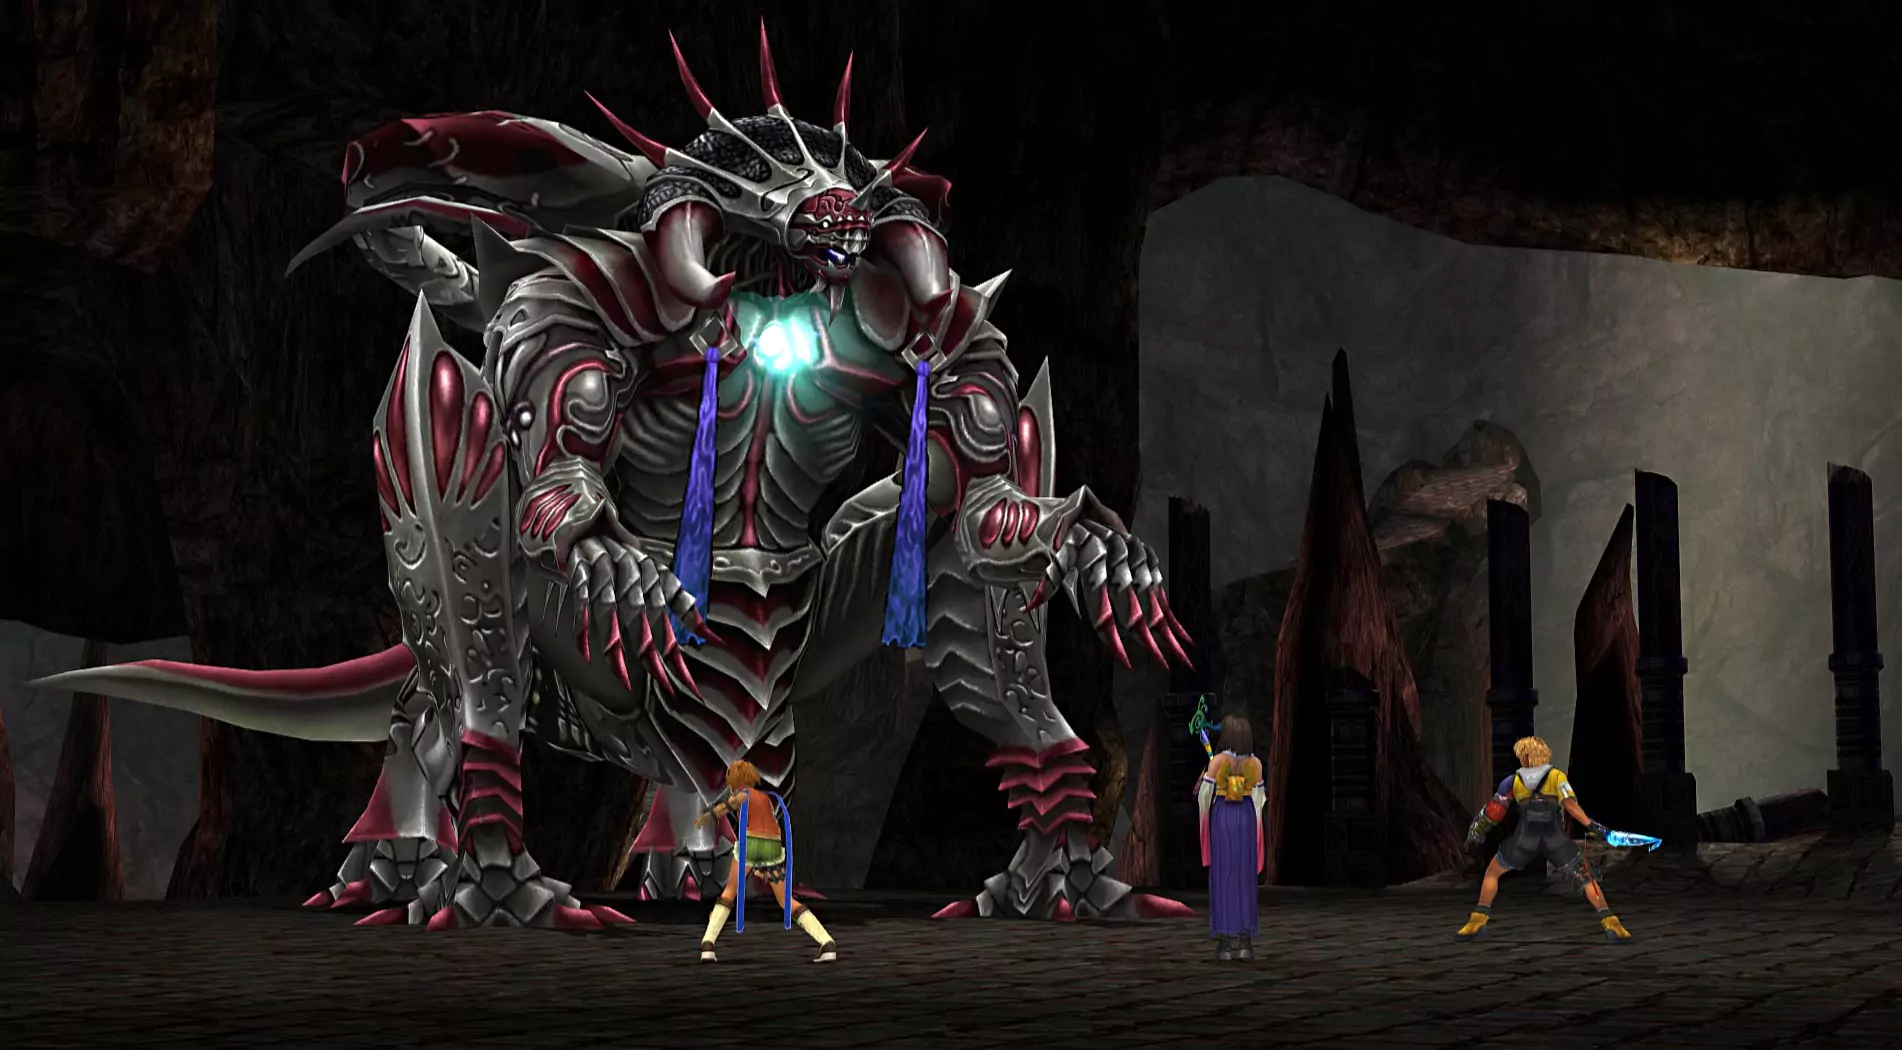
Omega Weapon
Location: The Omega Ruins. Omega Weapon appears at the end of the dungeon.
Details: Omega Weapon will shuffle through four attack patterns.
Core Energy will deal between 4,500 and 9,999 damage to a single character. After this, it has a chance to use either Break or Confuse before casting Shimmering Rain. This will deal 2,500 damage to the entire party. Soon after, Ultima Weapon may cast either Ultima or Demi to further damage your team.
If you decide to have Yuna summon an Aeon, Omega Weapon will only use Core Energy or Shimmering Rain.
Each time the boss uses an ability, it will add two points to a secret counter. When attacking physically, it will add five points. Once this counter reaches 30, Omega Weapon will cast Nova, dealing around 7,000 damage to the entire party.
Strategy: With 999,999 HP, Omega Weapon takes some time to kill. Keeping Protect, Shell, and Haste on your primary characters is vital. You’ll also want Stoneproof on your armor.
Using Celestial Weapons paired with Quick Hit will make this fight go much quicker. This ability is found at the very end of Tidus’s section of the Sphere Grid.
As with Ultima Weapon, if you use Ifrit’s Hellfire or Ixion’s Thor’s Hammer, you’ll see alternate animations during this fight.
Rewards: 50,000 AP (60,000 for Overkill) / 20,000 gil / 30 Gambler’s Spirits (Steal)
If you’ve successfully learned every possible Lancet attack for Kimahri up until this point, learning Nova from Omega Weapon will reward you with the ‘Learning!‘ achievement. If you forget, don’t worry–you can also use Lancet on Nemesis to learn this powerful skill.
Nemesis
Location: Nemesis will unlock after completing a lengthy side quest at the Monster Arena in the Calm Lands. You must capture 10 of every capturable fiend and defeat every monster in the Arena Conquest, Species Conquest, and Original categories. The last monster in the Original category, Nemesis costs 25,000 gil to fight.

Details: Nemesis will often start by casting Ethereal Cannon on one character before using Ultra Spark to inflict Curse, Poison, Slow, and Power Break to the entire party. At any point, Nemesis can also use a physical attack to kick you while you’re down.
If you try to use items to cause damage or think that an Overdrive will put Nemesis in its place, be warned–the boss will counter these attacks with Ultima.
Each time Nemesis uses a physical attack, its secret counter increases by three points. Any other attacks are worth two points. Once the counter hits 21, Nemesis will cast Armageddon on its next turn, dealing 99,999 damage to the entire party.
Strategy: With incredibly high defensive stats and a whopping 10,000,000 HP, the Nemesis encounter marks one of the longest boss fights in Final Fantasy X. Going forward, you’ll want to have your party members equipped with their Celestial Weapons and your stats as close to maxed out as possible.
Generally, keeping Protect and Shell on your party will mitigate damage very well. To stay alive during Armageddon, you can either keep track of the boss’s counter and summon an Aeon to take the hit, or you can ensure that someone in your party has Auto-Life. In a pinch, Rikku’s Hyper Mighty G mix will cast Auto-Life on the entire party.
As with Omega Weapon, this boss will absorb elemental damage and is immune to negative status effects.
Having Auto-Haste on your armor will make it much easier to deal with damaging status effects and damage.
Rewards: 55,000 AP / Mark of Conquest (Trophy Item)
Defeating Nemesis will also reward you with the ‘Overcoming the Nemesis’ achievement.
Dark Valefor
Location: At the entrance of Besaid Village after unlocking the Airship.
Details: The Dark Aeons use the same attacks that Yuna’s Aeons are capable of using, so you’ll likely be familiar with what to expect. Dark Valefor can use Sonic Wings to delay the actions of a party member, along with physical attacks and Energy Ray.
When the boss uses its Overdrive, Energy Blast, it will deal around 50,000 damage to the party regardless of your stats. Keep a close eye on the Overdrive gauge–it will increase by 15 percent when attacked and five percent when attacking.
Strategy: Be sure that your characters have high Defense before heading into this fight, along with decent Agility and Luck stats. Auto-Haste and Celestial Weapons will make this battle much less of a slog.
Curiously, Dark Valefor’s Energy Ray is a magic attack, so utilizing Shell will save you some grief. Protect is also helpful for dealing with physical attacks. To be on the safe side, make sure someone in the party has Auto-Life to deal with Energy Blast. You can also summon an Aeon to take the blow for you. The boss has 800,000 HP, but it’s possible to kill it before it uses Energy Blast if you use Celestial Weapons with Quick Hit.
Having one character use Sentinel is another way to reduce damage. The chosen character should have very high Defense or should use Protect–having a weapon with Counterattack or Evade & Counter is also recommended.
Rewards: 10,000 AP (15,000 for Overkill)
Dark Ifrit
Location: Bikanel Desert after unlocking the Airship. You’ll find the Dark Aeon near the entrance to where Al Bhed Home once stood. Speak with the Al Bhed woman–actually a Summoner in disguise–to trigger the battle.
Details: When it is Dark Ifrit’s turn, it will use Meteor Strike for 20,000 damage. The attack also delays the target. Additionally, each time you attack the boss, it will counter with a physical attack.
Once Dark Ifrit’s Overdrive gauge is full, it will use Hellfire to deal around 30,000 damage to the party regardless of defense or abilities. The gauge will increase by five percent when attacked and 10 percent each time the boss uses Meteor Strike.
Strategy: You can use Shell to protect yourself from Meteor Strike. Using Protect will also guard you against the boss’s retaliatory attacks. Like most superbosses, Dark Ifrit will absorb elemental damage and is immune to negative status effects.
Given Dark Ifrit’s high strength, you’ll want your party to focus on Defense for this fight. Auto-Haste is also useful, and Auto-Phoenix and Auto-Protect will be lifesavers–literally. Using Aeon Overdrives can help whittle down the boss’s 1,400,000 HP, and using Celestial Weapons with Quick Hit is, again, the best way to go.
Rewards: 20,000 AP (30,000 for Overkill)
Dark Ixion
Location: The Northern section of the Thunder Plains after unlocking the Airship. Speak to a Yevon Soldier–another Summoner in disguise–to start the fight. After defeating Dark Ixion once, he will reappear after a lightning strike, and the second battle will commence.
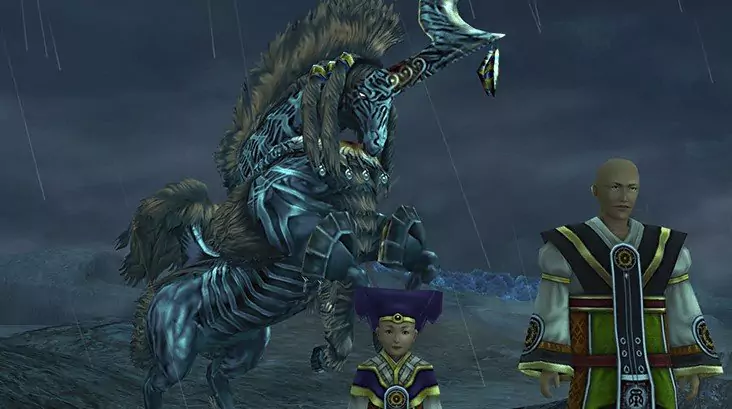
Details: The fight against Dark Ixion consists of two separate battles. During the first battle, the boss will counter every attack with a physical attack inflicting Mental Break, Armor Break, and Sleep. Additionally, it will use Thundaja, which will delay a character’s next turn.
During the first phase, Dark Ixion’s Overdrive is Aerospark. The Overdrive gauge will increase by 10 percent when the boss is attacked and five percent when it uses Thundaja. Aerospark attacks a single target, Dispelling them. You will be able to heal before the second battle.
The boss will no longer counter your attacks during the second battle, though his physical attack will now inflict Confuse along with Mental Break and Armor Break. Rather than being an Overdrive, Dark Ixion will use Thundaja as a regular attack–his Overdrive will change to Thor’s Hammer. Dealing around 17,000 damage to the party, this will also inflict Full Break.
The Overdrive gauge will increase by 10 percent when attacking and 10 percent when being attacked during the second phase.
Strategy: During both battles, Dark Ixion will have 1,200,000 HP. As with past Dark Aeon battles, using Celestial Weapons with Quick Hit and using Aeon Overdrives will procure you a rather easy win. Be sure to maintain Protect during both fights.
Having high Agility and Luck will help in this fight, and having Evade & Counter will allow you to evade Dark Ixion’s powerful physical attack.
Rewards: 20,000 AP (30,000 for Overkill)
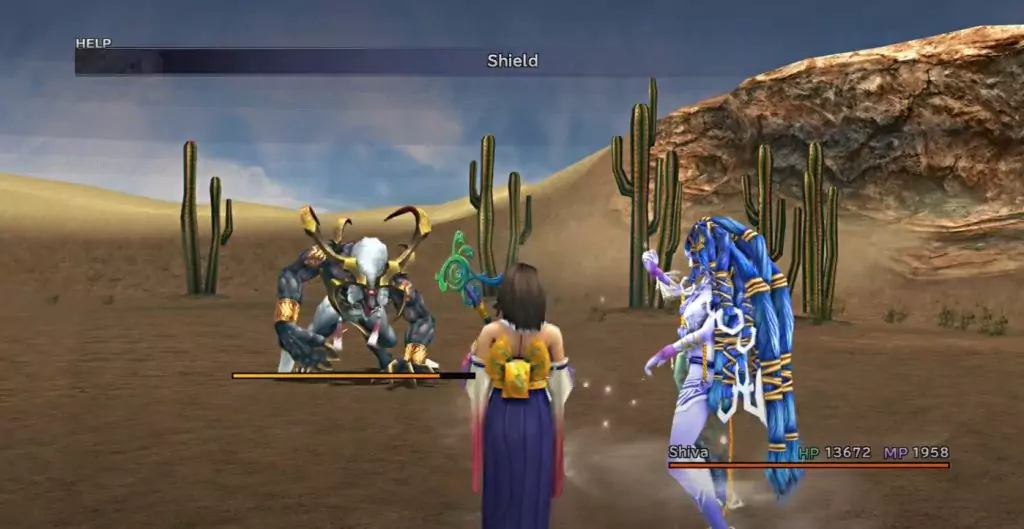
Dark Shiva
Location: The entrance to Macalania Temple after unlocking the Airship.

Details: Dark Shiva is extremely fast, and her physical attack will also Dispel whoever she attacks. Her Heavenly Strike attack will cause Berserk, Confuse, and Instant Death.
Her Overdrive, Diamond Dust, will deal around 80,000 damage to the entire party. The Overdrive gauge will increase by 10 percent when the boss is attacked and 10 percent when attacking.
Strategy: Heading into this fight, you’ll want very high Agility, Accuracy, Strength, and Defense. At least one party member should have Auto-Life to withstand Shiva’s Diamond Dust attack. You can also summon an Aeon to take the hit for you.
Use your Aeon’s Overdrives, Celestial Weapons, and Quick Hit ability to chip away at Dark Shiva’s 1,100,000 HP. Auto-Haste is also useful, and using Wakka’s Attack Reels while equipped with a Break Damage Limit weapon will put an end to this fight quickly.
Rewards: 20,000 AP (30,000 for Overkill)
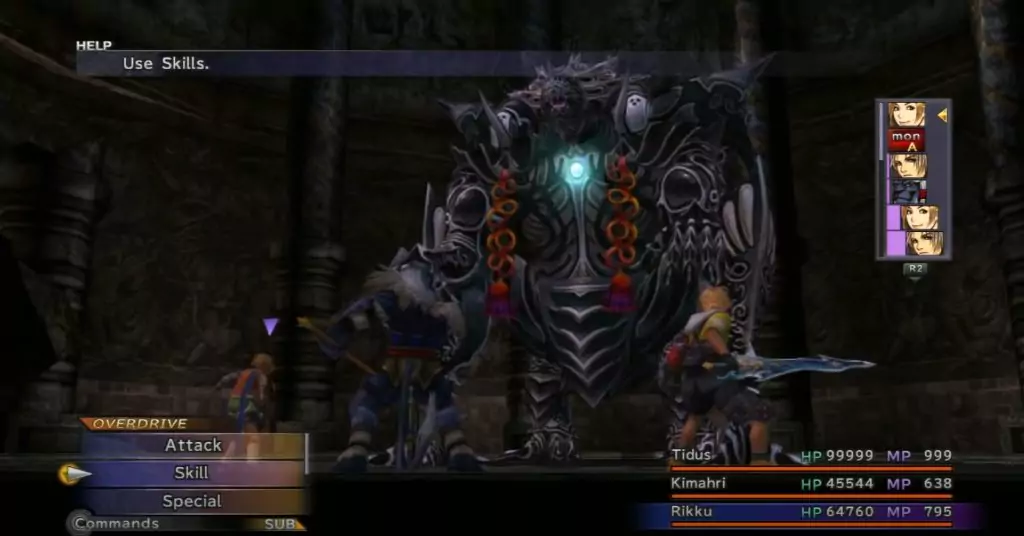
Dark Bahamut
Location: The Zanarkand Dome, where you previously fought Yunalesca, after unlocking the Airship.
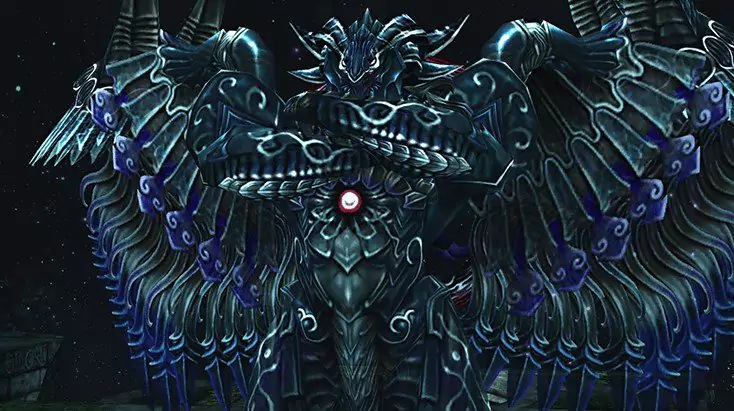
Details: As its terrifying appearance may indicate, Dark Bahamut is one of the most difficult Dark Aeons to defeat. His version of Impulse, which will trigger after being hit five times, will inflict Stone, Slow, and Full Break on the entire party, while also delaying their next attacks.
Each time Dark Bahamut attacks physically, his Overdrive gauge will increase by 10 percent. When attacked, it will also increase by 10 percent. His Overdrive, Megaflare, will delay and dispel the party and deal around 40,000 damage.
Strategy: Before taking on Dark Bahamut, you’ll want your Sphere Grid to be as close to complete as possible. Keeping buffs during battle will be difficult, so try to outfit your armor with as many helpful passives as possible, with Stoneproof and Auto-Haste being particularly important. Celestial Weapons are also a must if you want to make a dent in Dark Bahamut’s 4,000,000 HP.
At least one party member should have Auto-Life to survive Megaflare if you don’t summon an Aeon to take the hit. Using Attack Reels and Blitz Ace Overdrives are very effective. While physically attacking will typically raise the boss’s Overdrive gauge, this isn’t the case with the passive Counter-Attack ability found on Tidus, Wakka, Auton, and Kimahri’s Celestial Weapons.
Rewards: 30,000 AP (40,000 for Overkill)
Dark Yojimbo
Location: The Cavern of the Stolen Fayth after unlocking the Airship. You can find Dark Yojimbo in the same place where you first recruited Yojimbo.
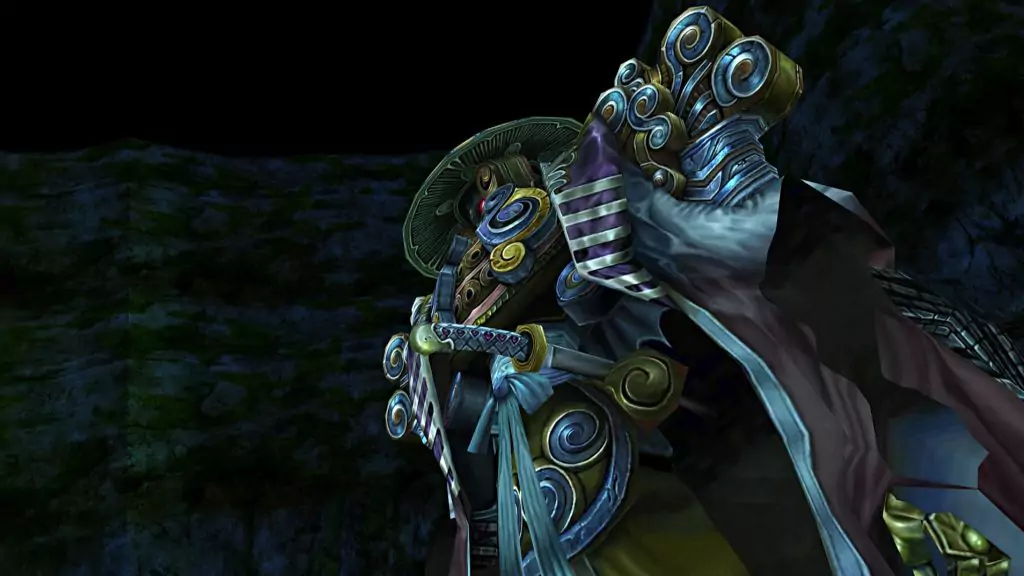
Details: Unique among Final Fantasy X‘s superbosses, you’ll need to fight Dark Yojimbo five times before escaping the Cavern of the Stolen Fayth. While you initially find this Dark Aeon at the back of the cave, you’ll need to fight him again and again as you head back toward the entrance.
Dark Yojimbo will use three attacks: Kozuka, Daigoro, and Wakizashi. Kozuka will attack a single target and inflict Slow and Full Break. Daigoro will also attack one target but will inflict Stone and Poison. Wakizashi will attack the entire party.
The Overdrive gauge will increase by two percent each time Dark Yojimbo is attacked during the first fight. In the subsequent four fights, it will increase by six, 10, 16, 20, and 26 percent, respectively.
Zanmato, Dark Yojimbo’s Overdrive, is extremely dangerous. Dealing 99,999 damage to the entire party, it will also remove Auto-Life.
Strategy: Ensure that your armor is packed with buffs, particularly Stoneproof. Your Defense, Agility, Strength, and Luck stats should be high for this battle. As long as your stats are high and your armor is well-customized, you should be able to defeat the boss before he uses Zanmato. Dark Yojimbo has very low Magic Defense, so using Ultima is a great way to chip away at his health.
Equipping a weapon with First Strike will make this fight much easier, as it will allow you to counteract the first fight’s Ambush. Having Quick Hit and using powerful Aeon Overdrives are the best way to take this boss down quickly.
It’s important to note that Dark Yojimbo’s encounter can be reset. This means that you can farm the boss for Dark Matter, Master Spheres, and rare armor with Break HP Limit and Ribbon passive abilities. After defeating him between one and four times, reset the encounter by either leaving the cave, loading a save inside the cave, using the teleporter near the end of the cave, or visiting the Blitzball menu in the Save Sphere.
Rewards: 8,000 AP (10,000 for Overkill) on each defeat
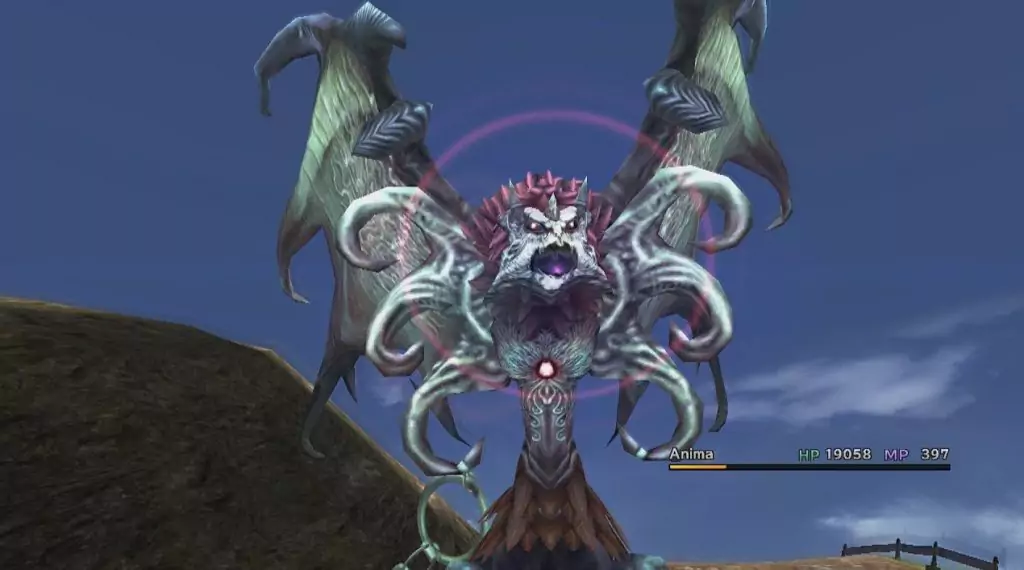
Dark Anima
Location: At the bottom of Mt. Gagazet after unlocking the Airship. You must go into the Mt. Gagazet cave to trigger Dark Anima’s appearance.
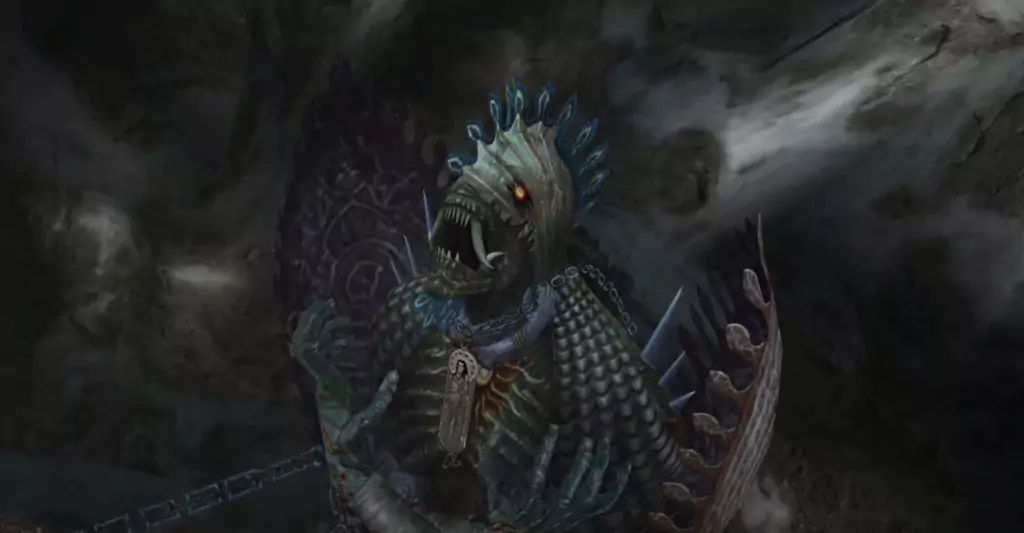
Details: Each of Dark Anima’s three attacks will inflict a number of negative status effects on your party members.
Her physical attack will apply Poison, Stone, Petrify, and Zombie to a single target. Pain will instantly kill one character regardless of Deathproof and Ribbon passive effects. Giga-Graviton will reduce the entire party’s HP by 7/16 while also inflicting Slow, Doom, Silence, Darkness, and Sleep.
Dark Anima’s Overdrive gauge will increase by 10 percent when attacking and five percent when attacked. Her Overdrive, Oblivion, will hit the entire party 16 times, with each hit doing around 5,000 damage and also draining the party’s MP. Oblivion will also Dispel all buffs except Auto-Life and Delay the party.
Strategy: Prepare for the longest Dark Aeon fight! Boasting a whopping 8,000,000 HP, Dark Anima’s love of inflicting status ailments makes this battle a tough one for even the strongest players. You’ll want to have Holy Water on hand for any characters hit with Dark Anima’s physical attack and MP recovery items to deal with the aftereffects of Oblivion.
Your Sphere Grid should be as close to complete as possible before fighting Dark Anima, and all armor pieces should be enhanced with useful passive effects. Having at least one piece of armor with Ribbon is particularly helpful, as the boss may cast Doom.
Having Quick Hit will help you do damage more quickly. Keep your HP above the halfway point to survive Giga-Graviton and summon an Aeon to deal with Oblivion if you don’t have Auto-Life equipped on a character.
Rewards: 30,000 AP (40,000 for Overkill)
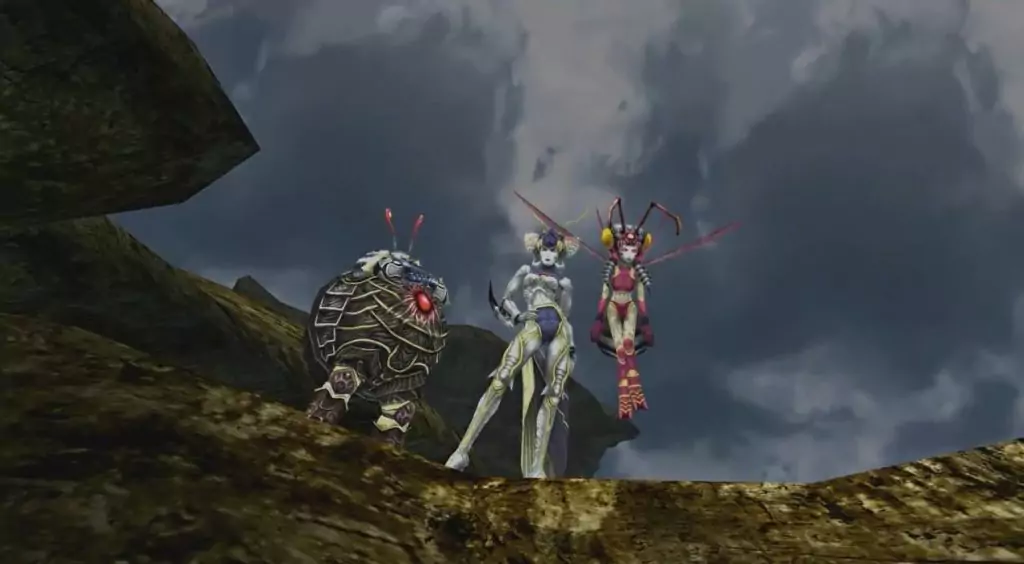
Dark Magus Sisters
Location: On Mushroom Rock Road near the exit to the Mi’ihen Highroad.
This battle gives you a choice of fighting the sisters together or separately. If you want to fight them together, simply run into them to start the fight. To engage with them separately, run down into the valley. Around the halfway point, Dark Cindy will stop chasing you. It’s possible to fight Sandy and Mindy together if you like–otherwise, keep running.
When you reach the elevator at the very end of the valley, Dark Mindy will give up the chase. You’ll fight Dark Sandy first, then Dark Mindy, and finally Dark Cindy.
Overall Strategy: Have all Celestial Weapons and make sure that your Sphere Grid is nearly complete. Be sure to customize your armor with helpful buffs. Having Auto-Phoenix or Auto-Life will be helpful, especially if you’re planning on fighting the sisters together. Holy Waters will also help you to deal with negative status effects.
Three Sisters Strategy: If you’re gutsy enough to fight all three Dark Magus Sisters together, be warned. Each sister can cast their own unique abilities, and their Delta Attack Overdrive will be useable at the start of the fight. This deals 99,999 damage to the entire party six times while also removing Auto-Life. You must summon an Aeon to survive, and this Aeon must be strong enough to withstand attacks from Dark Sandy and Dark Mindy before Dark Cindy casts the Overdrive.
You can damage all three sisters at once using Doublecasts and certain Overdrives. While this may be tempting, it will also fill their respective Overdrive gauges at once, leading you to another Delta Attack. Focus on defeating Dark Mindy first, as she has the least HP at 2,000,000.
After killing one of the sisters, the remaining two won’t be able to use Delta Attack.
Dark Sandy Strategy: Dark Sandy can use Razzia, an attack dealing around 170,000 damage which also removes Auto-Life. Her physical attacks also inflict Stone, so you’ll want to ensure that you’re protected. Each time she’s attacked, her Overdrive gauge will increase by five percent. It will increase by 20 percent when she attacks.
Her Overdrive is Mega-Graviton, which depletes 7/16 of the party’s max HP. It also inflicts Slow, Doom, Darkness, Sleep, and Silence.
Use Quick Hit and Aeon Overdrives to deal the most damage, and use Esuna on any party members without Ribbon. Make sure that your party’s HP is above half to survive Mega-Graviton. Dark Sandy has 2,500,000 HP, so if your stats are high enough, she won’t take too long to defeat.
Dark Mindy Strategy: Dark Mindy’s Calamity attack will inflict Darkness, Poison, Silence, Full Break, and Curse on a single target. Her main attack, Passado, hits a character 15 times and will instantly kill them unless they have Deathproof or Ribbon.
Mega-Graviton, her Overdrive, is the same as Dark Sandy’s. It depletes 7/16 of the party’s max HP. It also inflicts Slow, Doom, Darkness, Sleep, and Silence. Each time she’s attacked, her Overdrive gauge will increase by five percent. It will increase by 20 percent when Dark Mindy attacks.
With low Magic Defense, the best way to deplete Mindy’s 2,000,000 HP is to use Ultima or Flare as much as possible. Use Holy Water on Cursed party members and use Dispel to rid any characters of Full Break. Esuna will work on the other negative status effects.
Dark Cindy Strategy: Dark Cindy has the highest HP of the sisters at 3,000,000. Her physical attack will Dispel the impacted character, and her Cascade ability deals around 120,000 HP to a single character while also damaging their MP.
Like Dark Mindy, Dark Cindy has low Magic Defense, making Flare and Ultima extremely effective. Esuna will heal any negative status effects, and Auto-Phoenix or Auto-Life will keep the party alive.
Like the other sisters, Dark Cindy’s Overdrive is Mega-Graviton. Its effects are the same as previously noted, and the Overdrive gauge fills at the same rate as Sandy and Mindy’s.
Rewards: 10,000 AP (12,000 for Overkill) for each sister defeated
Penance
Location: After defeating every Dark Aeon, a cutscene showing Penance will play. This will unlock a new location you can reach using the Airship called ‘Penance.’ Fly there to start the hardest battle in the game.
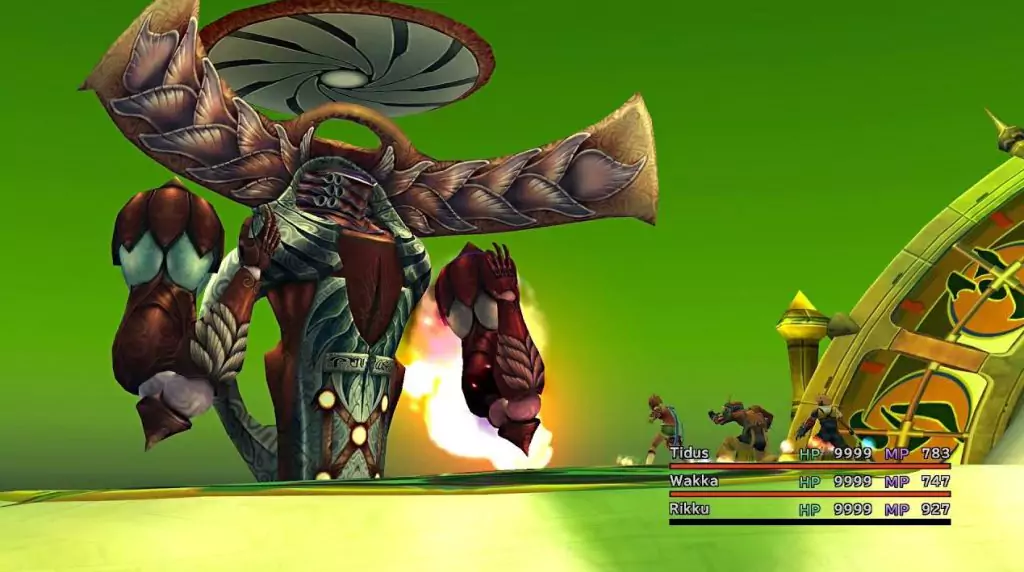
Details: The fight against Penance has two phases.
During the first phase, the boss will use Obliteration on the whole party, causing damage and inflicting the Slow debuff. In phase two, it will use Immolation on one character instead. This causes damage, inflicts Armor and Mental Break, and drops the character’s MP to 0.
Penance’s Ultimate attack, Judgement Day, can only be cast if both arms are still present. This will hit the entire party for 99,999 HP and 999 MP. According to the hidden counter, Penance will use Judgement Day on its next turn when the counter hits 19. The counter increases by one each time it is attacked.
Both of Penance’s arms can cast unique attacks, and while they can be killed, they will respawn after a few turns with full health.
The Left Arm utilizes physical attacks, Slowga, and Tera-Graviton, causing massive damage and inflicting Slow, Doom, Sleep, Darkness, and Silence. Notably, the Left Arm’s physical attack will also Dispel the impacted character.
The Right Arm’s physical attack will inflict Stone. It can also cast Calamity, which will impact your party with Poison, Full Break, Curse, Darkness, and Silence. The Right Arm can also protect Penance and both arms by casting Mighty Guard, shielding the boss with Shell, Regen, and Protect.
The Arms can be killed, but they will respawn after a few turns.
Strategy: Before taking on the ultimate superboss, you’ll want to max out every stat. To survive Penance’s attacks, you’ll want to equip armor that boosts your defense. Celestial Weapons are a must, and you’ll want to stock up on X-Potions.
Each of the arms has 500,000 HP, while Penance itself has a whopping 12,000,000 HP. Even if your characters have incredibly high attack power, this battle is all about endurance.
Be careful not to kill both arms at once. As each will take six Quick Hits to kill, attack each five times, and finish them each off just before they get a turn. Doing this will give you more time to attack Penance before needing to deal with the arms again.
The second phase will begin once Penance loses 3,000,000 HP. Dispel Haste as quickly as you can. When a character is hit with Immolation, you will also need to Dispel them immediately.
Rewards: 60,000 AP (65,000 for Overkill) / 10,000 AP (Arms)
Defeating Penance will also reward you with the ‘Perseverance‘ achievement.