![]() Key Takeaway
Key Takeaway
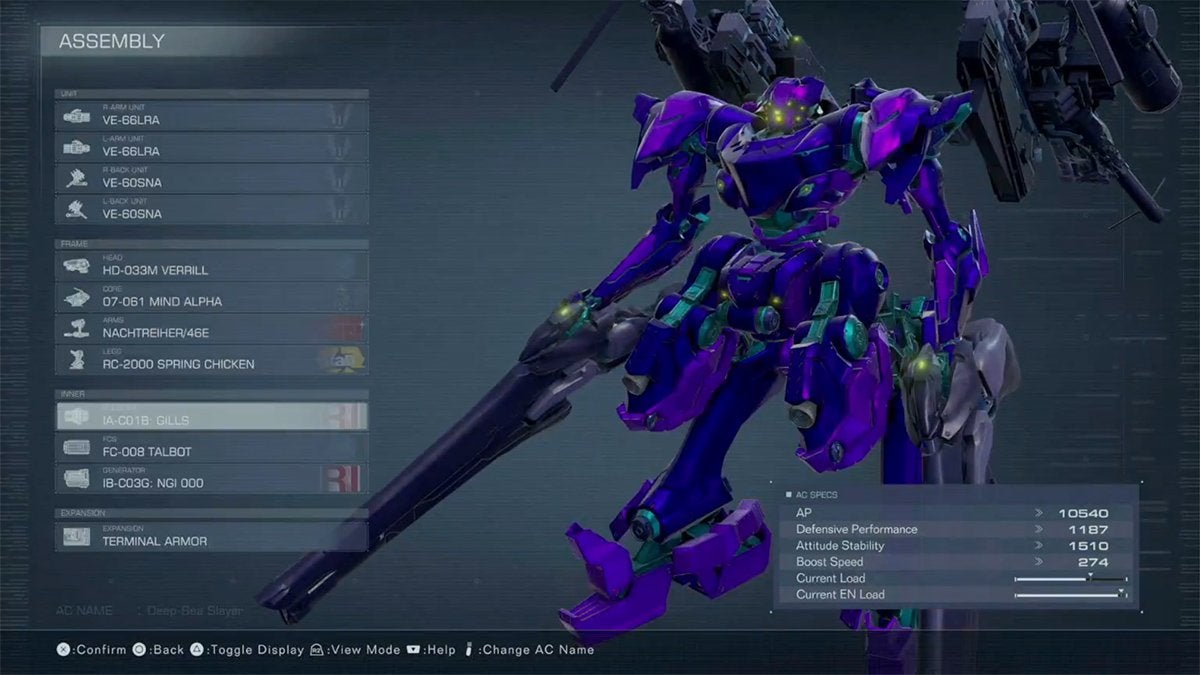
If you want a specific build that’s verified to work against Ibis, here’s the one we used when we first defeated this boss:
- R-Arm Unit – VE-66LRA
- L-Arm Unit – VE-66LRA
- R-Back Unit – VE-60SNA
- L-Back Unit – VE-60SNA
- Head – HD-033M VERRIL
- Core – 07-061 MIND ALPHA
- Arms – NACHTREIHER/46E
- Legs – RC-2000 SPRING CHICKEN
- Booster – IA-C01B: GILLS
- FCS – FC-008 TALBOT
- Generator – IB-C03G: NGI 000
Stay at mid-range, keep moving, Quick-Boost frequently, and save your slower weapons for when Ibis is stationary.
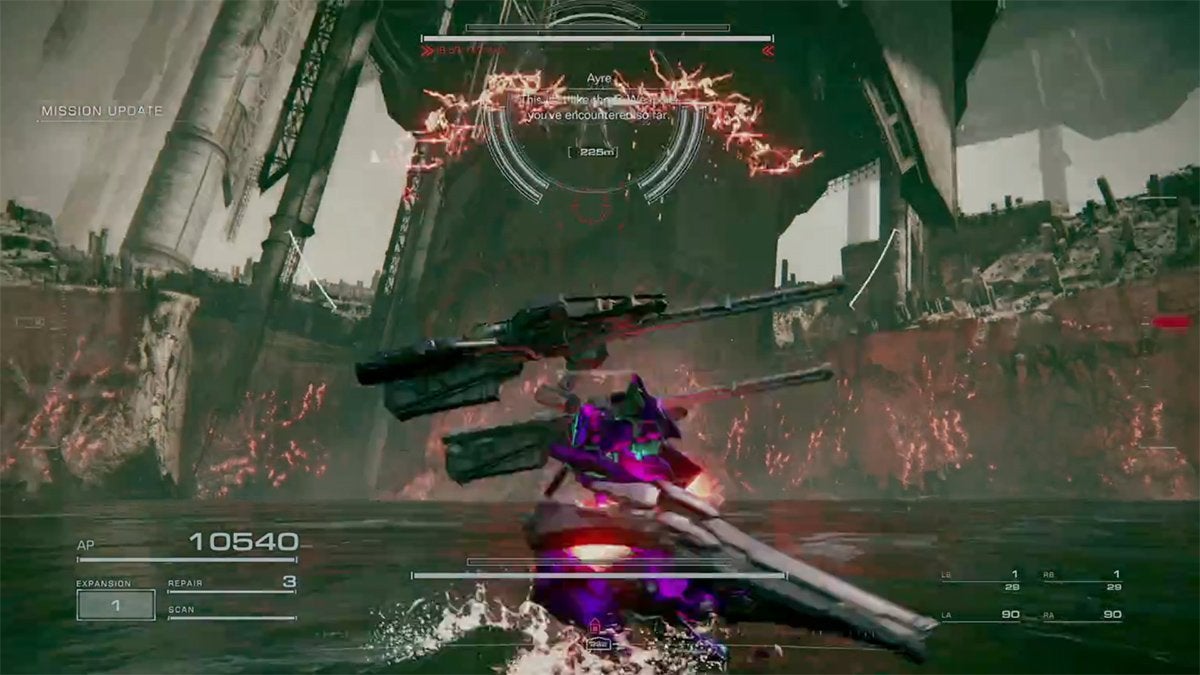
The end-game bosses in FromSoftware games are no joke. To beat Ibis in Armored Core 6, you’ll have to be quick on your feet (and in the air) to dodge this boss’ ludicrous amount of lasers. It also helps if you can consistently stagger this coral-powered AC.
Table Of Contents
Recommended Build Against Ibis Series CEL 240
Ibis is fast and stays mostly in the air, so you’ll have a hard time consistently landing hits on it at close range. The boss can get behind you faster than you can turn (unless you’ve unlocked the Quick-Turn ability in OS Tuning).
Furthermore, long-range attacks won’t hit their mark that well either, as the projectile speed of any weapon you choose can’t keep up with Ibis. The only exceptions are weapons that are designed to home in on targets.
For this reason, it’s best to use a mid-range build to reliably beat Ibis in Armored Core 6. With that said, feel free to use whatever frame parts you’d like—with the exception of the arms.
In this fight, we highly recommend using the NACHTREIHER/46E arms, as they’ve got the highest Firearm Specialization stat in the game. This is helpful when fighting a fast-moving enemy like Ibis because it’ll make it easier to hit the enemy with your shots.
As for weapons, the VE-60SNA is a great choice (and it usually is for boss battles). Mount two of them on your back for high impact and damage potential. On top of that, pick a couple of arm weapons that suit your preferences for mid-range combat.
In terms of inner parts, choose whatever booster lets you use a lot of high-speed Quick Boosts. The ALULA/21E and IA-C01B: GILLS are both great picks here. You’ll want to equip an FCS with a high Mid-Range Assist stat, such as the FC-008 TALBOT. Lastly, use a generator that has a lot of EN Output—the IB-C03G: NGI 000 is a suitable option.
On top of that, using the TERMINAL ARMOR expansion can save you in dire situations.
The Specific Build Assembly We Tested
If you want a specific build that’s verified to work against Ibis, here’s the one we used when we first defeated this boss:
- R-Arm Unit – VE-66LRA
- L-Arm Unit – VE-66LRA
- R-Back Unit – VE-60SNA
- L-Back Unit – VE-60SNA
- Head – HD-033M VERRIL
- Core – 07-061 MIND ALPHA
- Arms – NACHTREIHER/46E
- Legs – RC-2000 SPRING CHICKEN
- Booster – IA-C01B: GILLS
- FCS – FC-008 TALBOT
- Generator – IB-C03G: NGI 000
This build is maneuverable enough both on the ground and in the air to avoid most—if not all—of Ibis’ attacks. The counterintuitive trick for maintaining your EN is to fully deplete your EN gauge. Since the IB-C03G: NGI 000 has an impressive Supply Recovery stat, your EN gauge will almost completely refill itself about 3 seconds after being fully depleted. Use Quick Boosts liberally and don’t worry about your EN running out.
Alternate firing your dual VE-66LRA laser rifles to maintain steady damage output from mid-range. Their Rapid Fire stats aren’t the best, so you don’t want to fire them at the same time.
Use your two VE-60SNA units only when Ibis is stationary. There’s a half-second delay between when you fire and when the shots are launched, so wait until your foe stops moving to ensure your stun needles strike true.
The VE-60SNA back units are efficient at staggering Ibis (if they hit). Furthermore, they deal a lot of damage on staggered targets. They’re your best chance at halting Ibis in its tracks.
Best Strategy to Beat Ibis

Keep some distance between yourself and Ibis so you can keep track of it. If you’re too close, you’ll lose sight of it—which makes it harder to dodge its attacks and land shots on your enemy. However, if you’re too far away, you won’t be able to hit the boss.
Ibis pauses when charging its more powerful attacks; however, you don’t want to attack at this point due to the high incoming damage. Instead, wait until the boss launches their assault, dodge, and then immediately return fire with your slowest weapons.
While Ibis is using their lesser attacks and flies around the battlefield, you should do the same; use your faster weapons throughout the fight.
Ibis’ Phase 1 Attacks
In addition to sporadically spawning small red lasers, this boss has many stronger attacks. To avoid minor assaults, use Quick Boosts in any direction. With that said, these puny beams don’t do much damage, so you can tank through them with few consequences.
- Laser Shower – Whenever you see strings of coral sparks appear along Ibis’ wings, it’s about to shoot a series of laser beams at you. To dodge them, Quick Boost to the left or right.
- Melee Energy Blade – Ibis sometimes charges one of its arms with a blade of energy. If it does so when flying towards you, it’s aiming to unleash a sweeping energy attack directly in front of you. This move has a lot of horizontal range, so the best best to evade it is to boost upward to get over the damage hitbox. Conversely, if you’re on the ground when this attack occurs, you can get under it as well to avoid taking damage.
- Red X – When you see a red ‘X’ appear in front of Ibis, it’s preparing to launch a cross-shaped energy attack your way. This one’s hard to avoid, however, you can do so by swiftly using two Quick Boosts either to the left or right. Alternatively, if you’ve got fast enough reflexes, turn to the left or right and Assault Boost for a second to get out of this attack’s range.
- Crescent Blades – At mid or long-range, Ibis fires two crescent-shaped energy waves at you. If the energy waves are mostly vertical, dodge them by quick-boosting to the left or right. However, if the energy waves are mostly horizontal, boost upwards to avoid them.
- Big Beam – Once in a while, the boss fires a huge energy beam. You’ll see it coming when Ibis charges a red orb in front of itself. Quick Boost in any direction to get out of harm’s way. The hitbox for the Big Beam is surprisingly small, so as long as you avoid the center of it, you won’t lose AP.
Ibis’ Phase 2 Attacks
Ibis enters Phase 2 after you fully deplete its AP for the first time. It regains all of its AP and comes back with some new attacks—in addition to all of those from Phase 1.
- Vertical Slash – When you see a red line of energy appear above Ibis, it’s about to perform a long vertical melee attack. This move deals a lot of damage. However, it can be dodged easily if you’re continuously on the move. You don’t even need to Quick Boost here; simply side-step this attack.
- Laser Clamp – At first, this attack looks like Ibis missed and has fired lasers all around you. Don’t be fooled: these lasers are about to close in on your position for big damage. If you see such a strike, Quick Boost out of the laser ring’s radius and you’ll be safe.
After you beat Ibis in Armored Core 6, you’ll have completed Chapter 4. Well done! This is a tough fight, so coming out on top is no mean feat. Fighting Ibis makes the Balteus fight look like a tutorial boss. And that’s being said about a game where the tutorial boss is pretty challenging! FromSoftware sure doesn’t pull any punches. Rest up while you can, 621, as your journey isn’t over yet…