![]() Key Takeaway
Key Takeaway
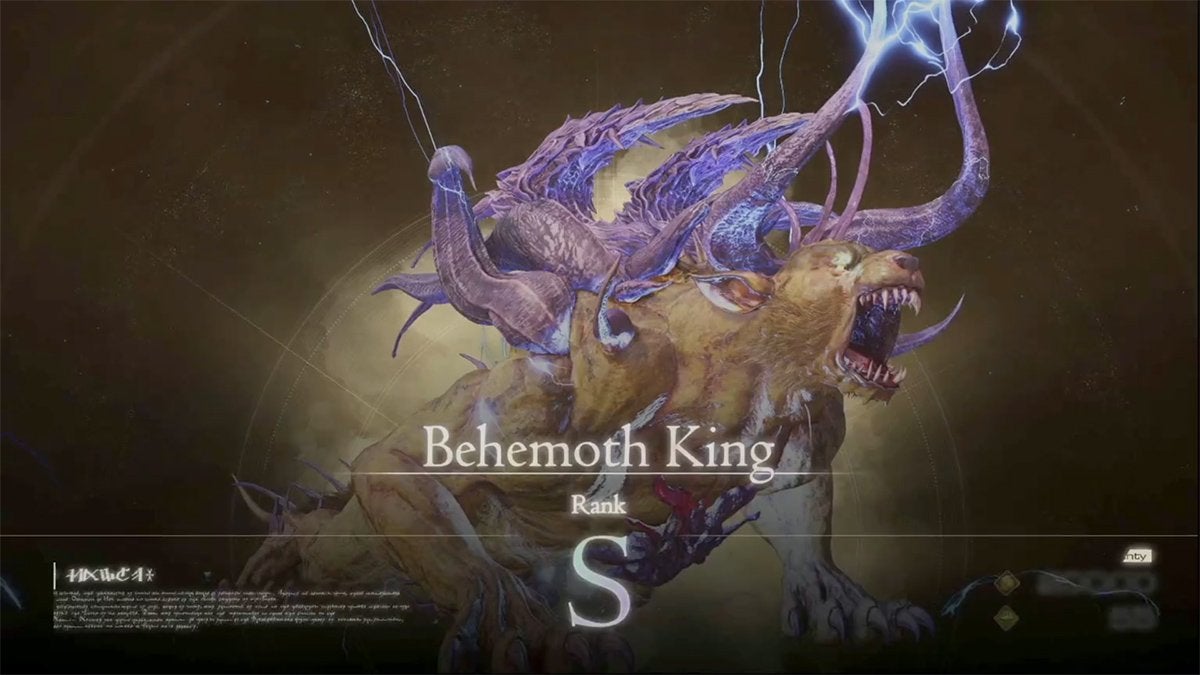
The Behemoth King—the Notorious Mark of the Masterless Marauder hunt—is found in the northeastern part of the Kingdom of Waloed. The beast roams the open area slightly southwest of the Vidargraes obelisk.
This hunt can be started after you begin the main quest Back to Their Origin.
The Masterless Marauder hunt in Final Fantasy 16 gets you a Behemoth Shackle and an Orichalcum. You’ll need both of these to craft and reinforce some great end-game gear. Though, finding your target is easier than defeating it. Prepare for a powerful foe!
Table Of Contents
Where to Find the Behemoth King, the Masterless Marauder
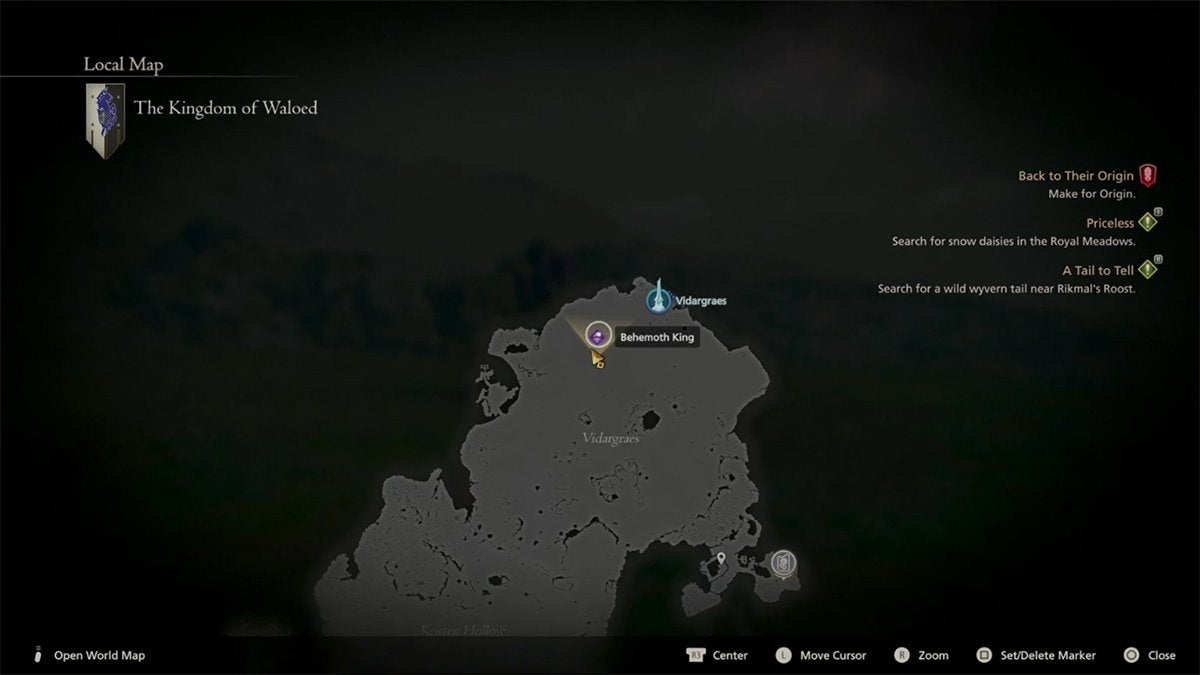
You’ll first need to reach the Back to Their Origin main quest before the Masterless Marauder hunt becomes available. Afterward, head to the Kingdom of Waloed to start your search. It’ll be pretty easy to come across the level 47 Behemoth King, as they’re hanging out just southwest of the Vidargraes obelisk in the northeast of the King of Waloed.
How to Beat the Behemoth King, the Masterless Marauder
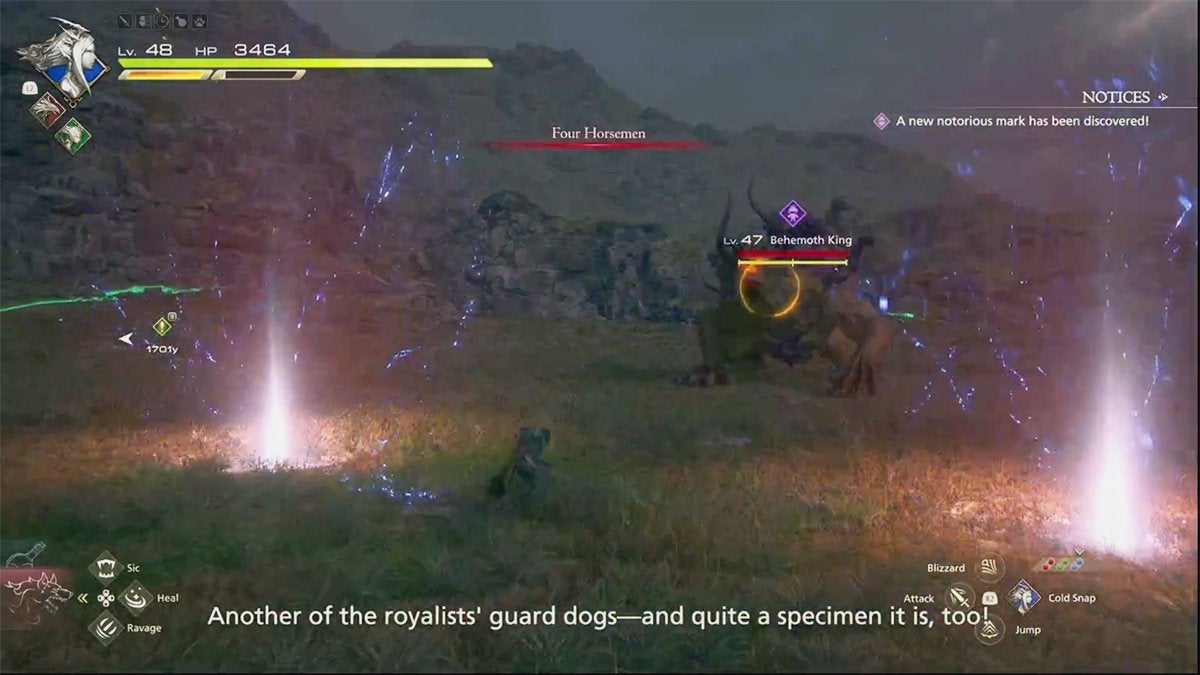
Despite the Behemoth King being a burly beast, it’ll cast tons of magical attacks—some of which are nearly impossible to avoid. Make sure you’re at least at level 45 or higher before challenging the Masterless Marauder. On top of that, bring as many healing items as you can to more easily slay this S-rank Notorious Mark.
With that said, you can’t win this fight by spamming potions; you’ll need to learn how to dodge most of the Behemoth King’s attacks and how to counterattack effectively.
- Four Horsemen: The Behemoth King unleashes this named ability (its name appears on-screen right before it’s used) as the battle begins—as well as throughout the fight. Four glowing beams of light appear around your position, which foretells the falling of a few meteors. You need to stay away from these glowing spots to avoid the initial impact of these projectiles—but also avoid the following shockwaves by dodging again or jumping over them.
- Lightning Storm: Sometimes this S-rank beast summons a cluster of lightning bolts as its eyes glow blue. This localized storm is in a fairly small area that glows obviously with impending electricity. As such, simply stay away from the bluish-white illumination to evade the lightning.
- Maelstrom: This named ability (its name appears on-screen right before it’s used) creates a tornado of black wind. Although the area of effect is large, this assault stays in one spot. Once you see dark winds swirling around you, dodge once or twice to get out of the twister’s epicenter. This attack lasts for about ten seconds.
- Meteor Shower: During many of its other attacks, the Behemoth King can open up numerous portals that’ll launch tiny meteors at you. Alone, this isn’t a big deal; however, when combined with other attacks, they can be hard to see and avoid. Try your best to predict where the meteors will land to avoid them.
- Reign of Fire: If you thought fighting the Dread Comet involved a lot of projectiles, this named ability (its name appears on-screen right before it’s used) puts the aforementioned Chocobo’s attack to shame. Two successive volleys of entirely too many meteors crash down on the battlefield. Now’s a good time to spam the dodge button, as there’s not much else you can do here. It’s also worth mentioning that this ability starts being used after the Behemoth King drops below 50% health.
- Apocalypse: Aptly titled, this named ability (its name appears on-screen right before it’s used) consists of a series of magical attacks. First, the Behemoth King uses Reign of Fire and Meteor Shower simultaneously. Then, it uses Four Horsemen twice (technically eight horsemen). Finally, the Masterless Marauder calls down a gigantic and slow-moving meteor. You can see where it’ll impact because there’s a huge glowing area showing its landing zone. To dodge this final strike, get out of the illuminated circle—you’ll have a full five seconds to do so. The Behemoth King only begins using Apocalypse after it drops below 50% health.
Besides the above-mentioned abilities and attacks, the Masterless Marauder can use some basic but brutal melee maneuvers. When you see it lift one of its massive forelimbs—and one of its hind ones—dodge away from your foe, as it’s about to do a spinning slash that’ll hit you with its claws and spiked tail. If the Behemoth King does what looks like a bow, dodge to the left or right to get out of its path, as it’s about to charge forward for a fierce tackle.
On occasion, the horned fiend may tense its body while on all fours: this heralds a pouncing attack. Evade this with a dodge to the left or right of your adversary. If you’re behind the beast, it’ll sometimes try to slam you with its tail.
Conversely, if you’re right in front of it, the Masterless Marauder will try to crush you with one of its huge arms, although this has an obvious windup as it lifts its arm high into the air. It can follow up one of these heavy hits with a backhand as well, so don’t get greedy with your attacks!
During the Masterless Marauder hunt, we found stagger-focused tactics to be the best. It goes without saying that you should upgrade them as much as possible.
Garuda’s Aerial Blast is a great way to passively decrease the Behemoth King’s Will Gauge. After using Deadly Takedown to briefly stun the beast, Garuda’s Gouge is perfect for cleaving through the rest of the foe’s Will Gauge. What’s more, Deadly Leap is ideal for getting into the air quickly to evade attacks.
Shiva’s Eikonic abilities also help a lot. Diamond Dust does a crazy amount of stagger damage—so use it as often as you can in this fight. Ice Age—while it needs to be charged—does a decent job at taking chunks out of the enemy’s health bar.
The Masterless Marauder Hunt Rewards
You’ll get these great rewards for completing the Masterless Marauder hunt:
- 20,000 Experience
- 200 Ability Points
- 20,000 Gil
- 55 Renown
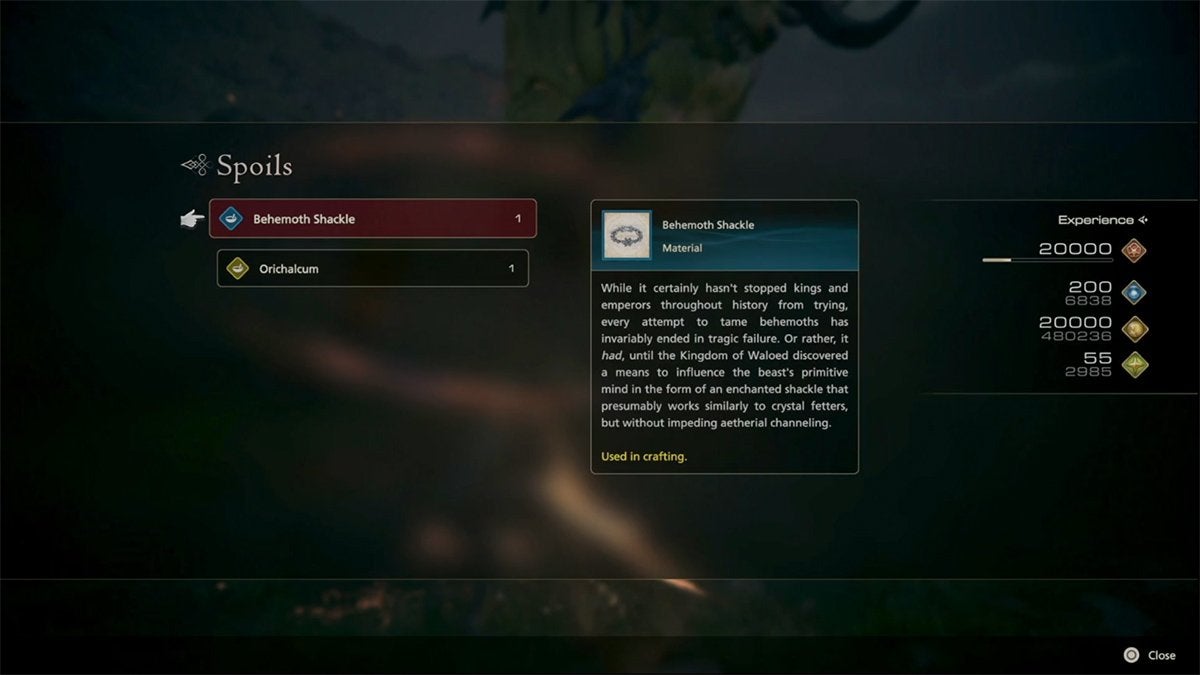
- 1 Behemoth Shackle
- 1 Orichalcum
This hunt is a fun—yet frenetic—way to get a ton of Experience and Gil right before the final part of FF16‘s story. More importantly, defeating the Behemoth King gets you a Behemoth Shackle and an Orichalcum. Both of these materials are important for crafting powerful end-game items, like the Defender and Gotterdammerung swords respectively. For more Orichalcum, try taking on other S-rank hunts, like the Tricephalic Terror, the Ruin Reawakened, and the Breaker of Worlds.