![]() Key Takeaway
Key Takeaway
Here are the physical elements you need to put together your recording setup:
- Your console
- A monitor with at least one HMDI port
- Your preferred capture card
- A laptop or desktop computer
- Two HMDI cables
- One capture card USB cable
- Your preferred recording software
Once you have all of the above, connect your console, monitor, computer, and capture card with your three cables. Then, open your recording software and adjust your video, audio, and recording settings.
Next, if you’re on a console that has an HDCP feature, turn it off before you begin recording.
Last but not least, remember to always do a test recording before a streaming session!
On both the PS5 and Nintendo Switch, you can only record videos up to a certain length (1 hour on PS5 and a mere 30 seconds on Nintendo Switch). To get around this limitation, you can use additional hardware and software. With that said, putting everything together isn’t too hard.
Table Of Contents
What You Need to Record Longer Videos From Consoles
Besides the consoles themselves, their default cables, a computer, and your monitor, there are a couple of other things you’ll need to record longer videos on PS5 and Nintendo Switch. Thankfully, in combination with the aforementioned devices, recording longer videos from your consoles only requires a capture card and your preferred recording software.
Our chosen capture card is the AVerMedia Live Gamer Mini Capture Card. You can get it on Amazon for well under $100 USD. As for recording software, we use Streamlabs, as it’s free and well-made. The download is easy to find on Streamlabs’ website—but you need a Windows operating system to use it.
All Recording Setup Components (Devices & Cables)
- PS5 or Nintendo Switch (or another console with an HDMI Out port, which will likely be labeled as only “HDMI”)
- Monitor with at least one HMDI In port (will likely be labeled as only “HDMI” as well)
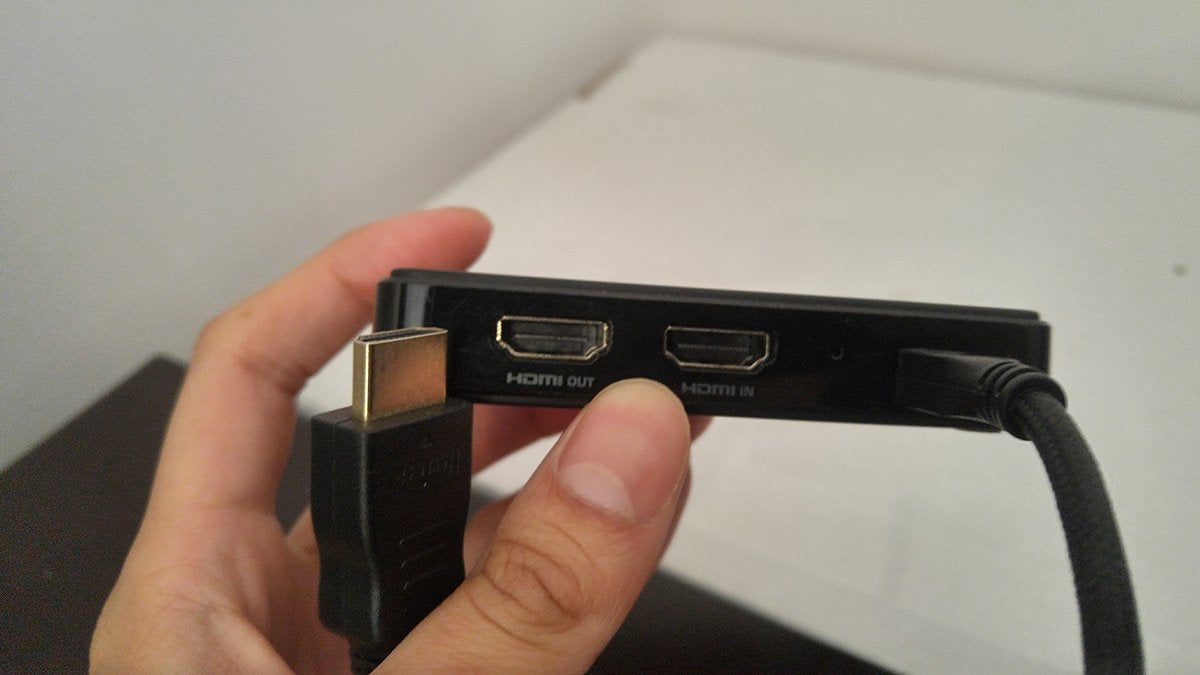
- Capture card with at least one HDMI Out port and one HDMI In port (these should be labeled as “Out” and “In” respectively)
- Laptop or desktop computer (we use a laptop for our setup)
- Cables (3)
- Two HDMI cables that are both long enough to connect your devices—which will vary depending on your setup (we use a couple of five-foot-long HMDI cables)
- One cable that connects your capture card to your computer (this should come with your capture card; the cable for the AVerMedia Live Gamer Mini Capture Card is of the USB-A to micro USB variety)
- Recording software (download a free one; most are pretty good)
How to Connect Your Devices to Record Videos Easily
The signal path (how your game video and audio gets from point A to point B) is the same for when you record videos on PS5 and Nintendo Switch if you use our method. With that said, let’s get into the details.
To begin, make sure your console, computer, and monitor are all plugged in and are getting power. Next, place your capture card somewhere between your console, monitor, and computer, as the capture card acts as a crossroad for your signals.
Step #1: Connecting Your Capture Card to Your Console
Once everything is powered and in ideal positions, you can start running your cables. Locate the HDMI Out port (it will only say “HDMI”) on your console. Connect one end of an HDMI cable to your console’s HMDI Out port.
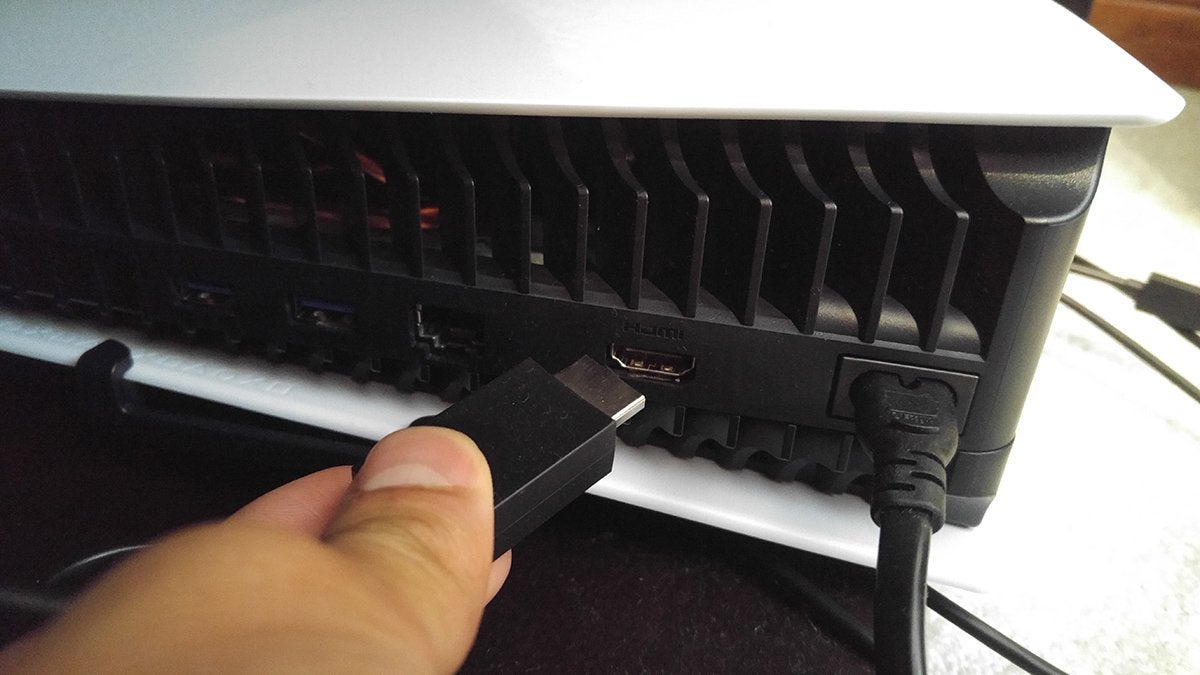
Then, connect the other end to the HMDI In port on your capture card.
This allows your console to send its audio and video signals to your capture card.
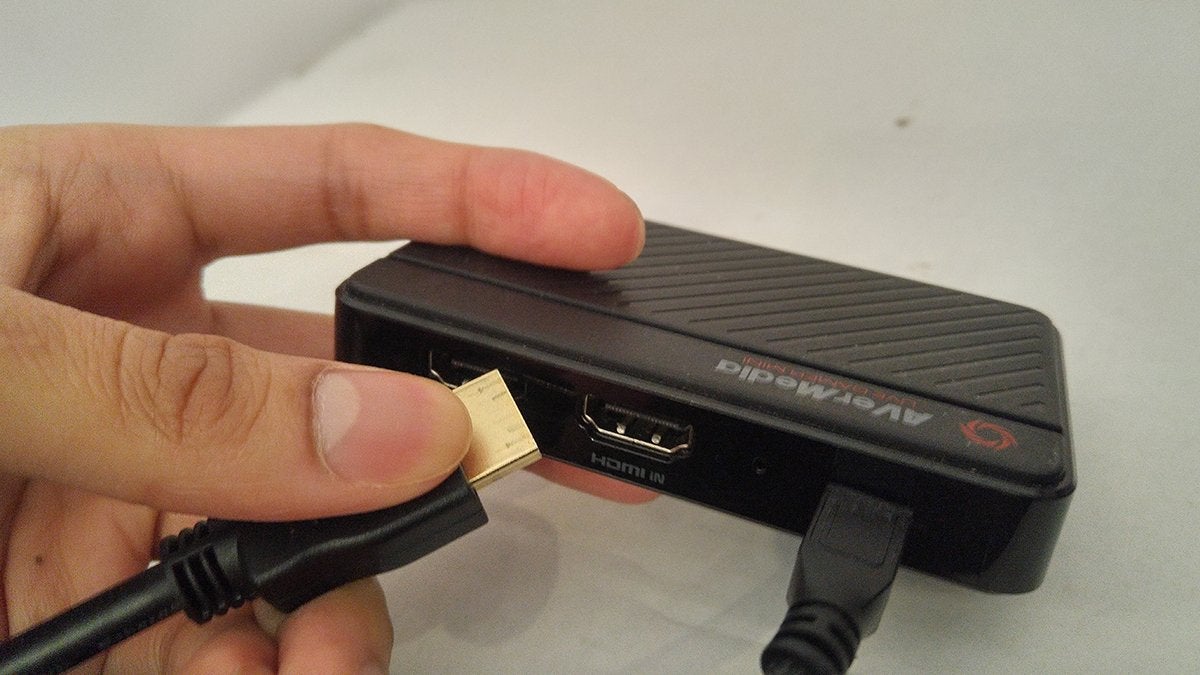
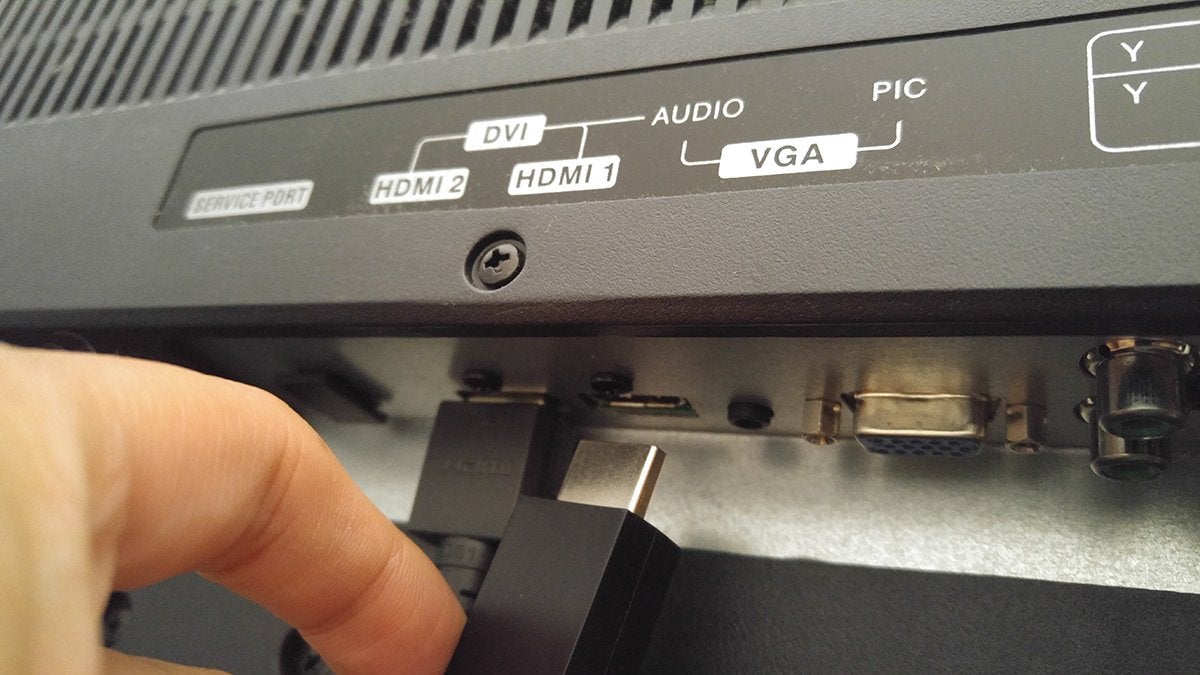
Step #2: Connecting Your Capture Card to Your Monitor
You’ll still want to be able to see what’s happening on your monitor, which brings us to the next step. For this, grab another HMDI cable. Connect one end of this new HMDI cable to the HMDI Out port on your capture card.
Afterward, plug the other end of this HMDI cable into an HDMI port on your monitor (it won’t be labeled “in” or “out” as all HDMI ports on monitors are “in”).
Step #3: Connecting Your Capture Card to Your Computer
Now that you’ve got your console, monitor, and capture card connected, there’s only one more step for setting up your signal path. Using the cable that came with your capture card, plug the micro USB end (or your capture card’s equivalent) into your capture card.
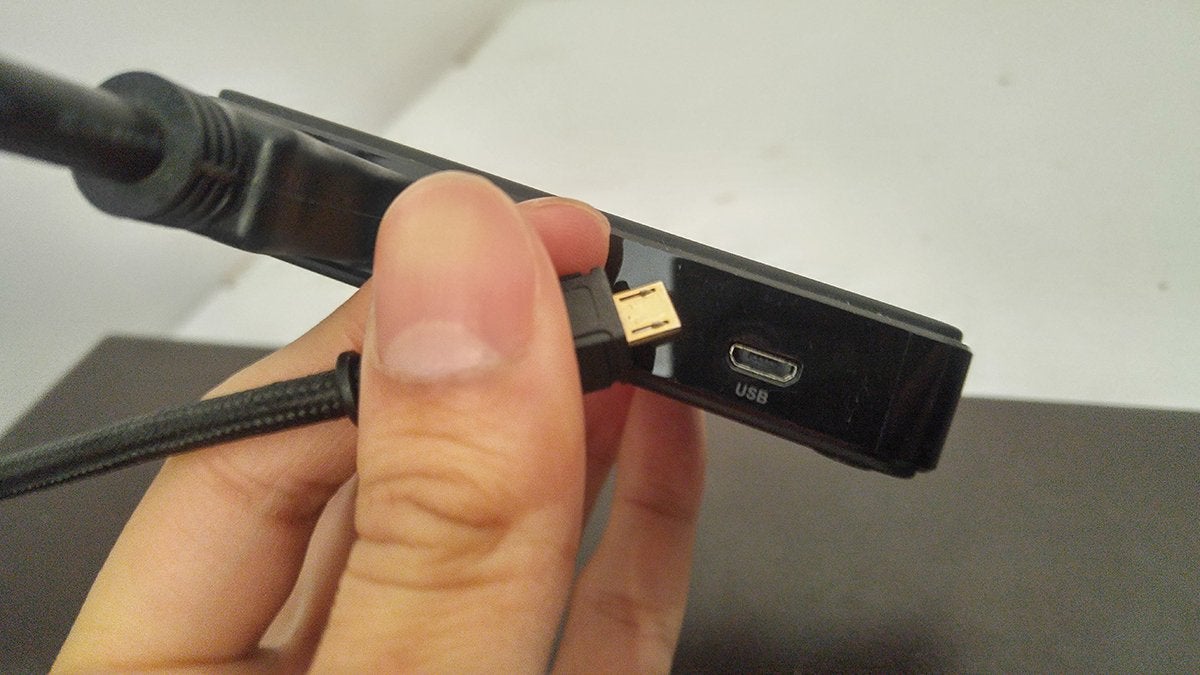
After that, plug the USB-A end into a USB port on your computer.
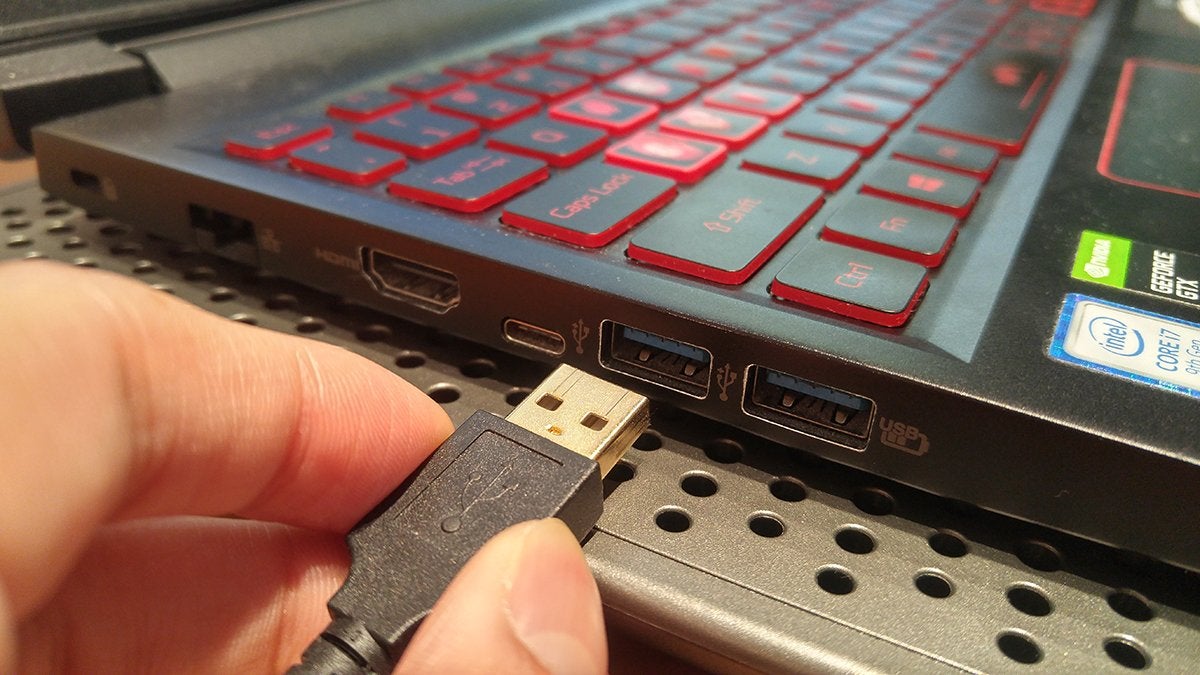
That’s it—you’re done with the physical connections!
How to Set Up Your Recording Software
We’ll go into how to set things up in Streamlabs—as that’s the recording software we use.
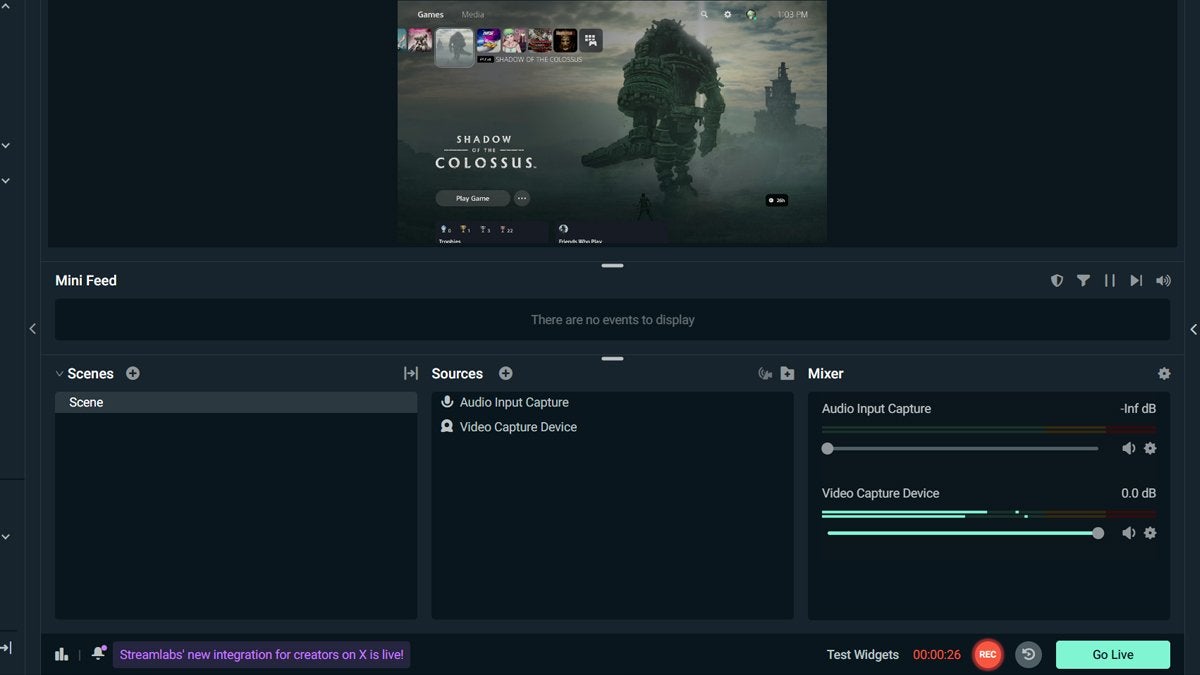
Selecting the Correct Video Capture Device
The first thing you need to do is select the device you’re using to capture your video (and audio).
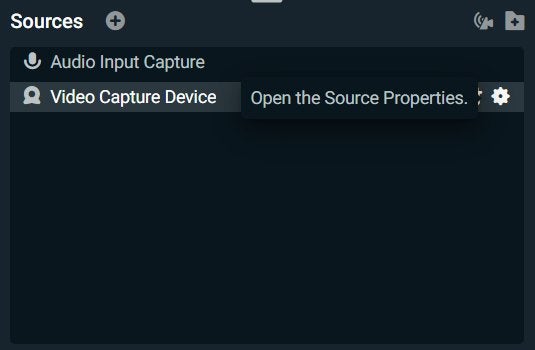
In the Sources section, hover over Video Capture Device with your mouse. When you do, you’ll see a few icons appear—the rightmost of which is a gear. Click the gear icon to Open the Source Properties.
This opens the pop-up menu that applies to the Settings for Video Capture Device. Here, click the dropdown menu next to Device to see a list of the available devices. If everything is connected correctly (and has power), you’ll see your capture card as one of the options.
In the case of using the AVerMedia Live Gamer Mini Capture Card, you’ll see “Live Gamer MINI” in this dropdown menu.
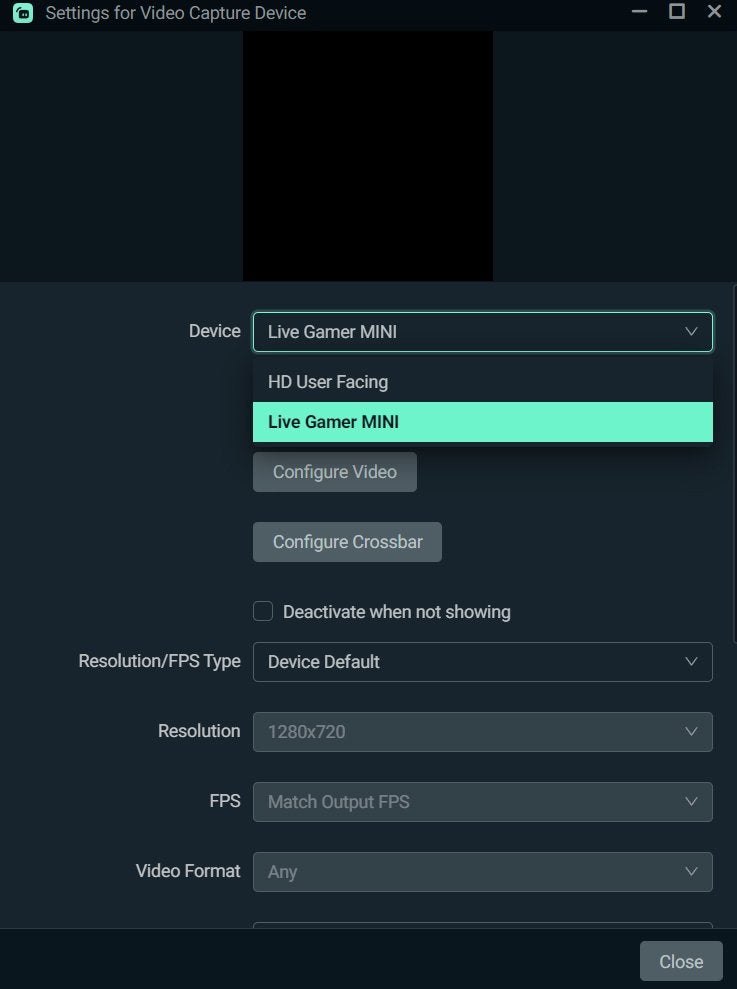
Click your preferred device and then click Close in the bottom-right corner.
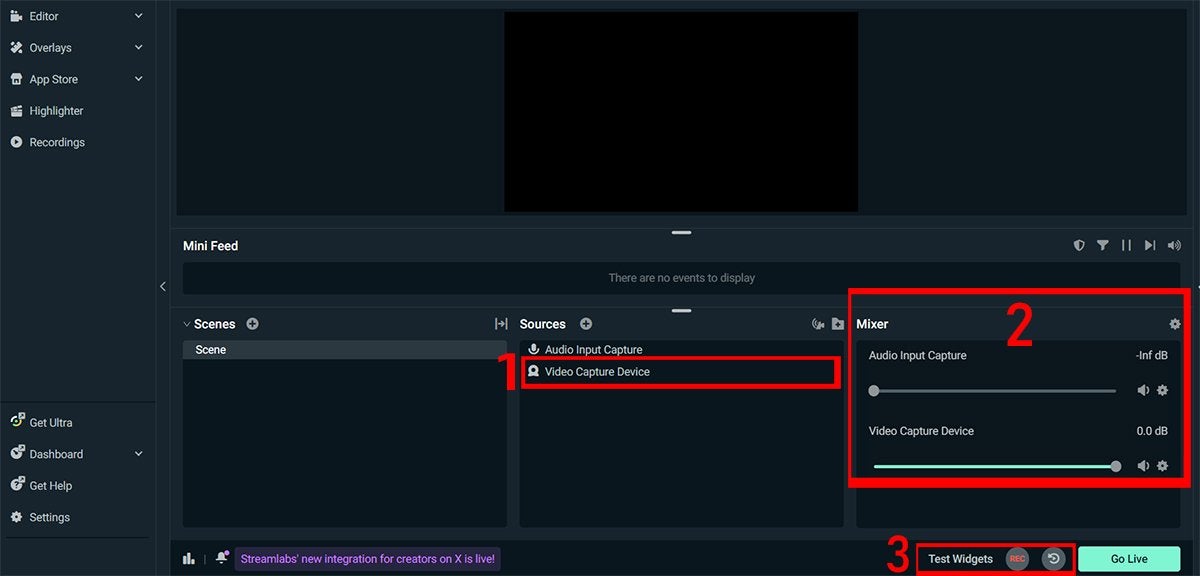
Adjusting Your Mixer Settings
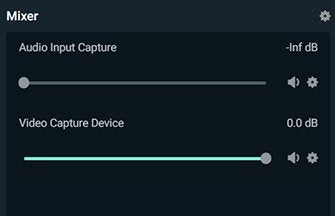
Your capture card transfers both video and audio information, so you need to mute the Audio Input Capture channel underneath the Mixer section. All you need for gameplay audio is the Video Capture Device channel.
If you don’t mute the Audio Input Capture channel, Streamlabs will record the same audio signal on two different channels: Audio Input Capture and Video Capture Device—which get compressed into a single MP4 file when you stop recording. This results in an odd echo as the two audio signals don’t perfectly overlap.
Thankfully, there’s an easy way around this. Grab the slider for the Audio Input Capture and slide it all the way to the left to mute this channel.
Managing Your Recordings
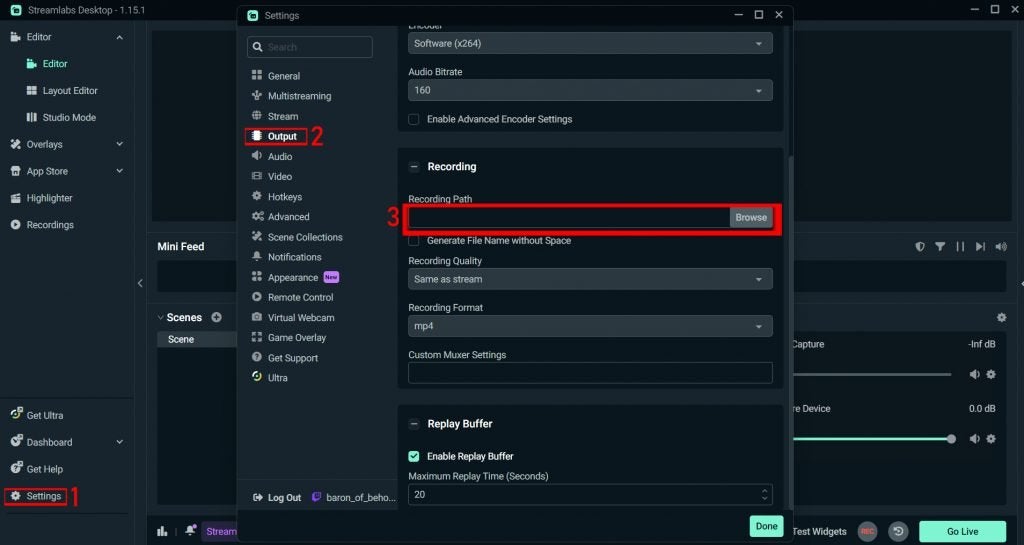
Before you begin to record videos on your PS5 or Nintendo Switch, you should set the destination for your recordings so that you can find them more easily. To do so, click Settings in the bottom-left of Streamlabs. In the Settings pop-up menu, select Output on the left side.
Here, in the section called Recording, you’ll see a dropdown menu immediately below Recording Path. Click the Browse button and choose a folder where you want your completed recordings to end up.
Click Done in the bottom-right corner of the Settings menu to save your changes. Afterward, you’re ready to start recording!
At the bottom-right of Streamlabs, you’ll see a circular REC button. When you’re ready to start recording, click this button. Then, when you’re ready to stop recording, click the REC button once more.
When you finish a recording, it will be in the folder you selected before.
Turning HDCP off on PS5 & Nintendo Switch
Due to an innate copyright protection feature, you won’t be able to record some parts of your gameplay on PS5. While annoying, there’s a simple way to get around this issue. For the record, HDCP stands for “High-bandwidth Digital Content Protection.”
On the Nintendo Switch, the HDCP setting is off by default. It will only turn on if you open a streaming service application like Hulu or Netflix.
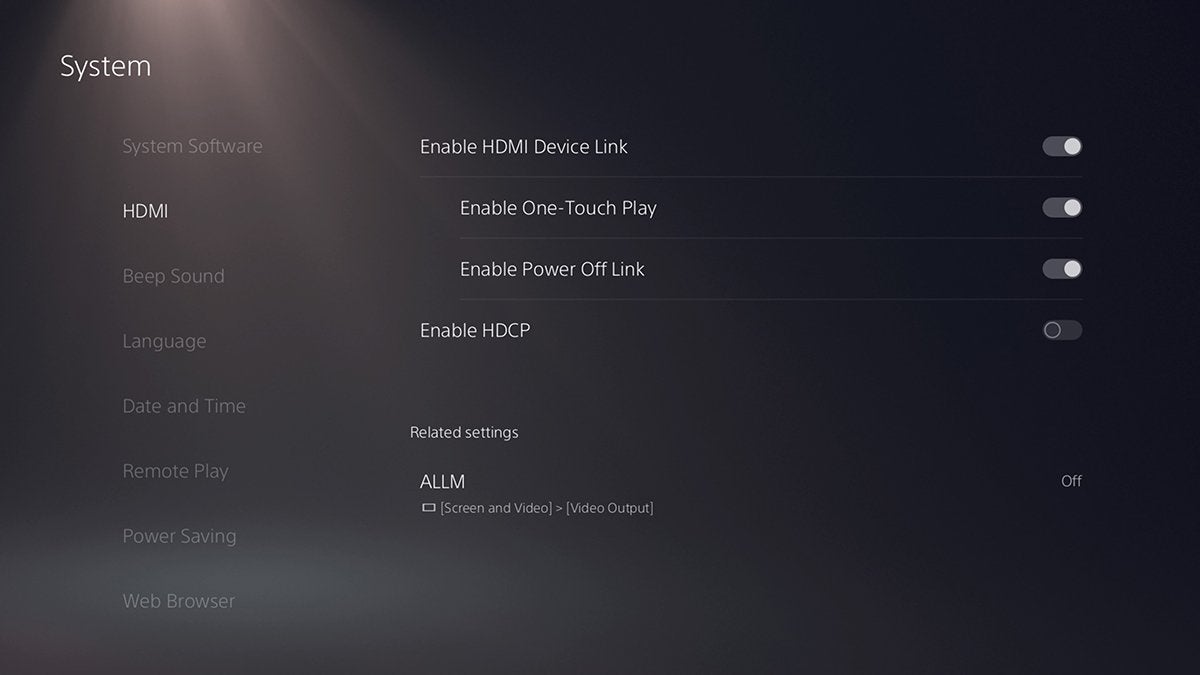
How to Turn HDCP off on PS5
Start by clicking the gear icon at the top-right of your PS5 home screen to get to Settings. Next, scroll down and select System. Once you’re in the System menu, hover over HDMI.
In the HDMI tab, you’ll see that you can toggle the Enable HDCP setting. When this setting is turned on, the toggle icon will be white, and the circle will be switched to the right side. If this setting is turned off, the toggle icon will be gray, and the circle will be switched to the left side.
Overall, it shouldn’t take you very long to get your recording setup together. With modern devices, the need to capture our favorite gameplay moments is acknowledged by both big-name console companies as well as third-party ones.
You’ll need some technical knowledge, but the learning curve is thankfully gentle. With that said, the same is true for finding your MAC address on your PS5 and learning how to use the hidden web browser on a Nintendo Switch. Regardless of your recording goals, there’s always a way to get the best shots!