The first thing you’ll want to do in Level 6 – Face Shrine is seek out the Powerful Bracelet. It’s an upgrade to your Power Bracelet that, like its predecessor, will help you move heavy objects. The Powerful Bracelet is what will allow you to move the big elephant statues you find everywhere—which is crucial for solving many puzzles in this dungeon.
Table Of Contents
Find the Powerful Bracelet
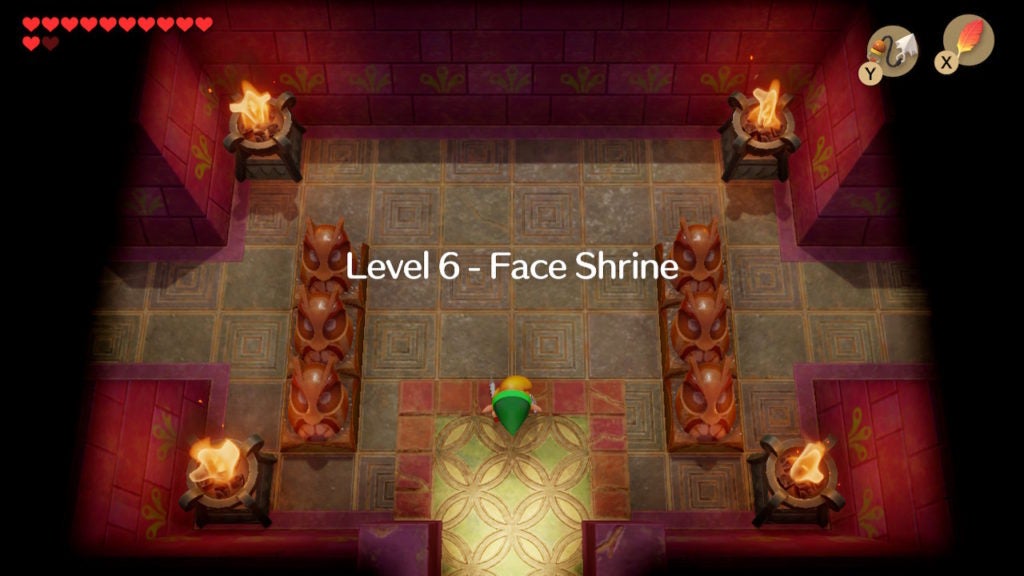
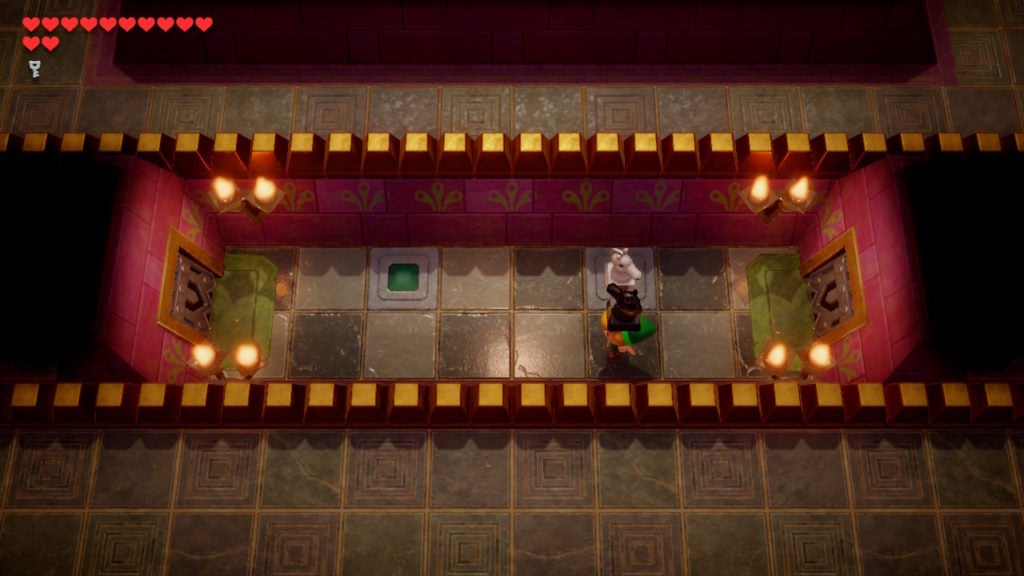
When you enter the dungeon’s main entrance, you’ll notice that you immediately have 2 paths: 1 leading west and 1 leading east.
Go west to begin your quest for the Powerful Bracelet. However, when you enter the room west of the main entrance, you’ll be faced with a trio of new enemies.
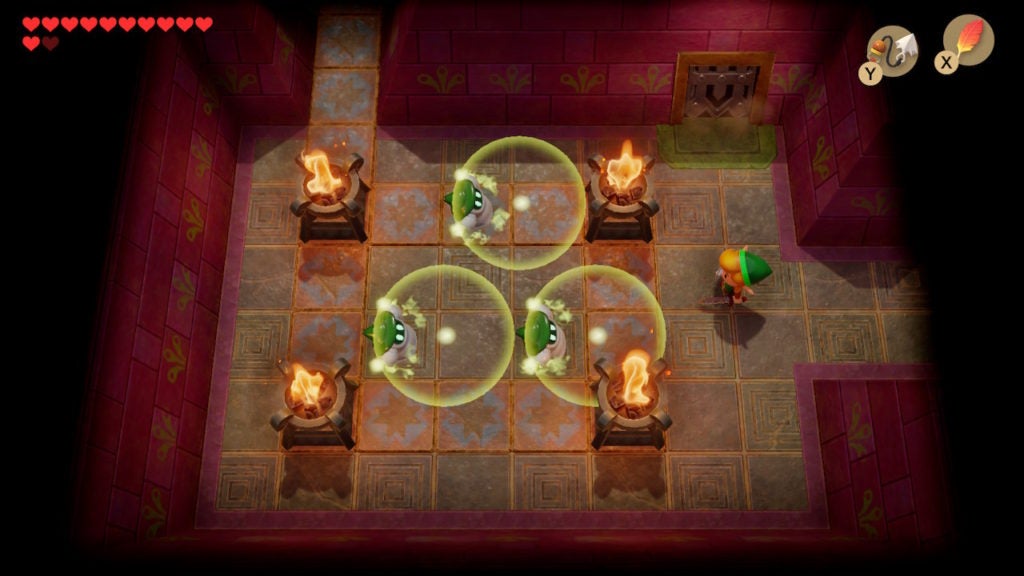
How to Beat Wizzrobes
These magical foes are Wizzrobes and they will be tricky to dispatch with just your Sword. If you strike them with your blade, they will only get knocked back instead of taking damage. This, combined with their abilities to temporarily disappear can make them tedious to fight.
However, there are thankfully a lot of ways to take down these mages. You can see where they will reappear as their hats show up shortly before they do. With this, you can line up an attack with a weapon that will actually do damage to the Wizzrobes. Both the Bow and Arrow Set, as well as Bombs, can destroy Wizzrobes, albeit the latter will need rather precise timing.
Additionally, you can make the battle even easier by using the Hookshot or the Boomerang to stun the Wizzrobes. This will allow you to blast them with Bombs easier if you want to save on Arrows. After the Wizzrobes here are defeated, the door to the northeast will open. You can pop into it quickly for some loot.
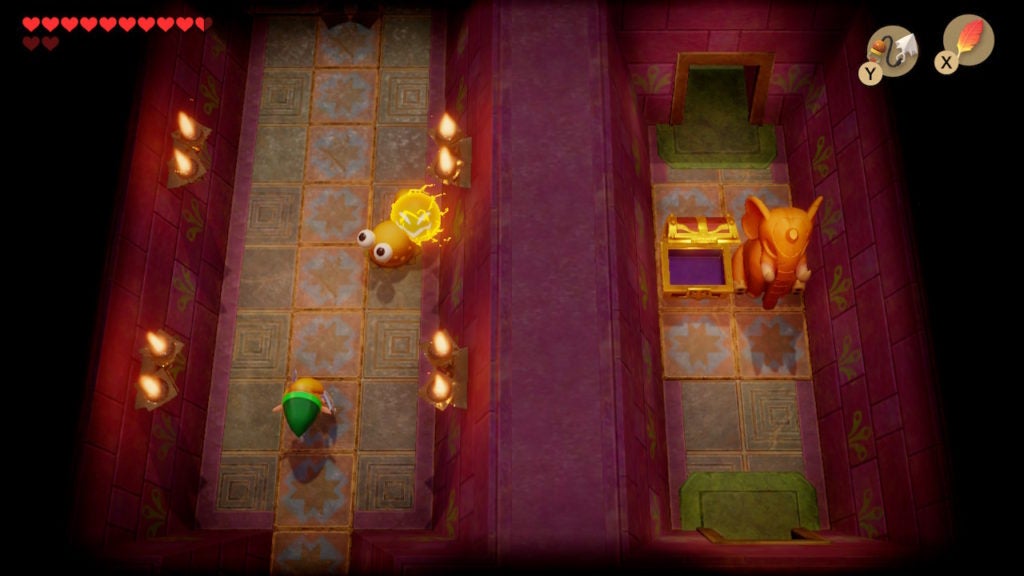
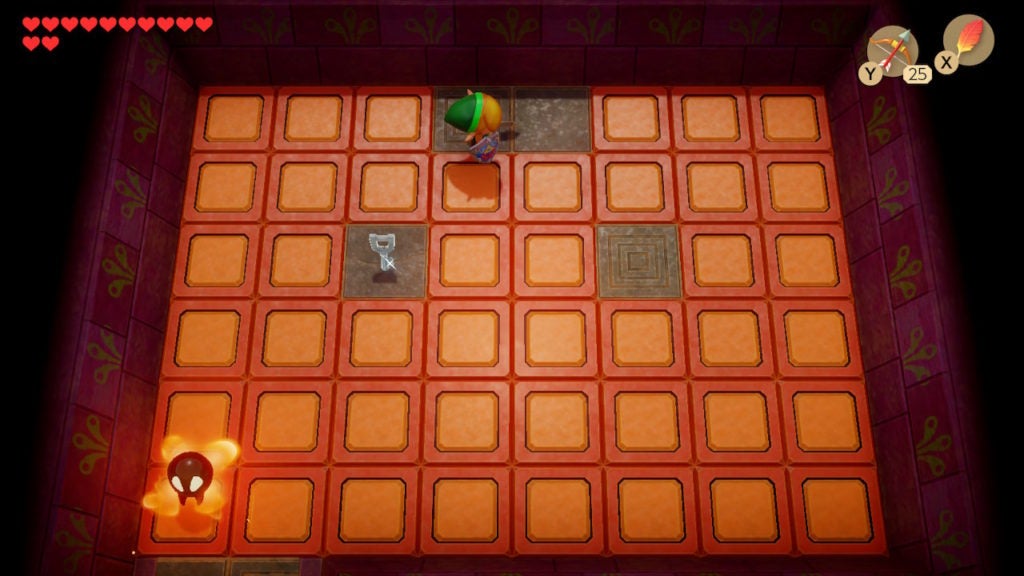
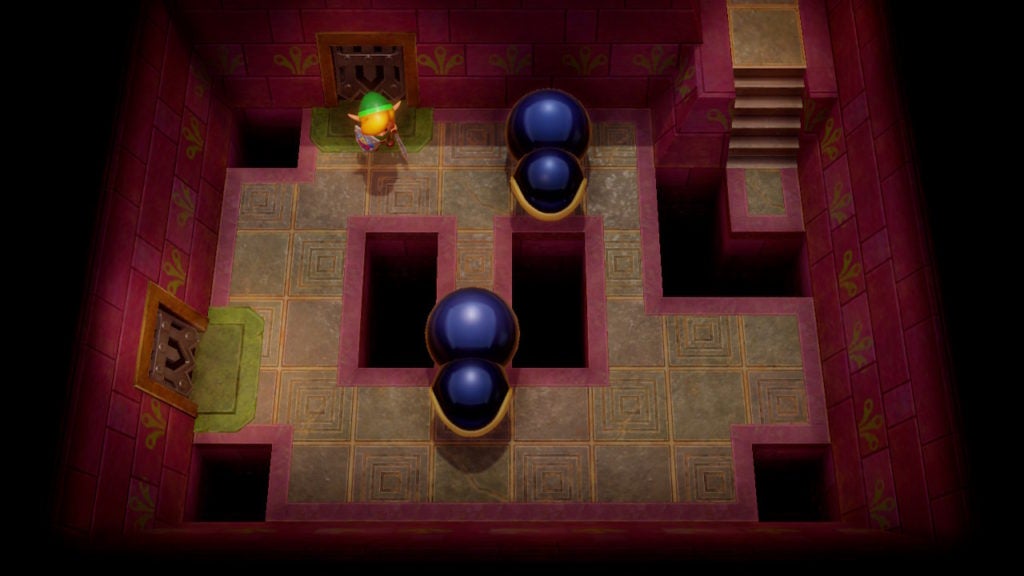
Find the Chest With 50 Rupees
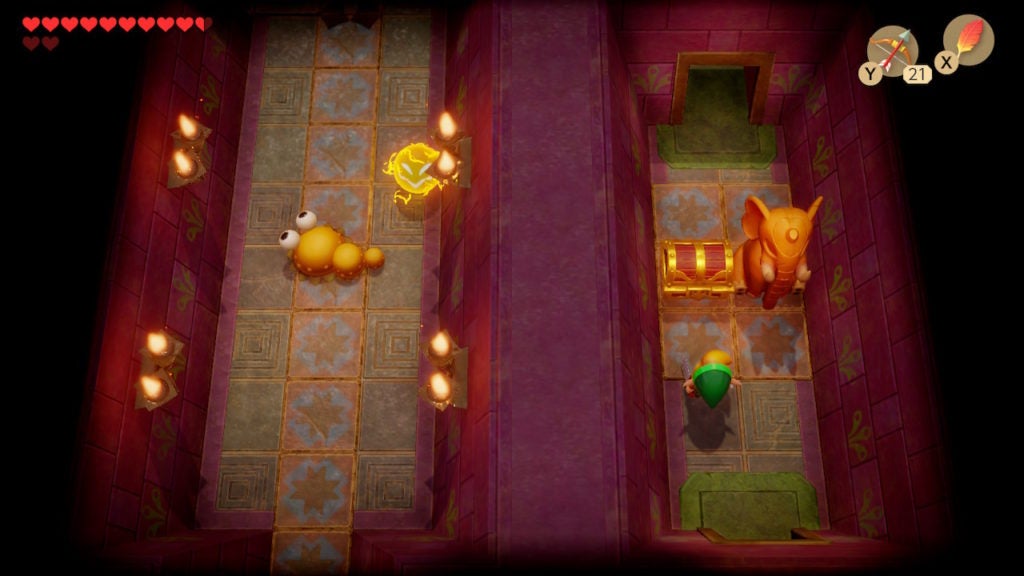
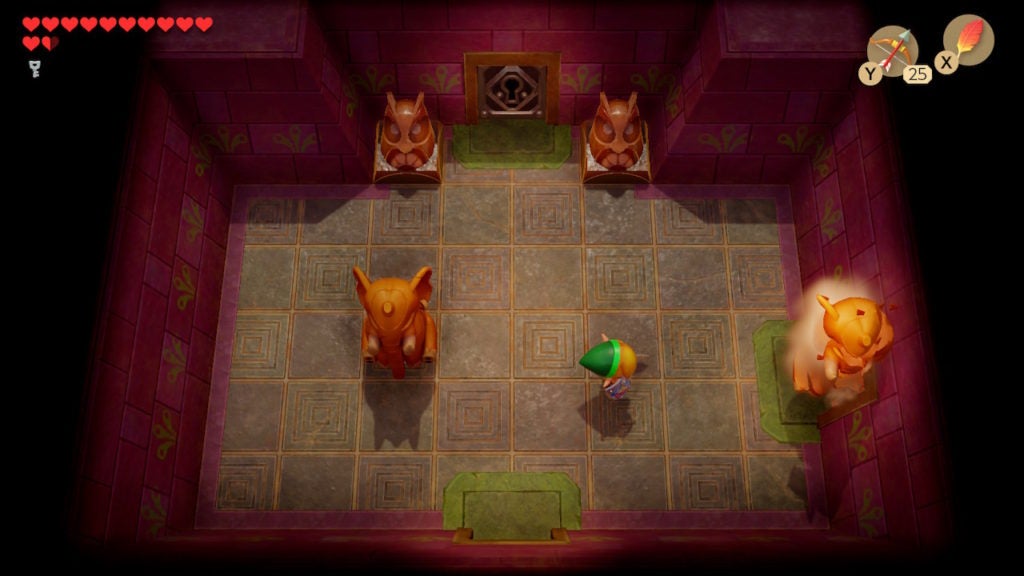
Here, you’ll find a chest and an elephant statue in a slim room. You’ll find plenty of similar elephant statues in Level 6 – Face Shrine, which you will be able to move eventually. However, for now, simply loot the Purple Rupee from the chest and head back south into the previous room.
Find the 1st Chest With 100 Rupees
The first chest containing 100 Rupees can also be found on the way to the Powerful Bracelet. It’s actually in the room just north of where you found the chest with 50 Rupees, however, you can’t go north due to the elephant in the room blocking your path. From the room where you defeated the Wizzrobes, head northwest into the next room. Here, you’ll find yourself on the opposite side of a wall from the chest that held 50 Rupees.
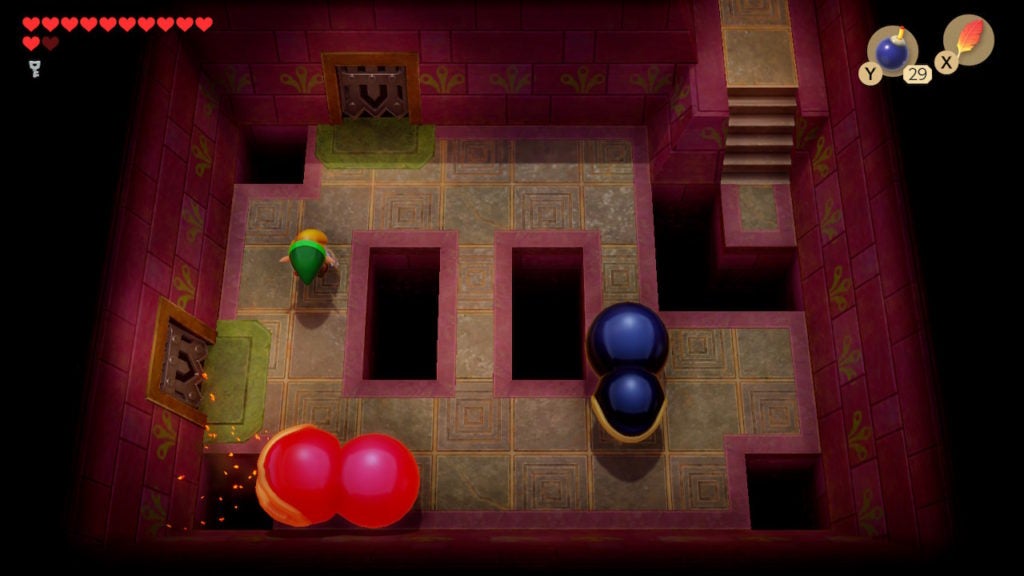
This section will contain 1 Spark and 1 Mini-Moldorm—either take them out or avoid them. After taking a mandatory western turn on the narrow path that leads north, you’ll find yourself in a room with a Shy Guy.
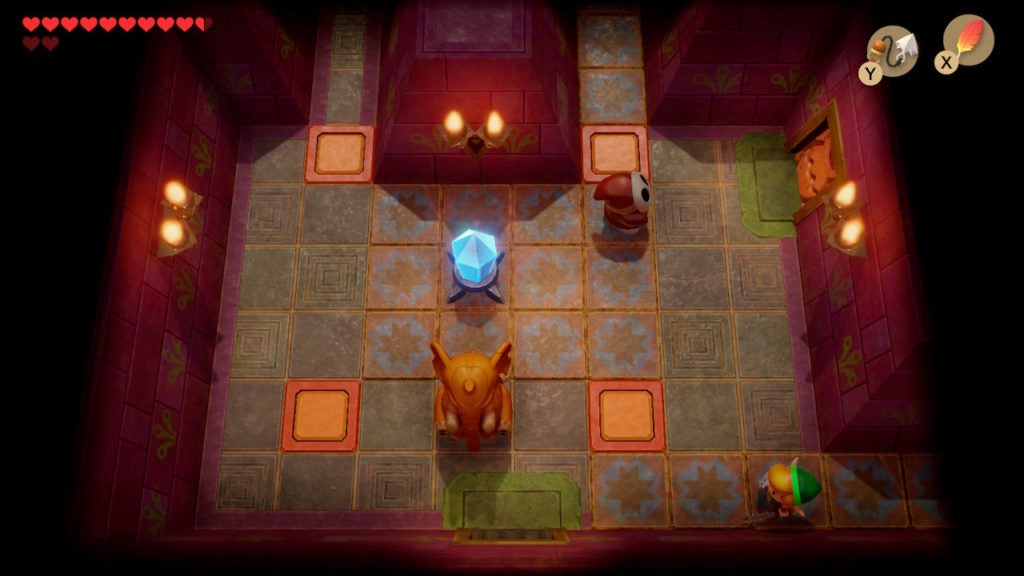
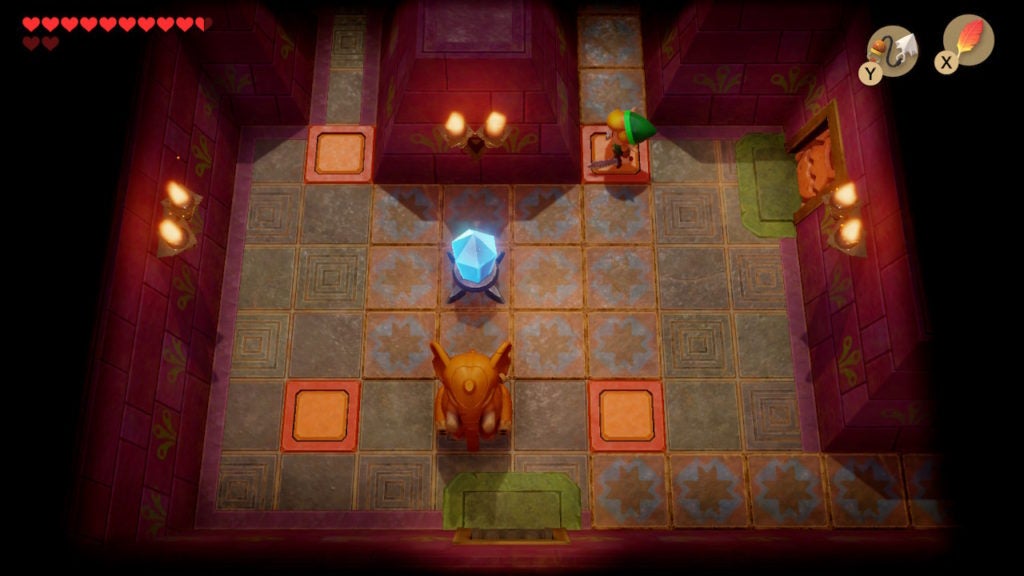
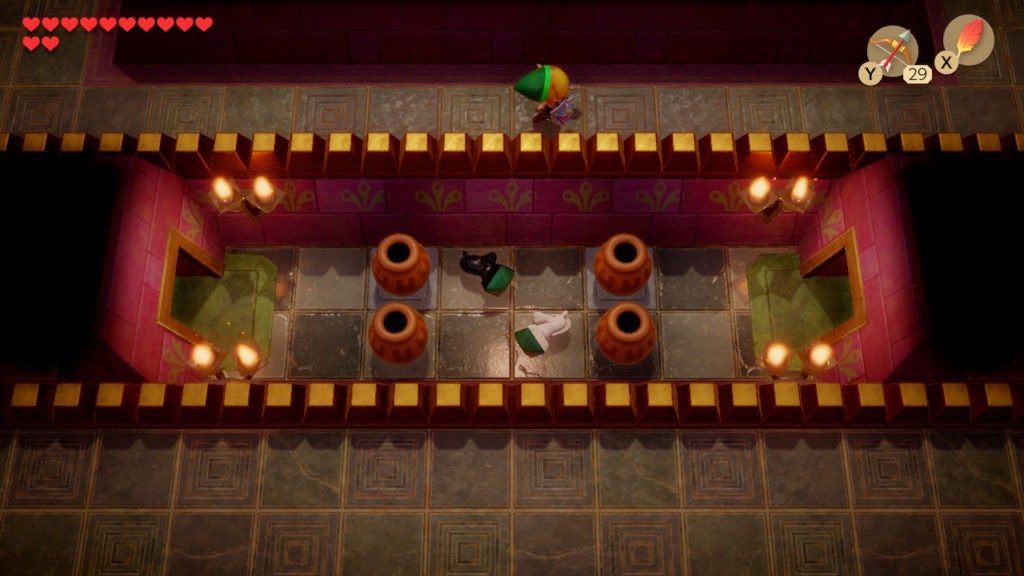
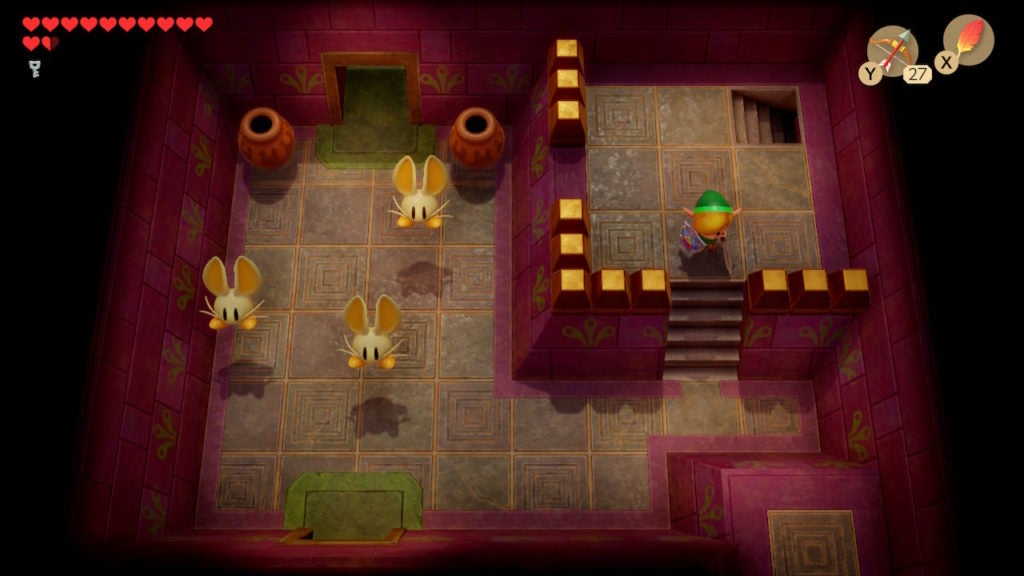
In addition to the Shy Guy, you’ll notice a crystal Switch in the center of the room and a few other features. You’ll need to come back here at least once, which is when the southern door comes into play—it’s a way back into this room from somewhere else. The room you care about right now is the one that lies to the east beyond a door with a pot symbol on it. Since you can’t toss the elephant statue at it yet, you’ll need to grab a pot from a nearby room. Dispatch the Shy Guy with a spin attack (or another method) and go north to grab a pot from the room beyond.
After dealing with the Green Zols that spawn here, lift up a pot, head back south, and toss it at the eastern door to open it.
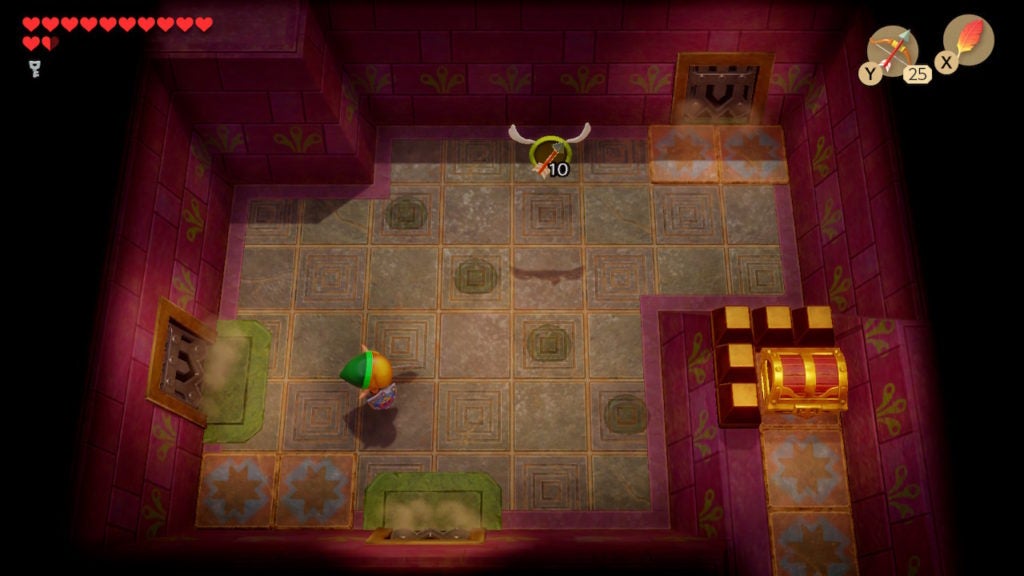
Walk over to the chest you see and loot it for 100 Rupees. Afterward, backtrack to the room with the Switch. You’ll need to use it to help you get the Powerful Bracelet.
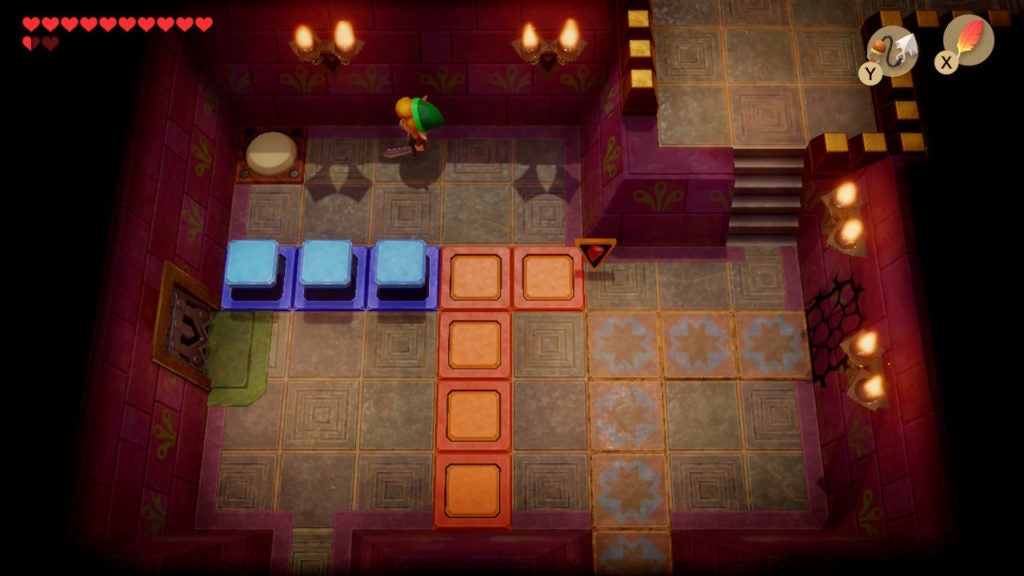
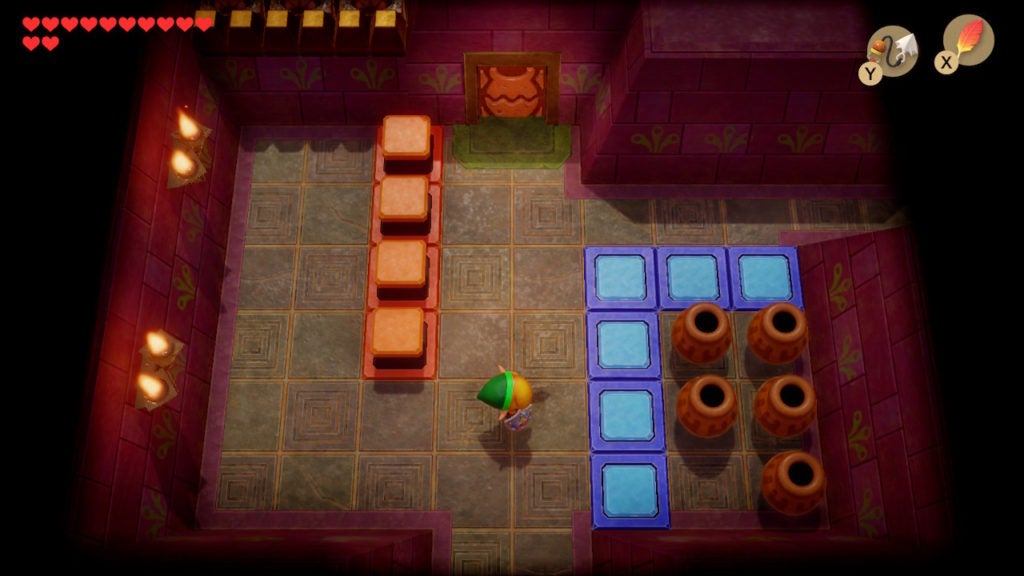
Activate the Switch to Get to the Powerful Bracelet
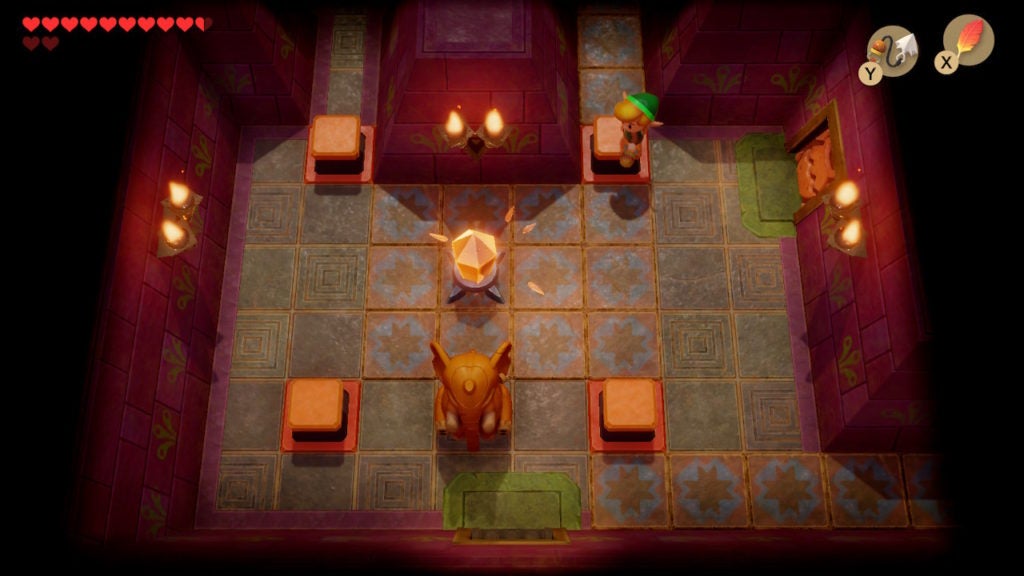
You’ll need the Blue Switch Blocks in the dungeon to be lowered to get by an upcoming obstacle. Currently, they are raised and the Orange Switch Blocks are lowered. You’ll need to reverse this while also still being able to head north, as you need to traverse the northern room for progress to the Powerful Bracelet. To do so, stand in the northeast corridor on top of the space where the northeastern Orange Switch Block will rise.
From this position, aim southwest at the currently blue Switch and use the Hookshot to hit it from a distance. Alternatively, you can use Bombs or Arrows to hit the Switch remotely, however, the Hookshot is the best method as it doesn’t use up any ammunition. In a similar manner, the Boomerang can also be useful here, though the Hookshot can fire faster than Link can throw the Boomerang. With that, the Switch in this room will now be orange and the Switch Blocks will all have changed their position.
Getting to the Powerful Bracelet Chest
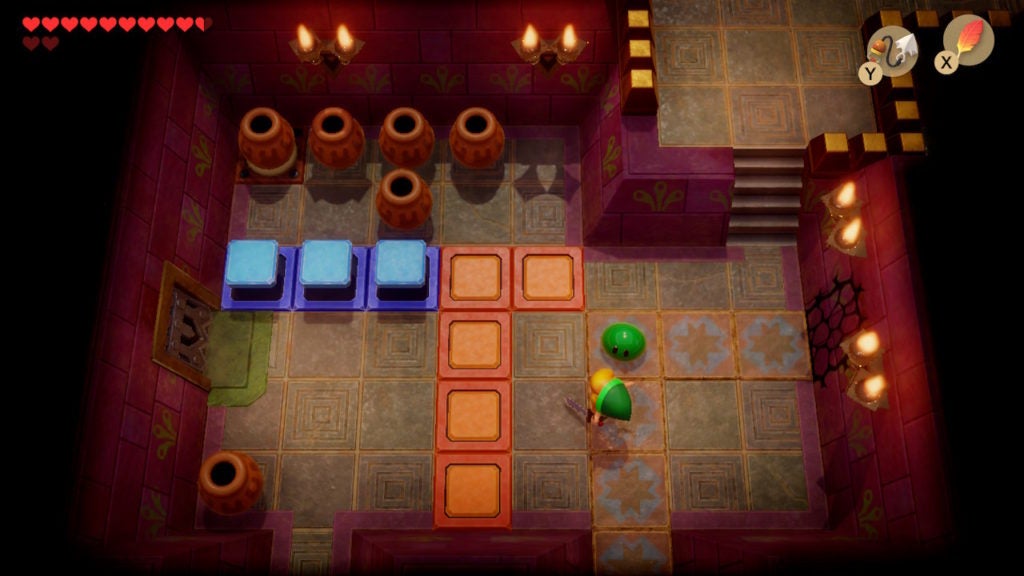
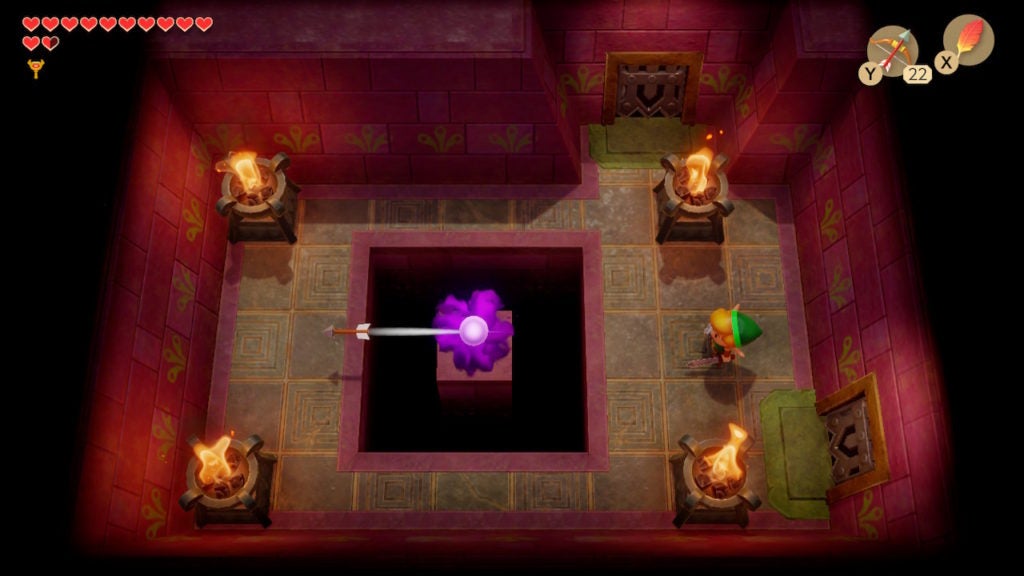
You’ll now be standing on the northeast Orange Switch Block, which will allow you to go north and back into the room with the pots. To find the hidden path that will help you progress to the Powerful Bracelet, blow open the cracked wall on the east side of this room with a Bomb.
Go east and you’ll find yourself in a dark room. You may want to light the 2 torches in the north of the room with some Magic Powder if you’re having a hard time seeing.
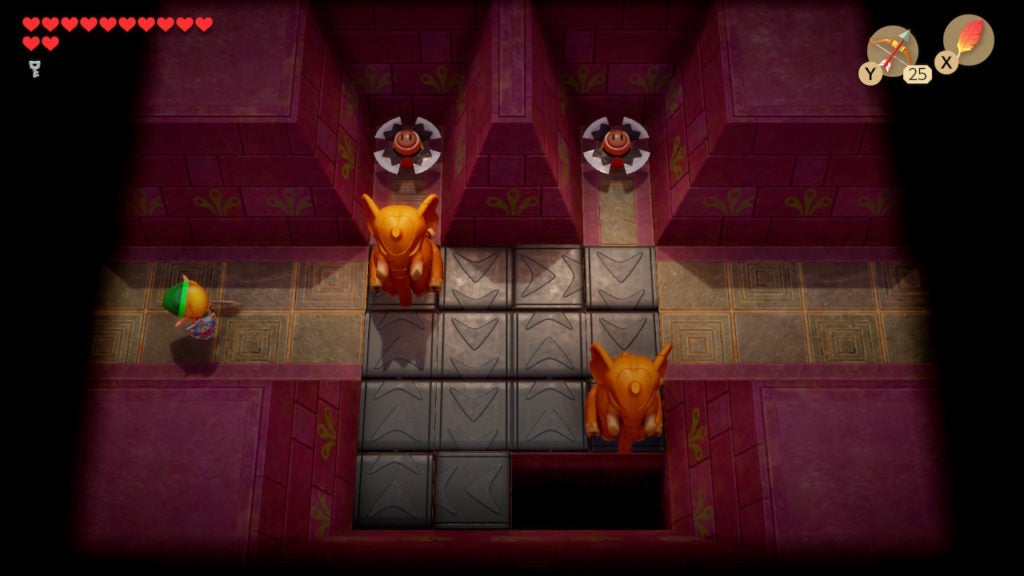
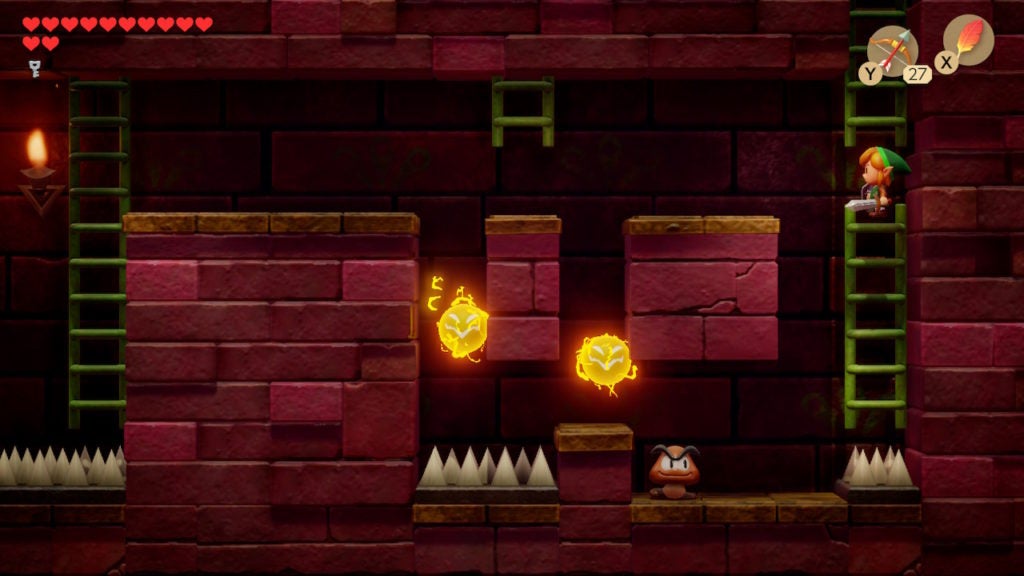
In this room, you’ll have to take out all of the Green Zols that spawn. You can find them by walking around the room. When all have been taken out, a staircase will be revealed in the northeast corner. When you descend it, you’ll be in a side-view underground tunnel with some Goombas and Giant Bubble enemies.
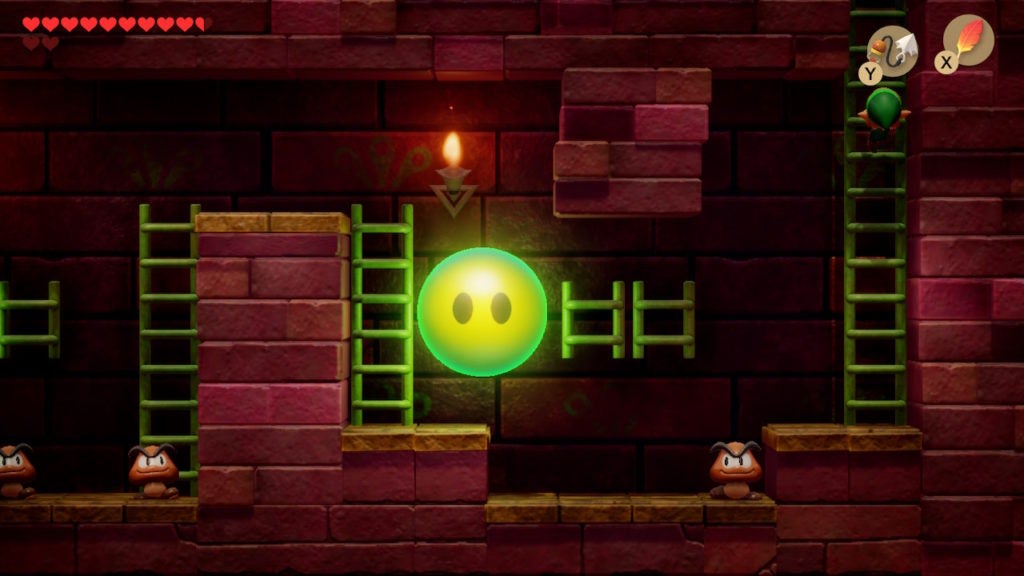
You need to proceed to the west while avoiding the big green foes. The Goombas will be easy to deal with, however, the Giant Bubbles are annoyingly large. Their thickness will make it tricky to get around them. Use the Roc’s Feather here to leap across the gaps to the small ladders in the middle of each section of this tunnel. This will help you avoid the Giant Bubbles a bit easier.
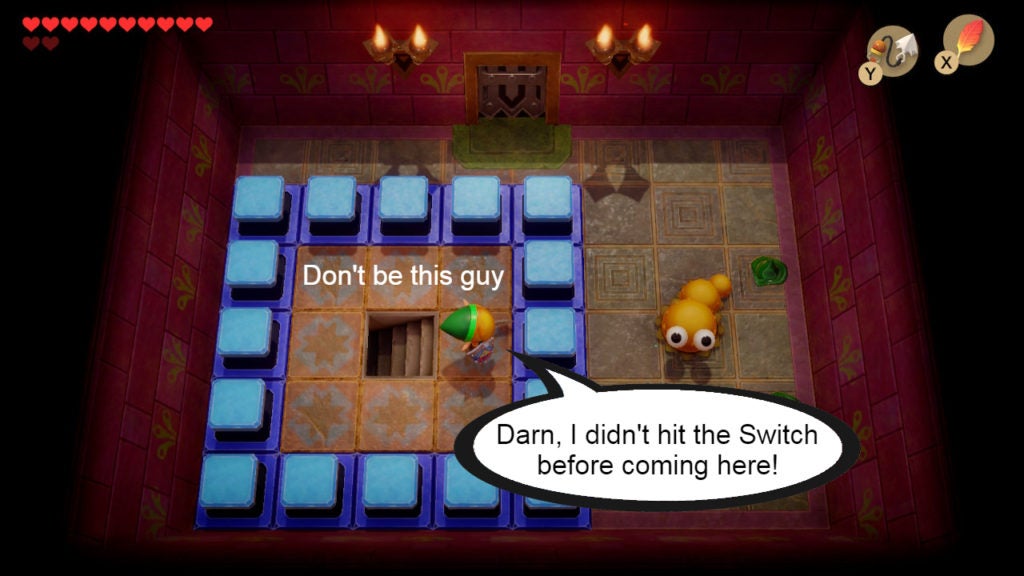
When you make it out of the tunnel via the western ladder, you’ll be in a room with a ring of lowered Blue Switch Blocks and a few enemies. If you didn’t hit the Switch before coming here, you would have been trapped by raised Blue Switch Blocks.
Open the Powerful Bracelet Chest
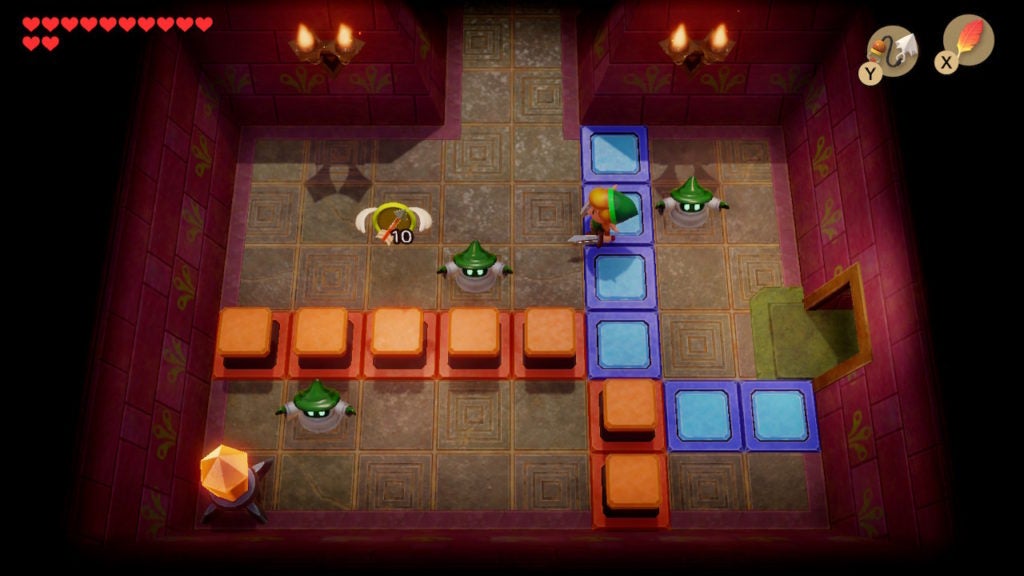
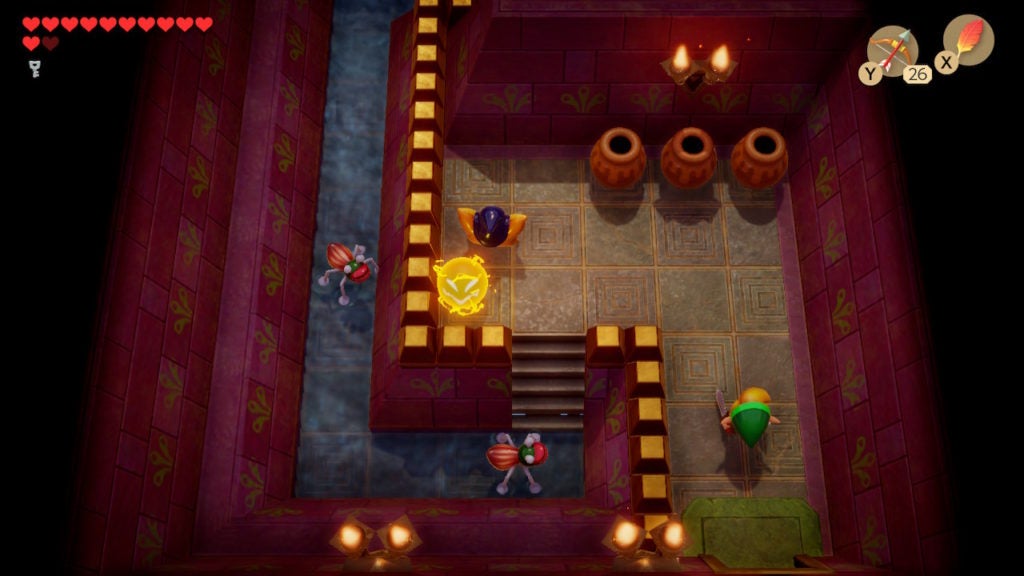
However, if you did hit the Switch, you should be able to take out the 1 Mini-Moldorn and 2 Wizzrobes in this room. When you do, the door to the north will unlock, allowing you to proceed.

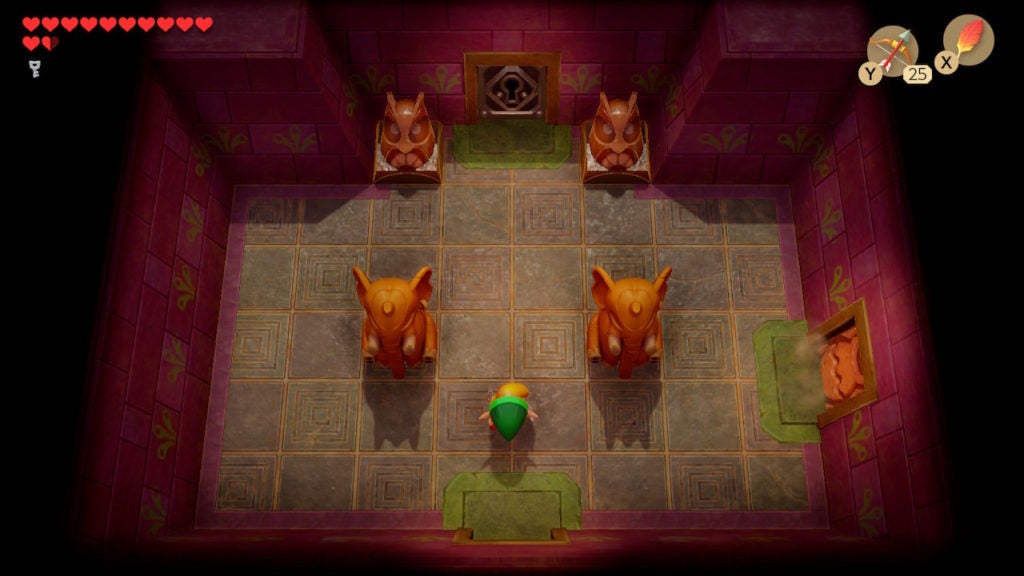
Beyond, you’ll find a room with 2 elephant statues in the middle and a chest in the northwest. There will also be a pot in the east that you can smash to find a Fairy. Open up the chest in the northwest to obtain the Powerful Bracelet.
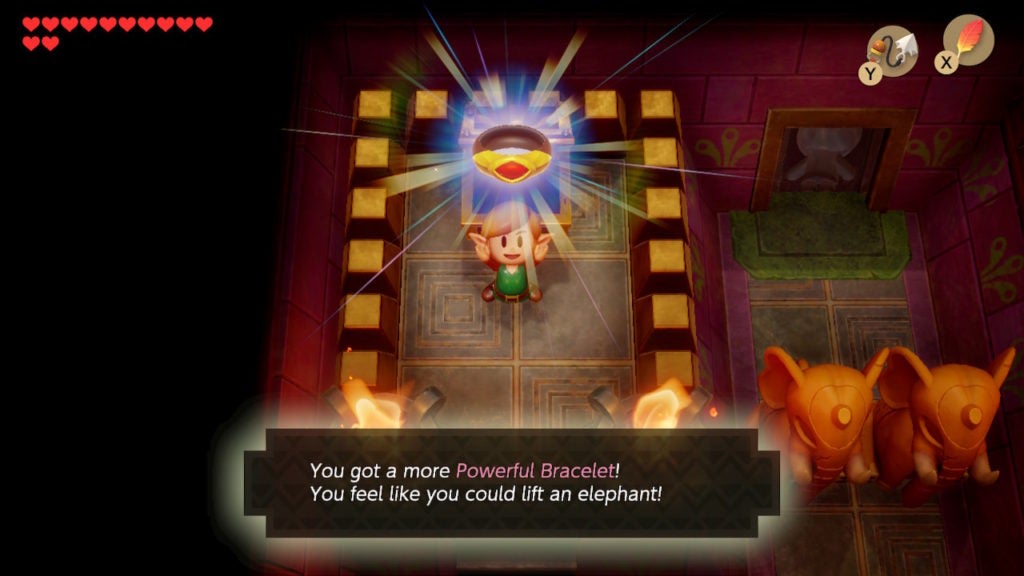
The Powerful Bracelet will replace your Power Bracelet on your Items menu screen. It will be in the same place: where the permanently-equipped items reside. You’ll be able to use this upgraded armband in the same way you used its predecessor. With your newfound strength, pick up the elephant statues in the center of the room and toss them out of your way.
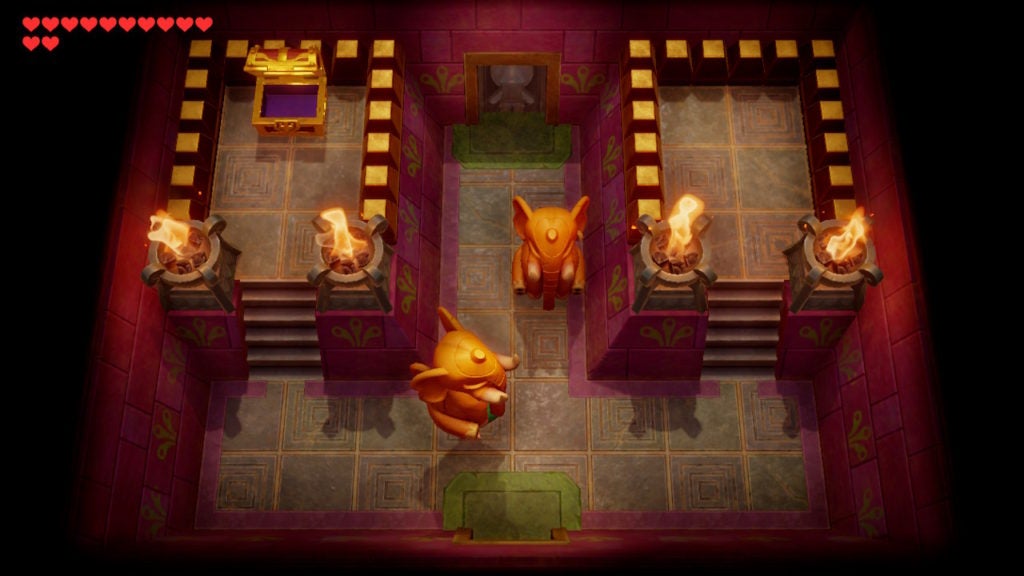
When you do, you’ll be able to head north through the one-way door. You’ll find yourself back inside of the room with the Switch. Now that you have herculean might, you can face any threat that Level 6 – Face Shrine will throw at you. The next important item you’ll want to get is the Dungeon Map, as it’s close by.
Find the Dungeon Map
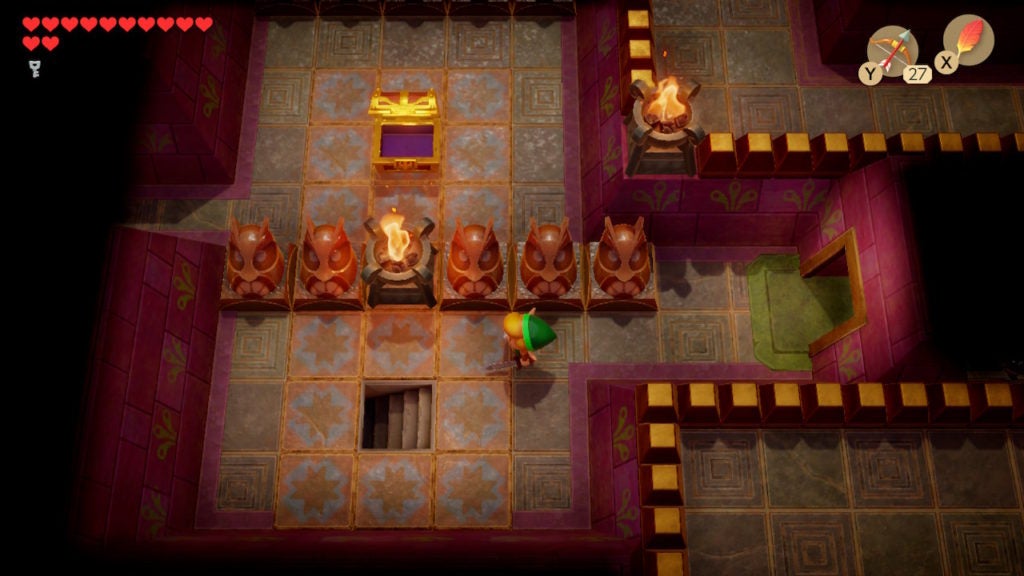
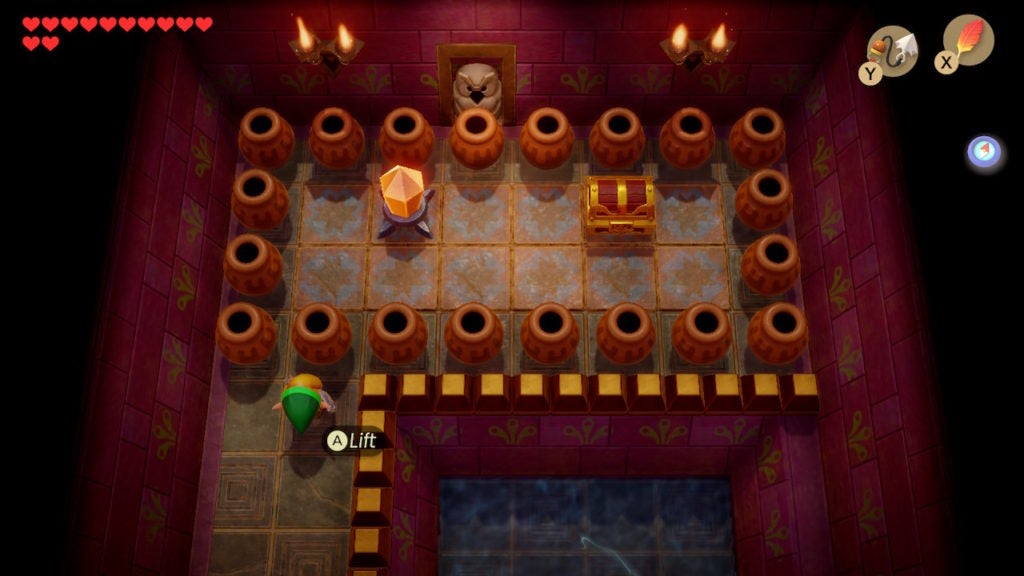
Once more, return to the room north of the Switch room where there are a lot of pots in the northwestern corner. If you destroy all of them, you’ll find a sneaky button underneath the pot in the very corner.
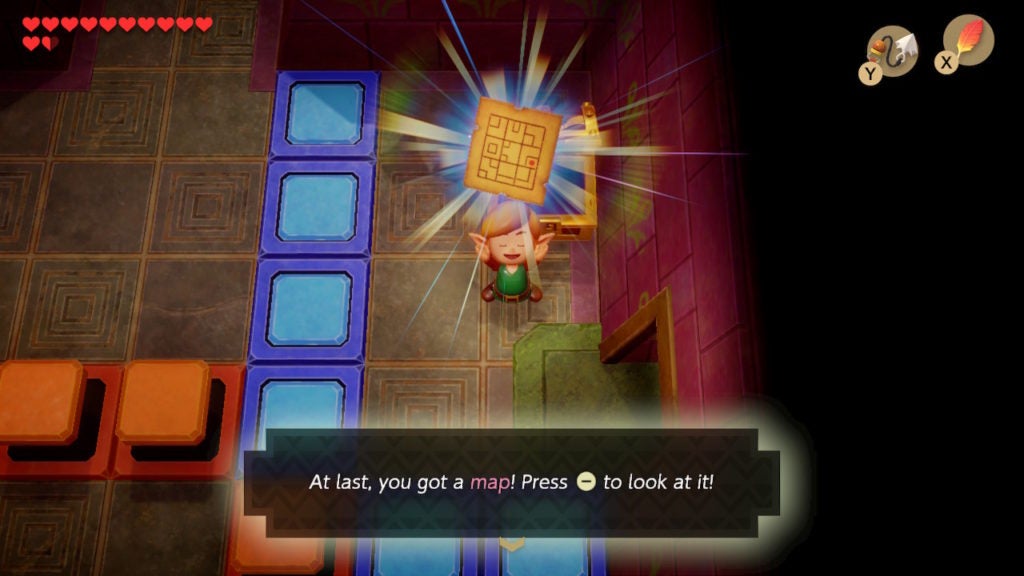
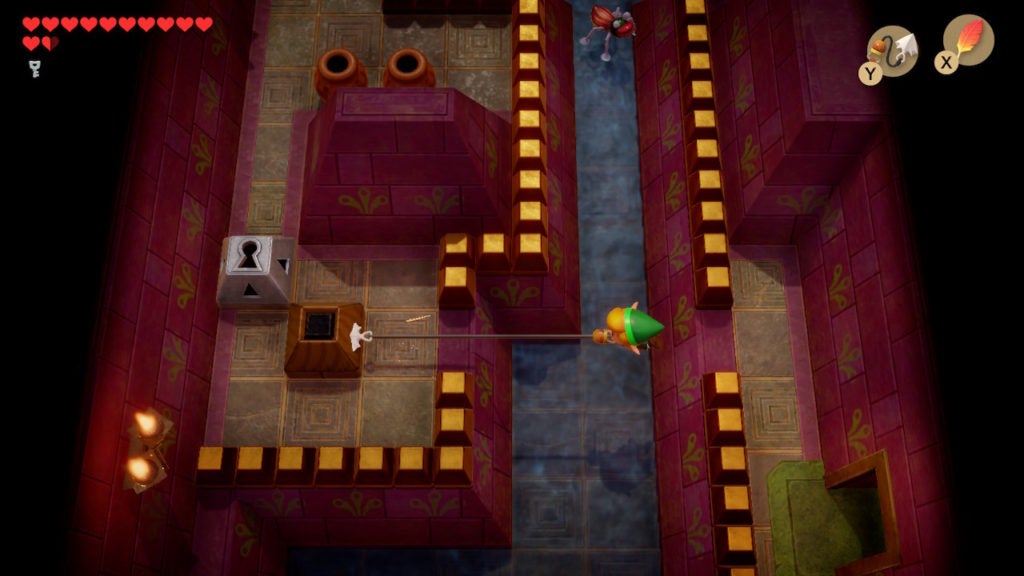
When you step on the button, the locked door to the west will open. Head beyond it to find the room where the Dungeon Map chest spawns. However, to get the chest to appear, you’ll need to defeat 3 Wizzrobes.
Use the same tactics you used before to dispatch the mystical foes. When all are down, a chest will spawn in the northeast corner of the room. When you open it, you’ll get the Dungeon Map. If you want to play around with the Switch, you can do so by shooting the Hookshot between the 2 westernmost Orange Switch Blocks.
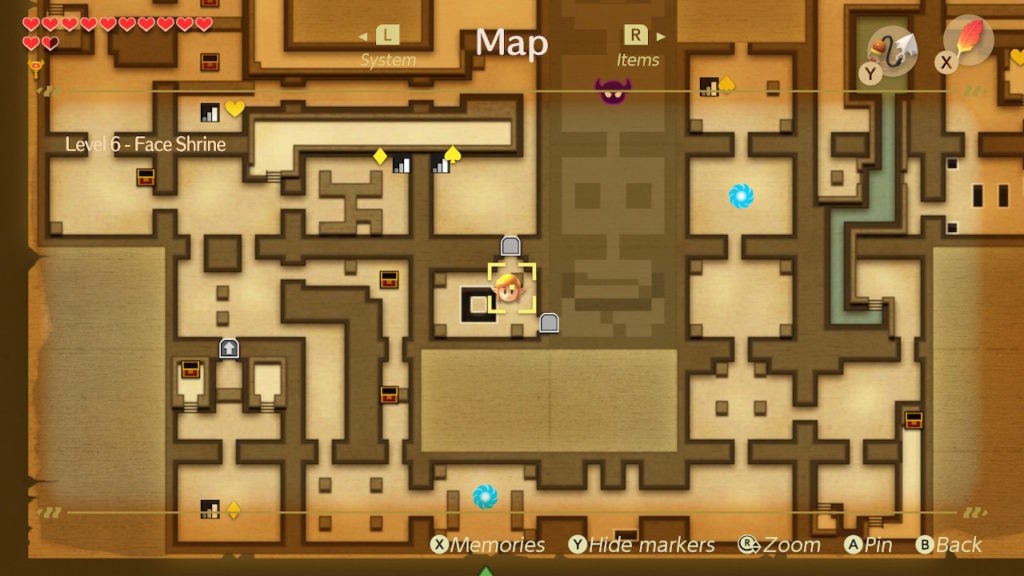
Look at the Map to Survey the Dungeon’s Layout
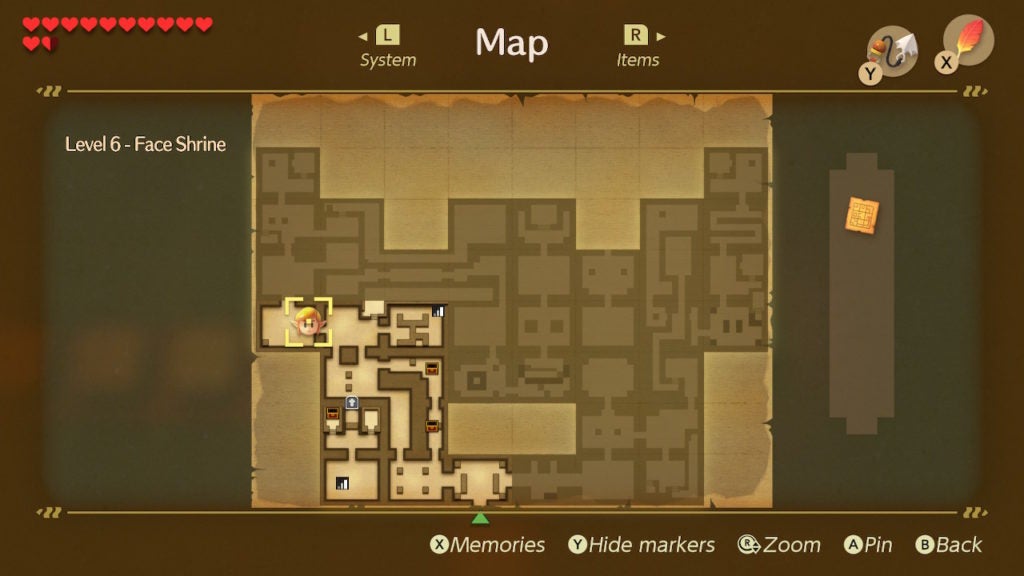
After opening your Map menu, you’ll find that Level 6 – Face Shrine looks a bit like a face with horns. There are many rooms within it, however, there are no other floors. As such, every staircase leads to another in a different part of the same floor through underground passages. With that said, you should now head north into the next room, as this will lead you towards the next important dungeon item.
A Tip to Avoid Getting Lost in Bigger Dungeons
If you haven’t already, you should start using Pins to mark which staircases are connected. To do so, use 2 of the same kind of Pin (a heart shape, a circle, etc.) to make a mark next to the 2 staircases that are connected. Pair every staircase couple like this and you’ll never get lost!
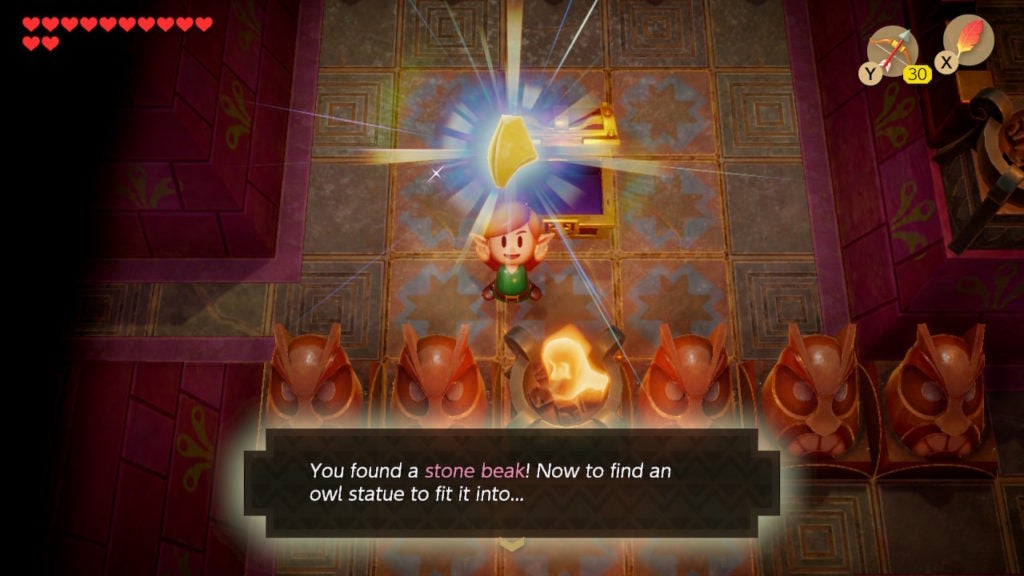
Find the Stone Beak
In the next room, you’ll be in another room with a pot symbol on the door. You can use 1 of the available pots to smash the northern door open. However, the Stone Beak lies to the east. Go through the eastern passage to approach it.
Open the chest to find the Stone Beak, which will let you interact with any of the Owl Statues that you see. In fact, you can get a hint from a nearby Owl Statue right now.
Get the Hint From the Nearby Owl Statue
Go back to the room with the floor button and proceed through the northeastern passage that lies just up some stairs. This will take you into a winding elevated corridor that will go north and then east. Continuing will bring you into a hallway where you’ll find an Owl Statue flanked by 2 lit torches. Interact with the Owl Statue to learn a little secret that will come in handy later.
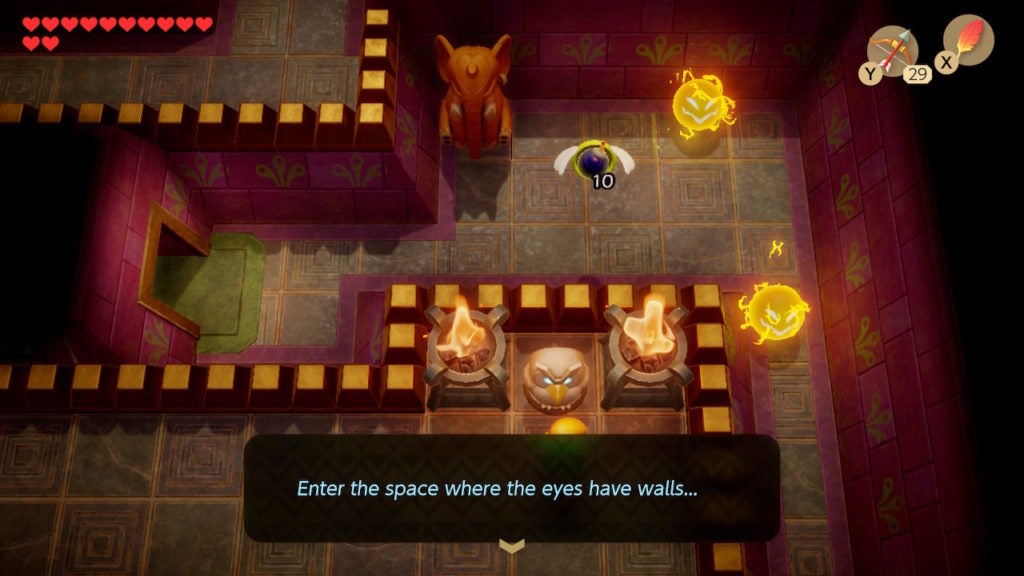
“Enter the space where the eyes have walls”…
With that nugget of wisdom in mind, head back to the room with the northern pot symbol door. Throw a pot at it to open the way and go north. If you can’t access the pots due to the Blue Switch Blocks being raised, you’ll have to backtrack to a Switch room to flip the colours on it.
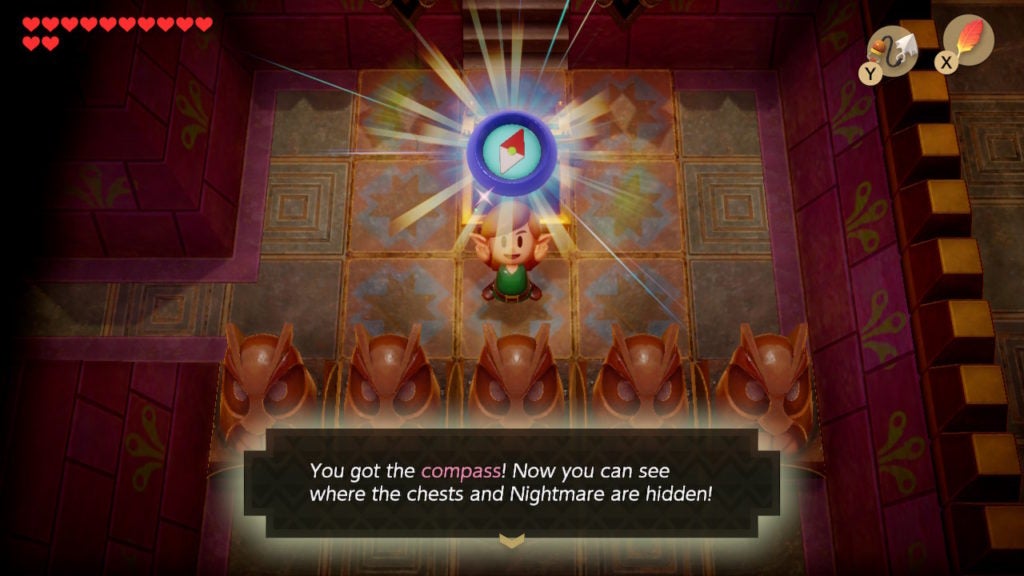
Find the Compass
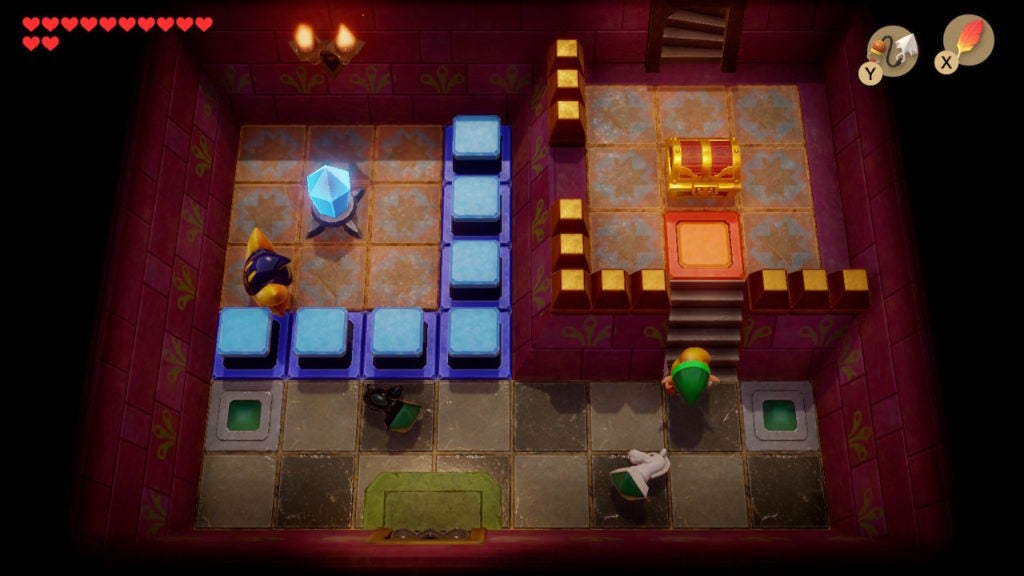
The next item you can get is the Compass. North of the room with the pot symboled door in its north wall, you’ll find another room with a similar layout. However, this chamber will have more Switch Blocks, 2 Sparks, and 2 elephant statues.
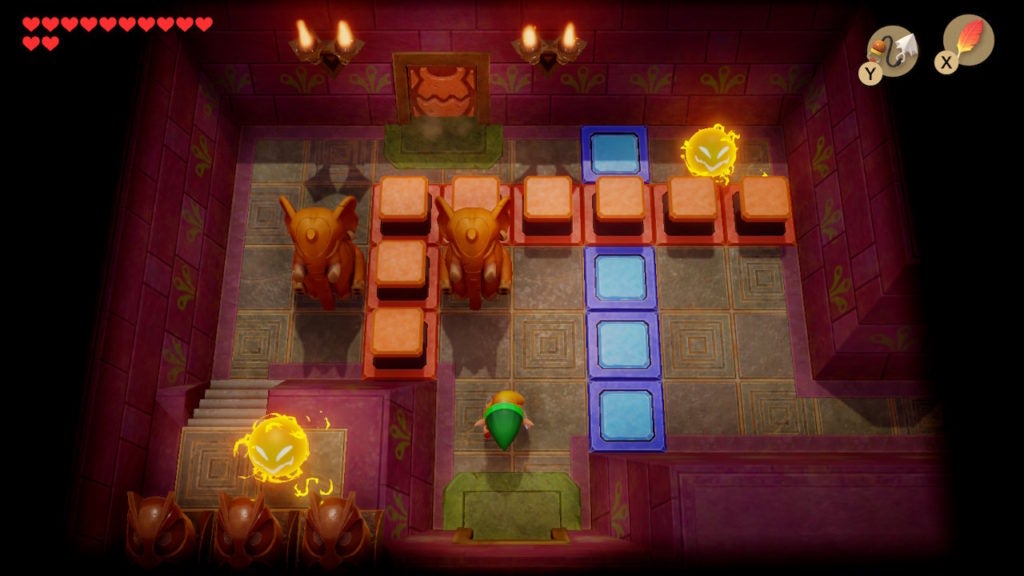
Thankfully, regardless of what type of Switch Blocks are raised, you can always make it to the eastern exit. Though, to check out what’s beyond the north door, you’ll have to lower the Orange Switch Blocks so that you can get to the door. As such, you’ll need to go east first—that way lies some good stuff, including another Switch. You’ll now come across a chest. Open it to loot the Compass from within.
Survey the Dungeon’s Layout With the Compass
Open your Map menu now to see where all the chests are and where the boss room is located.
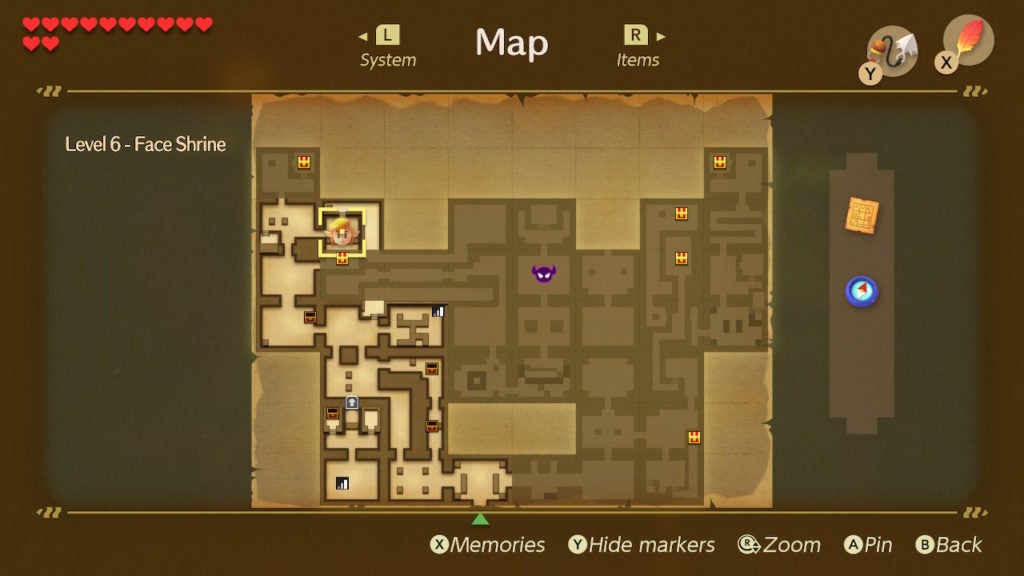
This will give you a general idea of where you need to go next. Since you’ve already explored most of the western side of the dungeon, you should check out the eastern half soon. However, before you do, be sure to grab all of the remaining loot from the dungeon’s western side. It’s worth noting that you’ll need to explore the central part of Level 6 – Face Shrine later on, but, for now, don’t worry about the Nightmare’s lair and the area around it.
The 2nd Chest with 100 Rupees
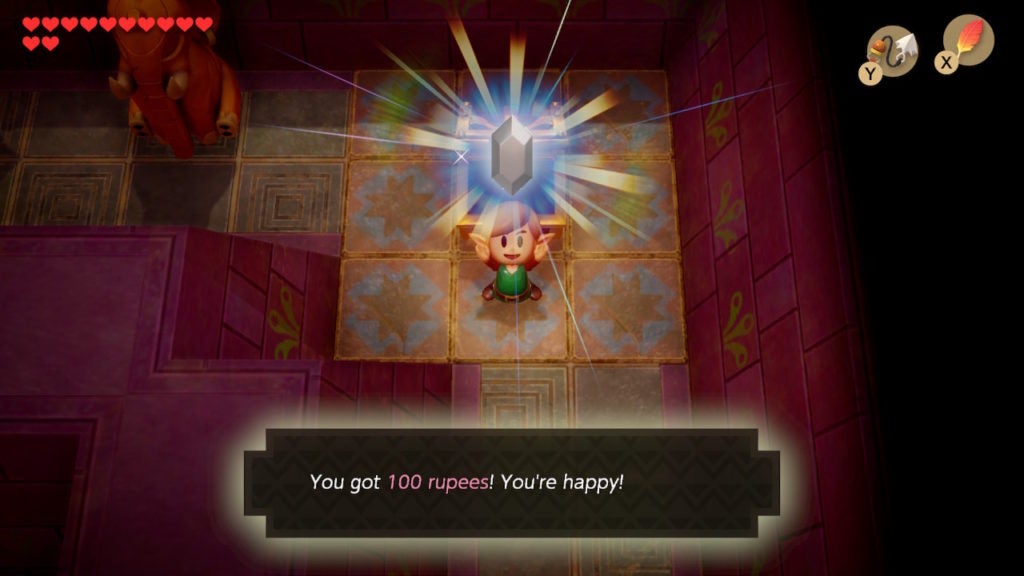
In the room that has the Compass chest, there will be a Switch in the northwest corner. If the Orange Switch Blocks in the room west of here are raised, hit the Switch to lower them. Then, go back to the room to the west and use 1 of the 2 elephant statues to open the door with the pot symbol. Going north, you’ll find a room with a chest, an imprisoned Star enemy, and some chess pieces.
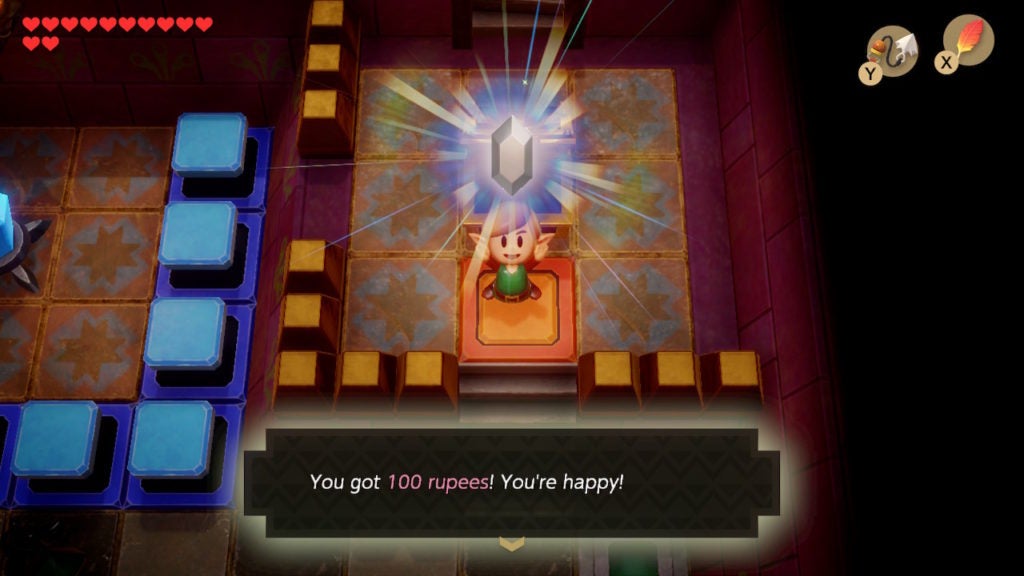
Head up to the chest and open it to receive 100 Rupees. If you’ve opened every chest so far, this will bring your dungeon-chest Rupee haul up to 250.
From this area, it will be easy to come across another chest full of goods, though of a different variety than Rupees.
The Secret Seashell Just Outside the Dungeon
You’ll see a staircase north of the chest in this room. Ascend it to find yourself outside and in an unexpected place.

You’ll be on a tiny island in the southwest of the Rapids Ride course. On it, there will be a chest that you can loot for a Secret Seashell.
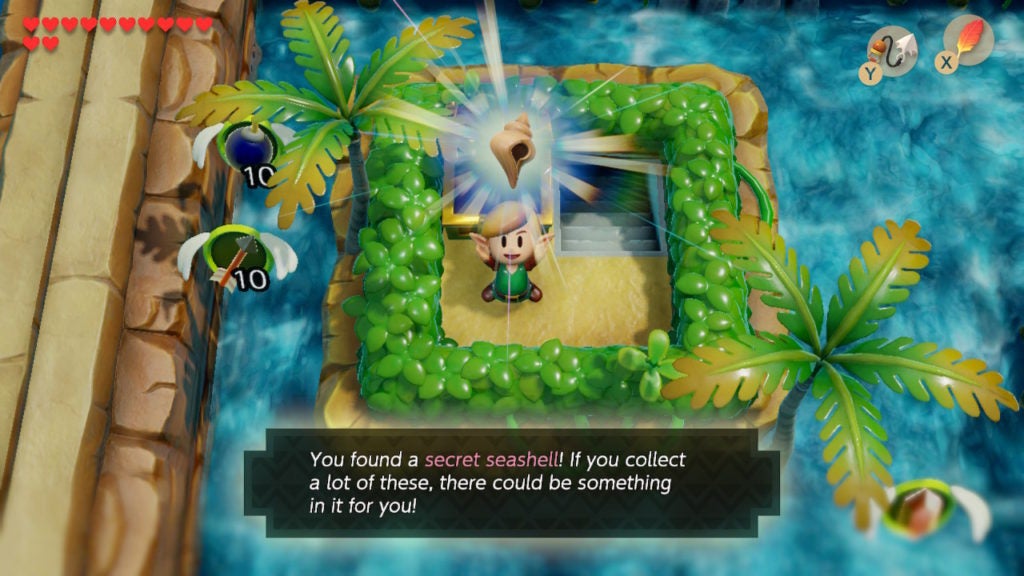
After you snag this collectible, head back down into the dungeon. Now’s when you should solve that little chess puzzle before moving on to grab the last bit of loot in the west of Level 6 – Face Shrine.
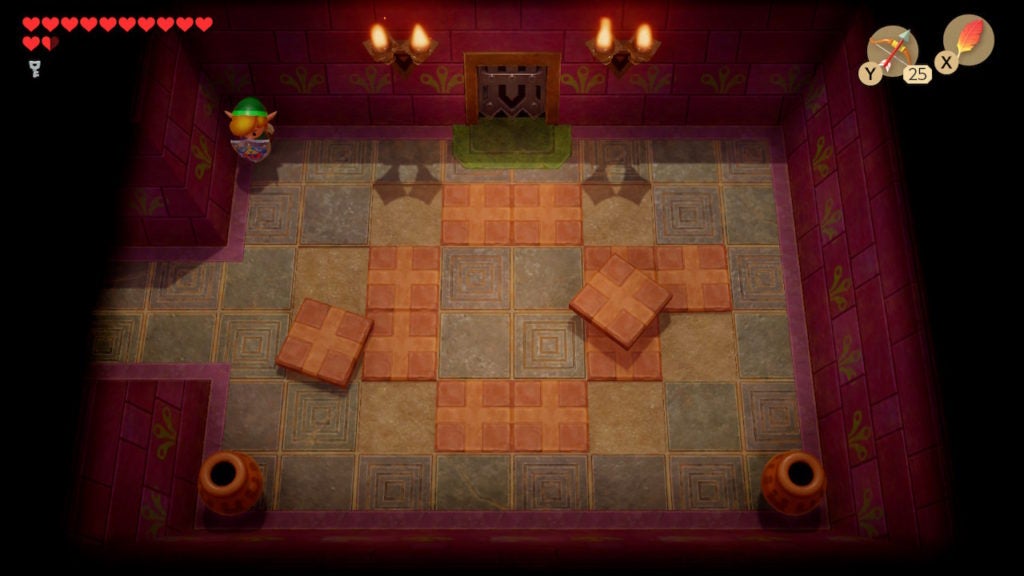
Solve the 1st Chess Puzzle
When you re-enter the room with the 100 Rupee chest and chess pieces, you’ll notice that the southern door is locked. You’ll have to get both of the chess pieces on the green tiles on opposite sides of the room. Only then will the southern door be unlocked.
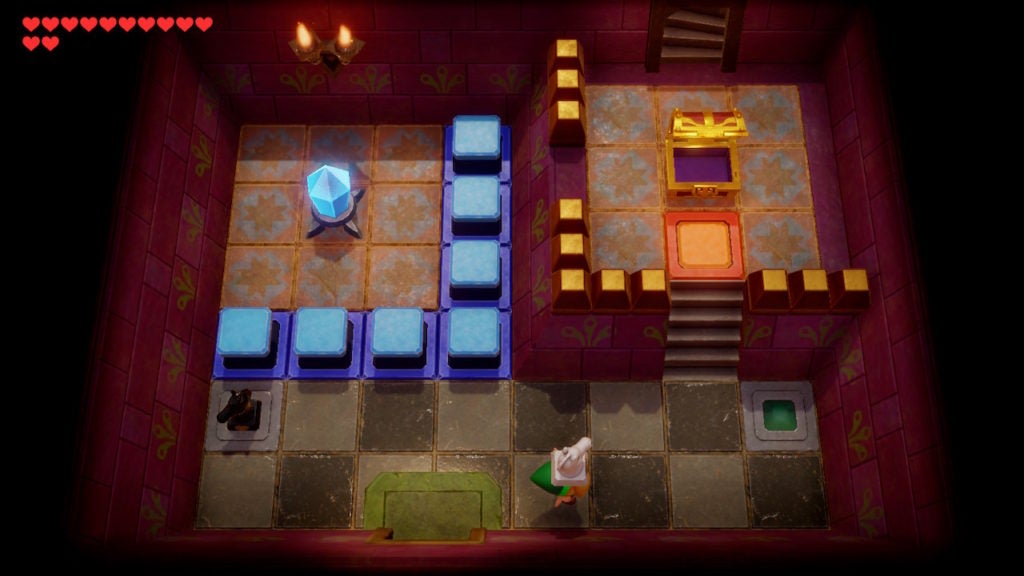
When you throw the chess pieces, they will travel in an L-shape. To get the white knight onto the eastern green tile, stand on the floor tile just east of the entrance and throw the chess piece east. To get the black knight onto the western green tile, stand on the easternmost of the pale green entranceway tiles and face west before throwing the black knight. Placing the knights correctly will let you leave through the southern door, as it will unlock.
Find the 1st Small Key
The last thing you want from the west side of Level 6 – Face Shrine is the first Small Key. To find it, start from the room where you got the Compass. Head up the stairs to the north and travel east along the elevated walkway. This will take you east, past an area with some more chess pieces below that you’ll have to deal with later.
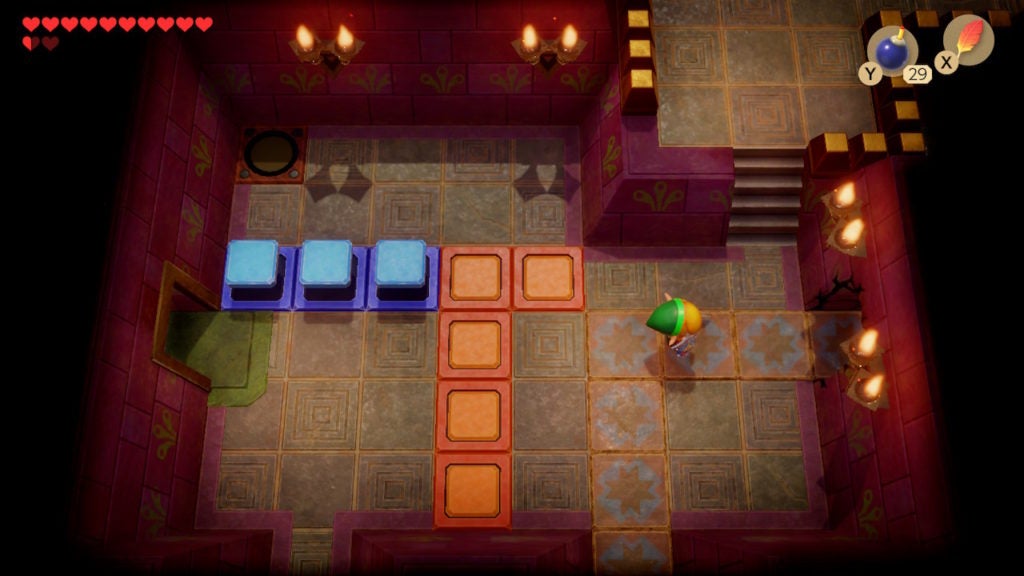
For now, keep going east and you’ll eventually get to a big room with a ton of Orange Switch Blocks. If they are all raised, the room will be untraversable.
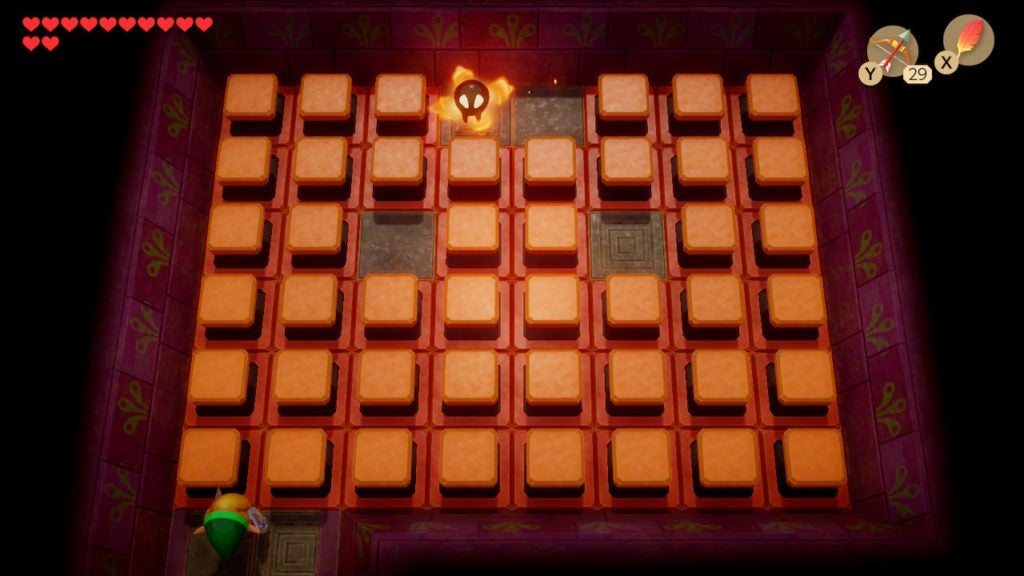
You may need to hit the Switch in the Compass chest room to lower the Orange Switch Blocks. Furthermore, this is when you should remember the hint that ‘the Owl Statue gave you a while ago: “Enter the space where the eyes have walls…” This hint means that you’ll need to get to 1 of the 2 ‘eyeholes’ of the face made from Orange Switch Blocks.
Coming back to this room full of Orange Switch Blocks when they are all lowered will cause 1 Small Key to drop onto the western ‘eye’ of the ‘face’. After you pick it up (while avoiding or killing the Bubble in the room), you’ll have everything you need from the western half of the dungeon. However, to get to the eastern areas, you’ll have to backtrack all the way to the main entrance.
Normally, you could play Manbo’s Mambo on your Ocarina to warp back there. However, since you briefly left the dungeon to get the chest with the Secret Seashell, playing Manbo’s Mambo will take you to the room with the staircase that leads up to the tiny island on the Rapids Ride course.
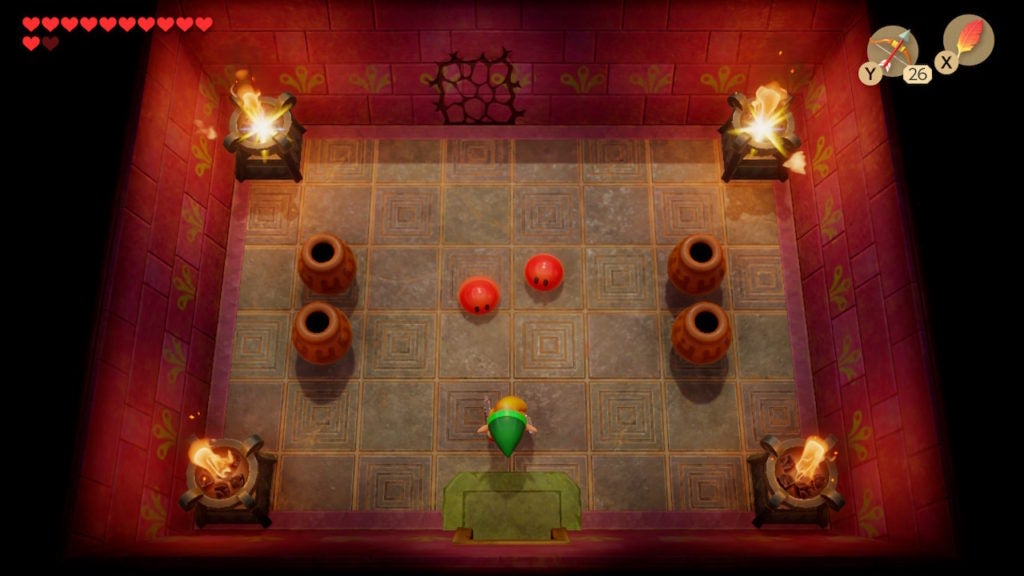
Find the Mini-Boss (Rover)
From the main entrance, head east into the room beyond. Here, you’ll find 2 Blade Traps waiting along the north wall. Most of the room is full of conveyor belts, though, you can use the elephant statues here as cover to get by the Blade Traps.
Stay south of the elephant statues while they are between yourself and a Blade Trap. Alternatively, you can use the Roc’s Feather to leap over the areas in front of the Blade Traps. Whatever method you choose, when you make your way across the room, keep going east. In the next room, you’ll come across a northward door that locks immediately. You then get attacked by floor tiles that come alive and pelt themselves at you!
Thankfully, they are really easy to defend against, albeit time-consuming. If you stand in a corner with your Shield up, the tiles will push you back, but cannot harm you. Simply wait until all the flying tiles destroy themselves against your formidable defense for the door to unlock. Continue north when you’re ready.
Use the 1st Small Key on the Locked Door That Leads North
In the room beyond, you’ll find 2 elephant statues as well as 1 locked door leading north and 1 pot symbol door on the east. To find the first mini-boss in this dungeon, use your lone Small Key on the locked door that leads northward.
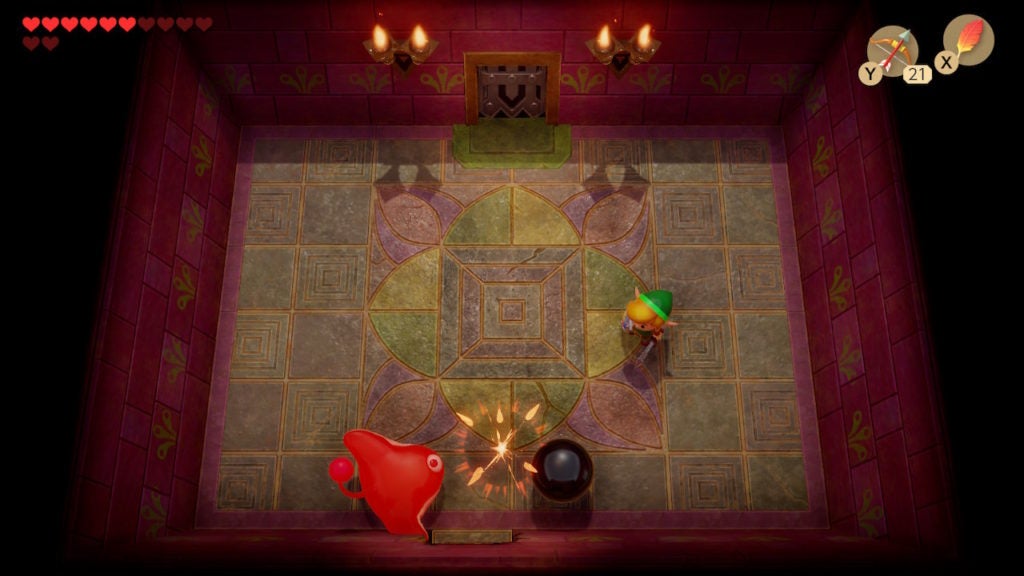
Proceeding that way will bring you into a room with 2 Red Zols. There will also be a suspicious crack in the north wall. After you deal with the blob-like enemies, use a Bomb to blow open the cracked wall to reveal a passageway.
Beyond, you’ll come face to face with the first mini-boss: Rover. This is a unique battle that will require an unconventional tactic.
How to Beat Rover
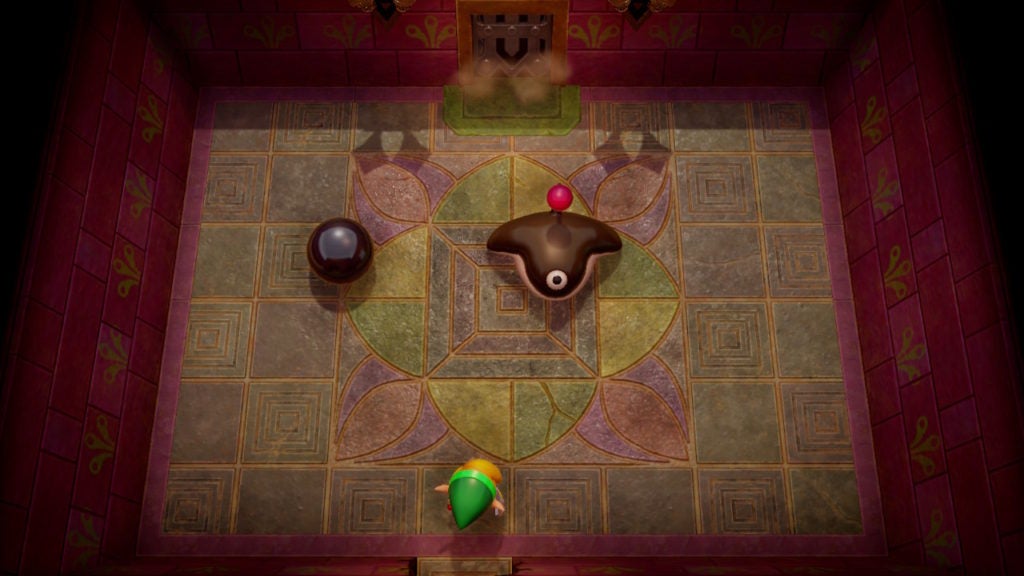
This single-eyed foe will constantly try to play catch with you. However, the ball used for this game is about as large as Link’s entire body. You will have to dodge Rover’s throws and then get to the ball before the mini-boss can pick it up again. The best way to hurt Rover is to throw their ball at them, just like how they were trying to do to you.
After each toss, you’ll have to retrieve the ball and keep throwing it at Rover until the adversary’s health is gone. If Rover gets to the ball before you, you’ll have to dodge an aggressive toss from the foe. Eventually, when Rover goes down for good, a blue warp point and a Fairy will spawn in the room. Grab the Fairy if you’re low on Hearts and then head north through the now-unlocked door.
Find the Hidden Staircase
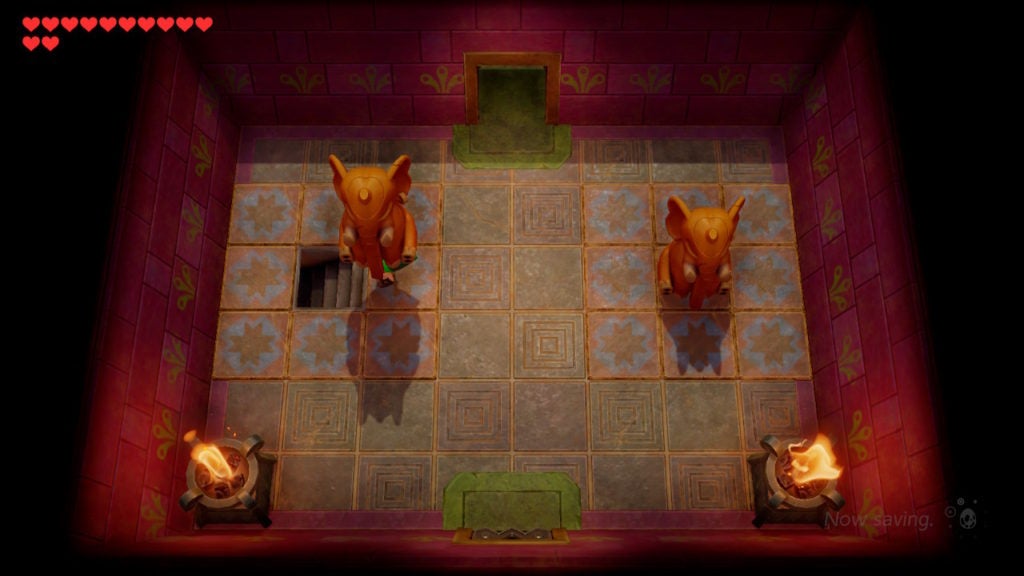
Here, you’ll find 2 elephant statues and an open doorway that leads north. If you lift up the statue to the west, you’ll find a hidden staircase beneath it.
However, you shouldn’t proceed down this staircase yet. It will lead you to the central rooms of the dungeon, which are the final ones leading up to the Nightmare’s lair. You’ll want to explore the rest of the eastern rooms first to collect all the loot. To do so, you can either go north through the open doorway or south once more. Although, if you go north, you’ll actually get teleported south into the room that had the 2 Rel Zols and the cracked wall passage leading into the mini-boss room.
Find the 2nd Small Key
The next item you’ll want to find is the dungeon’s second Small Key. Head back to the room with the 2 elephant statues and the pot symbol door to the east. Smash the eastern door open by throwing a statue at it to proceed.
When you enter the next room, you’ll be ambushed by 4 Wizzrobes that spawn in a diagonal line. Take them out in whatever way you see fit and the room’s exits will reopen.
You’ll likely have spotted the chest in the southeast on that raised walkway. Don’t worry about it for now. Go north and out of this room to progress. There, you’ll encounter 1 Star and 2 Water Tektites in a passage that becomes full of shallow water.
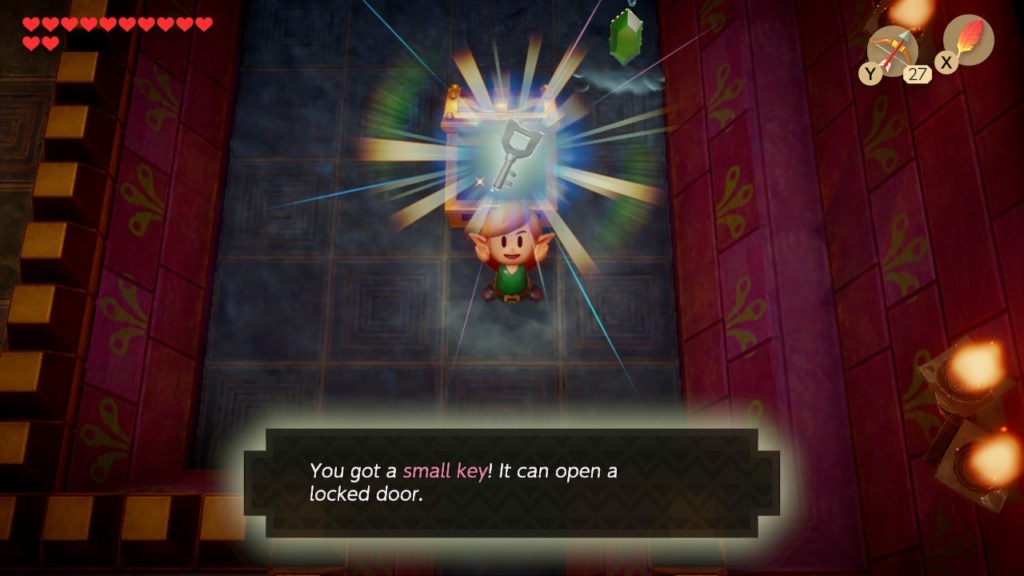
Take care of the enemies with your trusty Sword and then keep going north. Eventually, you’ll find a chest, which will contain 1 Small Key.
With that, you’ve obtained everything that you can from this part of the dungeon. It’s time to decent that hidden staircase you found earlier. Head back to the room north of the mini-boss lair and travel down it to find an underground side-view tunnel.
Find the 3rd Small Key
In this tunnel, you’ll have to travel west by leaping across gaps and climbing the many ladders here. It should be fairly easy to cross this cavern, just be wary of the Spark enemies. Feel free to throw your Boomerang at them to destroy the energetic foes.
When you climb the western ladder and exit this passage, you’ll be in a room with a locked block in the northeast corner barring the only exit. However, before using your Small Key on the locked block, you should get into a corner and raise your Shield, as this is another room full of flying tiles.
After the tiles expend themselves, 1 Small Key will drop on the floor space with the blue crystal design on the western side of the room.
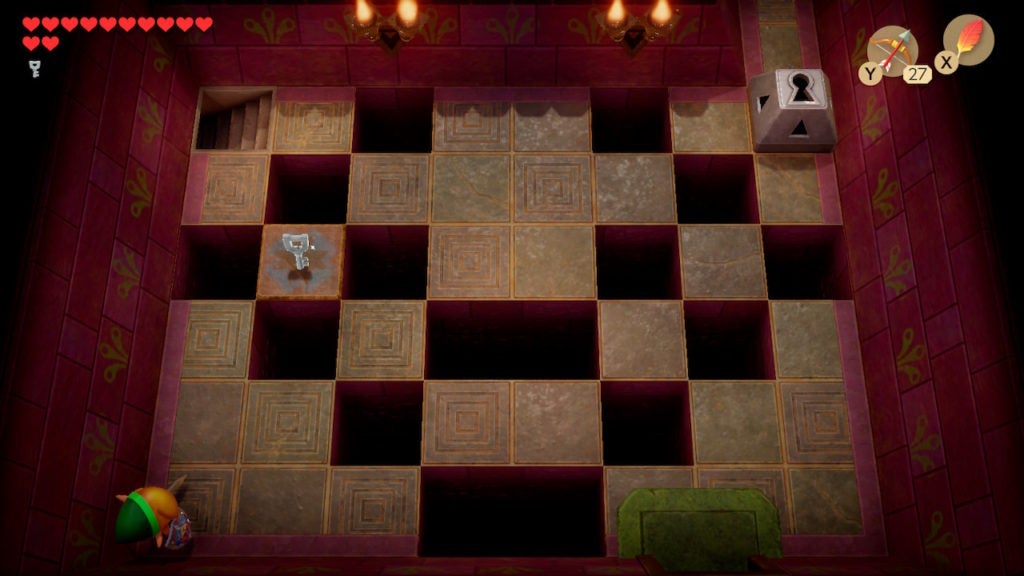
Pick it up and then immediately use it on the locked block so that you can head north. Be careful not to fall into the many holes that now pocket this area.
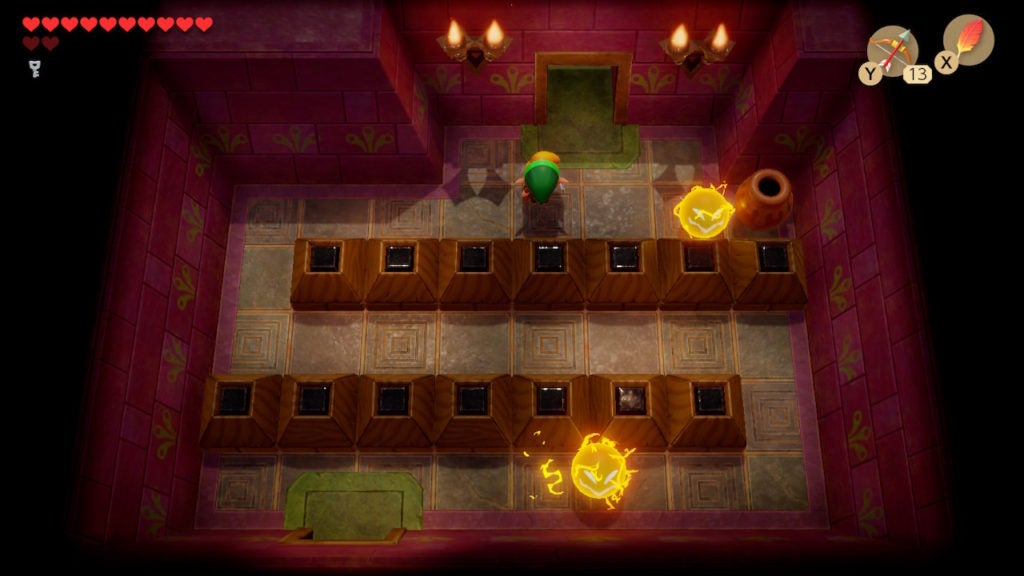
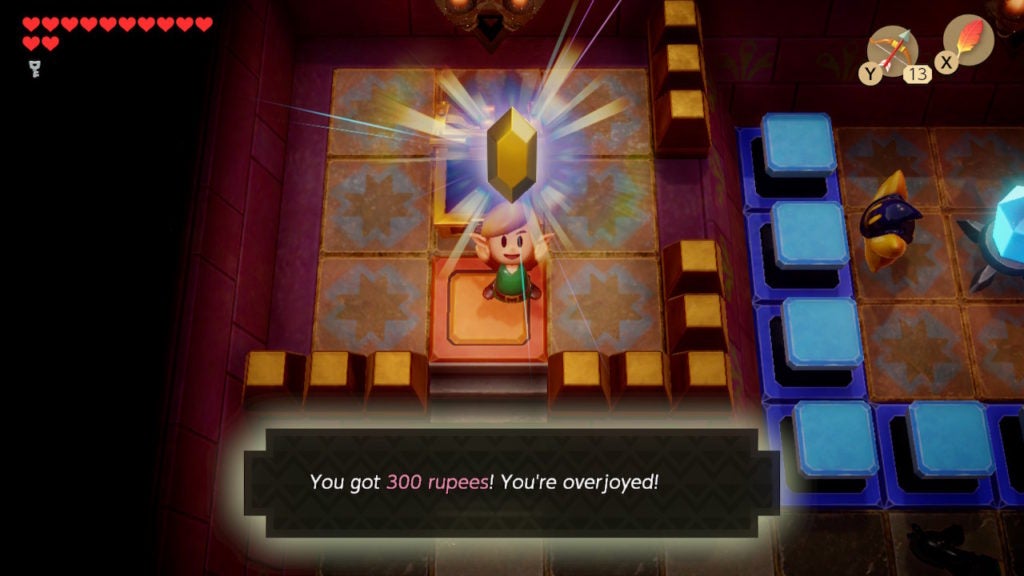
The Chest with 300 Rupees
As you progress deeper into Level 6 – Face Shrine, the next bit of loot you can find is the chest with 300 Rupees. To seek it out, start from the room north of the one with the flying tiles and the locked block. Here, you’ll find 2 Sparks patrolling the thin passage. When you get by them, you’ll have to smash a pot into the door leading west to progress.
Solve Another Chess Piece Puzzle
In the room beyond, you’ll find another chess piece puzzle. This one is pretty easy and follows an intuitive pattern. First, stand south of the westmost green tile and throw the white knight to the east. This will cause the white knight to land on the eastern green tile.
To solve the other half, do the reverse. Stand south of the eastmost green tile with the black knight in your hands and toss it west. It will bounce onto the western green tile and the door to the west will unlock. In the next room, there will be a staircase that you can descend.
This will take you into a tunnel that will lead to the far northeast of the dungeon that’s inaccessible from other areas. There, you’ll find the 300 Rupee chest and more.
Traverse the Tunnel With the Tiny Thwomps
Down the staircase, you’ll have to travel east through a side-view tunnel. Though, you’ll have to be quick, as there are many small Thwomps here that will crush you if you don’t run by them quickly enough.
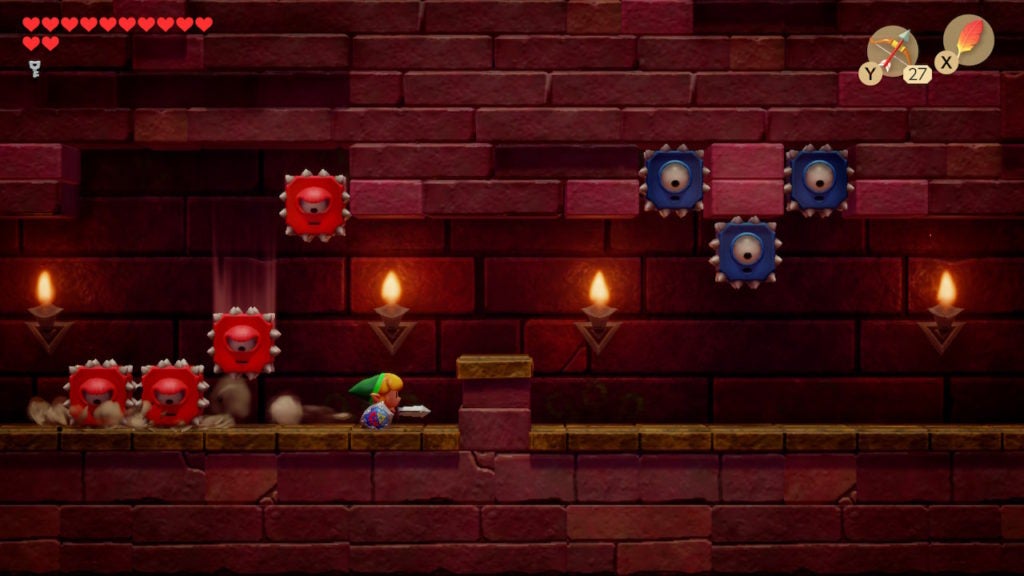
Use the Pegasus Boots to dash by them and occasionally use the Roc’s Feather to jump over the minor obstacles. Eventually, you’ll make your way to a ladder in the east that you should ascend.
Go North to Locate the 300 Rupee Chest
Here, you’ll find a room with 3 Pols Voices, which you can either avoid or slay.
Either way, you’ll want to go north. Beyond, you’ll find a room with a subtle yet annoying maze of blocks.
There are 2 Sparks in this room that you can dispatch with your Boomerang or jump over with your Roc’s Feather. After you get by them and proceed further north, you’ll finally be in the room with the 300 Rupee chest. Ascend the stairs to the west to claim your loot!
Solve the Chess Piece Puzzle to Exit the Room
However, you’ll now notice that you’re now locked in the room. You’ll have to solve another chess piece puzzle to get out. First, break the pot in the southwest corner to reveal the second green tile. Next, stand 1 space north and 3 spaces east of the western green tile and throw the white knight to the west. This should place the white knight onto the western green tile.
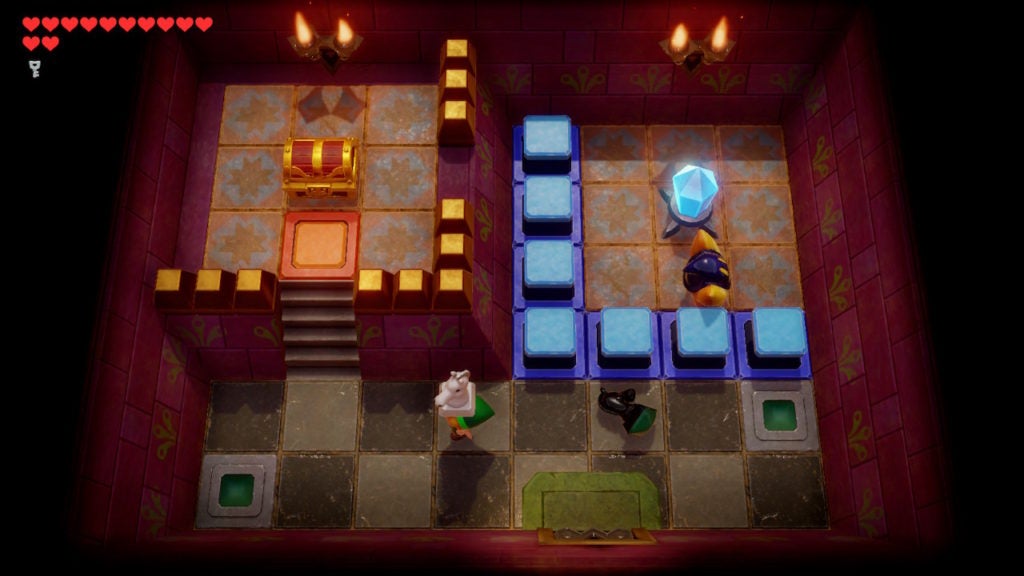
The black knight will be harder to place, as you’ll need to be on one of the spaces occupied by a Blue Switch Block. You can lift up the black knight and ascend the stairs to the west before leaping off the ledge to stand on top of the raised Blue Switch Blocks, however, you’ll need to flip the Switch in the room for something later on. To make things a bit easier, use the Hookshot or the Bow and Arrow Set to shoot the crystal Switch and lower the Blue Switch Blocks. Take out the Star enemy and stand on the lowered Blue Switch Block that is the most southwest.
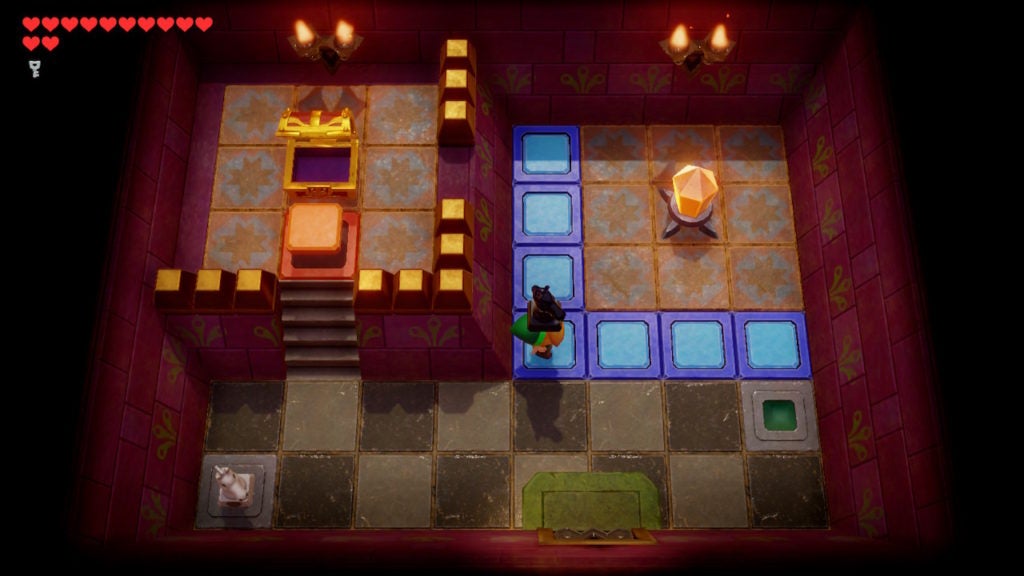
Toss the black knight east from this position to get it to land on the eastern green tile. This will open the locked door, which will allow you to head south.
Find the Mini-Boss (the Dodongo Snakes)
Backtrack south to the room with the trio of Pols Voices and then keep going south. In the room beyond will be the second mini-boss of Level 6 – Face Shrine. However, this is a pair of foes you’ll be familiar with, as you’ve defeated them before in a past dungeon.
Like before, you’ll have to feed them Bombs to destroy them. You must feed 3 Bombs to each of the 2 Dodongo Snakes (a minimum of 6 needed this fight) to take them down.
How to Beat the Dodongo Snake
The area separated from the rest of the room in the northeast is a decent vantage point from which to lob Bombs at the hungry fiends. Furthermore, if you run out of Bombs, you can also leave through the northern exit and come back later. Although, doing so will reset the health of both Dogongo Snakes.
The Dodongo Snakes travel in a relatively linear path. If they are not facing a dead end, they will most likely travel in a straight line. Use this knowledge to place Bombs in front of them. It’s easier but more dangerous for you to place Bombs in the right place and at the right time when close to the Dodongo Snakes. Keep making laps around the room to avoid touching them, and you should be able to minimize how much health you lose. Just be wary of the holes in the floor.
Find the Nightmare Key
After you defeat the Dodongo Snake, no warp point will spawn in this room however, you will get a Fairy. Take the free heal if you need it and then go west into the next room to progress toward the next item you’ll need: the Nightmare Key. In the room west of the one where you defeated the Dodongo Snakes, you’ll find yourself in a thin corridor.
Across the gap in the room, you’ll see a block and a locked block. You can easily use your Hookshot to zoom over there and unlock the locked block with your last Small Key. Afterward, go north and you’ll find a room with a chest ringed by pots.
However, when you try to open it, you won’t be able to. Thankfully, the Owl Statue nearby will give you a hint on how to open the chest. Put simply, you’ll need to throw a pot at the chest to open it. When you do, you’ll be able to loot the Nightmare Key.
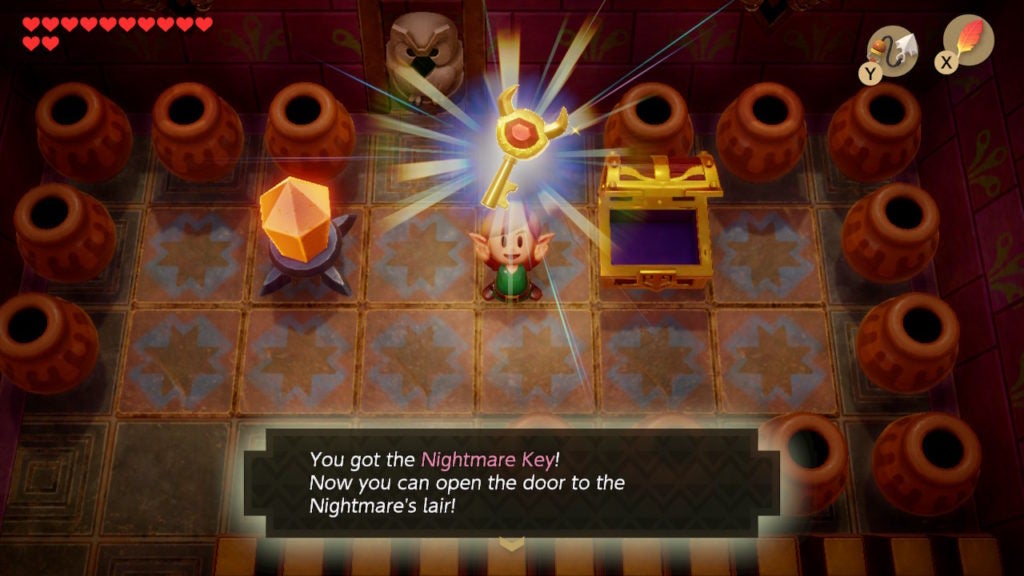
With it, you’ll now have everything you need to find and defeat the Nightmare of Level 6 – Face Shrine. However, before you do, you should consider looting the last chest in the dungeon. If you plan to do so, make sure the Switch next to the Nightmare Key chest is orange so that the Orange Switch Blocks in the dungeon will be raised.
The Secret Medicine (Optional)
The final chest in the dungeon, located in the southeastern section, contains a special healing item called Secret Medicine. This item will automatically heal you for all missing Hearts if your life drops down to nothing—it’s like having an extra life. However, you can only hold 1 Secret Medicine at a time. If you already have some, you won’t be able to loot another Secret Medicine from a chest. Instead, the chest will close with the item safely inside so that you can come back and get it later. With that said, if you want the Secret Medicine, you should start heading to its location by the main entrance.

From the main entrance, travel east until you’re in the room south of where the 4 Wizzrobes ambushed you in a diagonal formation. You’ll see some Switch Blocks and an Owl Statue behind a pot in the northwest corner.
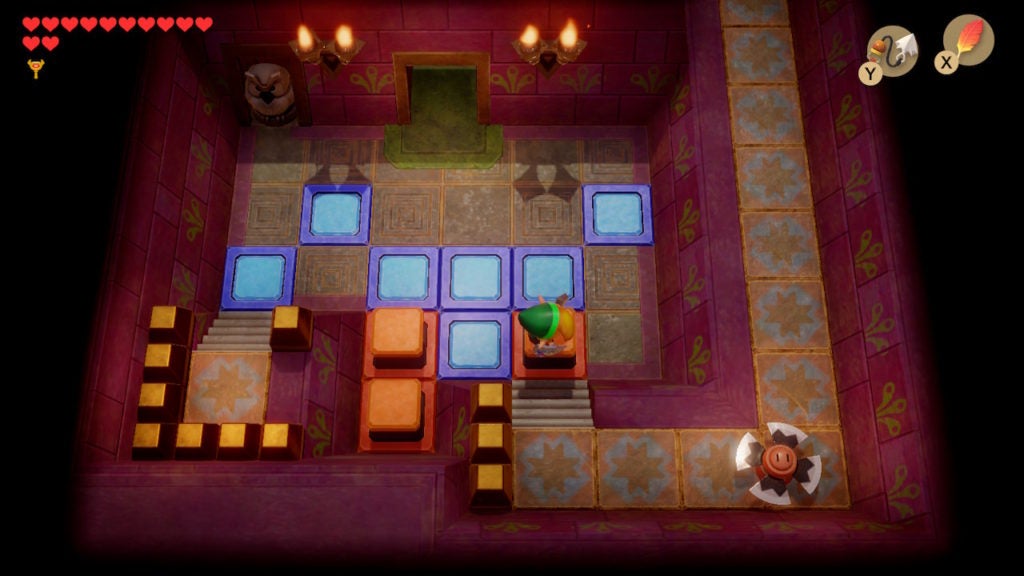
The Owl Statue will tell you and you need to use the crystal floor tiles as an indication of how to proceed through this room. Put simply, walk up the stairs in the southwest and then leap east to the closest raised Orange Switch Block. Use the remaining Orange Switch Blocks to traverse the room. Make your way to the eastern walkway and then head north by jumping liberally. The Blade Trap will be a pain to deal with, though, you can jump over them if you time your leaps correctly.
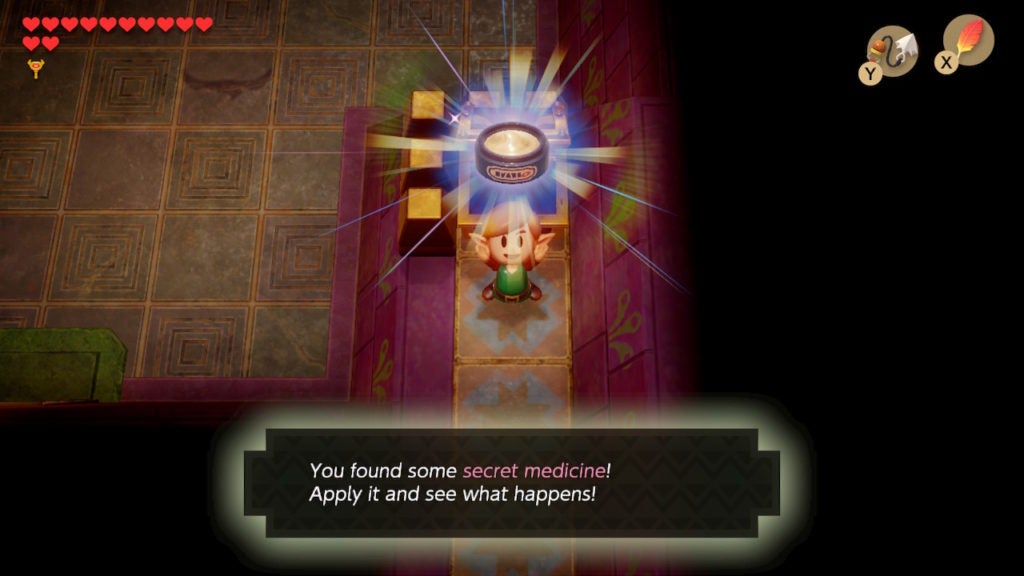
In the room to the north, you’ll be able to loot the chest you find for some Secret Medicine. Now that you’ve got an extra life, you’re as ready as you can be to face the boss of Level 6 – Face Shrine.
How to Get to the Boss Room
The place you’ll need to begin the last leg of your quest in this dungeon is the room with flying tiles that used to have a locked block in the northeast corner. To easily get back here, return to the main entrance and used the warp point to get back to the mini-boss room that once held Rover. Proceed into the room that lies north of here, which is the chamber that possesses the staircase that was hidden under an elephant statue.
That passage will lead you back to the underground tunnel with many ladders, spike traps, and a few Goombas. Go west and ascend the farthest ladder to get back to the room with the many aggressive floor tiles in an initially ornate shape. From there, go south to enter a new area. This one will have a Vacuum Mouth in the middle of a huge pit.
Vanquish the Vacuum Mouth
The doors will lock when you enter the room, which means you’ll have to defeat the foes within to proceed. Shoot the Vacuum Mouth with a ranged weapon to take them out. With them gone, the rest of the enemies will be easy to take down. If you walk around the room, some Green Zols will spawn. Dispatch them all and then head through the eastern door.
Get Past the Wizzrobe and Head North
Beyond, the next room will be split into northern and southern halves. You’ll have to leap across to the north and move the easternmost block further east. This will push it into the void and allow you to walk northward. Though, you’ll still have to defeat the Wizzrobe here for the door to unlock.
You’ll also have to be careful about the Beamos in the southeast corner that will try to shoot energy projectiles at you. Since you can’t defeat a Beamos right now (you need the Mirror Shield from the next dungeon to do so), slay the Wizzrobe in your desired manner and then go north once the door unlocks.
Get Some Fairies From the Sparks in Front of the Boss Room
In the room that holds the doorway to the Nightmare’s lair, you’ll find a couple of Sparks orbiting some torches.
If you have the Boomerang, you can easily hit the Sparks with it to destroy them, which will cause them to drop Fairies. As such, the 2 Sparks in this room that hover harmlessly around the center can be used to get 2 heals. Be sure to grab 1 or 2 to put in Fairy Bottles, if you have such empty containers.
However, when you’re ready, you should use the Nightmare Key to unlock the boss room and head into it. Beyond, you’ll come face to face with the greatest foe in Level 6 – Face Shrine.
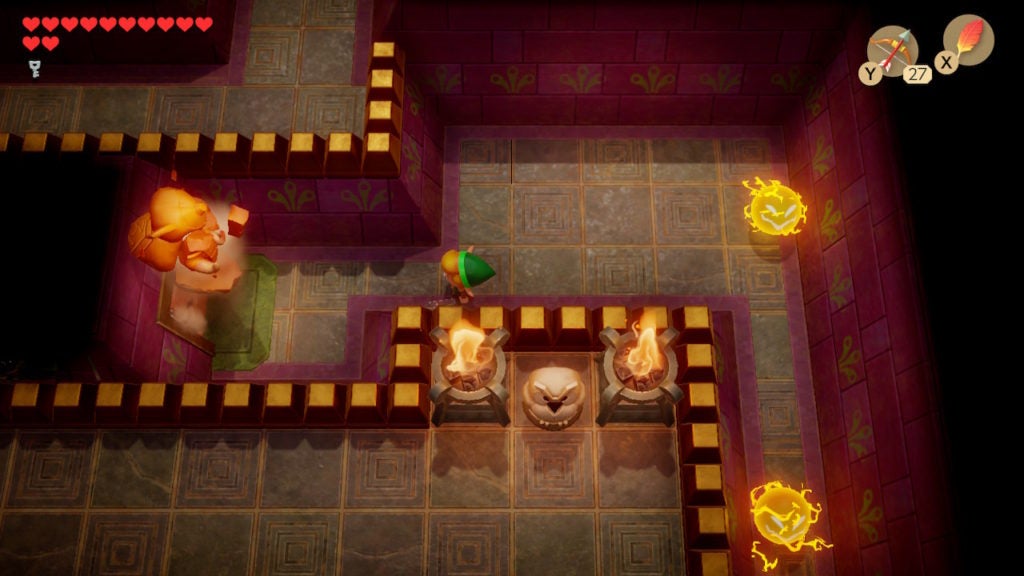
How to Beat Facade
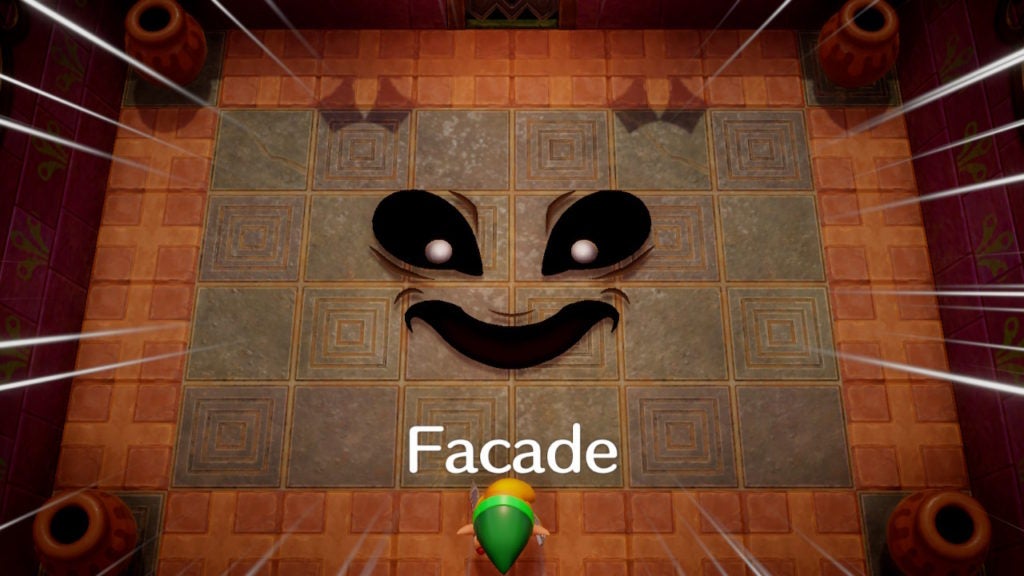
Yes, the boss of Level 6 – Face Shrine is a literal face…named Facade. After a quick insult, the floor-bound adversary will begin attacking you.
Facade’s Attacks
First, the boss will begin throwing the orange tiles that line the walls of the room at you.
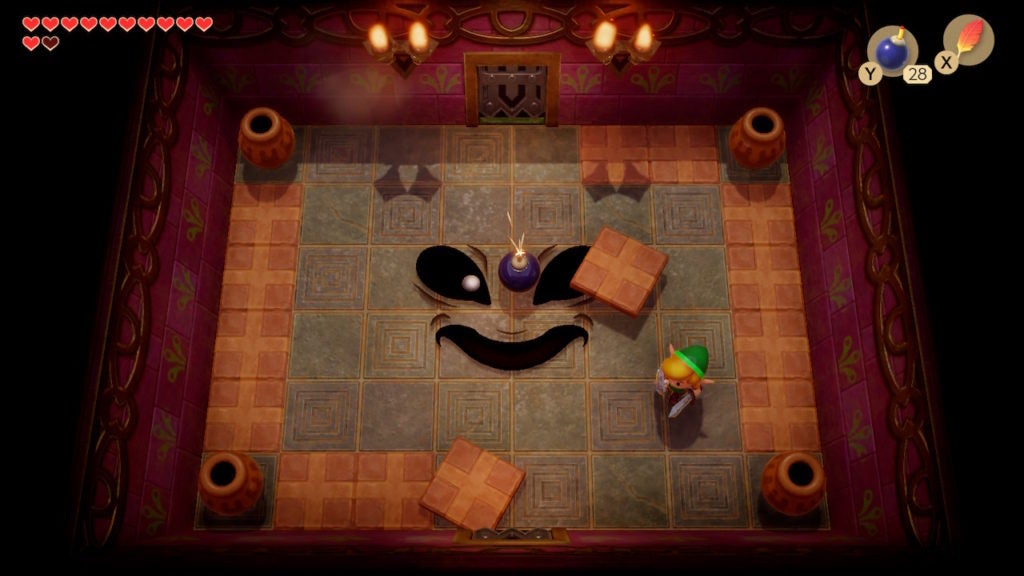
You’re likely familiar with how to defend against this simple threat. Hold up your Shield while keeping your back to a corner will cause Facade to exhaust his ammunition quickly, and to no effect.
After the boss has no more orange tiles to throw at you, they will begin temporarily making floor tiles disappear in hopes of making you fall through.
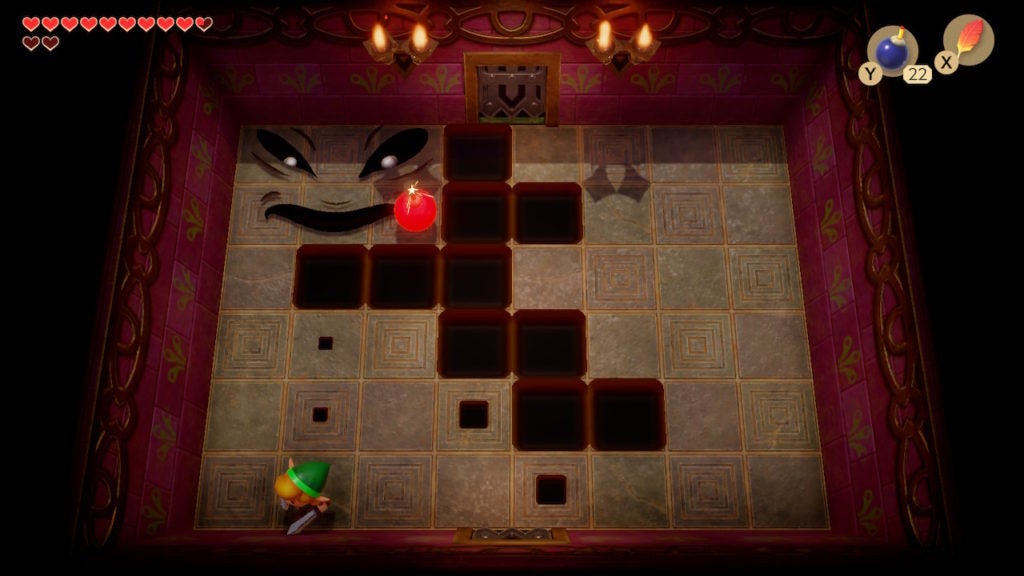
To avoid taking fall damage, you’ll have to stay on the move. Keep walking around the room and jump with the Roc’s Feather when necessary.
How to Hurt Facade
You can drop Bombs on Facade’s face to deal damage to them. If you time your Bombs well, you can take Facade down very quickly.
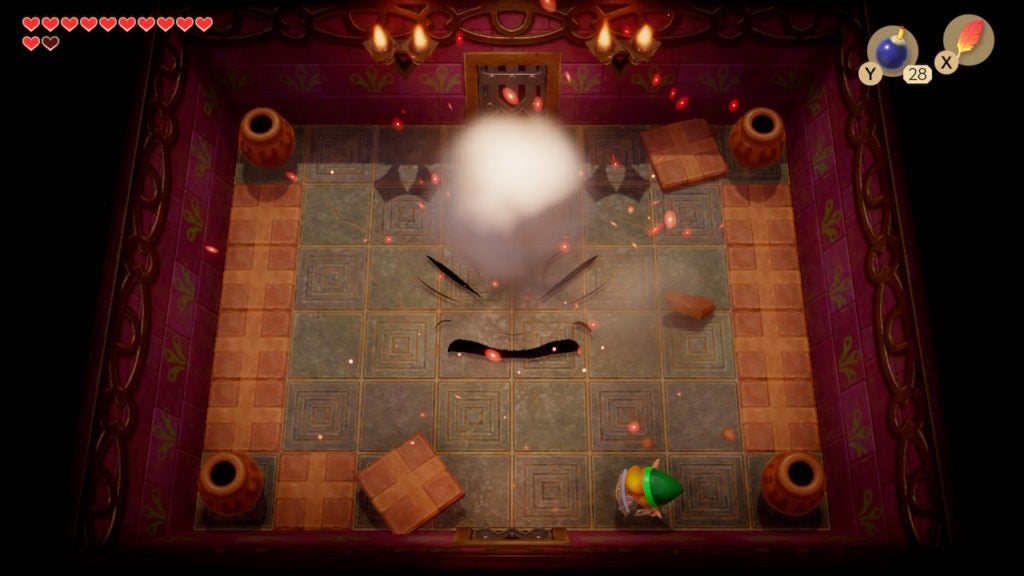
Keep bombing the boss until they are defeated. With their dying breath, this Nightmare tells you that when the Wind Fish wakes up, everything will disappear forever. However, you likely remember hearing this from other sources before. After Facade explodes into purple flames, they will drop a Heart Container and the door to the north will unlock.
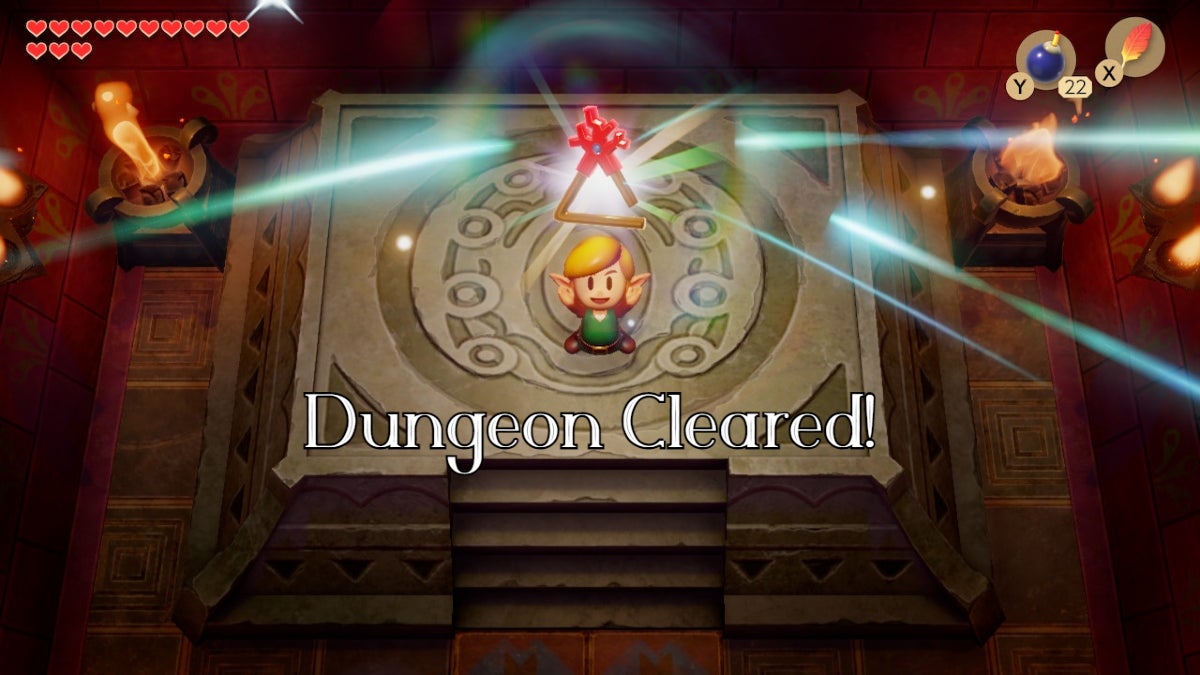
Pick Up the Heart Container and Siren Instrument
Grab the Heart Container for a full heal and to increase your maximum number of Hearts by 1. Afterward, go north to collect the sixth Siren Instrument.
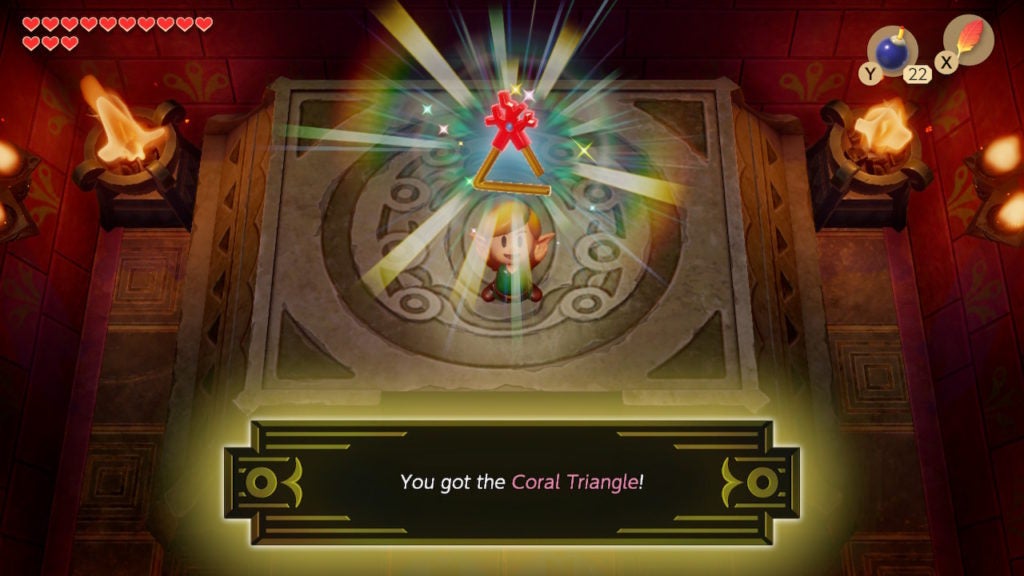
Congratulations, you’ve obtained the Coral Triangle! As you lift the treasure above your head, you’ll get a hint about needing to go to a mountain.
Where to Go Next
As you exit Level 6 – Face Shrine, you’ll meet up with the wise Owl once more. They’ll elaborate on the hint you just received, which will point you in a more specific direction.
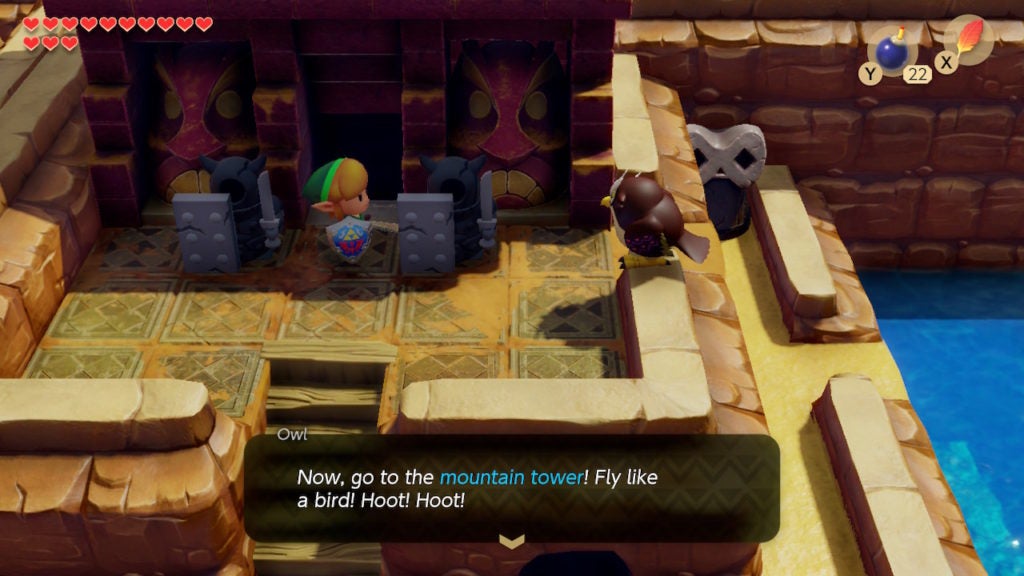
The Owl tells you to go to the mountain tower, and that you’ll need to fly like a bird. The latter part is yet another hint, though this one means you’ll need to get some unexpected help to bag the bird key.