Both finding and clearing Color Dungeon will take some serious problem-solving. However, it is worth it to get the useful upgrade from the depths of this dungeon: one of two colorful Tunics. It’s time to rampage through a rainbow!
Table Of Contents
How to Find Color Dungeon
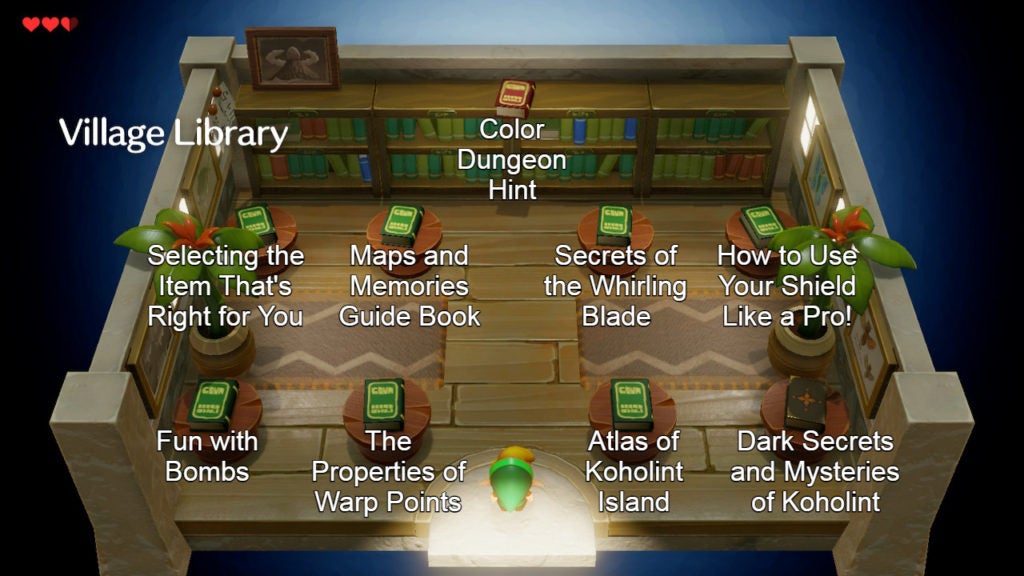
Firstly, you’ll need to head to the Library in Mabe Village in order to find the hint that leads to Color Dungeon. At the back of the Village Library, there is a book on top of the singular large bookshelf. You’ll need to run into this bookshelf by dashing into it with the Pegasus Boots.

After you knock the red book off the bookshelf, give it a read. Within, you’ll get some hints as well as a set of instructions. Memorize the pattern of arrows and numbers (or write it down). You’ll need to use this sequence to move specific objects.
Head to the Cemetery South of the Tabahl Wasteland
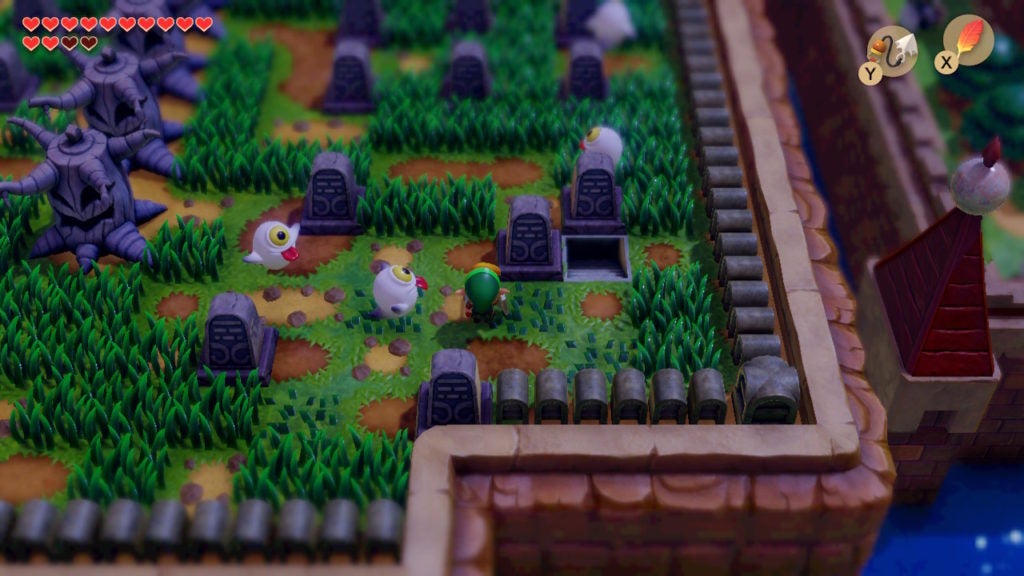
The specific objects you’ll need to move are a set of 5 tombstones in the Cemetery. Go to the southeast corner of the Cemetery to find these special tombstones. You’ll need to push the tombstones in the directions mentioned by the red book’s hint in the order stated.
Therefore, you’ll need to follow these steps:
- Push the southern tombstone south
- Then, push the southwestern tombstone west
- Next, push the northwestern tombstone north
- Afterward, push the central north tombstone east
- Finally, push the northeastern tombstone north
After you push the final tombstone, you’ll find a staircase beneath it. This staircase will only appear if you follow the red book’s instructions. Thankfully, after you solve the puzzle, the northeastern tombstone will stay out of the way. This means that you’ll never have to solve this puzzle again. When you’re ready, descend the staircase to enter the Color Dungeon.
Find the Compass
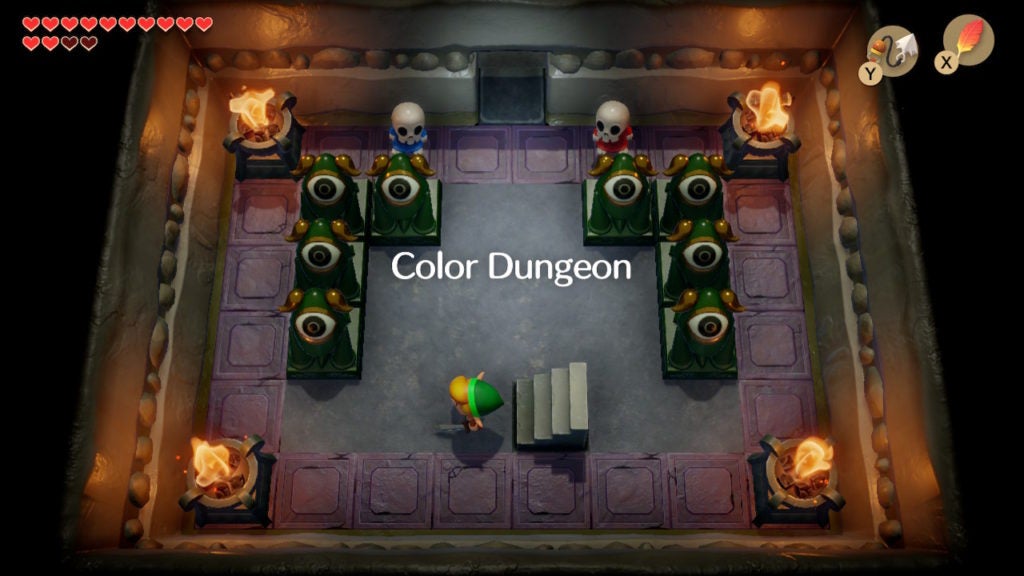
When you first enter Color Dungeon, you’ll meet a couple of friendly skeletons: Dion and Gar. One will mention that you need Magic Powder within and the other will give you some Magic Powder.
Furthermore, note what the skeletons are wearing. One is garbed in a Blue Tunic and the other is wearing a Red Tunic. This is a subtle hint to the final rewards of completing the Color Dungeon. When you’re ready, proceed past the amiable undead to begin searching for the Compass.
Slay the Red and Green Goo Specters
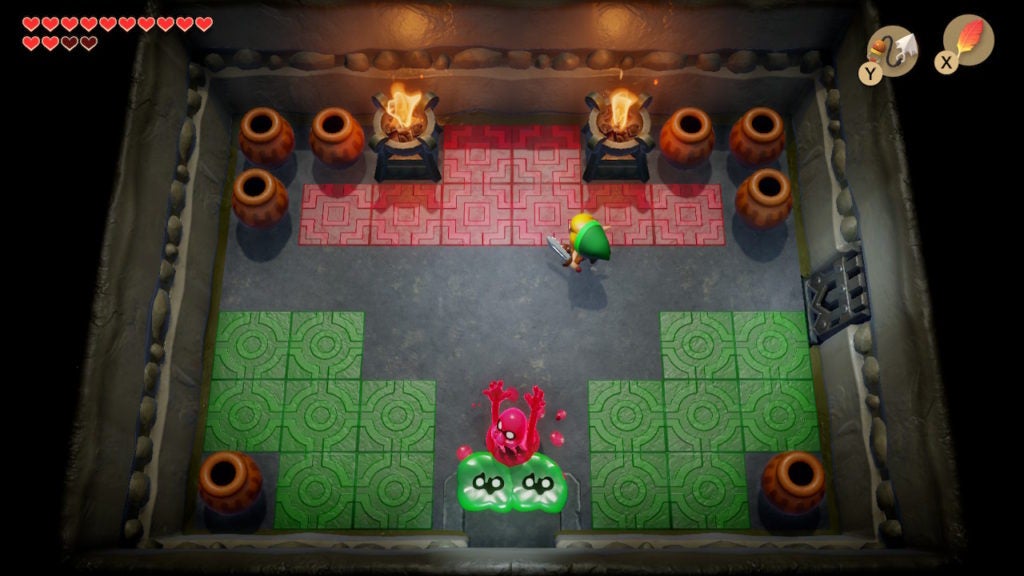
North of the entrance, you’ll come across some new enemies. These slimy fiends are Goo Specters (sometimes called Camo Goblins). While unique and vibrant, you can take them out easily with any weapon you choose. After you dispose of them, the locked door to the east will open. Head through it to progress.
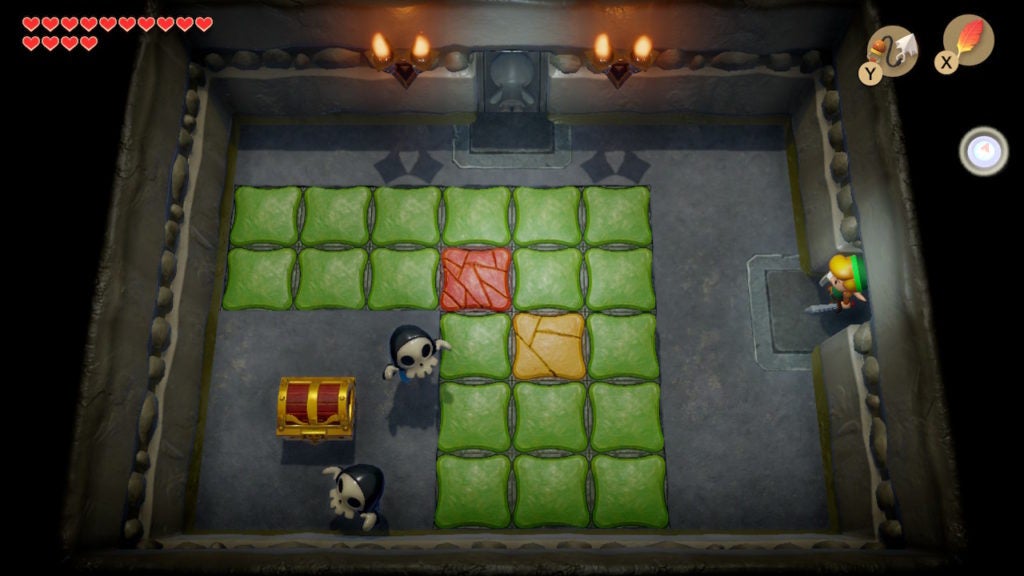
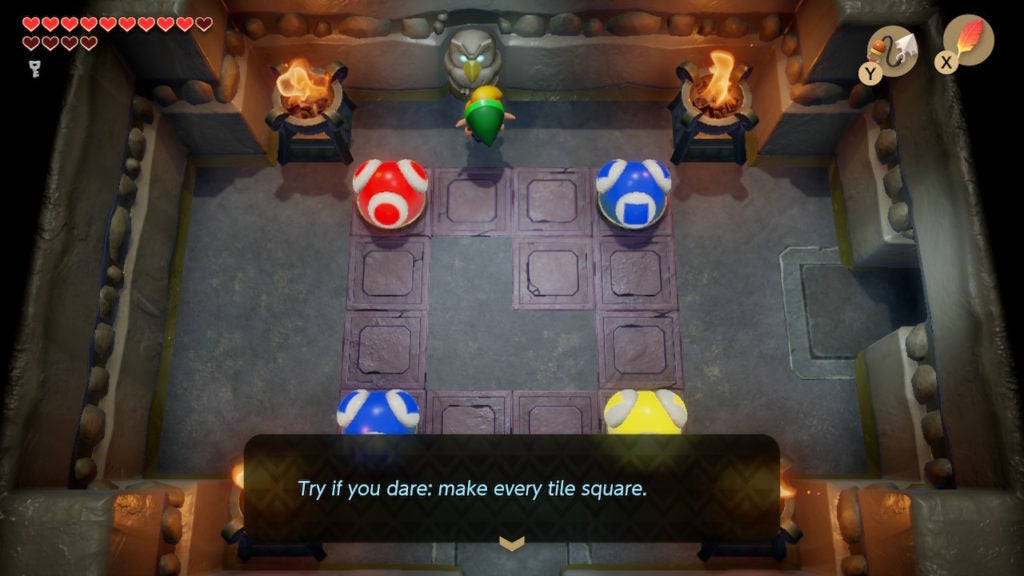
Solve the First Color Bulb Puzzle
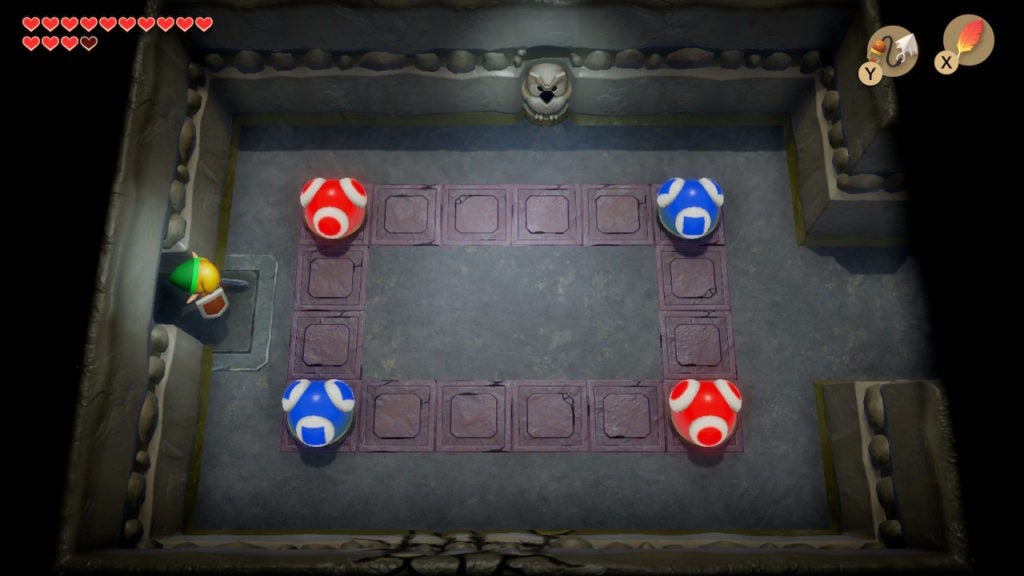
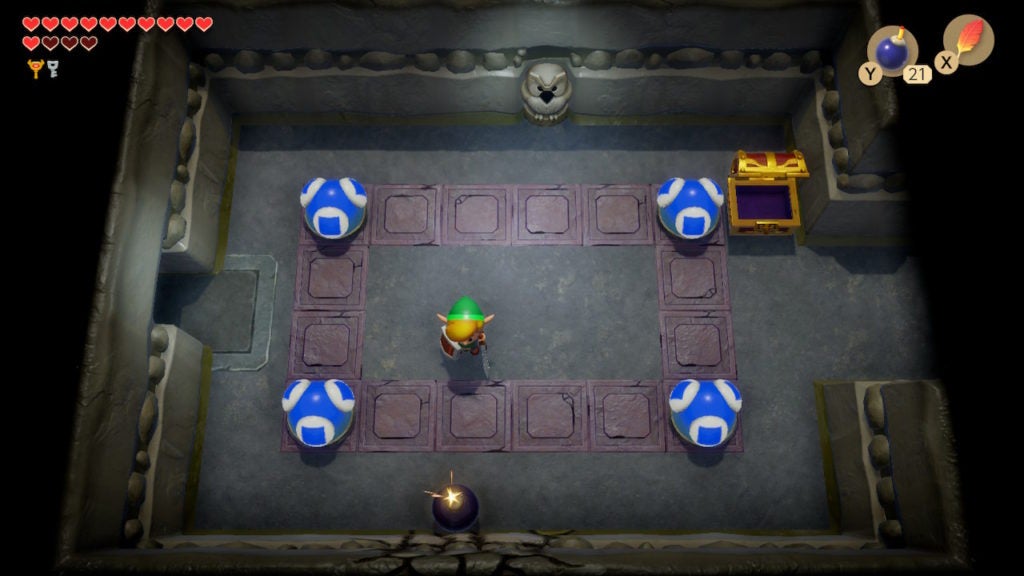
In the room to the east, you’ll find some new objects and an Owl Statue. Since you don’t have the Stone Beak yet, you can’t speak to the statue for a hint. Although you can pass through to the room to the east, you should solve this puzzle first, as doing so will give you the Compass.
You’ll need to match the colors of all the bulbs in order to get the Compass chest to appear. For this puzzle, all bulbs will need to be turned blue. When you strike a bulb with your Sword, it and its adjacent bulbs will change color. Thankfully, you can solve this puzzle in 2 moves.
First, hit the northwest red bulb. This will cause the one you struck to become blue while all others will become red. Afterward, go to the bulb that is diagonally opposite of the one you hit. Hit that diagonally opposing bulb and you’ll turn all red bulbs blue.
Loot the Compass and Scout the Map
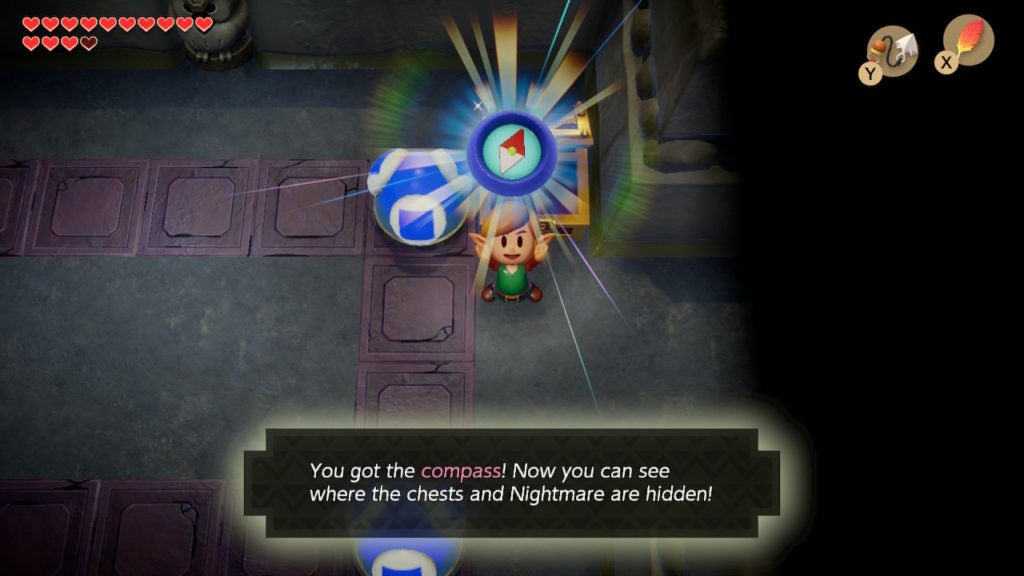
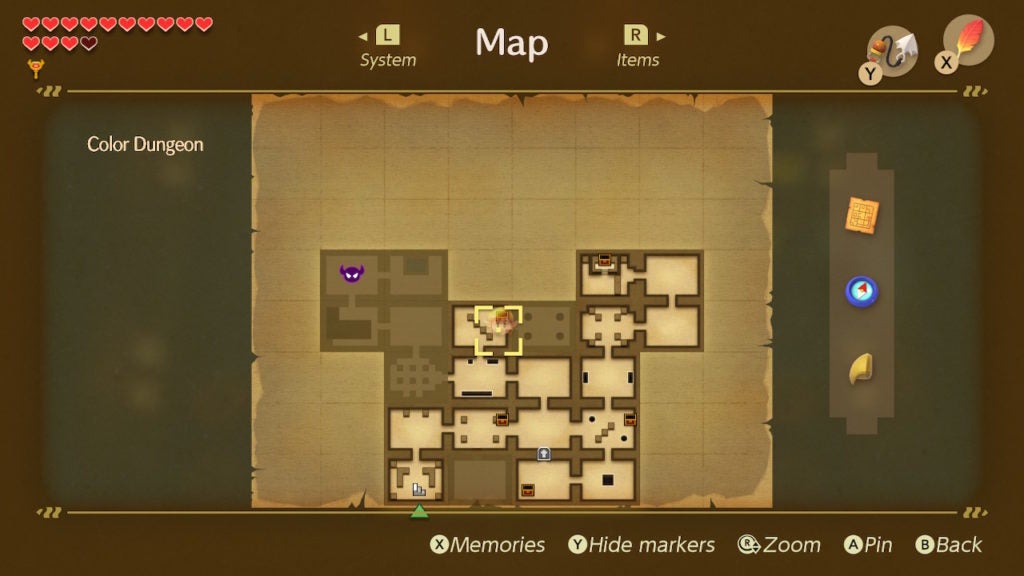
Following the color alignment, a chest will spawn. Loot it for the Compass. Afterward, you should take a look at your map to see where the other chests are, as well as where the Nightmare’s lair is located.
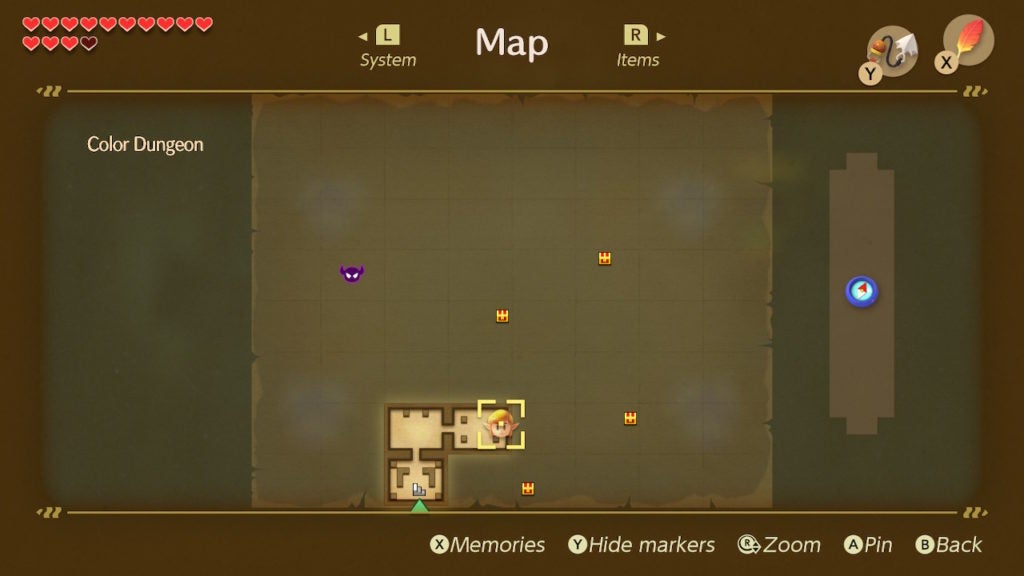
When you do, you’ll notice that there are only 4 other chests. This makes Color Dungeon one of the dungeons with the fewest amount of chests. Although this means less minor loot, it also means less exploring and backtracking.
Find the Stone Beak
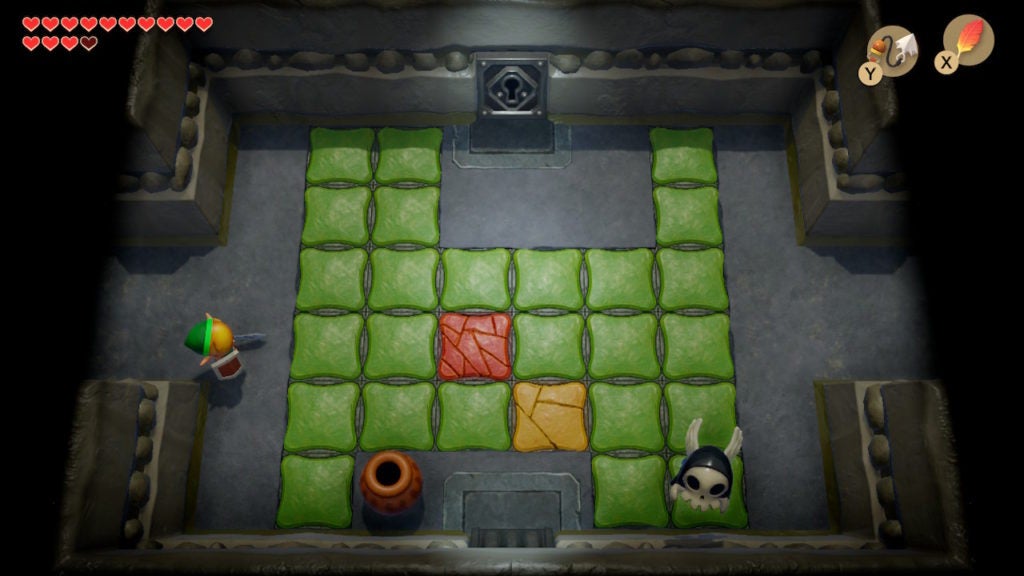
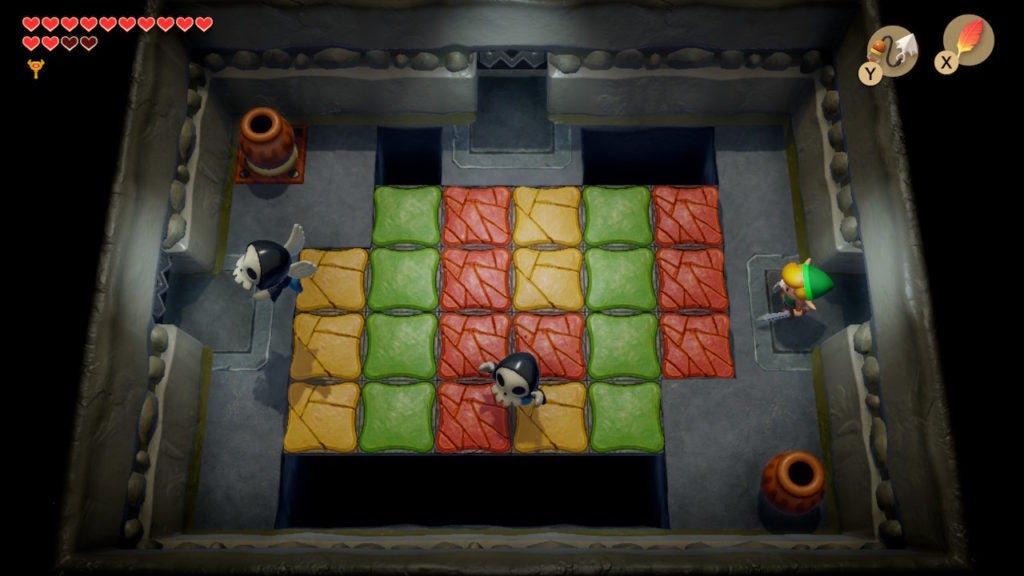
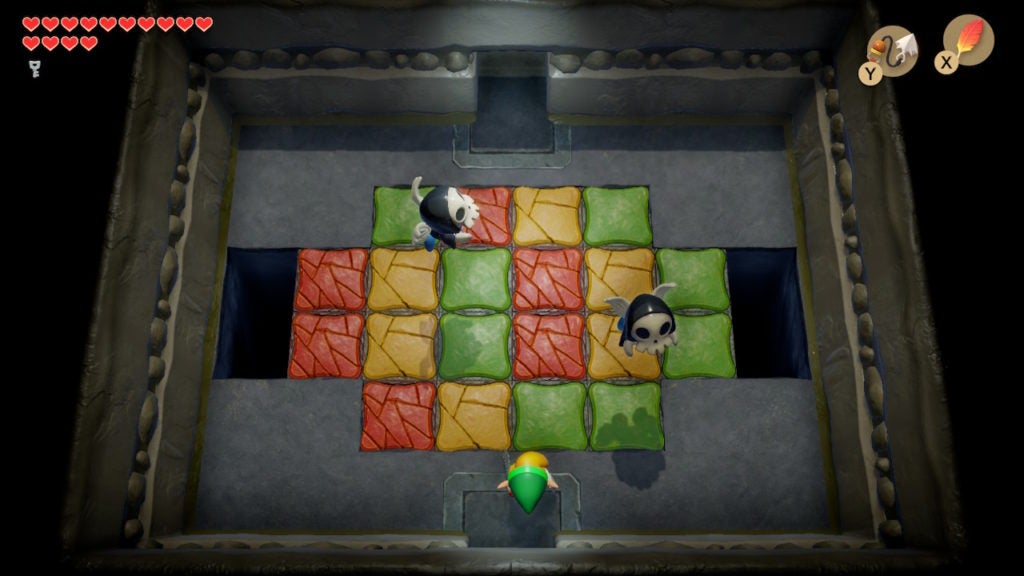
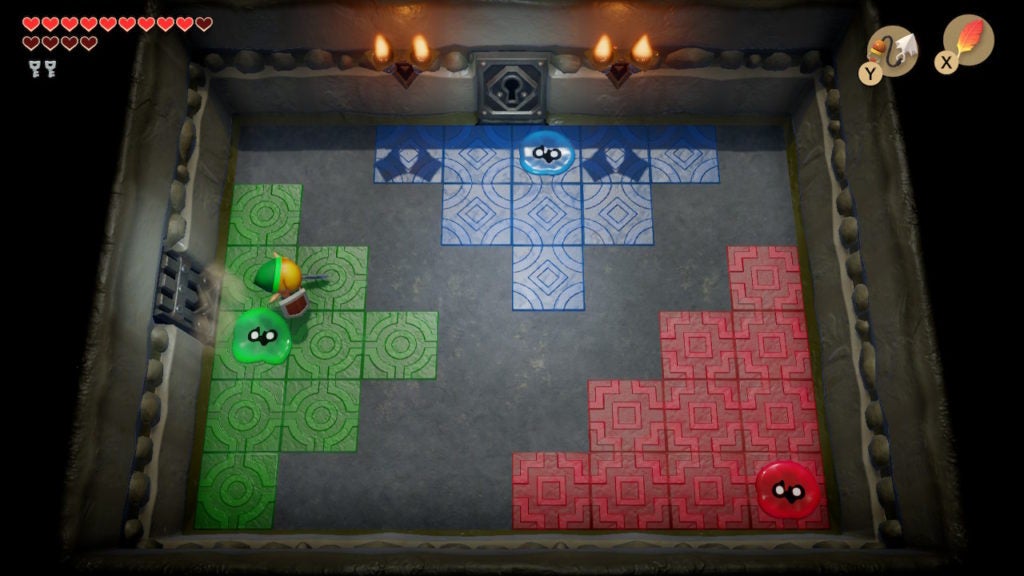
Go east into the next room to get closer to finding the Stone Beak. Here, you’ll find many colorful floor tiles. The green ones will crack and turn into yellow tiles when you step on them, while the yellow tiles will crack again and turn red. Be extra careful of the red tiles, as, if you step on them, they will break and turn into a hole.
However, right now, you should bypass this room and head east into the one beyond. You’ll need to come back here later.
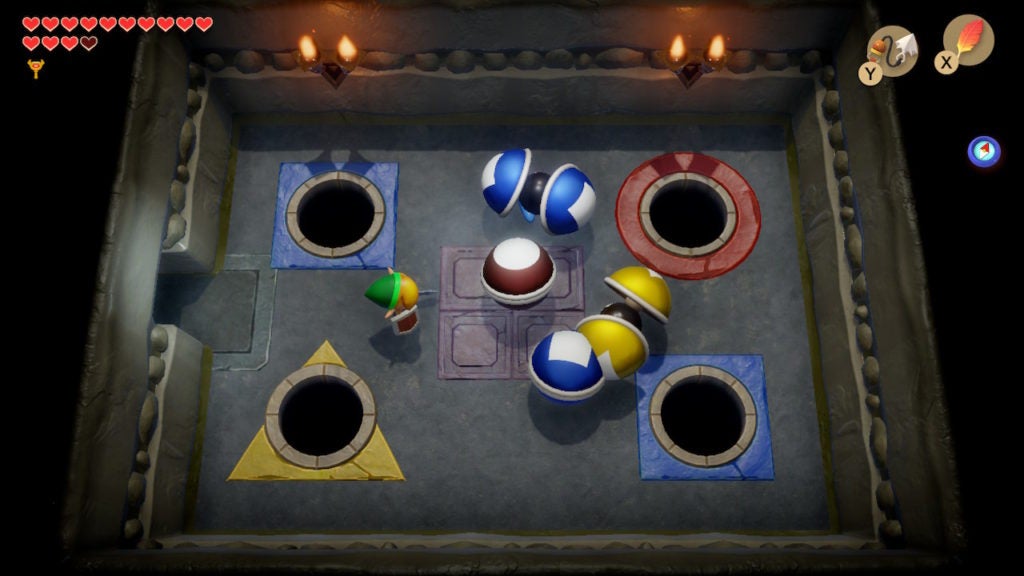
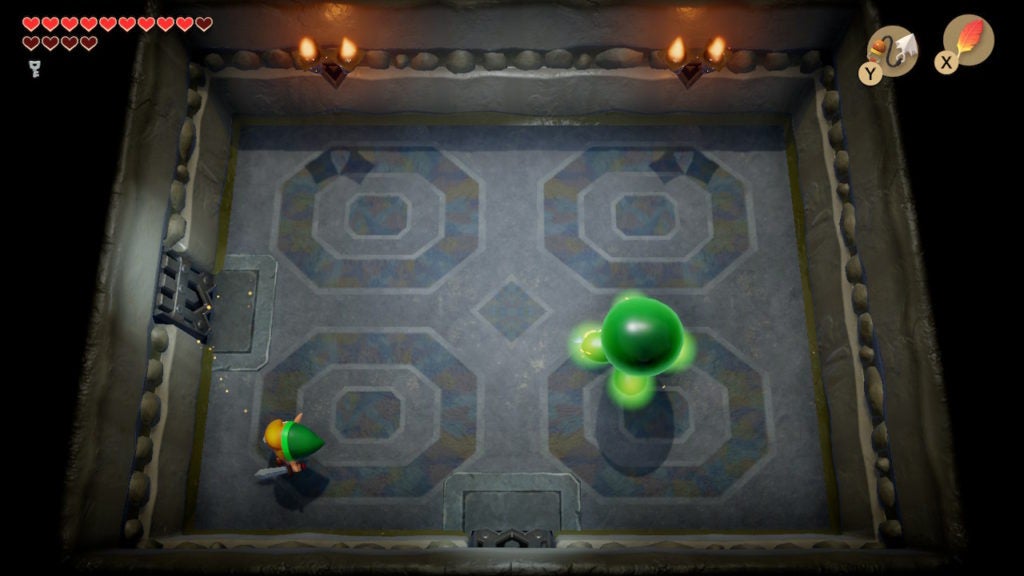
Put the Orb Monsters in Their Place
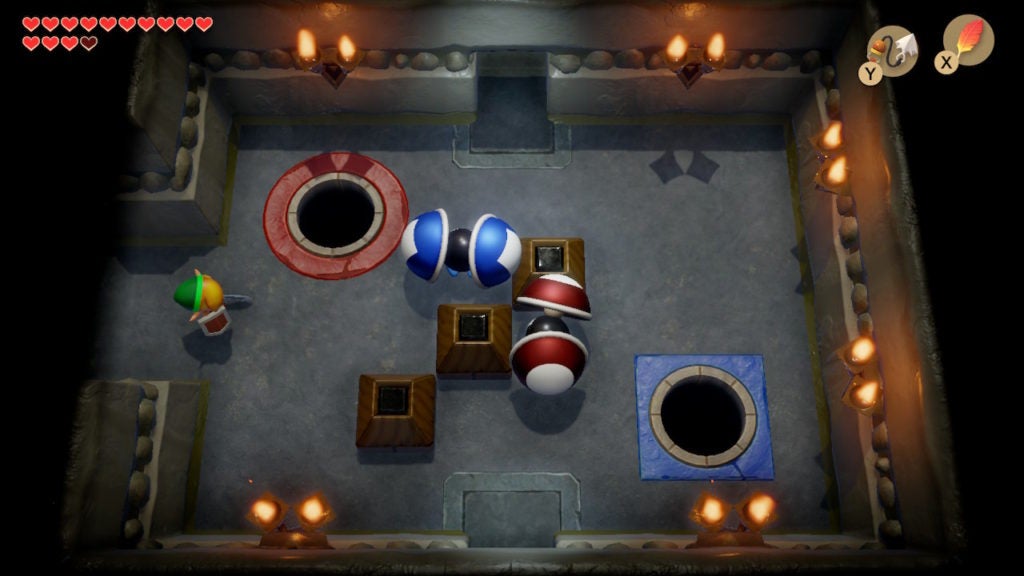
In the next room, you’ll find some more new enemies: Orb Monsters. There is a blue one and a red one. Furthermore, there are some holes in the ground with blue and red outlines. You’ll need to socket each Orb Monster into the hole that matches their color.
First, you’ll need to strike the Orb Monsters with your Sword to get them to curl up into their ball forms. After that, pick them up and toss them into their respectively colored holes. When you socket both Orb Monsters correctly, a chest will spawn in the northeast corner of the room. Looting that chest will give you the Stone Beak.
Pick Up the Stone Beak
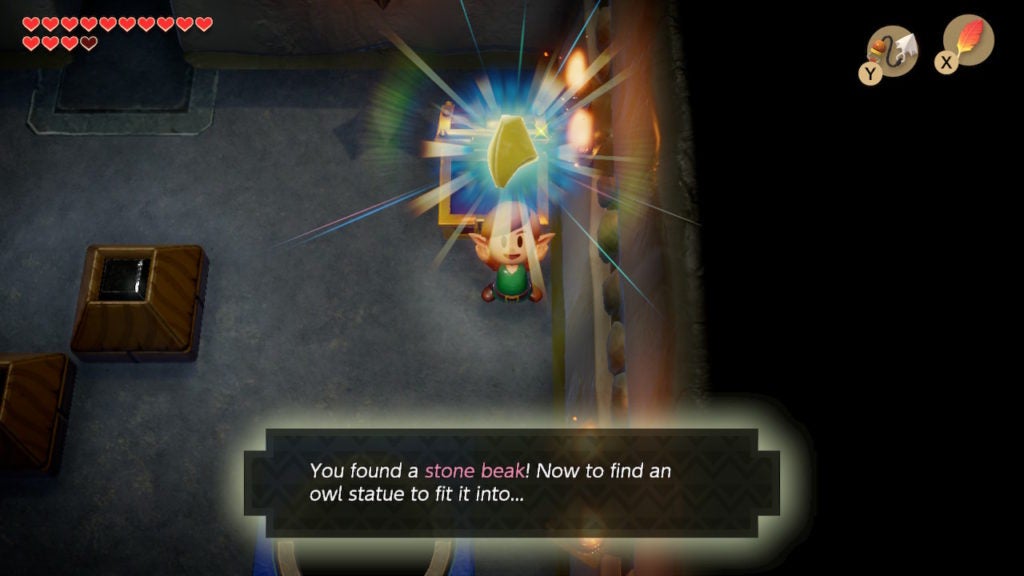
The Stone Beak, like in other dungeons, will let you speak to the Owl Statues for hints. Since Color Dungeon has many unique puzzles and enemies, these hints can be helpful.
Find the First Small Key
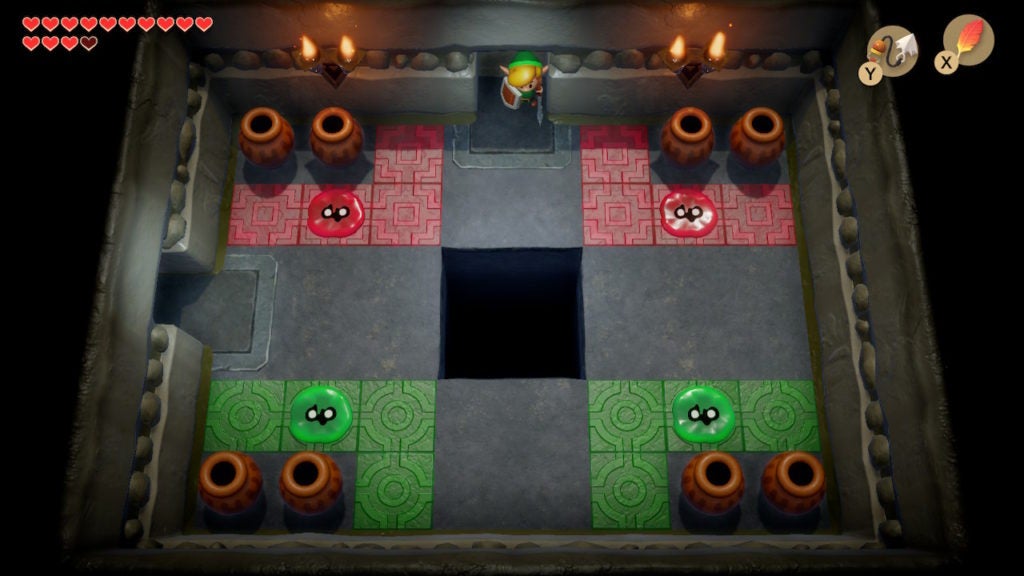
After getting the Stone Beak, it’s time to seek out the first Small Key of Color Dungeon. To do so, go south into the next room. Here, you’ll find 2 Red Goo Specters and 2 Green Goo Specters. Take them out if you want to, however, it’s not technically necessary, since the western exit of this room does not lock. Proceed to the west when you’re ready.
To the west, you’ll find a room with more breakable color tiles, a chest, and some Bone Putter enemies. Again, you don’t need to take out the enemies here, although it will make moving around the room less dangerous.
The chest in the southwest holds a Small Key. Loot it and then go north to find yourself back in the other room with many colorful tiles and a locked door in the north.
Defeat the Mini-Boss, Avalaunch
The locked door that you need to open with the Small Key leads to a mini-boss room, so be prepared for a fight! When you use the Small Key and go north, you’ll come face to face with Avalaunch; a golem-like enemy.
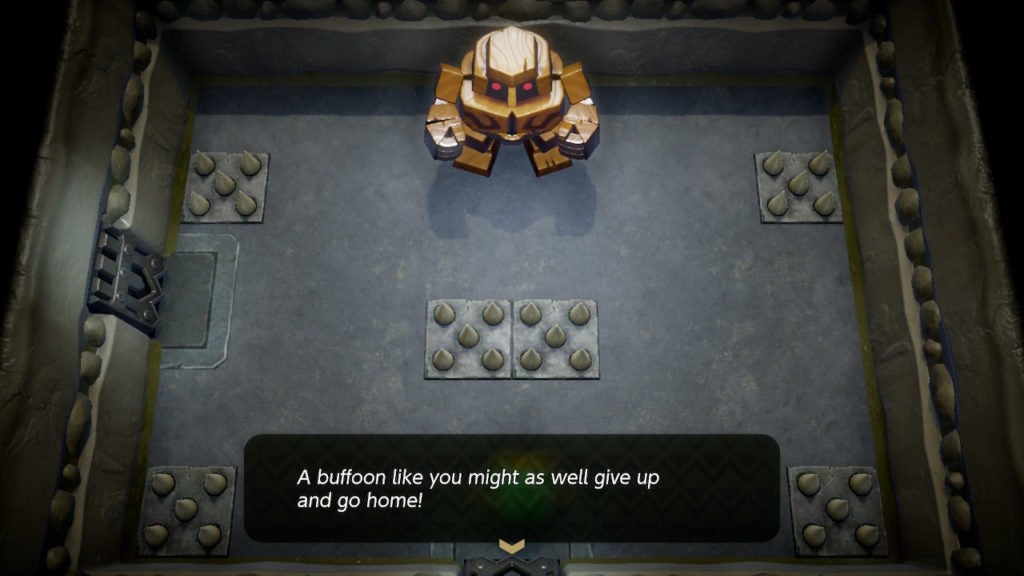
Avalaunch will insult you before beginning their assault. In terms of attacks, this mini-boss will shake the ground and cause boulders to fall from the ceiling. They will sometimes even attack multiple times in a row, which can make dodging their attacks frantic.
How to Beat Avalaunch
Thankfully, Avalaunch has a crippling weakness to Bombs. Due to this, you can lob Bombs at them from a distance to take them down quickly—2 Bombs should be enough. However, if you want to make this fight even more trivial, you can use your Bombs and Bow and Arrow Set at the same time to launch Bomb Arrows.
Find the Dungeon Map
After you take down Avalaunch, you should go west in search of the Dungeon Map. This will bring you to a room with many colorful floor tiles and a couple of Bone Putters. Furthermore, both the northern and western exits will lock.

To unlock the doors, you’ll need to smash the pot in the northwest corner and step on the button beneath it. After you step on it, both of the previously locked doors will open. Head through the northern exit.
Slay the Red Zols to Get the Dungeon Map Chest to Appear
In the room to the north, you’ll find some pesky Red Zols. Slash them asunder to get a chest to spawn in the northeast. When you do, you’ll get the Dungeon Map.
Scout the Dungeon With the Dungeon Map
When you open the map at this point, you’ll notice that it is, appropriately, in the shape of a tunic. At this point, all you have left to find are the remaining Small Keys and the Nightmare Key in the northeast of the dungeon (if you haven’t already obtained them).
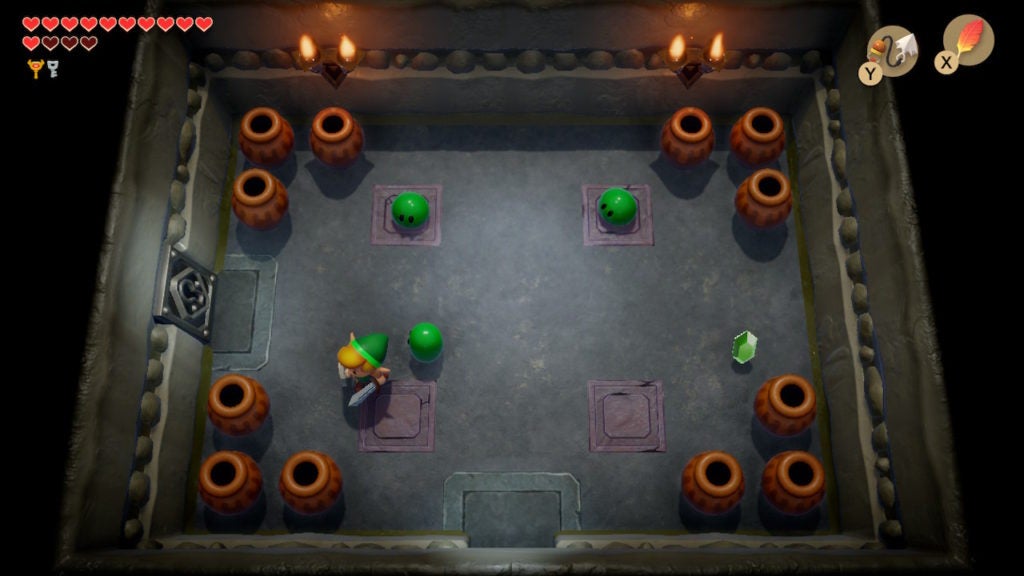
Find the Second Small Key
From the room where you got the Dungeon Map, go east into the room beyond. Here, you’ll be crowded with 4 Orb Monsters. Like before, you’ll need to hit them with your Sword and then toss them into the corresponding holes. When you do, a Small Key will drop onto the central tiles of this room. Loot it and then make your way back to the room where you got the Stone Beak.
Find the Nightmare Key
In the room north of where you found the Stone Beak, there will be yet more colorful floor tiles and more Bone Putters. Thankfully, you can bypass these skeletal fiends easily since there is no locked door impeding your progress.
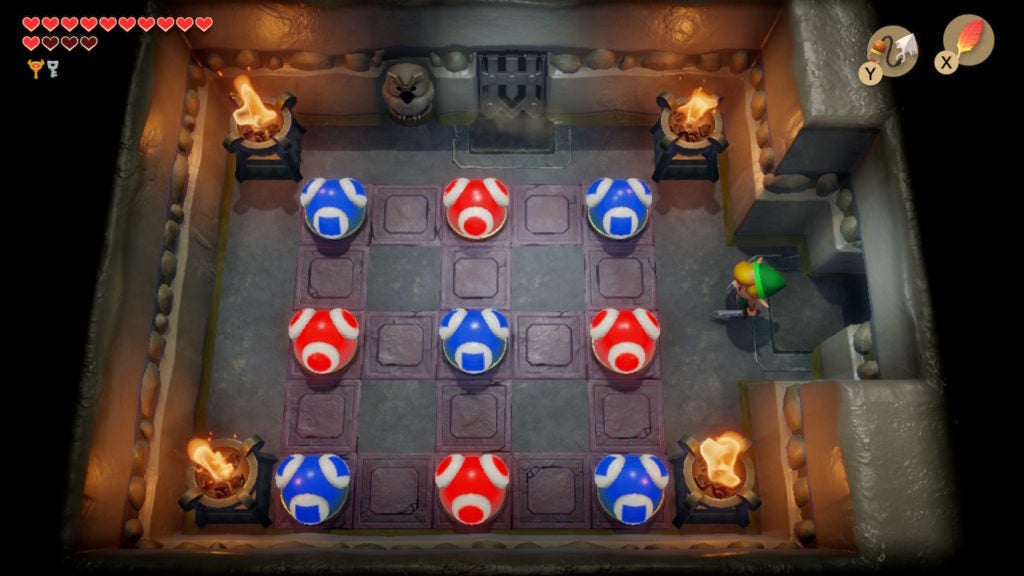
Solve the Second Color Bulb Puzzle to Get the Third Small Key
In the room to the north, you’ll find another color bulb puzzle as well as an Owl Statue. When you speak to the statue, it will tell you to make every tile square—which means you’ll need to make all the color bulbs turn blue.
This puzzle will be a bit trickier than the first color bulb puzzle, as there are 3 colors to cycle through. Put simply, trial and error is the best method for figuring out how to make all the bulbs turn blue. Since there are only 4 color bulbs, you can brute force this puzzle without needing to think too much.
Afterward, a Small Key will drop into the center of this room. Pick it up and then go east.
While you can unlock the northern door with one of your Small Keys immediately, you’ll need to defeat the Goo Specters here to return the other way. Take them out and then head north by using up one of your Small Keys. But be prepared, as there is another mini-boss lying in wait to the north!
Defeat the Giant Buzz Blob Mini-Boss
This mini-boss acts very similarly to regular Buzz Blobs, however, they will change color when weakened. You’ll need to avoid their lightning attacks and approach this green fiend. When you get close, you’ll have to sprinkle some Magic Powder on them to weaken them.
When they are in a weakened state, they will turn blue. This is your chance to hit them with your Sword. This is the only time when your Sword can damage this mini-boss, so be sure to only attack after sprinkling them with Magic Powder.
After you dispatch this gelatinous foe, the door to the west will unlock. Proceed through it to find the room with the Nightmare Key chest.
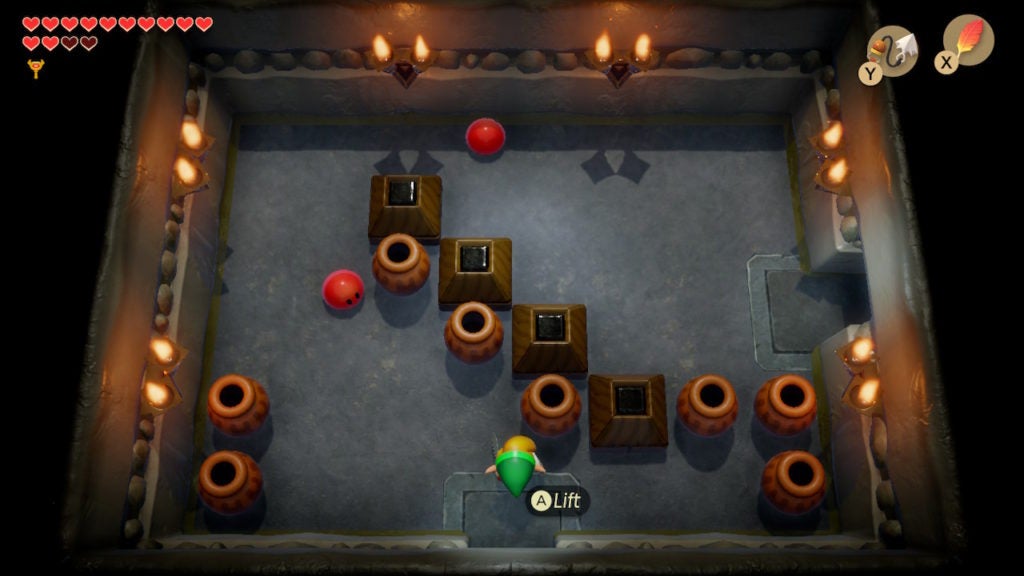
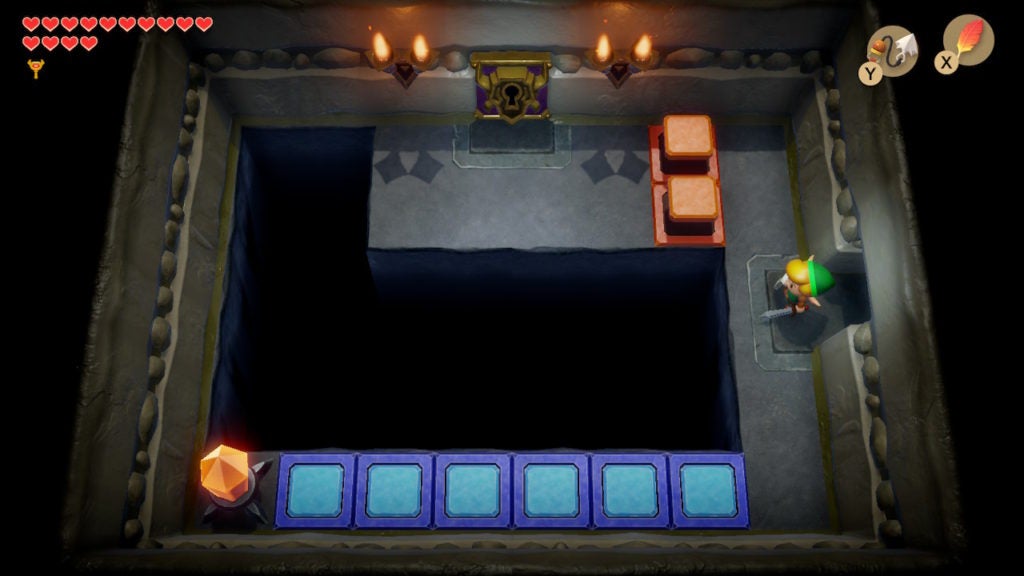
Solve the Simple Block Puzzle to Reach the Nightmare Key Chest
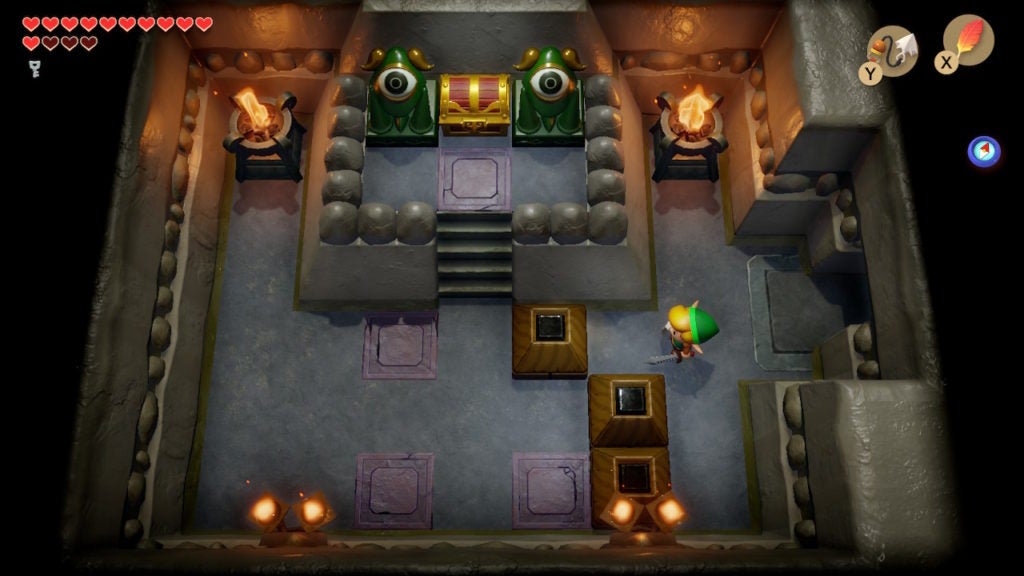
Before you can reach the chest, you’ll have to push some blocks out of your way. Of the 3 blocks, push the southernmost one to the west. Afterward, push the middle block either north or south. This will open a path and let you walk up to the chest.

After you get the Nightmare Key from the chest, you’ll be able to enter the boss room. However, before that, you should head to the south of Color Dungeon for some hidden treasure.
Find the Hidden Room Full of Blue Rupees
Head back to the room where you got the Compass and take a look at the southern wall. There is a big crack in it that you can blow open with a Bomb.
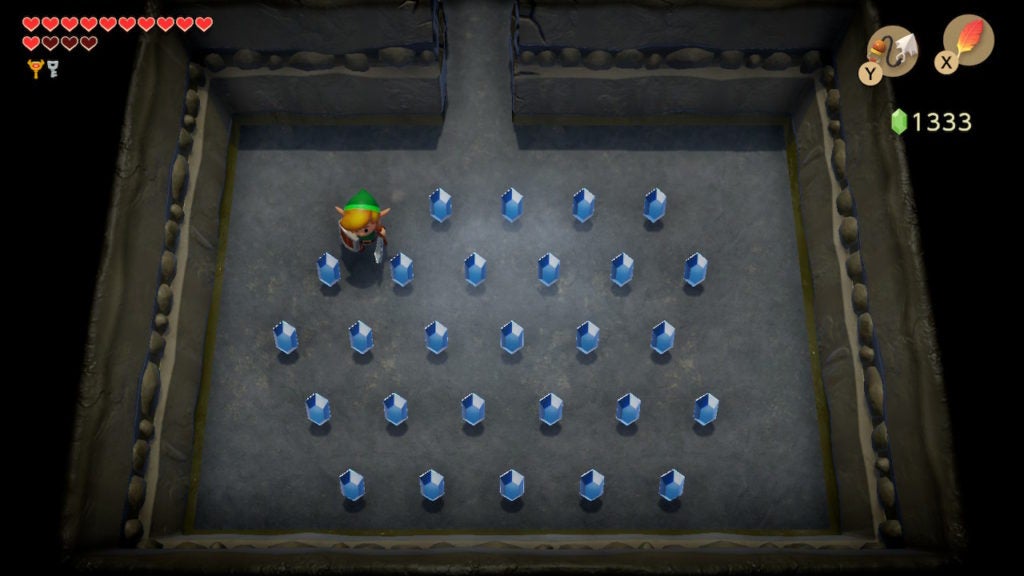
There will be 28 Blue Rupees in this room, which, combined, will give you 140 Rupees total—what a haul! With your wallet sufficiently packed, it’s time to make your way to the Nightmare’s lair.
Find the Nightmare’s Lair
First, you’ll need to make your way back to the room south of where you got the Dungeon Map. Afterward, head west into the next room to find yet another color bulb puzzle—though one that’s deceptively easy to solve.
Solve the Third Color Bulb Puzzle
There is an Owl Statue in this room, however, their hint only tells you that you need to turn all the bulbs in this room blue. To do so, you’ll only need to hit 4 bulbs. First, hit the northern bulb. Next, hit the eastern bulb and then the western one. Finally, strike the southern bulb and all will turn blue. The door to the north will then unlock, allowing you to progress.
Use Your Last Small Key to Unlock the Western Door
Beyond, you’ll find a room with some Green Zols and a locked door. Either slay the Green Zols or ignore them before you unlock the door with your last Small Key. Go west to head toward the Nightmare’s lair.
Hit the Crystal Switch to Reach the Nightmare Door
At this point, you’ll be in a room with a simple Switch Block puzzle. All you need to do is walk up to the Crystal Switch at the southwest corner of the room and hit it with your Sword. This will raise the Blue Switch Blocks and lower the Orange Switch Blocks. After you lower the Orange Switch Blocks, you’ll be able to reach the Nightmare door easily.
Defeat the Hardhit Beetle Boss
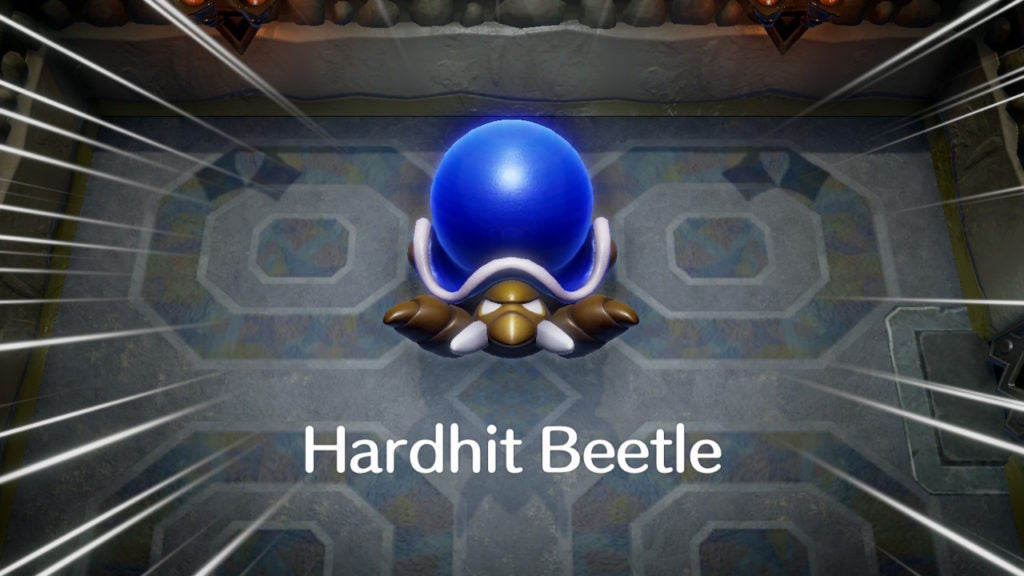
In the boss room, you’ll meet Hardhit Beetle. While this foe is quite durable, they are actually really easy to defeat—especially if you have the Boomerang.
Throughout the fight, Hardhit Beetle will launch orange projectiles at you while summoning minions to help them. However, you can take the boss down very quickly by repeatedly hitting them. All you need to do is hit Hardhit Beetle 8 times and they will go down. To do so quickly, you can spam the Boomerang at them.
Alternatively, the Sword works almost as well, although you’ll be more likely to take damage. It’s recommended to prioritize offense over defense here, as Hardhit Beetle can regenerate health every few seconds. Be aggressive and continue attacking them to avoid having to deal with their summoned minions for longer than you have to.
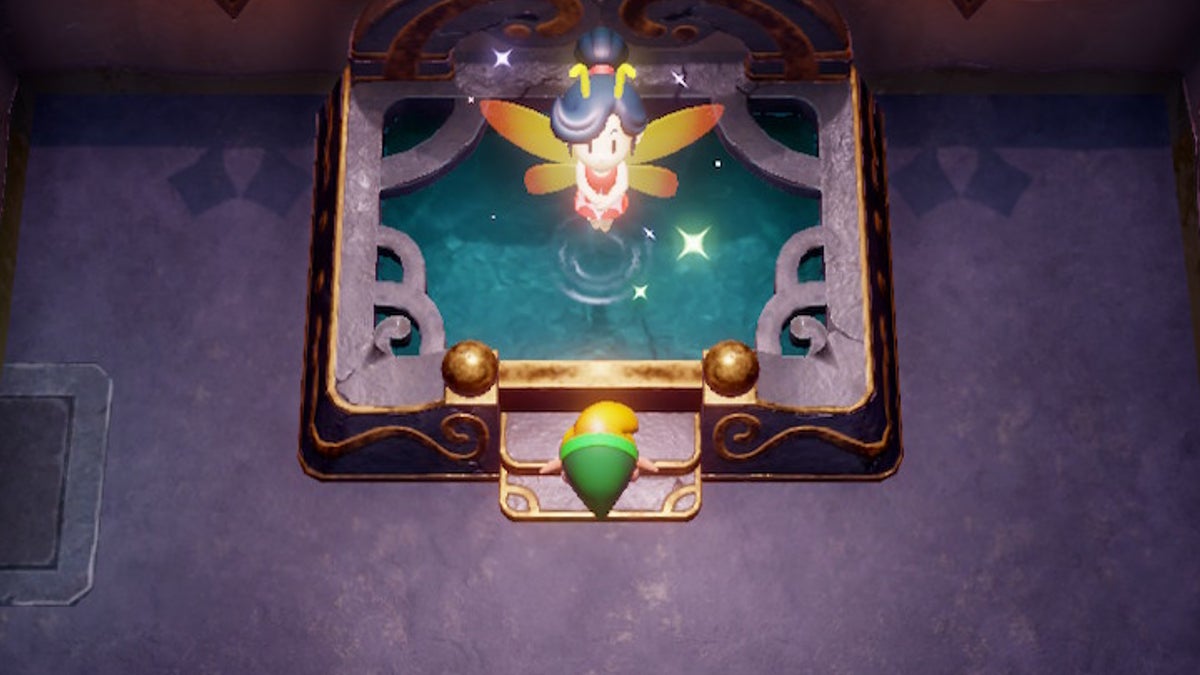
Meet the Fairy Queen and Get the Blue or Red Tunic
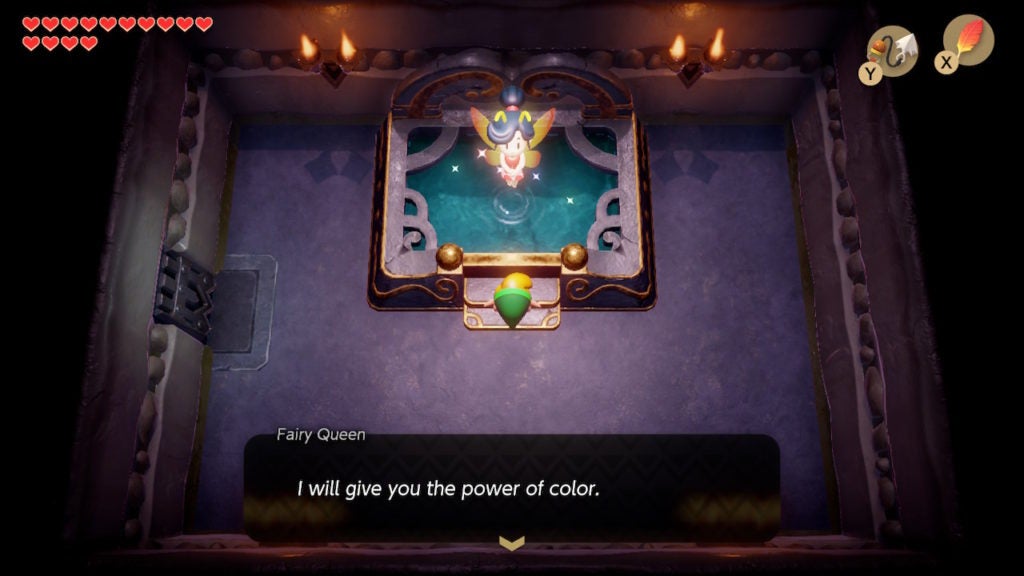
After you defeat Hardhit Beetle, go east into the final room of Color Dungeon. Here, you’ll meet the Fairy Queen, who will give you the power of color. After some dialogue, the Fairy Queen will give you a choice between getting the Blue Tunic or the Red Tunic. Choose wisely, as you won’t get a chance to change your mind later!
Which Tunic Should You Choose?
Depending on your gameplay preferences, you’ll want to choose the tunic that best suits your style. The Blue Tunic will cause you to take half damage from all incoming attacks, while the Red Tunic will double your attack power.
Most players choose the Red Tunic, as it makes defeating enemies much easier. However, if you are playing on Hero Mode, the Blue Tunic may be better as foes are much tougher in this mode. Furthermore, if you want to beat the game without dying in order to get the secret ending, it’s recommended to get the Blue Tunic for better survivability.