
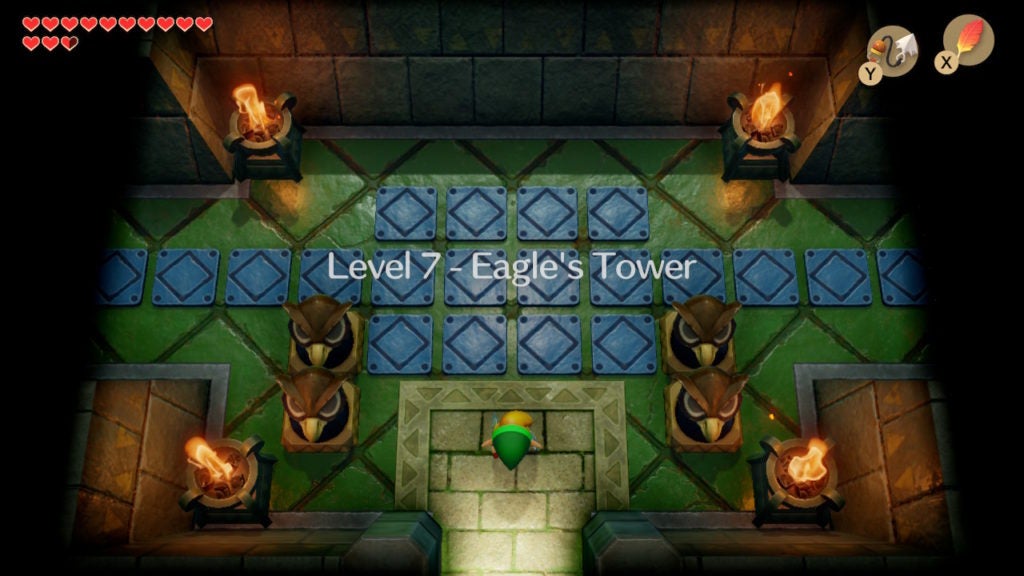
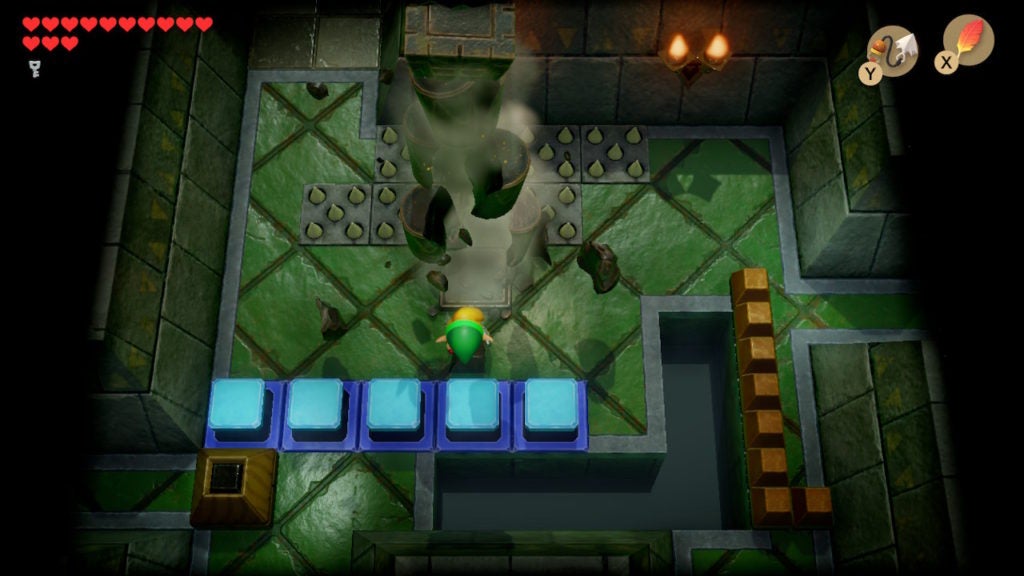
When you enter Level 7 – Eagle’s Tower, the blue rooster can’t come with you. Don’t worry about them, though, as they’ll head to the Henhouse Keeper’s indoor pen and live there for the rest of the game. You’ll have to ascend this dungeon to find a very different kind of bird—one who guards the seventh Siren Instrument and is not nearly as friendly as the rooster.
Table Of Contents
Get the 1st Small Key
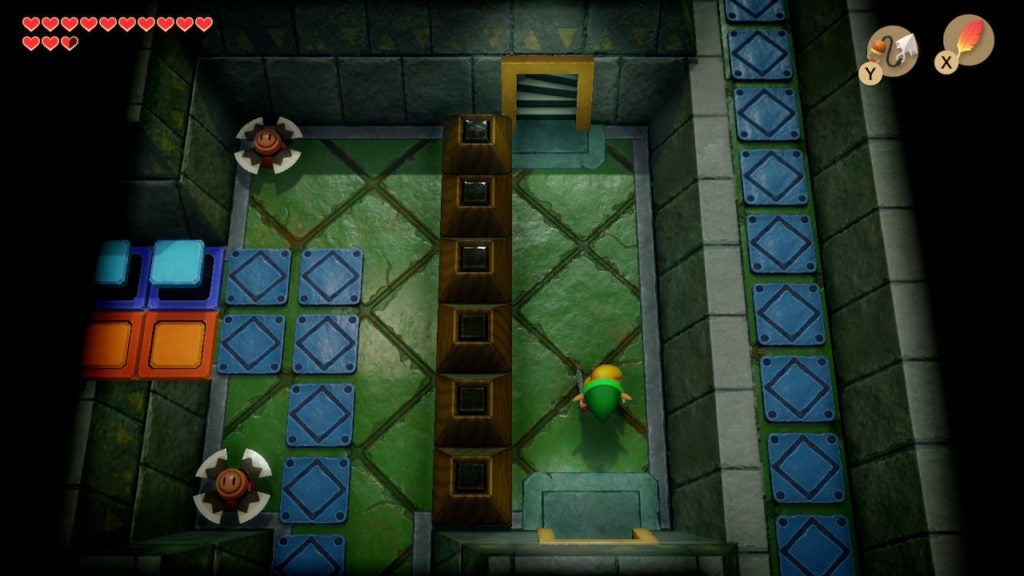
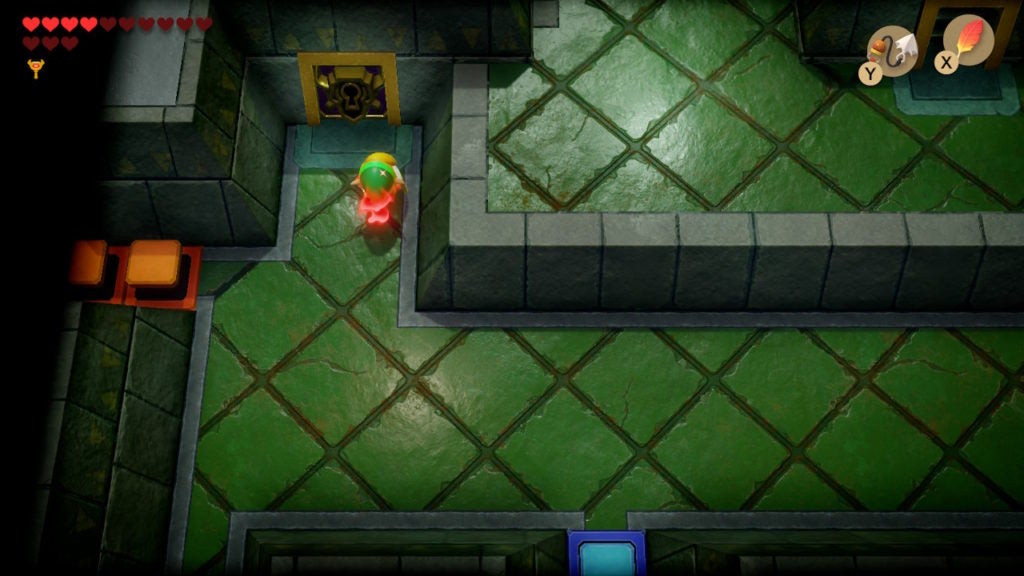
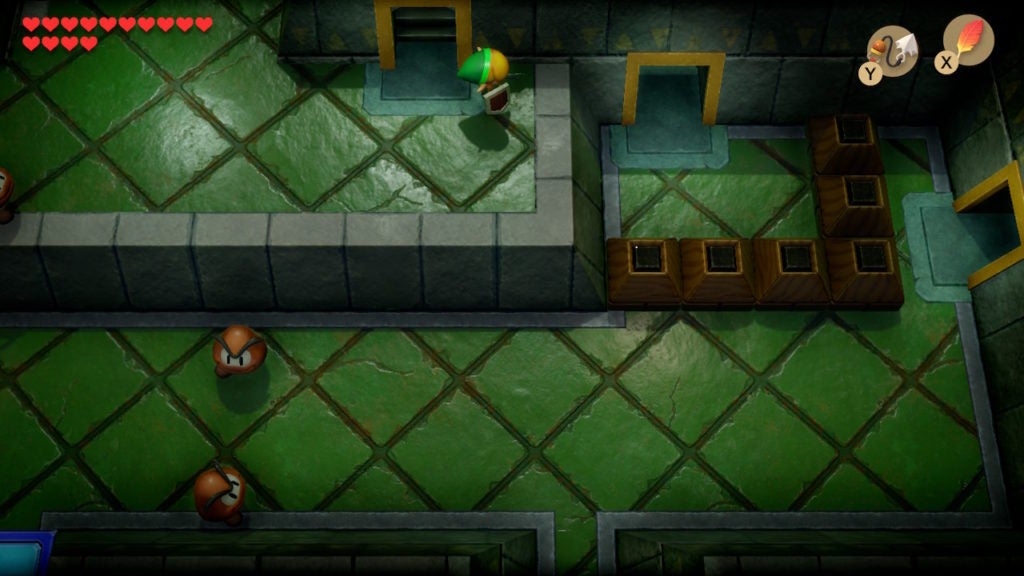
As soon as you enter Level 7 – Eagle’s Tower, you’ll have 2 ways you can go: east and west.
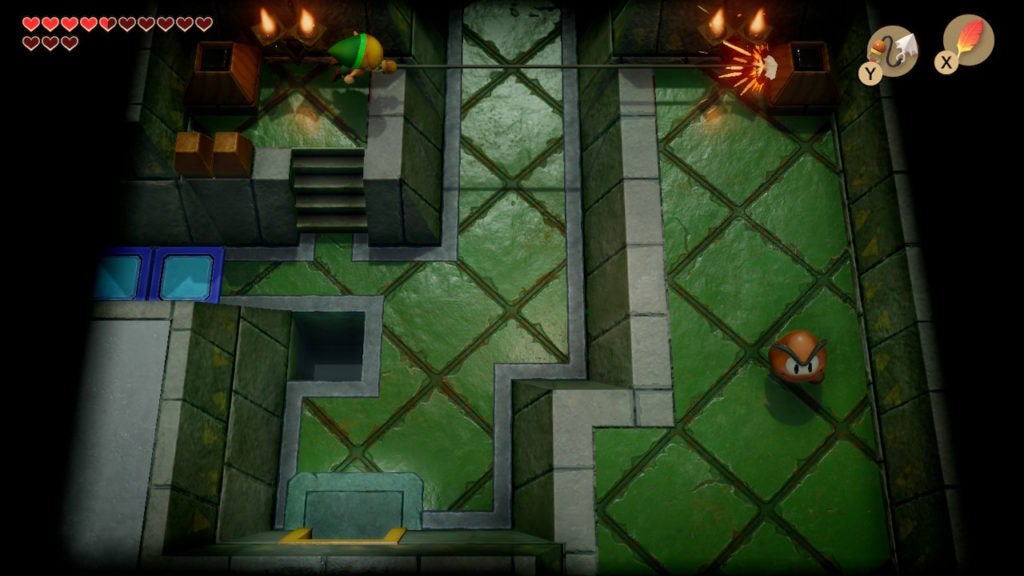
You should go east to find the first Small Key as well as the locked door you’ll need to use it on. In the room to the east, however, you’ll find a few obstacles along the way.
There are 2 Blade Traps—1 on either side of the room. There will also be a ring of spikes on the floor, though, you can avoid both of the sharp obstacles by jumping over them with the Roc’s Feather. From this room, go east into the one beyond. There, you’ll find a few more enemies.
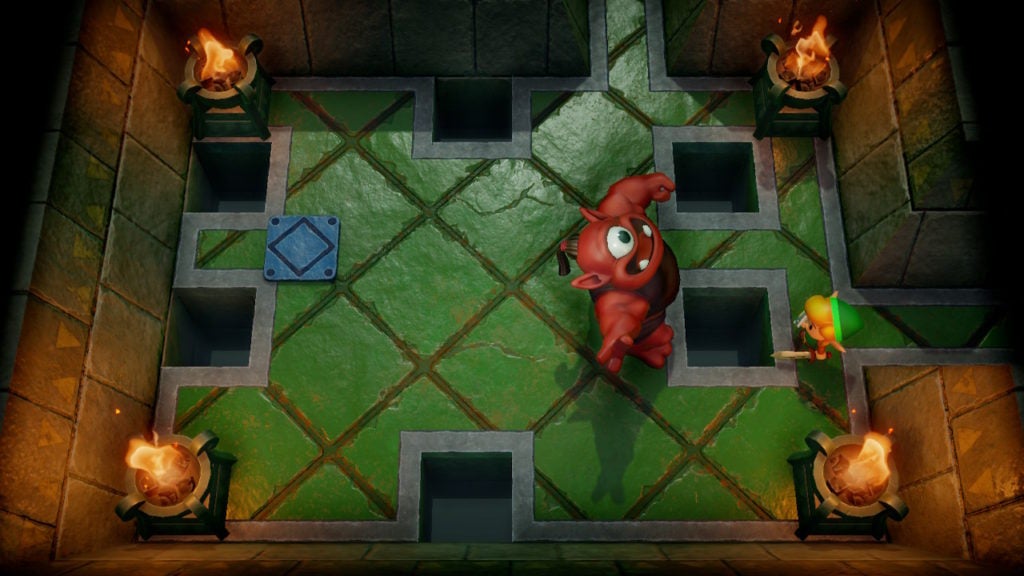
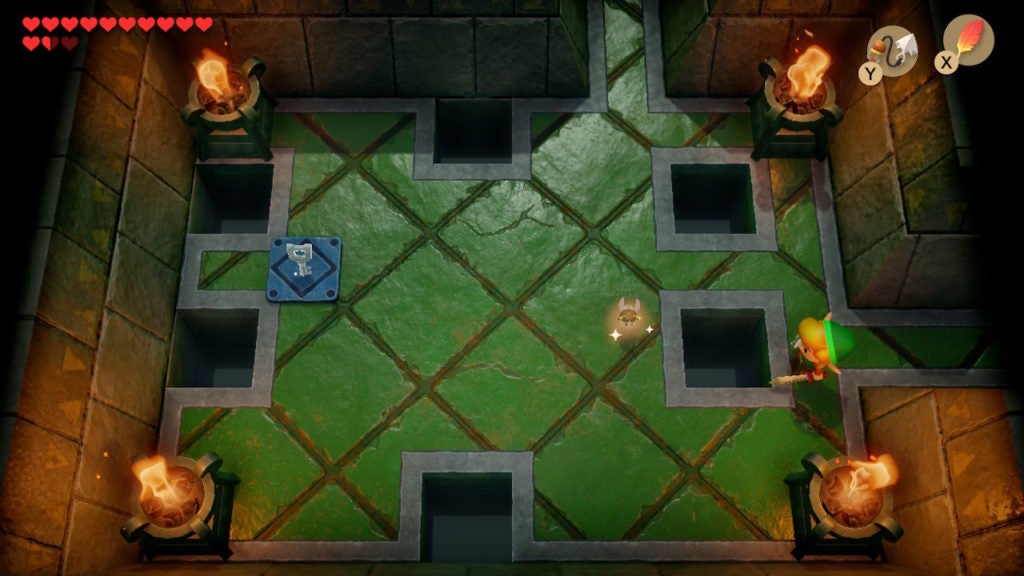
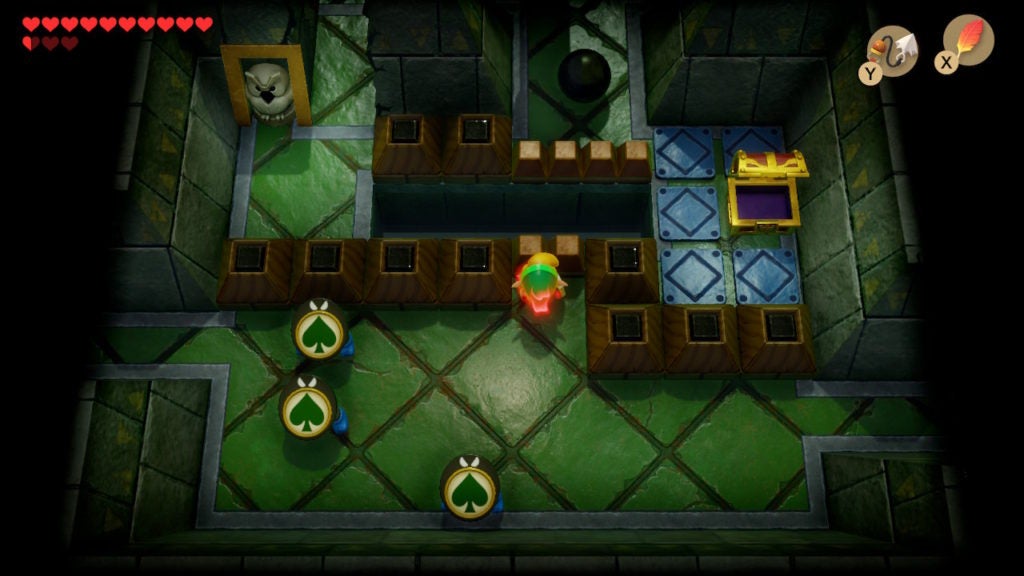
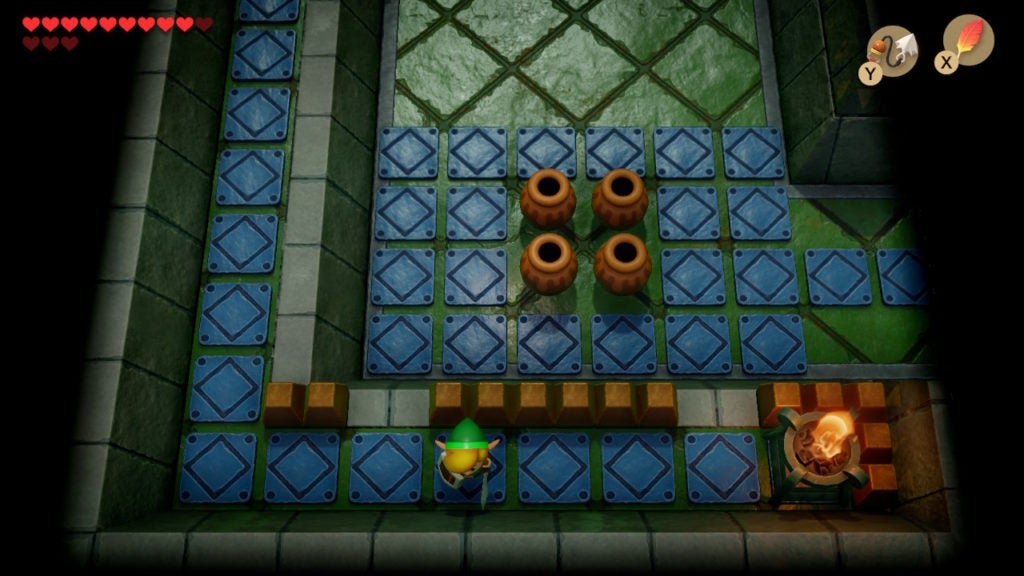
There are 2 Like Likes and 1 Bubble here. You need to slay the 2 Like Likes for 1 Small Key to drop onto a blue tile nearby. You don’t have to mess with the Bubble, however, you can take them out with some Magic Powder if you’d like.
Head-Up the Western Staircase
After you pick up the Small Key, you should use it immediately on the locked door in this room. Going north through it will bring you to a slim room with a staircase. Ascending it will bring you up to Floor 2.
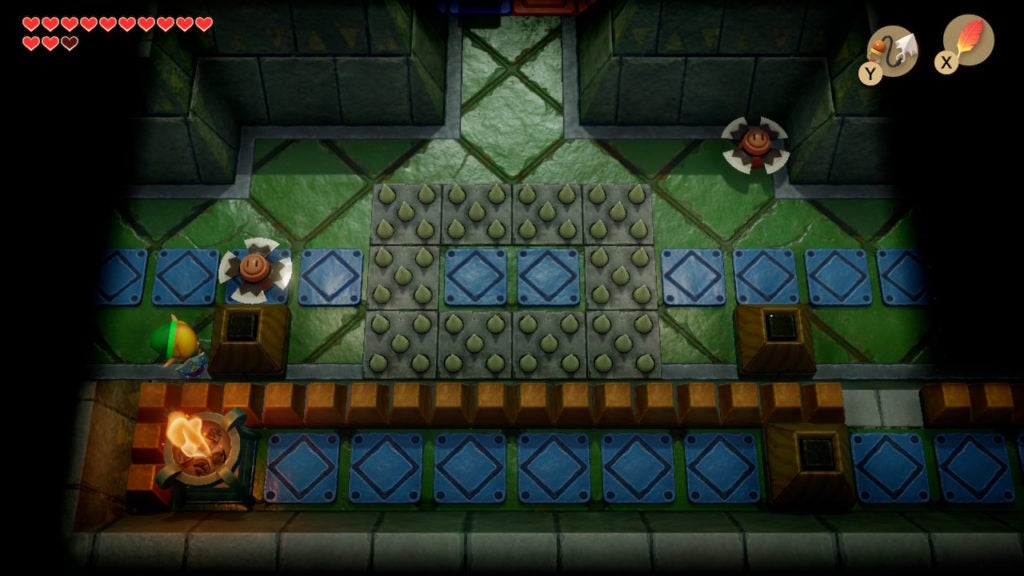
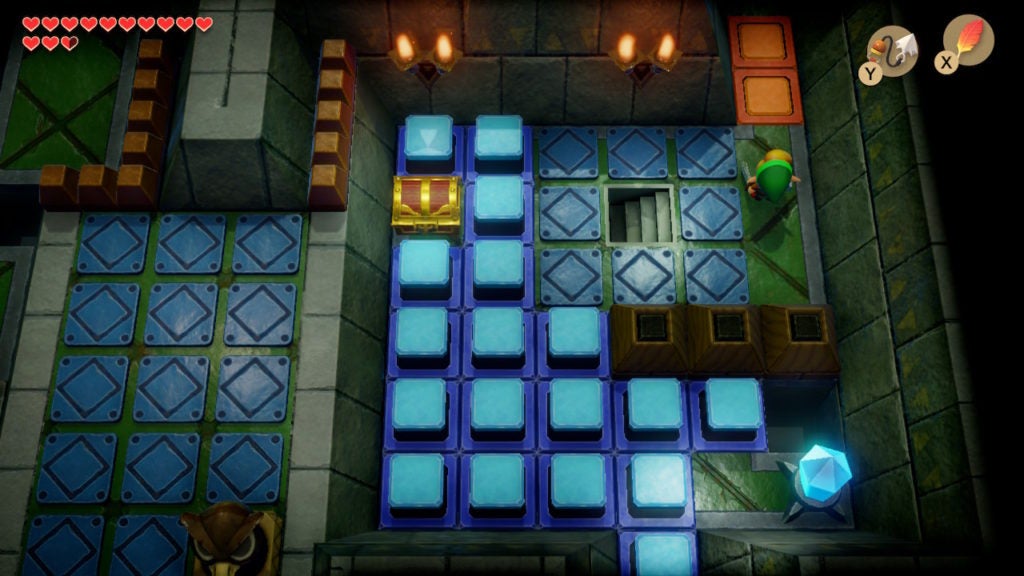
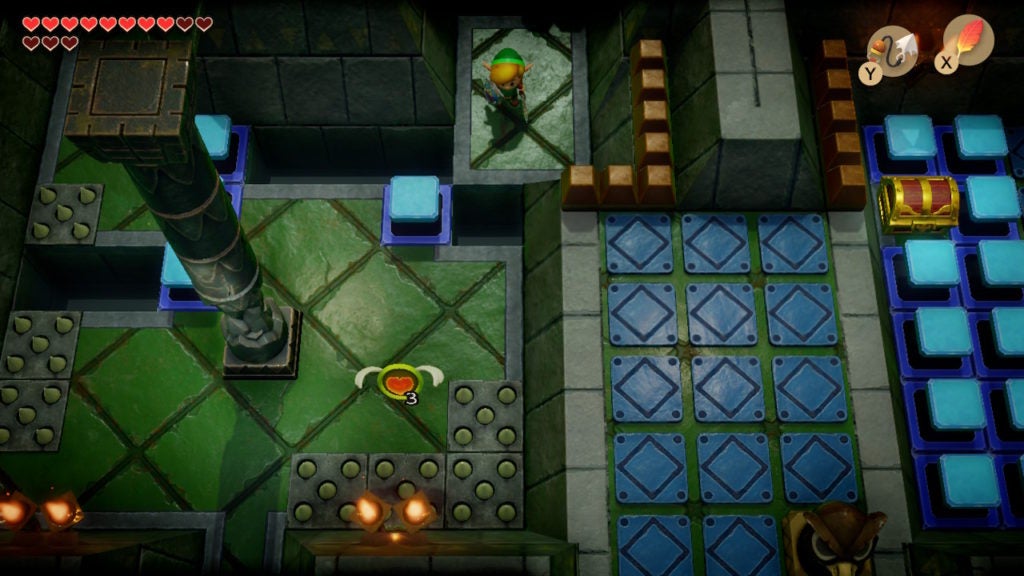
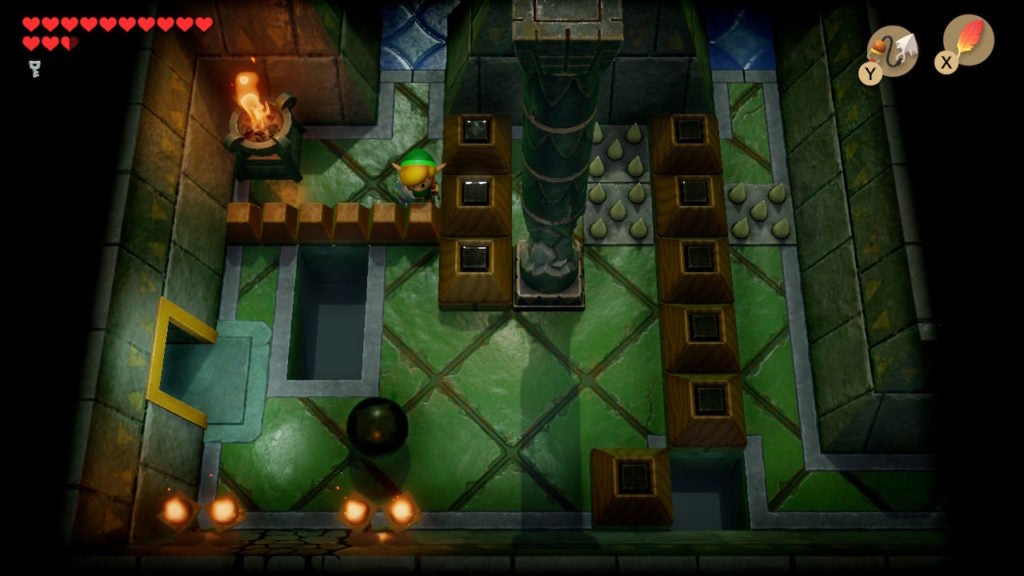
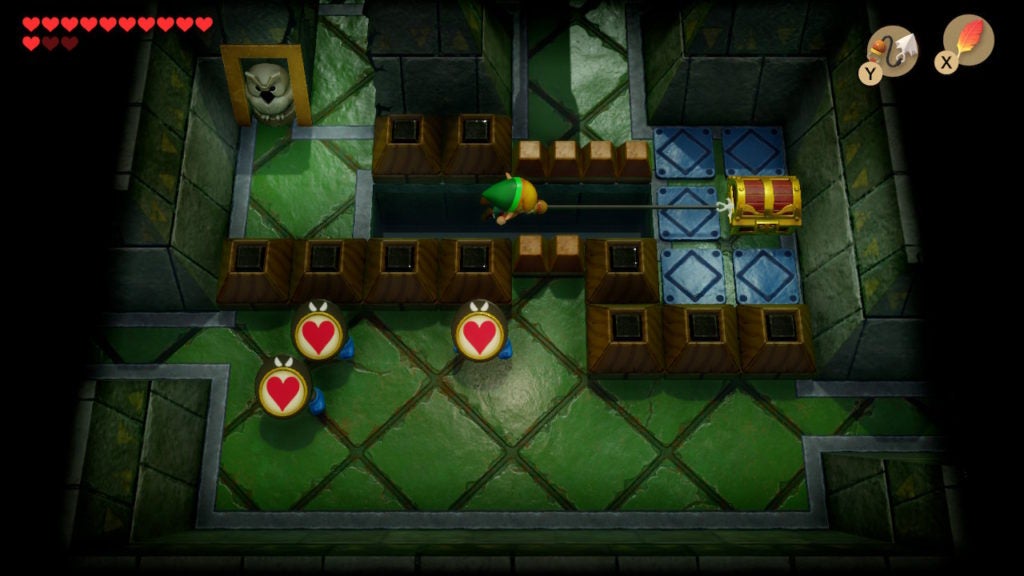
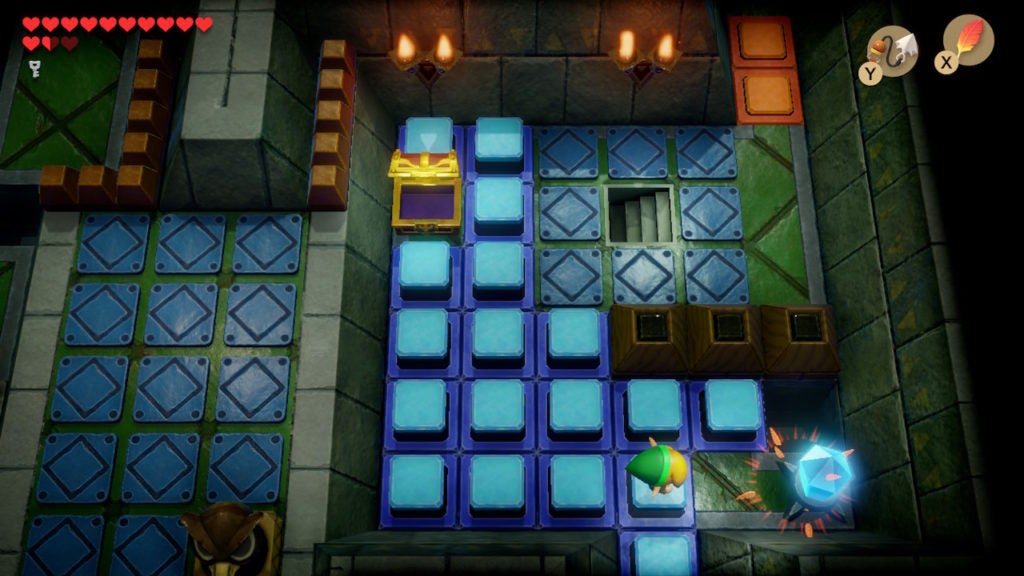
After going up the staircase, you’ll be in the eastern part of Floor 2. You’ll notice a bunch of raised Blue Switch Blocks surrounding a chest. This chest contains the Mirror Shield, but you won’t need to get it quite yet.
For now, go north and into the next room. Here, you’ll encounter a pull-lever on the east of the room that you need to extend. When you do so, the blocks barring the western exit of the room will open, though only temporarily.
You’ll have to quickly make your way through the western exit before the blocks slide together and bar the way once more. You’ll also notice a round black stone on a dais in the center of the room and an Owl Statue. You can’t interact with the Owl Statue yet, as you haven’t found the Stone Beak. However, you can grab the round black stone and take it with you into the room to the west. This will help with an important upcoming puzzle.
Smash the 1st Pillar
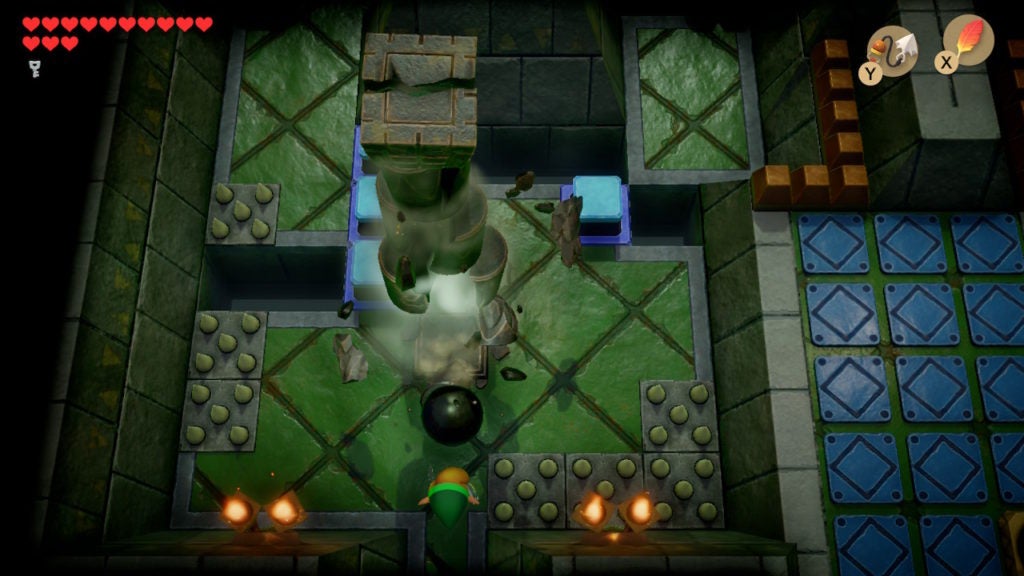
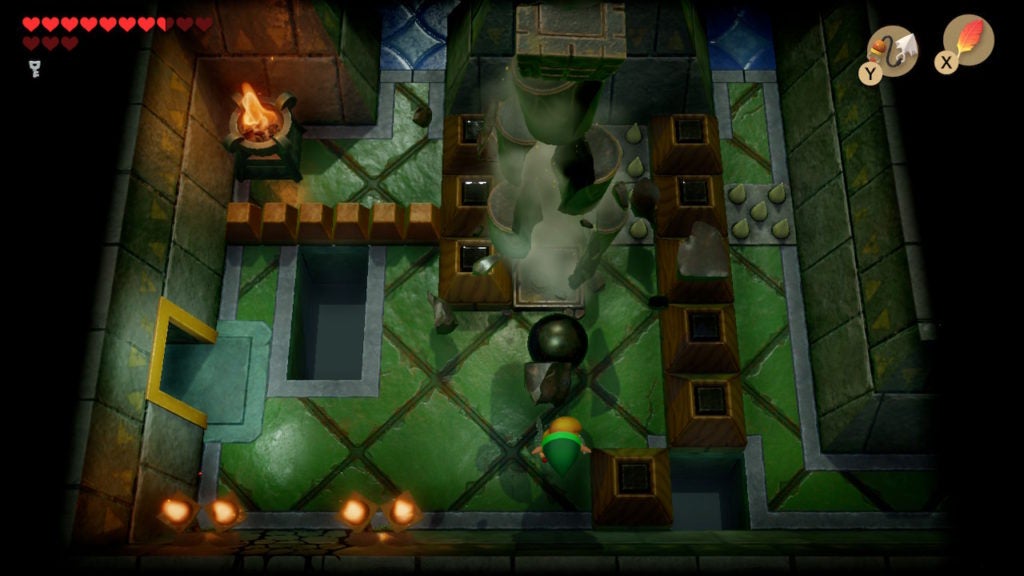
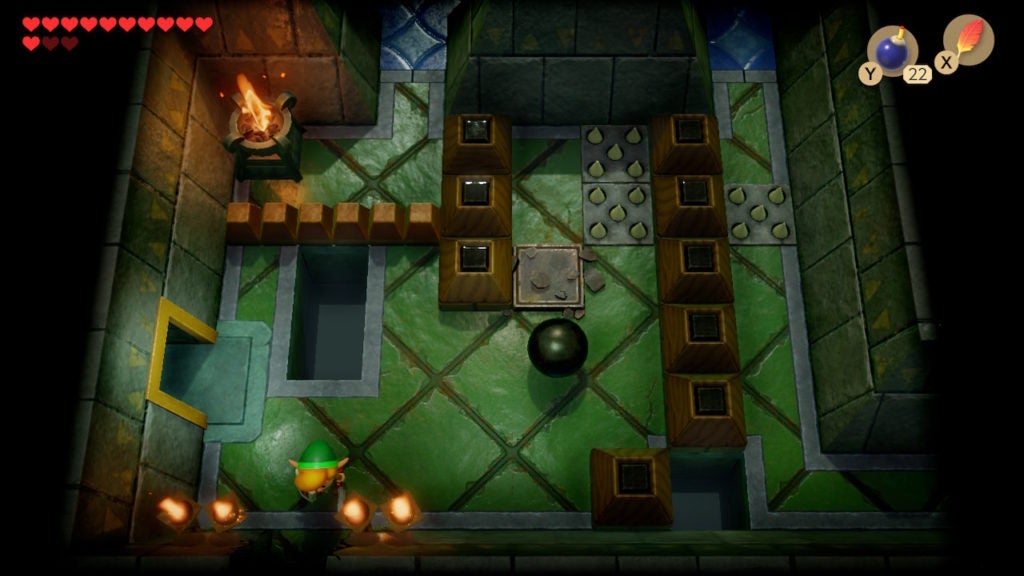
In the room that lies to the west, you’ll find some Zols and a cracked pillar south of some spike traps. Take out the Zols to traverse the room easier—throwing the black stone at them can be an effective method.
On a related note, you’ll have to smash the pillar in this room by throwing the rock at it as well. It’s impossible to come across this hint at this point in the dungeon, however, to get to the higher floors, you’ll need to smash 4 cracked pillars around Floor 2 to bring the top one down.
Afterward, you should leave the round black stone in this chamber and go into the room north of here. The black stone will stay where you left it, so you can come back for it later.
Find the Dungeon Map
In the room north of the first cracked pillar (now smashed to bits), you’ll come across a chess puzzle. You’ll need to solve it to get a chest containing the Dungeon Map to spawn.
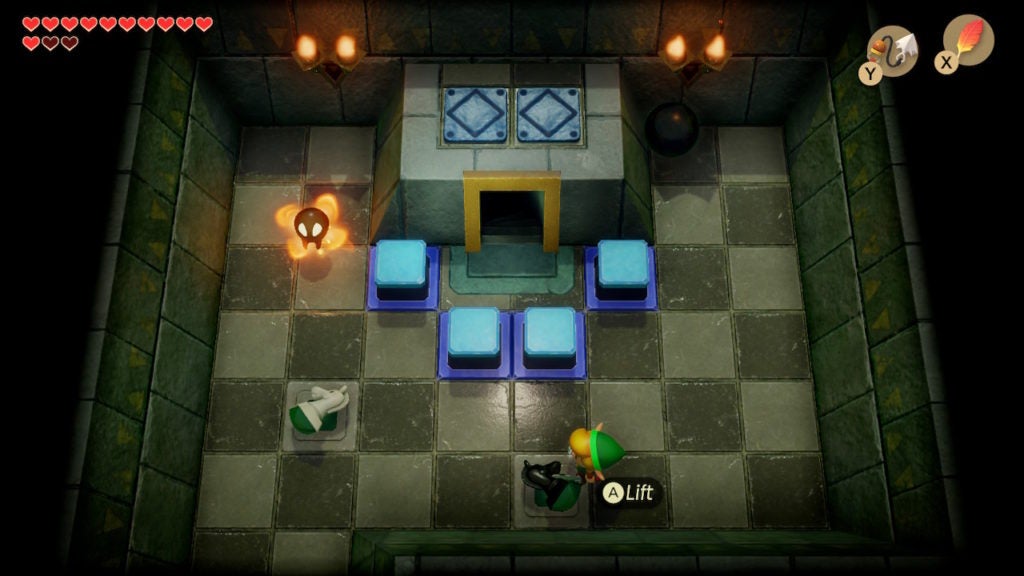
How to Solve the Chess Puzzle to Spawn the Dungeon Map Chest
Initially, you’ll find each of the knights lying on top of the respective green tiles that they need to be standing on to complete the puzzle. To get the black knight into place, you’ll first need to move the white knight out of the way—anywhere will do for now. This is because you’ll need to pick up the black knight and throw it while standing on the western green tile as you face east.
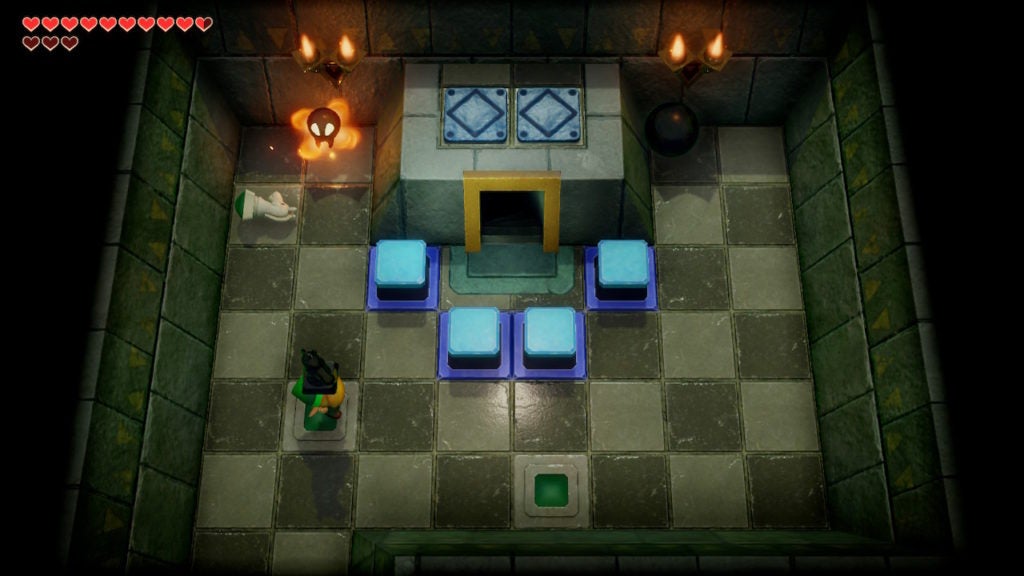
When you throw the black knight from this position, it will hop into place onto the green tile that lies to the east. As for the white knight, you’ll have to throw it south from a position in the northwest of the room. The tile you want to stand on to do so is the light gray tile just south of the dark gray tile in the very northwest corner of the room. When you toss the white knight from this spot, it will jump onto the western green tile.
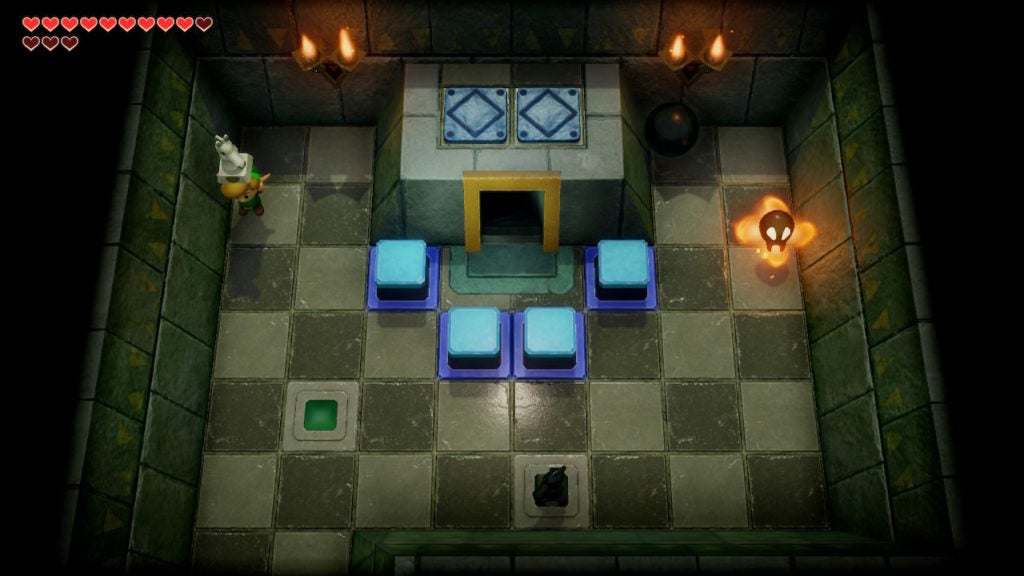
Afterward, a chest will spawn in the northeast of the room. Open it up to loot the Dungeon Map!
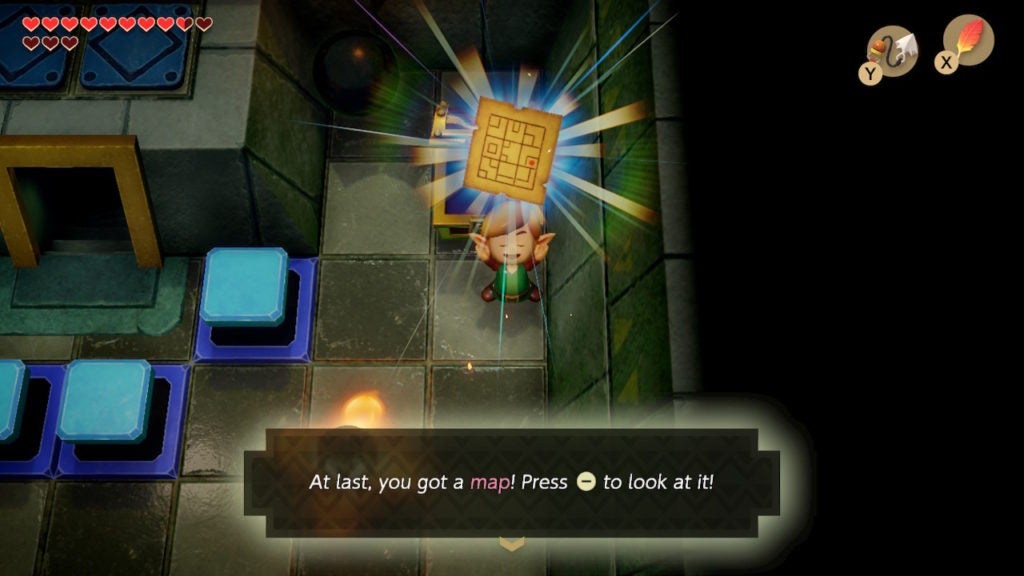
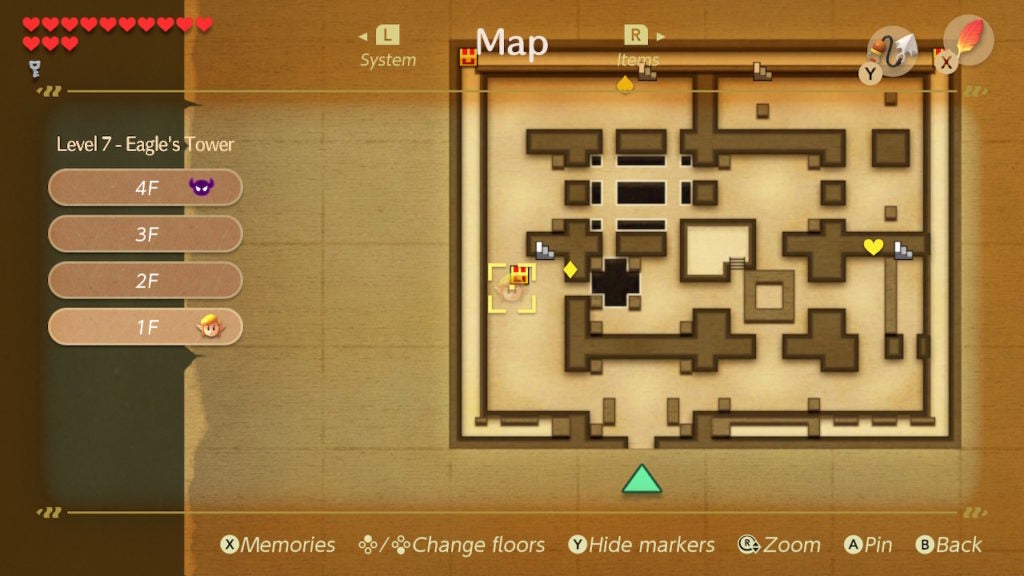
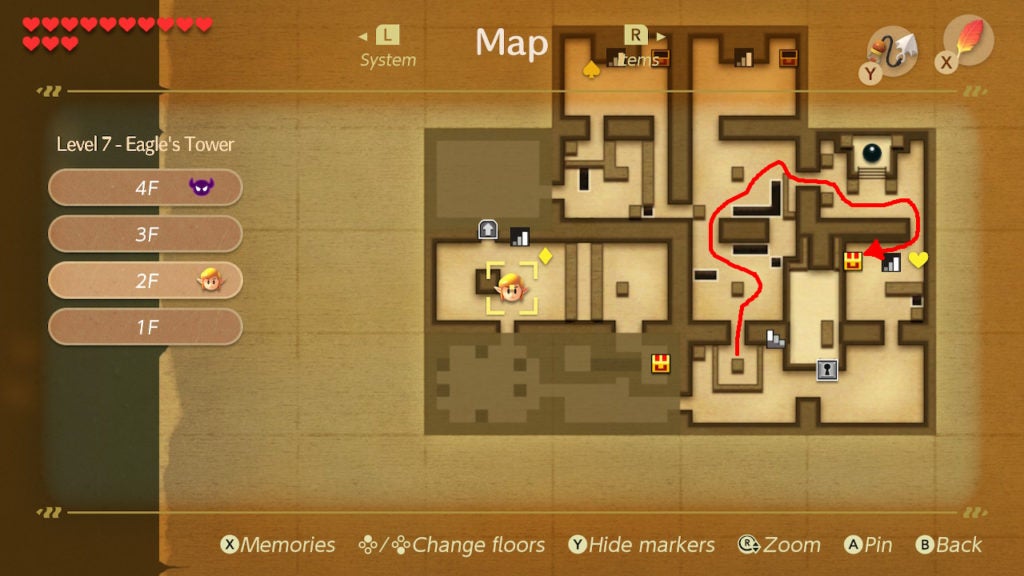
Take a Look at the Map to Survey the Dungeon
After acquiring this helpful tool, open your Map menu to scout Level 7 – Eagle’s Tower’s layout. When you do, you’ll find that there are 4 floors.
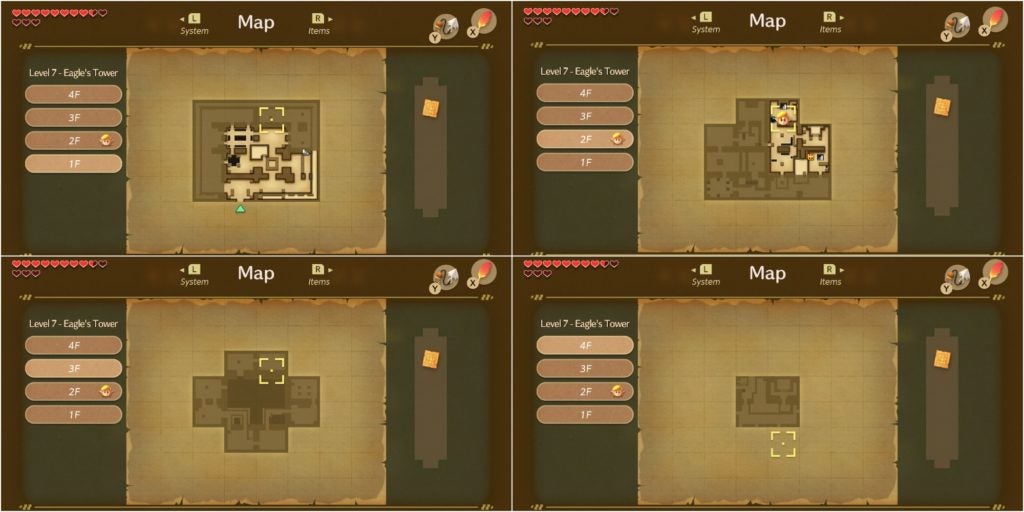
However, don’t worry too much about Floor 4, as you’ll be dropping that down into the middle of Floor 3 once you smash the remaining 3 cracked pillars. After surveying the dungeon, you’ll want to pick up the Compass next. Although, you’ll need to lower the Blue Switch Blocks in order to open the way that leads to it.
Flip the Switch to Lower the Blue Switch Blocks
The closest Switch is on Floor 2, though, you’ll need to reach it in a specific way. From the room where you looted the Dungeon Map, go south back into the room where the first pillar was. Here, jump across the gap to the southeastern doorway. Proceed through it and you’ll find the second cracked pillar.
From here, go south through another open doorway to find a Switch surrounded by a short fence.
Hit the Switch so that it turns orange. This will lower the Blue Switch Blocks in the dungeon. Now, you’ll want to head north back to the room where you smashed the first cracked pillar and retrieve the round stone. Take the stone south by carrying and throwing it.
Smash the 2nd Pillar
After successfully getting the black stone to the area of the room with the second cracked pillar, hurl the rock at the column to bring it down.
Following this, you’ll want to pick up the stone again and bring it with you as you head towards the room that holds the Compass.
Prepare to Smash the 3rd Pillar
You’ll need to alternate throwing the round stone across gaps and jumping across them yourself. In this manner, head north back into the room that used to hold the first cracked pillar. Push the block that’s preventing you from going west out of your way.
When you make your way into the room that lies to the west, you’ll find the third cracked pillar that you must destroy. You’ll be in a thin hallway that leads north on the east side of the room. Take the round stone north into the blue-tiled room and then come back to the third cracked pillar room from the southwest exit so that you can toss the stone into the southwestern part of the room that holds the third cracked pillar.
You’ll soon have to go around and throw the black stone at the pillar from the south. However, before that, you should grab the Compass from the blue-tiled room just north of here.
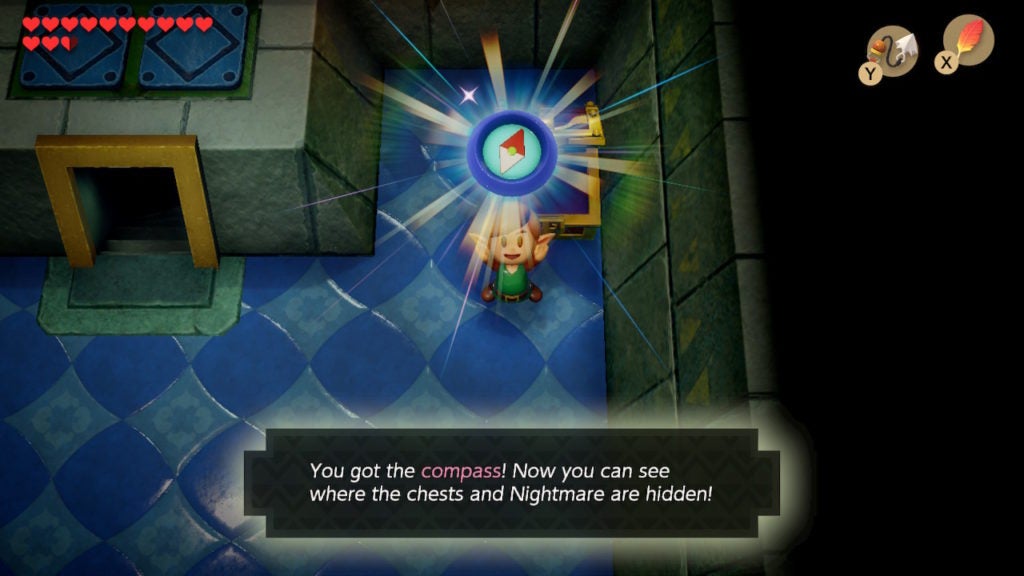
Find the Compass
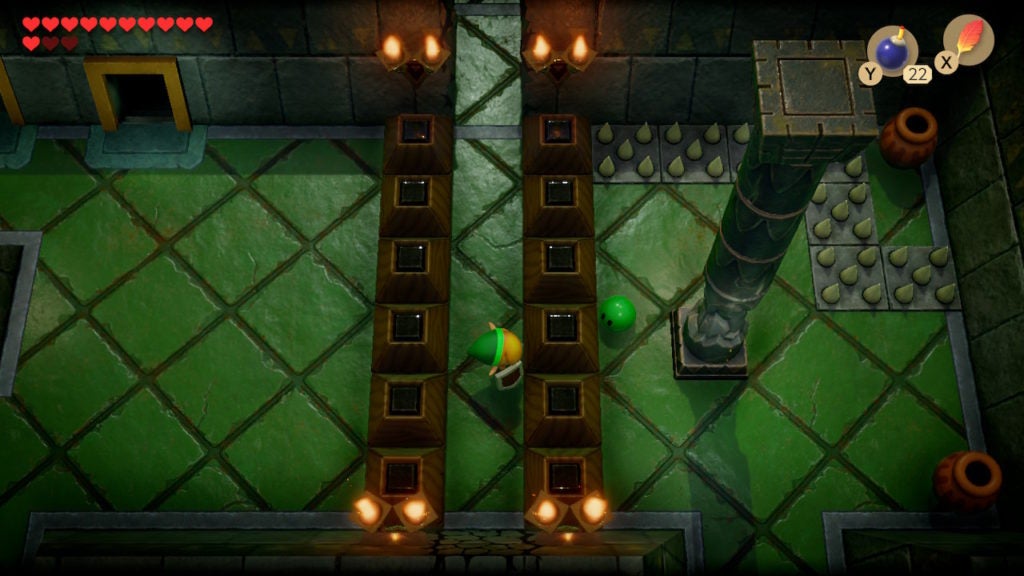
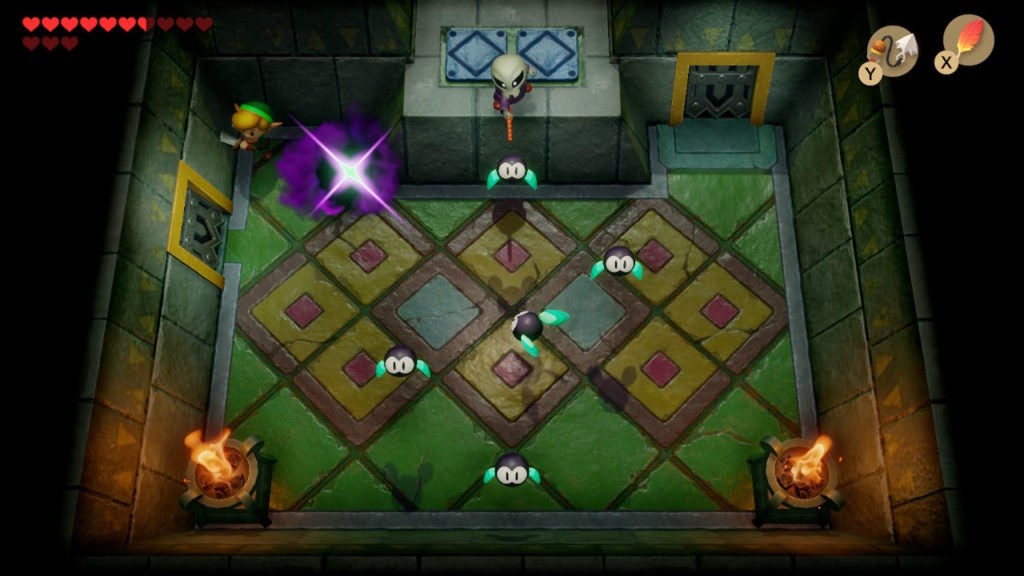
In the room north of the third cracked pillar, you’ll find 3 Three-of-a-Kind enemies in a room with blue tiles.
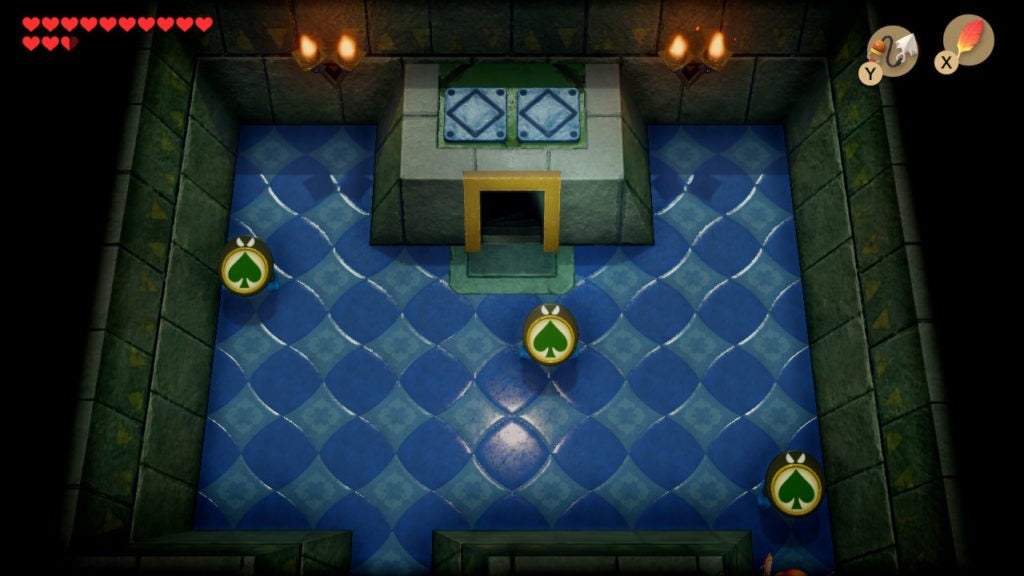
The trick to defeating these enemies and solving the puzzle in this room is to match the symbols. When you hit these round foes, they will get stunned and will rest on a symbol appearing on their front as opposed to cycling through 4 symbols. You need to hit all 3 enemies with well-timed strikes to match the symbols on their fronts (which out of the 4 symbols you choose doesn’t matter). Doing so will destroy the Three-of-a-Kinds and will cause a chest to spawn in the northeast corner of the room. Loot the chest to obtain the Compass.
Take Another Look at the Map to Survey the Dungeon’s Chests and Boss Room
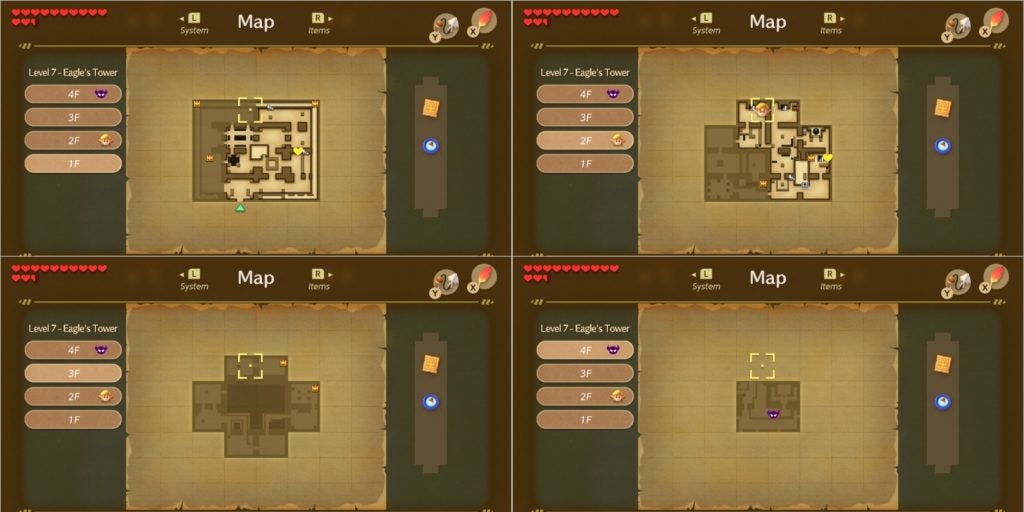
Open your Map menu to take a look at where the remaining chests are located. The next task you’ll want to perform in this dungeon is taking out the first mini-boss and getting the second Small Key from them.
Find the 1st Mini-Boss, Red Hynox
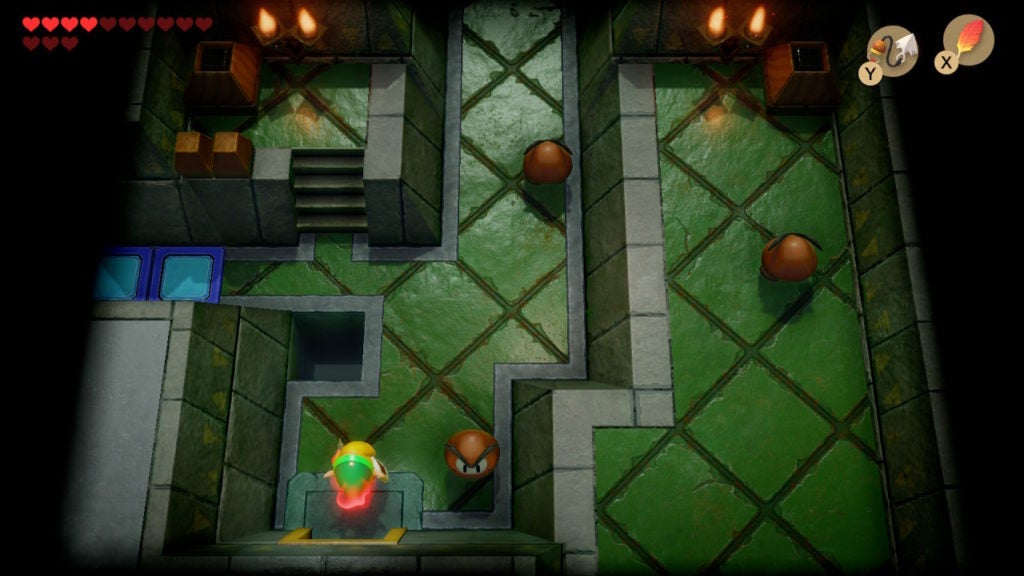
From the room with the Compass chest, head down the staircase along the north wall. This will bring you to an area in the northern section of Floor 1.
From here, you’ll want to go west while being north of the raised Orange Switch Blocks. This path will turn southward and will take you by a chest that you can’t open while Orange Switch Blocks are raised.
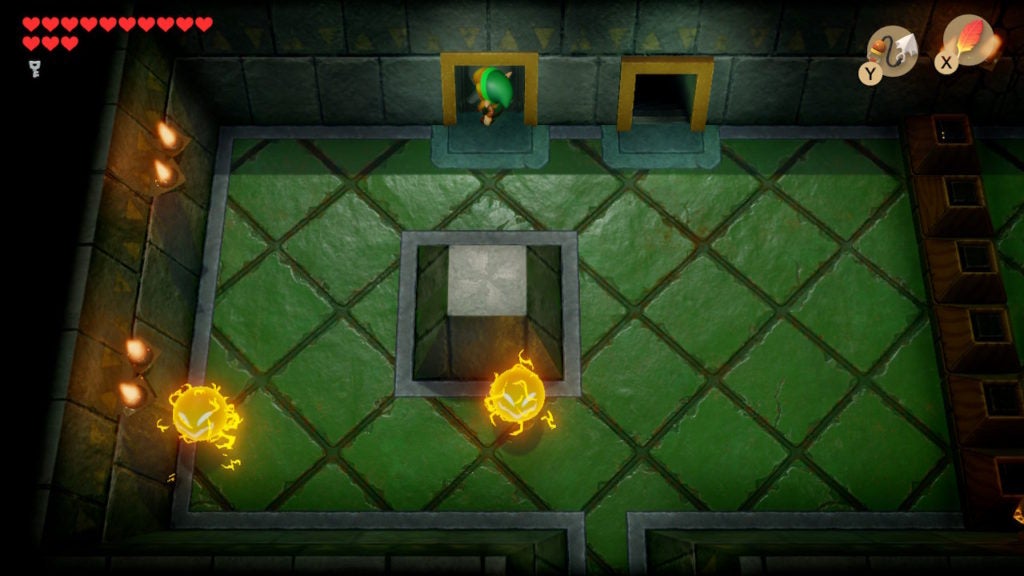
This chest contains the Stone Beak, however, you don’t need it just yet. Ascend the staircase to the east of the surrounded chest to enter a room on Floor 2 with 2 Sparks, a one-way exit leading north, and an open doorway leading south.
The first mini-boss of Level 7 – Eagle’s Tower is waiting in the room to the south. Prepare for battle as you see fit and then proceed southward.
Beat Red Hynox For the 2nd Small Key
In the mini-boss room, you’ll find a red version of Hynox, the cyclops you defeated in Level 2 – Bottle Grotto.

You’ll have to defeat this red foe in the same manner as did the other Hynox. As such, you’ll only need your Sword to slay this mini-boss. However, be careful of getting picked up by the Red Hynox, as they can throw you into one of the room’s floor holes. While this will not damage you much, it will cause you to land on Floor 1. You’ll have to make your way back up to fight the Red Hynox again, though, they will have recovered all of their health.
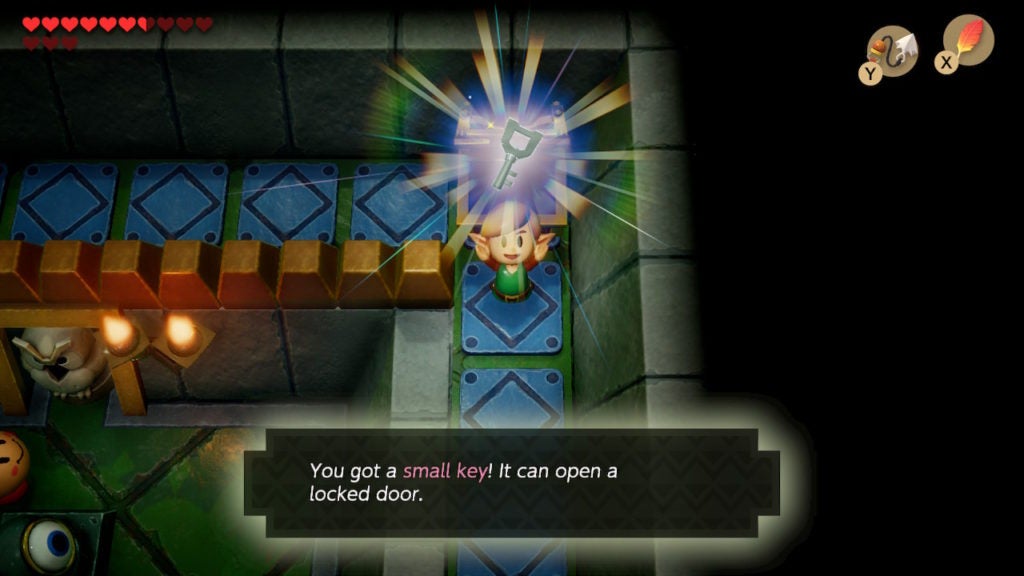
A great way to avoid getting picked up by the cyclops is to keep 1 of the 2 eastern floor holes between yourself and the mini-boss. In between avoiding grab attacks, you’ll want to strike the Red Hynox with your Sword to whittle their health down. Soon, the burly foe will fall and a Small Key will drop onto the blue tile on the west side of the room.
A Fairy will also spawn, so be sure to grab the little fae if you need some healing. Snag the Small Key and then make your way to the nearest Switch.
What to Do After Beating the Red Hynox
Although you’ve already figured out the most important puzzle of this dungeon (smashing the 4 cracked pillars), getting hints from Owl Statues can still be useful. As such, you should obtain the Stone Beak before progressing further into Level 7 – Eagle’s Tower. Though, to do so, you’ll first need to flip a Switch to lower the Orange Switch Blocks in the dungeon. You’ll also be able to smash the last cracked pillar along the way.
The nearest Switch is on Floor 2—in the room south of where the second cracked pillar was located. To get back there fairly quickly, exit through the north of the Red Hynox’s mini-boss room to re-enter the one with the 2 Sparks and the one-way passage that leads north.
Go through the one-way passage to find a room full of orange floor tiles and a door to the east that will lock. The orange floor tiles in this room will then come alive and fling themselves at you, which you can block with your Shield. There’s also 1 Bubble in the room that you’ll need to watch out for.
You’ll need to destroy all the orange tiles for the door to the east to open. When it does, make your way through it. Afterward, you’ll be in the room with the third cracked pillar, which you can now smash. The round black stone will be on the ground nearby, which you’ll need to use as before to demolish the column.
With that, you’ll only have 1 more cracked pillar to smash to lower Floor 4 down to Floor 3. Though, you have more business in this room than just smashing the third pillar.
Find the Hidden Passage
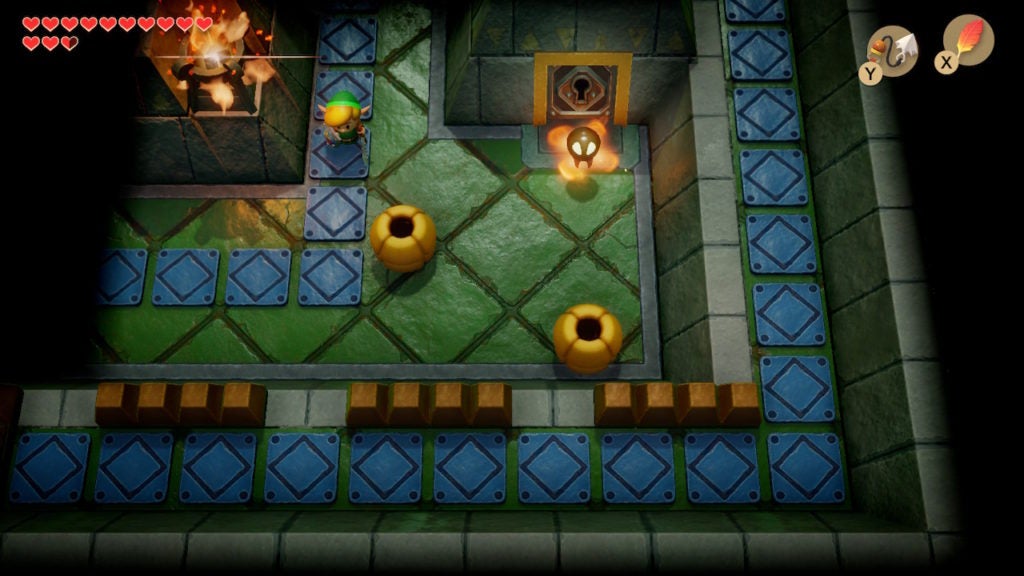
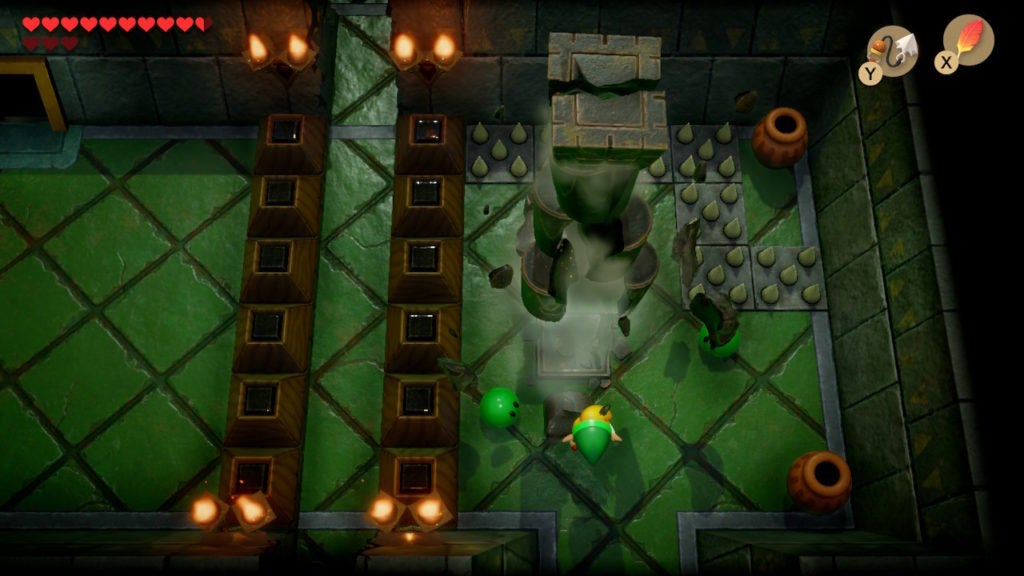
In the southwest corner of this room will be a cracked wall between the 2 lit wall torches. Blow it up with a Bomb to find a hidden passage that leads south into a thin hallway flanked by blocks.
In the south part of the thin hallway, you’ll find another cracked wall. Blow this one up as well by using another Bomb. To the east, you’ll see that fourth and final cracked pillar that you will need to smash. The passages you just opened will be helpful for that a bit later.
Return to the Switch on Floor 2
For now, return north to the room where the third cracked pillar was once standing. Push the block in the southeast further east so that it falls down a hole. Take the round black stone and go east into the room that used to hold the first cracked pillar and then go south into the room with the remains of the second cracked pillar. Afterward, head further south to encounter the Switch in the enclosed area.

Smack the crystal Switch so that it turns blue and lowers all of the Orange Switch Blocks in the dungeon. Furthermore, you should take the round black stone you’ve been lugging around and toss it beyond the fences enclosing the Switch. You’ll need to retrieve the stone from the south of this room later. However, now that you’ve lowered the Orange Switch Blocks, it’s time to head to the chest containing the Stone Beak.
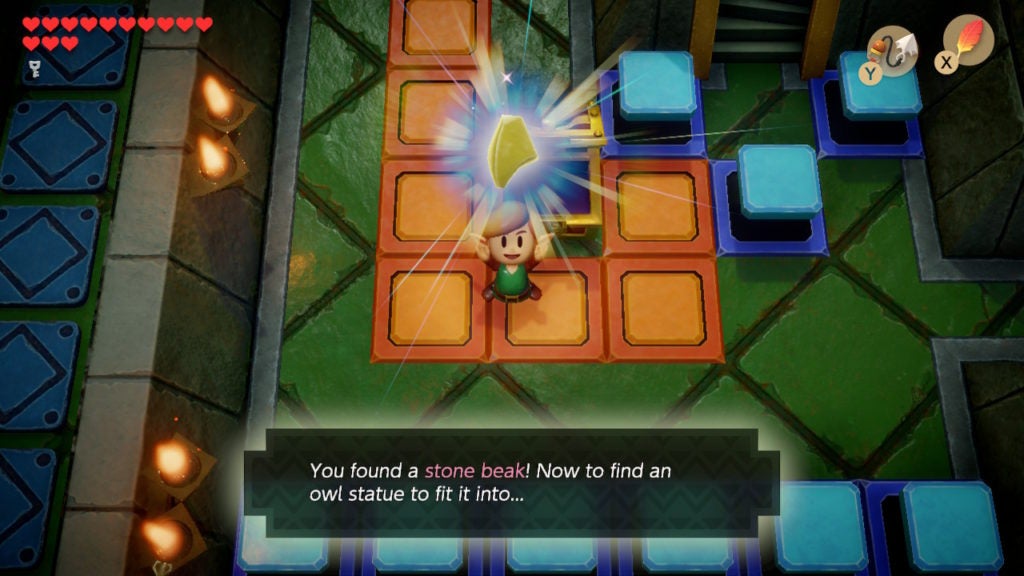
Find the Stone Beak
The chest containing the Stone Beak is located in an area you’ve already passed in the southwest section of Floor 1. To get back to this area quickly, go to the room where you smashed the third pillar and jump through a floor hole there.
This will bring you to the room on Floor 1 northeast of the chest (the room with all the floor holes). From there, navigate southwest to the chest located by some lowered Orange Switch Blocks. Open the chest to obtain the Stone Beak.
Find the Mirror Shield
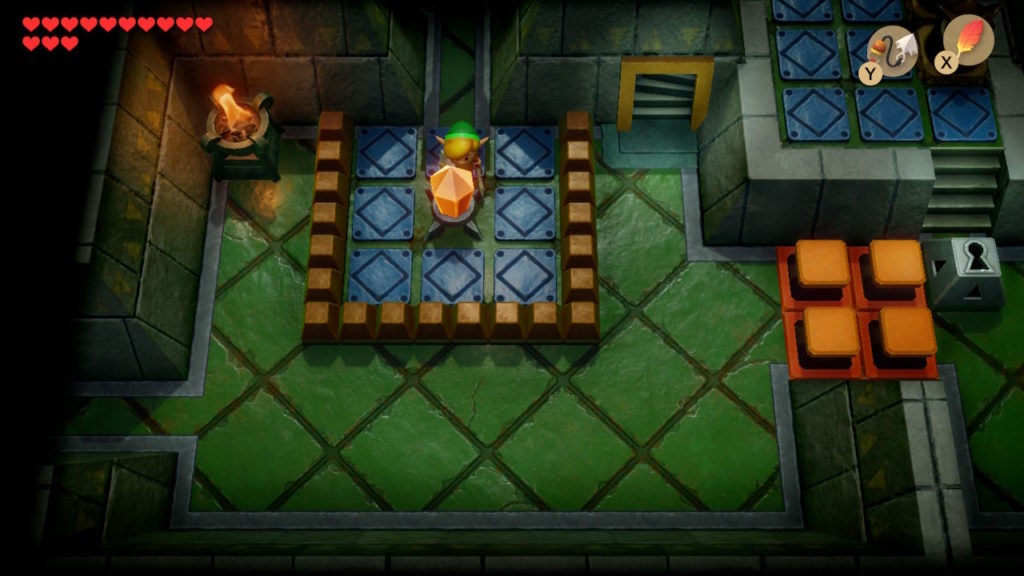
After getting the Stone Beak, you’ll be able to get some useful hints. If you didn’t figure out the pillar-smashing puzzle by now, using the Stone Beak on the Owl Statue in the room where the round black stone spawns would give you a hint that would reveal the puzzle’s nature. With that said, now is a good time to smash the fourth and final pillar. However, along the way, it will be easy to find an important item: the Mirror Shield.
First, head back to the enclosed Switch room on Floor 2 and flip the Switch again so that it turns orange. This will lower all the Blue Switch Blocks in the dungeon, which will make it possible to open the chest containing the Mirror Shield. The chest holding the desired item is in the room just south of the one with the pull-lever and sliding blocks that bar the room’s west exit.
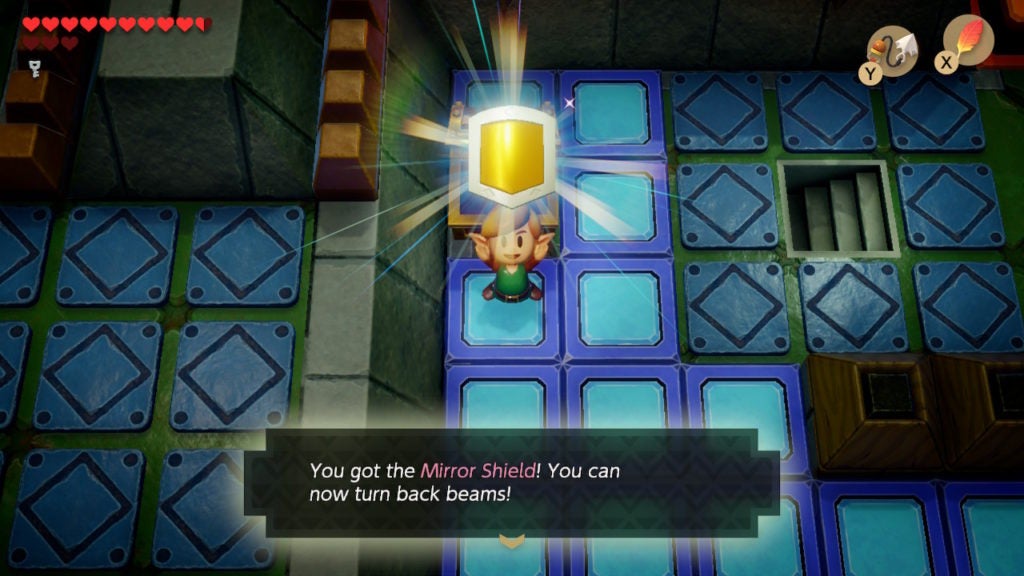
When you enter it, all the Blue Switch Blocks around the chest will be in the lowered position, allowing access to the chest. Open it up to get the Mirror Shield. This will replace your current Shield and will work mostly the same. However, you will now be able to reflect magical attacks! For example, you can now send the energy attacks of Beamos back at them if you are guarding and facing the direction of your foe.
Unlock the Locked Block On Floor 2
After getting your shiny new Mirror Shield, head south out of the room to find 1 Bubble among a few pots. You can smash the pots for some minor loot. The most important part of this room is the locked block on the west side. You’ll need to use your Small Key on it to clear the way.
This will give you access to a raised area that you can leap down from to get into the Switch room to the west. You’ll now be in the outer parts of the room with the Switch and can pick up the round black stone that you left here.
Smash the 4th Pillar
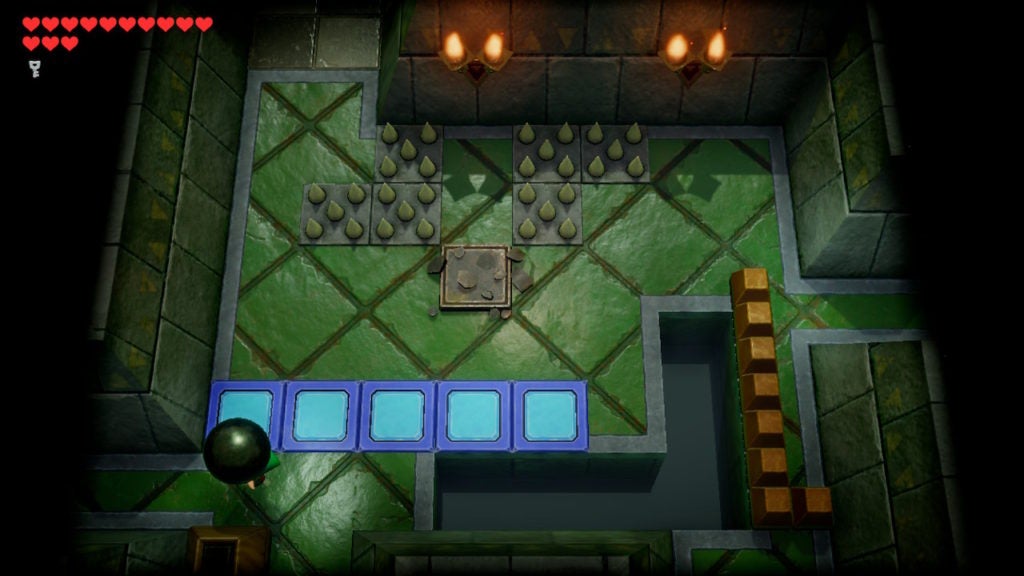
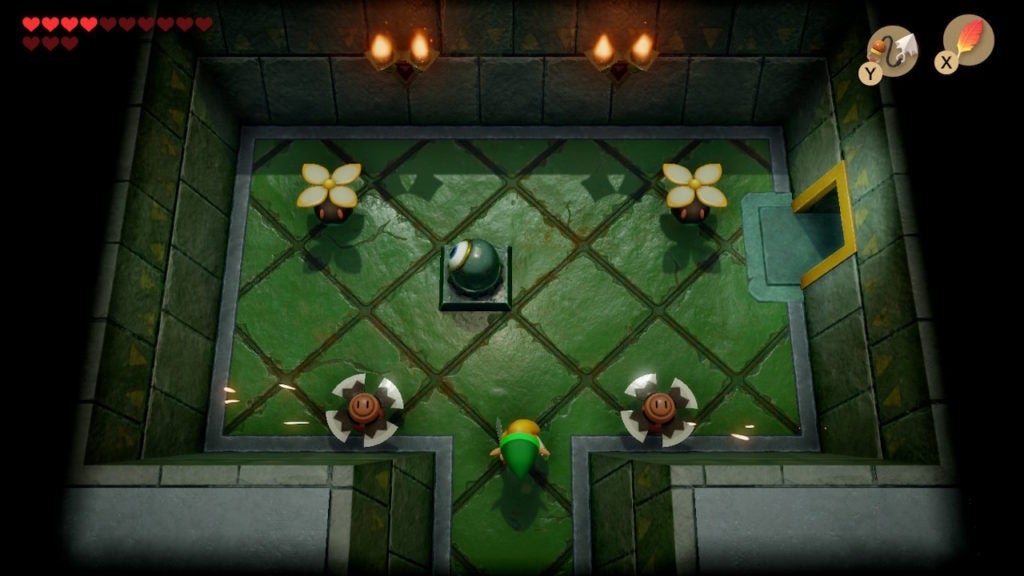
Pick up the round stone and head into the room that lies to the west. Here, you’ll be in the southern half of a room split by a large hole. There will be 3 Three-of-a-Kind foes here. If you take them all out, a chest will spawn in the northeast corner of the room.
What you want to do here is toss the round stone over the bit of fence in the center of the room. This will cause it the land in the north hallway, which leads to the fourth cracked pillar. Now you need to make your way around to the northwestern section of this same room.
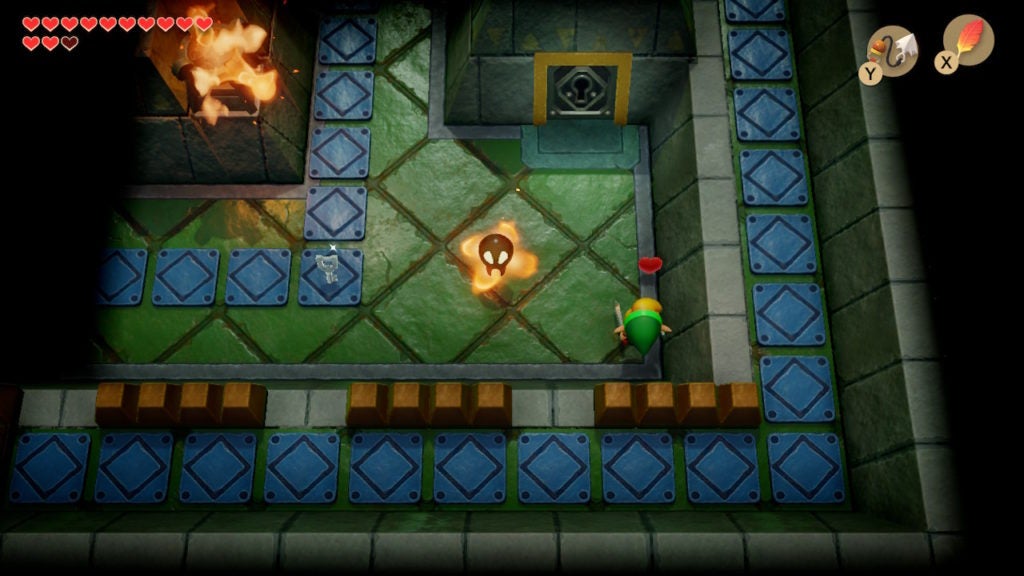
Return to the thin hallway with the passages you blew open with some Bombs. Heading all the way south will bring you to the northeast corner of the room where you tossed the round stone north. You’ll enter the room next to the Owl Statue, which you can interact with to get a hint about throwing the round black stone over fences. Use your Hookshot to travel eastward to the chest in the room and open it if you haven’t already.
Open the Chest to Get 1 Bomb
Yes, that’s right, the chest only contains a single Bomb as loot. After pocketing the meager goods, travel north into the room with the final cracked pillar. Throw the round stone at it to smash it to bits.
Afterward, if you’ve smashed all of the other pillars, a cutscene will show you the outside of Level 7 – Eagle’s Tower.
Floor 4 will crash down and merge with Floor 3, which, in turn, will make the latter parts of this dungeon accessible. After solving this crucial puzzle, you should focus on opening the remaining chests. There are 2 chests on Floor 1 in the northern corners of the dungeon. You’ll need to access both of these by dropping from Floor 2 down to Floor 1 through specific holes in the ground.
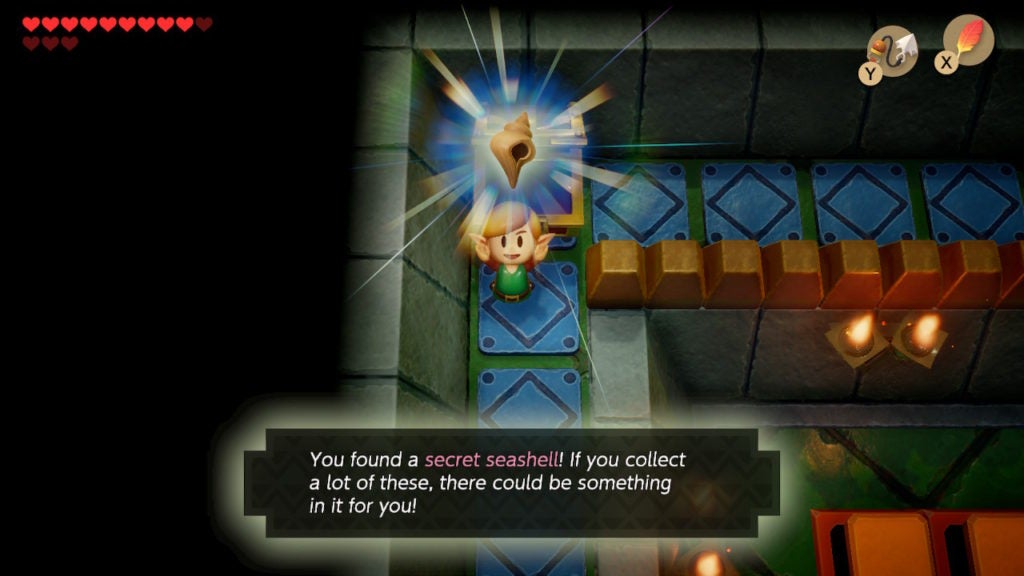
Find the Secret Seashell On Floor 1
To get to the chest in the northwest corner of Floor 1, which contains 1 Secret Seashell, you’ll need to return to the room where you defeated the Red Hynox.

Drop down the hole in the south of the room and you’ll land on a raised walkway in the southwest corner of Floor 1.
From this spot, travel north along the west wall until you reach the northwest of Floor 1. Here, you’ll find a chest, which, when opened, will give you 1 Secret Seashell.
For the remaining chest on Floor 1, you’ll have to use a similar tactic to reach it.
Find the 3rd Small Key On Floor 1 (Optional)
Go back to the room where you got the Mirror Shield. There is a small hole in the southeast corner by the Switch in the room.
Jump down this hole to find yourself on another raised walkway on Floor 1. This one will lead you north as well, mirroring the west side of Floor 1. Travel north to the chest and open it to get 1 Small Key.
This Small Key can come in handy on Floor 3, though, you won’t need it if you get the Nightmare Key. The only use for this Small Key is on a locked block—the last locked item in the dungeon besides the Nightmare Door. Though, you can get around it easily after acquiring the Nightmare Key, making this Small Key a bit pointless.
Find the Staircase to Floor 3
To get to Floor 3, you’ll need to return to the room where you got the Mirror Shield. Stand on any of the lowered Blue Switch Blocks in the south of the room and then activate the Switch in the southeast corner with a ranged weapon. This will raise the Blue Switch Blocks and lower the Orange Switch Blocks. You need to do this because there’s a barrier of Orange Switch Blocks on Floor 3 that would prevent your progress if they are raised at this point.
After hitting the Switch, go south into the next room and then go west towards the room with the fenced-off Switch. Head up the stairs in the northeast of this room and jump down the ledge leading west. You’ll now be in front of the staircase leading up to Floor 3.
Exploring Floor 3
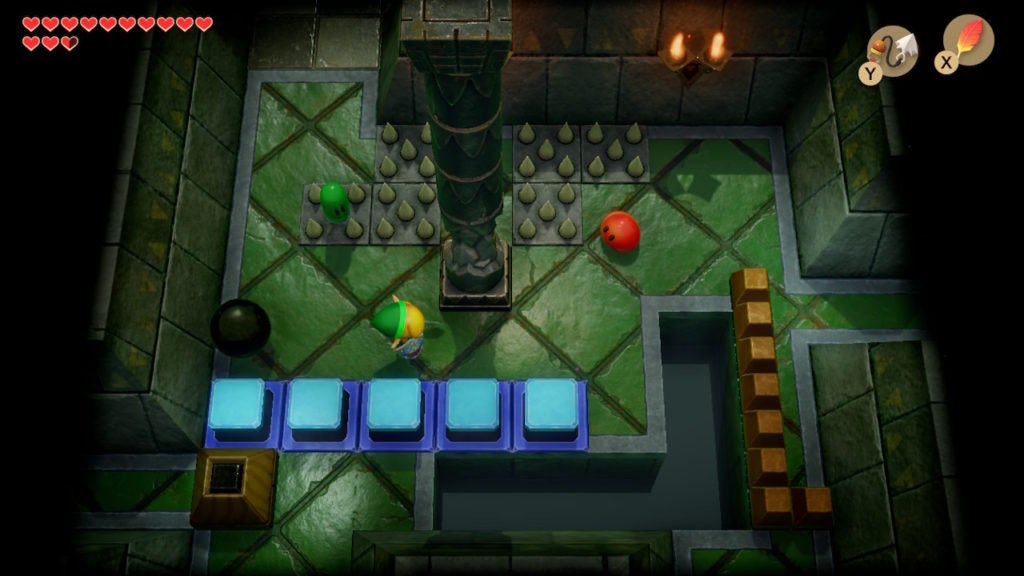
As you step onto Floor 3, you’ll be in a room with 2 Helmasaurs and 1 Peahat. There will also be some floating Hearts that you can collect.
From this room, you should go north into a long horizontal room.
There will be an open doorway here that leads east, however, be careful. Beyond it will be the dungeon’s second mini-boss. When ready, travel east to face them and their minions.
Beat the 2nd Mini-Boss (Grim Creeper)
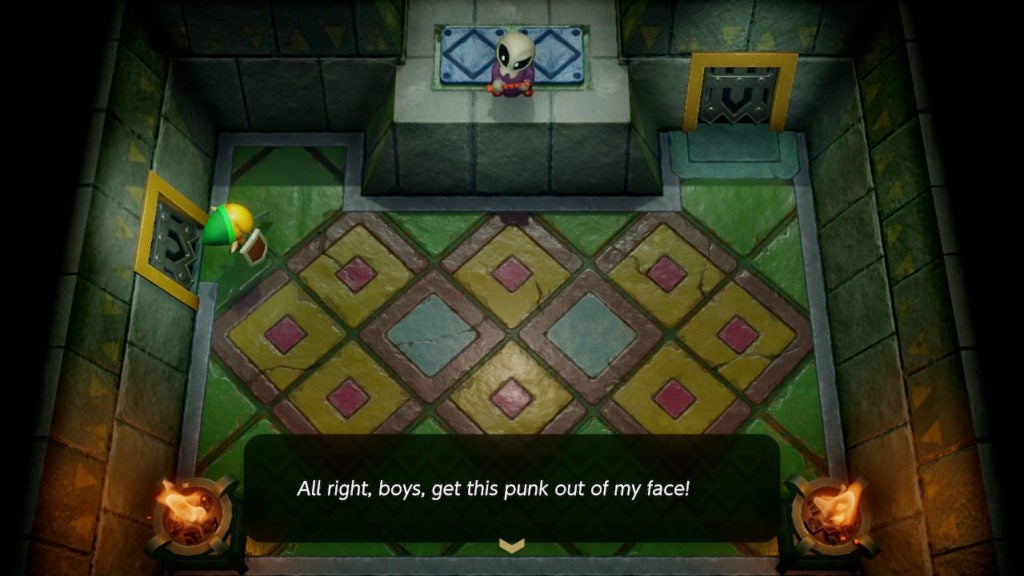
After you enter the room, the doors will lock and Grim Creeper will be standing nearby. The mini-boss is on a raised area to the north that you can’t reach. After a bit of dialogue, Grim Creeper will summon a bunch of Battle Bats. The skeletal adversary will then command their flying minions to swoop at you aggressively.
To win this fight, it would be easiest to stand in a corner and allow all of the Battle Bats to come to you. Slash at them as they fly at you and you’ll be able to slowly but surely clear the room. After you dispatch all of the flying foes, Grim Creeper will threaten you angrily before disappearing. The exits of this room will now open and a blue warp point will appear in the center.
When you’re ready, head north into the next room. This is where you’ll find the Nightmare Key.
Find the Nightmare Key
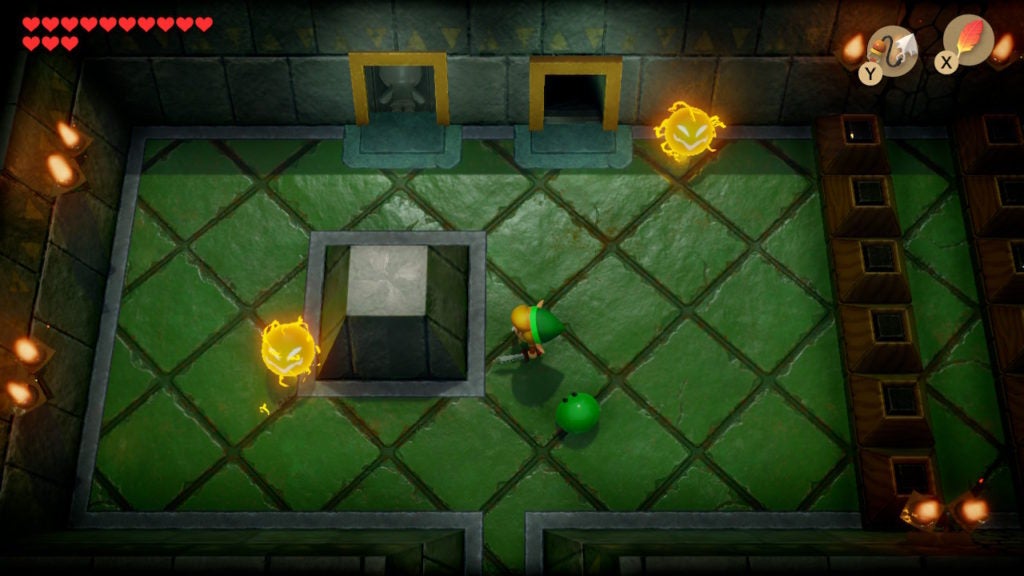
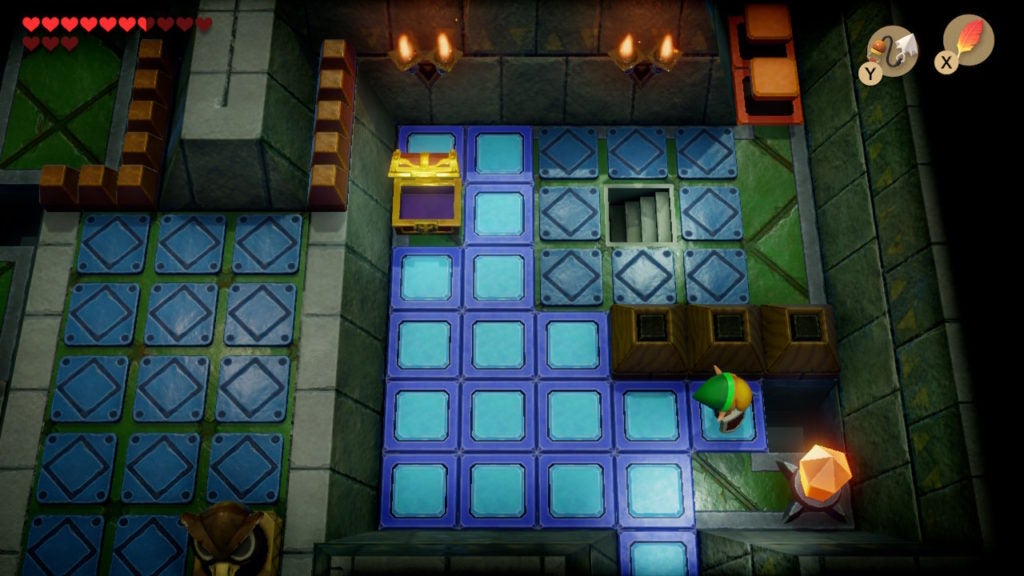
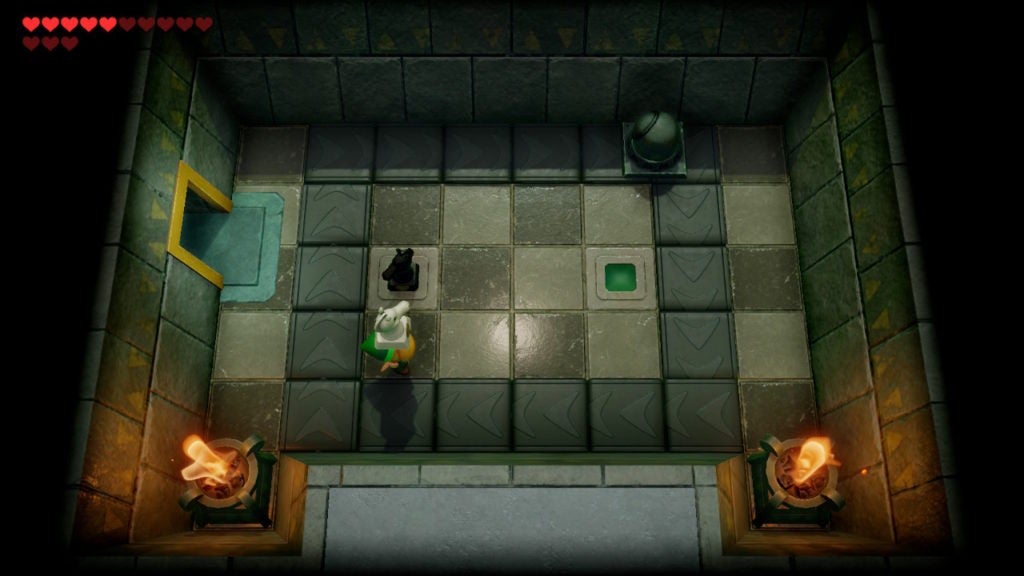
In the room north of where you defeated Grim Creeper, there will be 3 Sparks and 2 blocks.
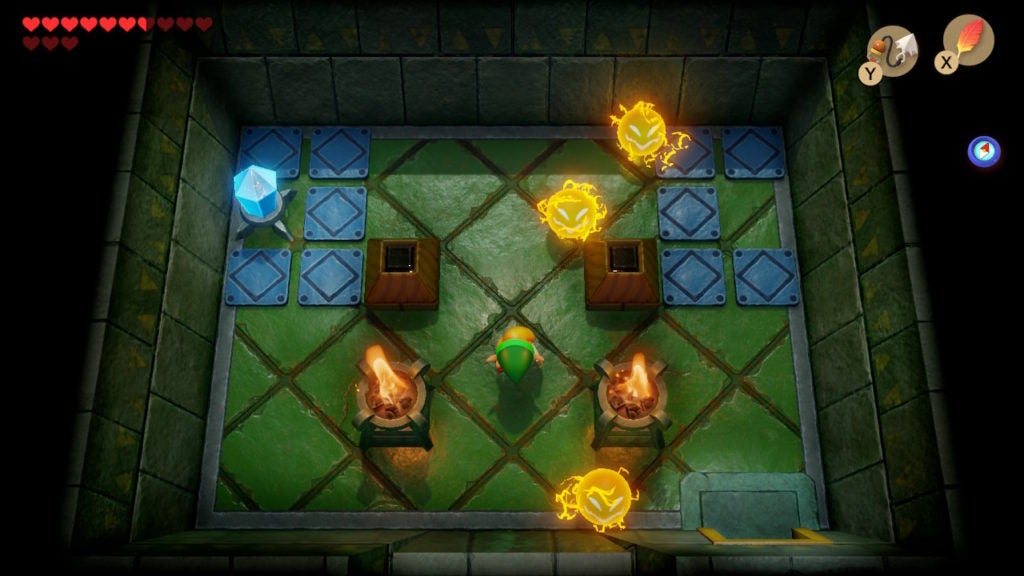
There is also a group of blue tiles in the northeast corner that indicate that a chest will spawn there. The puzzle for this room is simple: push the 2 blocks together and the chest will appear.
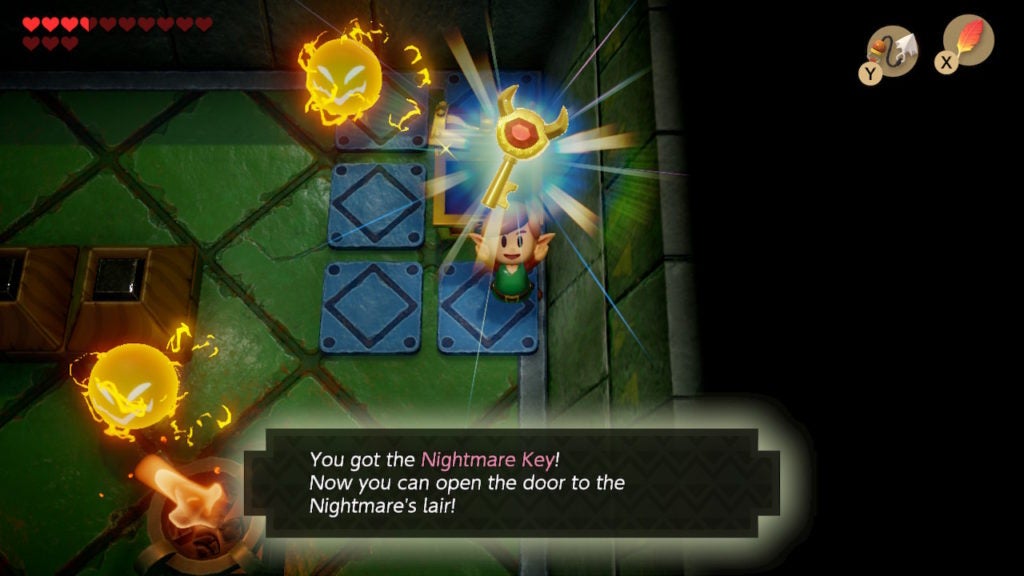
Loot the chest for the Nightmare Key while avoiding the Sparks. If the energetic enemies are annoying you, be sure to take them out with the Boomerang. You’re now almost ready to face the boss. There’s 1 last chest you can open—which is located on this floor. It contains Secret Medicine, which is like having an extra life. However, you can only hold 1 Secret Medicine at a time. If you already have some, you can make your way to the Nightmare’s lair without missing anything at this point.
Find the Secret Medicine (Optional)
Head back to the room with the blue warp point and then go west into the long horizontal room. In the northwest of the long room, you’ll find the Nightmare Door, though, beyond won’t be a boss room.
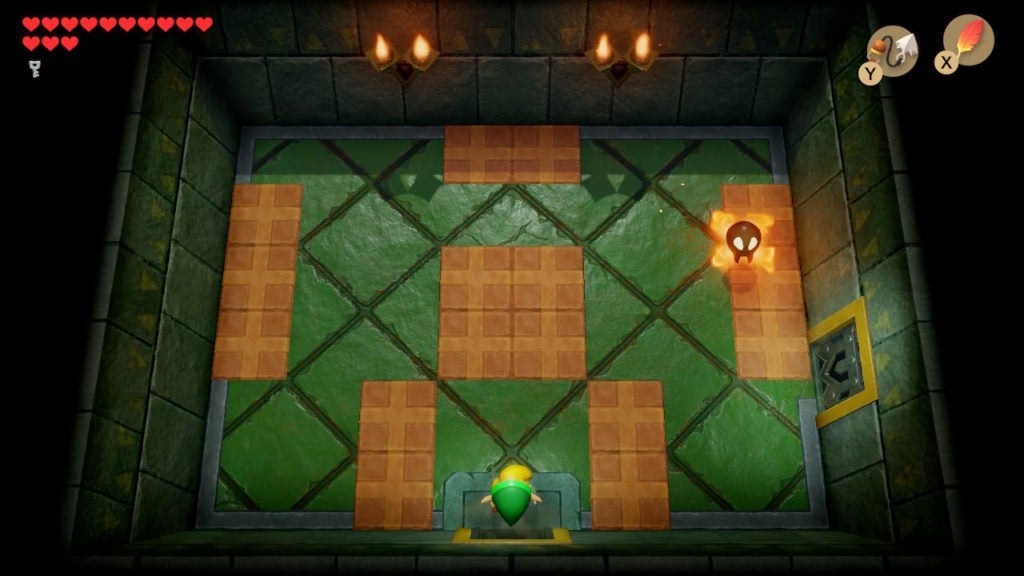
When you traverse the doorway, you’ll be in a room with some Goombas and a simple Hookshot puzzle.
You’ll have to get up to the raised area to the east soon. But, for now, go north into the next room. Be careful in this new room, as there will be a couple of Blade Traps by the entrance.
Avoid the Blade Traps and the other foes to make your way east and into the following room. Here, you’ll find another Beamos as well as a chess puzzle. Since you need to spend some time in this room, it would be best to take out the Beamos. Raise your Mirror Shield in the direction of the Beamos and wait until they fire an energy attack. The projectile will bounce off of your Mirror Shield and return to the Beamos, which will cause them to close their eye and stop attacking. Now that you have some peace, it’s time to solve the chess puzzle.
How to Solve the Chess Puzzle to Get the Secret Medicine Chest
This one is pretty intuitive, so it won’t take you long. Stand south of the eastern green tile while holding the black knight and throw the black knight westward. This will cause it to land on the western green tile.
Mirror the process by standing south of the western green tile and throwing the white knight eastward. This will cause the white knight to land on the eastern green tile. Afterward, a chest will spawn in the northeast corner of the room.

Open the chest to get some Secret Medicine. If you lose all of your Hearts while you have Secret Medicine in your inventory, you will automatically get revived with full Hearts. As such, it’s an excellent emergency healing item—especially since it activates automatically. Though, keep in mind that upon being used, your Secret Medicine will disappear.
Getting to the Boss Room
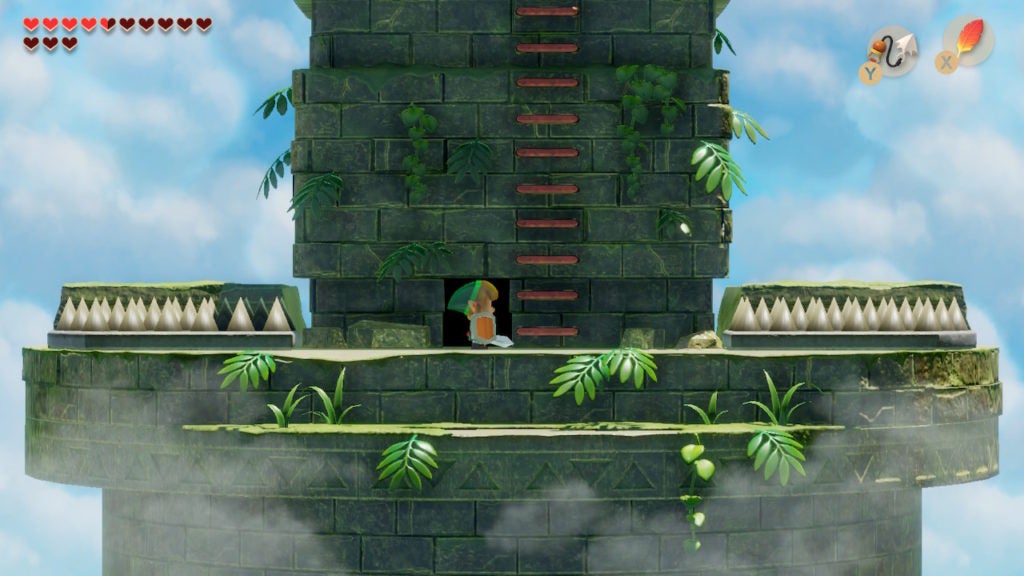
When ready, head to the room just north of the Nightmare Door. Ascend the stairs in the northwest corner and use the Hookshot to grapple across the center of the room. This will bring you to the raised eastern side of this chamber.
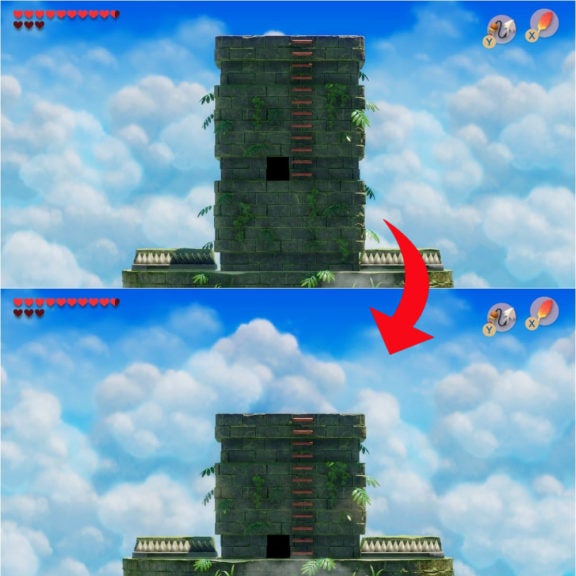
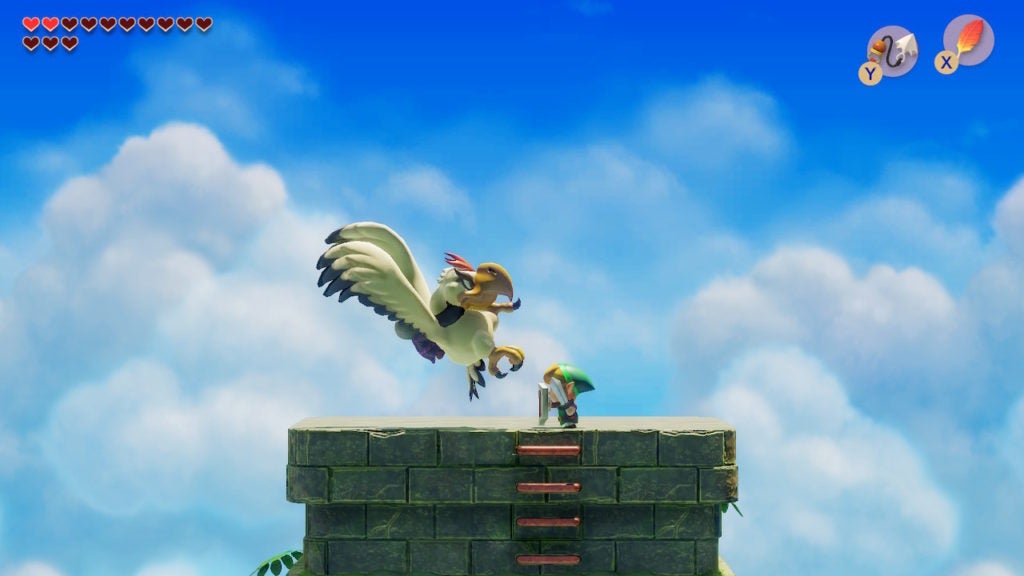
From there, go south and then east to find a staircase that leads up and outside. Instead of fighting this dungeon’s Nightmare in a boss room, you’ll have to fight them beneath a blue sky. When prepared, ascend the staircase to challenge the boss of Level 7 – Eagle’s Tower.
Beat Evil Eagle
When you get to the top of the staircase, you’ll be outside and the perspective will change to a side-view. You’ll be in front of a stone pillar with a ladder. It’s worth noting that on either side of the large pillar, there are spike traps.
To confront the boss, you’ll need to climb the ladder to the top of the pillar to find a small platform. Here, Grim Creeper and a couple of Battle Bats are waiting to threaten you.
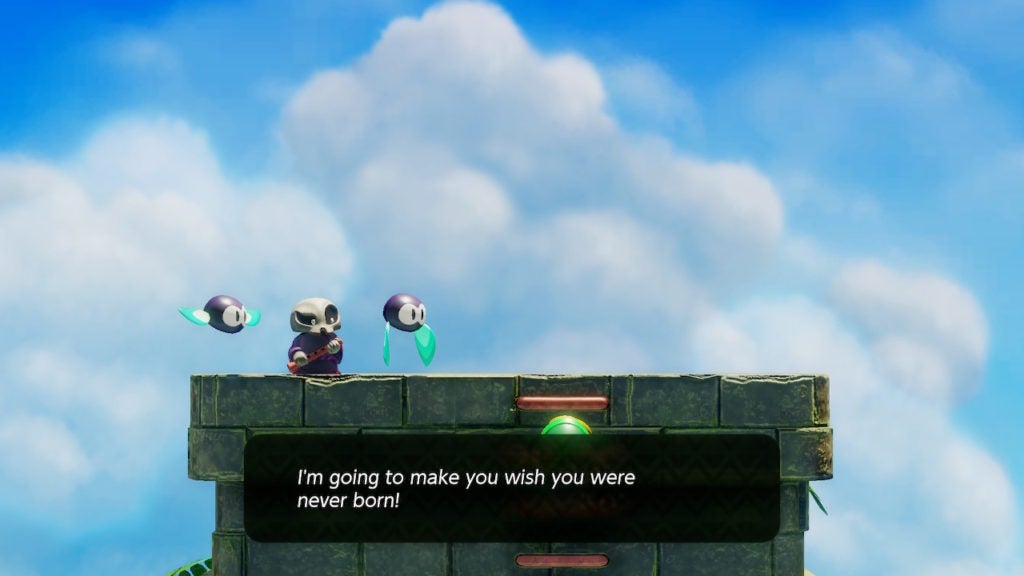
Afterward, the skeletal foe will summon Evil Eagle, the true boss of this dungeon. Grim Creeper will hop onto the great eagle’s back and will ride them throughout the fight. Since Evil Eagle has the aerial and speed advantage, you’ll only have small windows for your attacks. Most of this fight will be avoiding or defending against Evil Eagle’s attacks. Thankfully, there are straightforward ways of dealing with all of this boss’ moves.
Defending Against the Gust Attack
Often, Evil Eagle will fly to either the east or west side of the screen and will shoot feathers at you as well as gusts of wind. The feathers will deal damage if they make contact and the wind will push you back. The latter is arguably worse as you can get pushed off the platform and onto the spike traps that wait below.
If you get blown off and survive, you’ll have to climb the ladder back up to the boss fight area, however, Evil Eagle won’t fly around idly. They will attack you as you try to climb the ladder, which is not a position you want to be in. You can lose a lot of health that way, so do your best to stay on top of the stone platform.
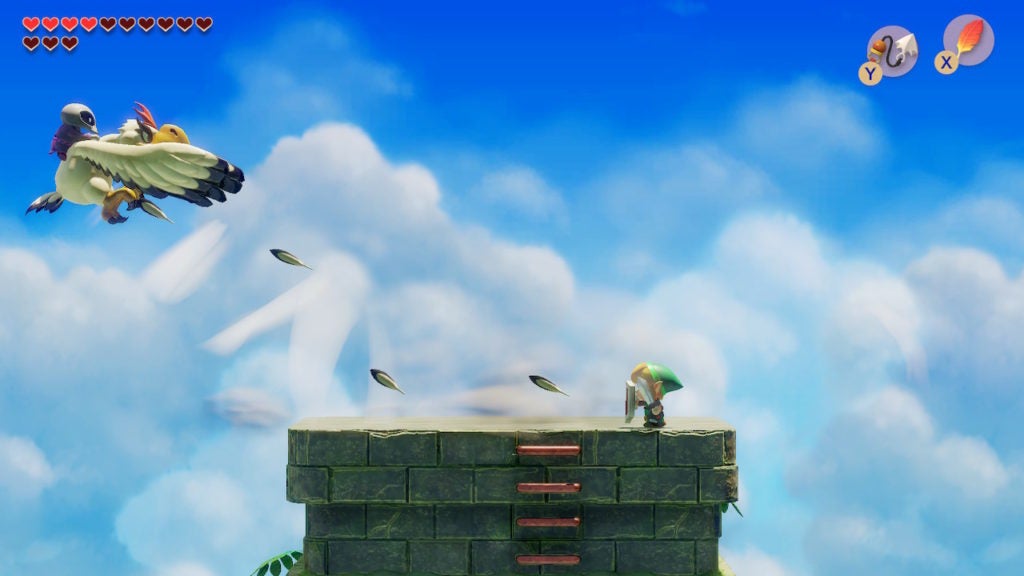
To avoid taking damage here, you’ll want to raise your Mirror Shield and continuously walk towards Evil Eagle. This will prevent the feathers from hitting you and keep you away from the platform’s edges. You cannot really attack the boss from this position, so just endure the attack and wait for your opportunity to strike back.
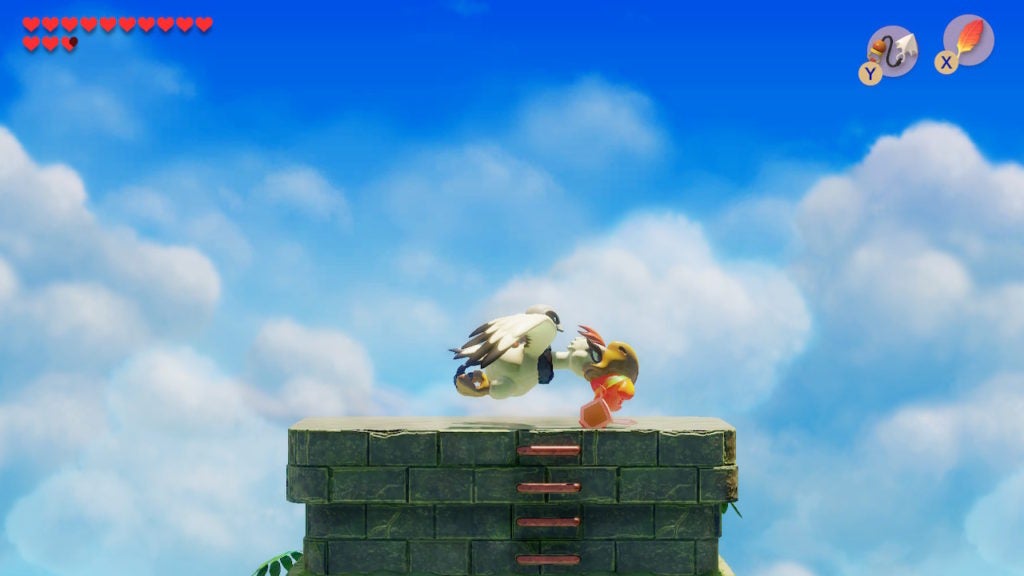
Countering the Claw Attack
This next move is more direct. Evil Eagle will swoop down at you and will slash at you with their huge talons.
You can defend against the furious claws by raising your Mirror Shield, though the force of the attacks can push you back a bit. However, you can strike the boss from this range. When you land a hit, Evil Eagle will back off. If you’re quick, you can even hurt Evil Eagle as soon as they initiate this attack, which removes the need to block the boss’ claw attack.
Avoiding the Dive-Bomb
Occasionally, Evil Eagle will fly horizontally across the screen. Sometimes this will be above you while other times the boss will fly directly at you for a dive-bomb attack.
You can’t block this attack very well without getting pushed back a lot. Your best way to avoid damage here is to jump over Evil Eagle with the Roc’s Feather. Alternatively, you can try to hit Evil Eagle with your Sword as they approach. However, that can be a risky play as it requires precise timing. Most of the time, such an attempt will result in you trading damage with the boss, which is not altogether a bad thing if you have the health to spare.
Evil Eagle’s Phase 2
After you hit Evil Eagle a few times, they will turn red and they will begin to move faster. This will make defending against their attacks and counterattacking more tricky. However, you can use the same methods you’ve been using against the boss up until now—just faster.
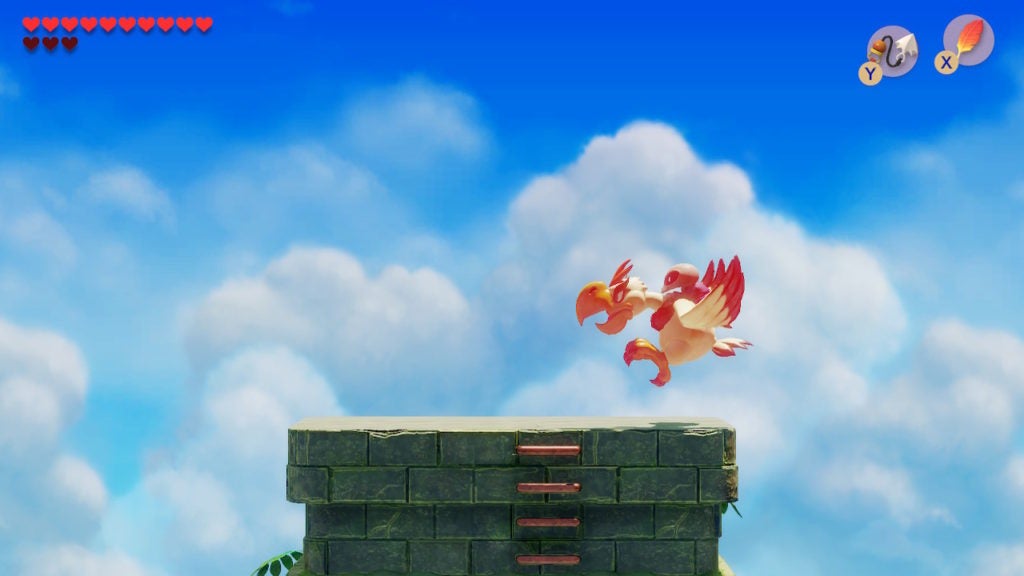
If you have the Bow and Arrow Set or the Boomerang equipped, you can attack Evil Eagle as they sometimes pass overhead. Though, the boss is swift, so you’ll need to lead your shots accordingly. Keep hitting Evil Eagle when you can and the huge bird boss will eventually go down.
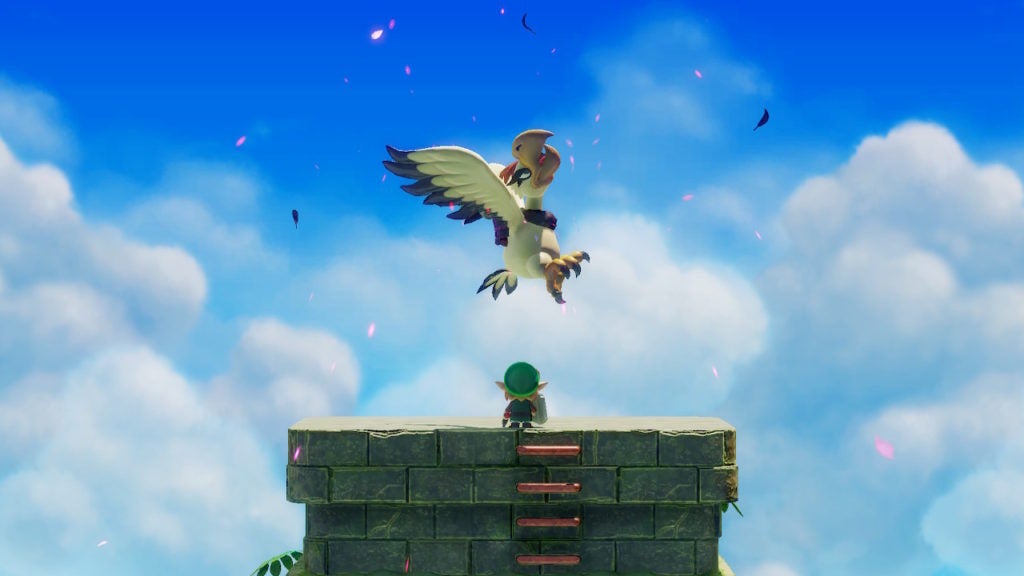
Afterward, a Heart Container will spawn and you’ll be able to access the room with the Siren Instrument. Grab the Heart Container to be fully healed and increase your maximum number of Hearts by 1.
Collect the Siren Instrument
Descend the ladder and go through the entrance into the stone pillar that you came from prior to the boss fight. This will bring you back into the dungeon. Though, you’ll notice an open doorway just east beyond a ledge.
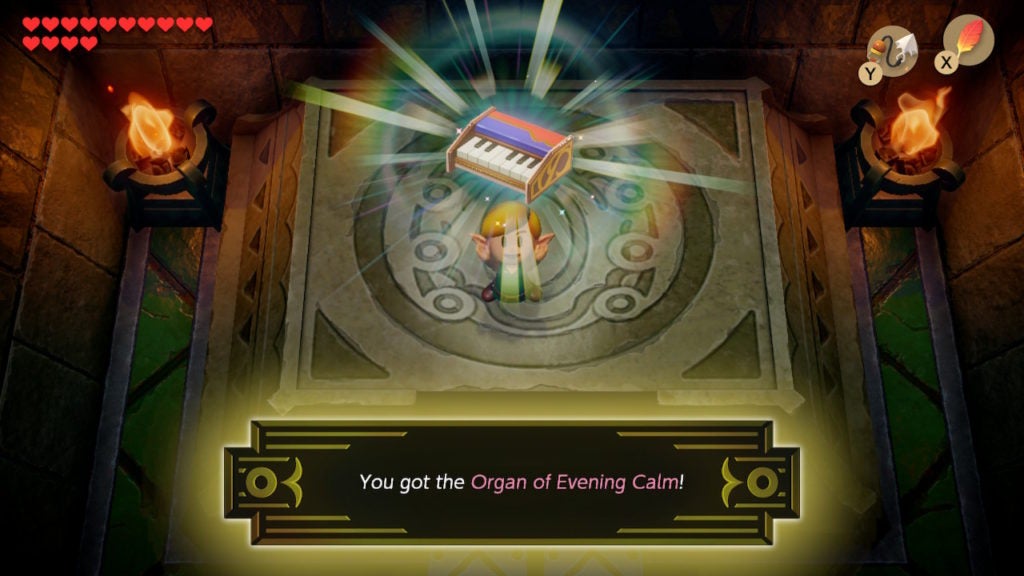
Hop down the ledge to the east and enter the doorway to find the room with the Siren Instrument beyond. Walk up the stairs and obtain the seventh Siren Instrument: the Organ of Evening Calm!
After you pick up the treasure, you’ll get a vague hint about where to proceed next. Over a white screen, some text will tell you that the “music of the Ocarina” leads somewhere.
Where to Go Next
To put it simply, you’re in for quite the pilgrimage if you want to find the final dungeon in Link’s Awakening. You’ll have to journey all the way across the Tal Tal Mountain Range to find Level 8 – Turtle Rock.