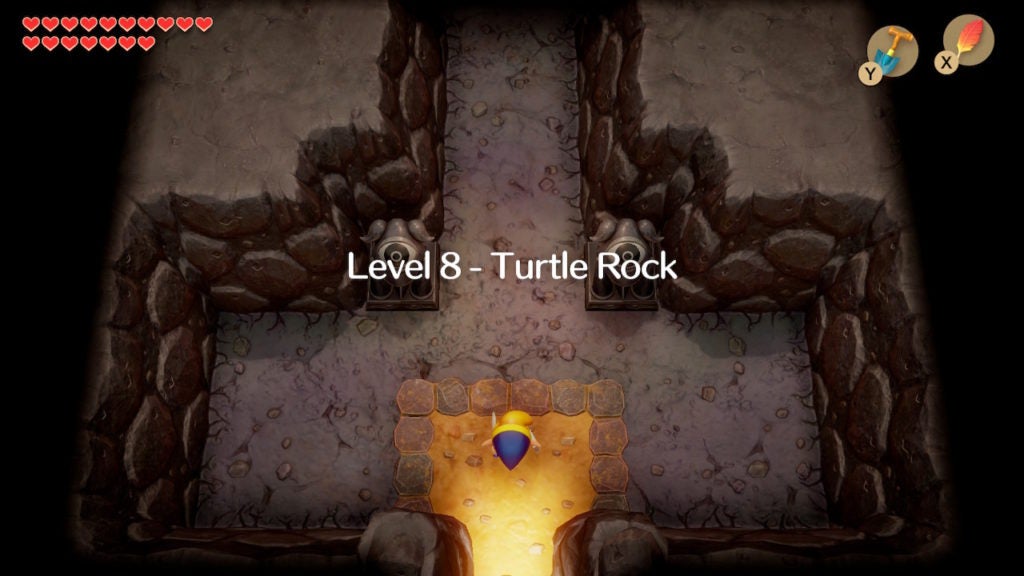
Use any Warp Point to teleport to the one nearest Level 8 – Turtle Rock. From there, go west and enter the dungeon. Now that the fearsome stone dragon is gone, you can make your way through the entrance with few issues.
Table Of Contents
Find the Compass
Inside Level 8 – Turtle Rock, you’ll find that you can only go north. However, after you do, your exploration options will increase. The first thing you’ll want to do in this dungeon is to find the Compass.
North of the entrance, you’ll encounter a Vire in a room with three exits—albeit two of them immediately lock. Vires are red flying demons that will shoot fireballs at you as well as deliver divebomb attacks.
To defeat Vires, you’ll need to hit them three times with either your Sword, Hookshot, or Boomerang. However, be wary, as after they are defeated, a Vire will split into two large Keese. Later on, after you get the Magic Rod, you’ll be able to take down Vires without them splitting into Keese. However, for now, your best bet is the Boomerang.
After you defeat the Vire, the doors to the east and west will unlock. Go west and you’ll find yourself in a room with a Beamos and three worm-like foes. There is a door to the north that will lock itself. You’ll need to take out all the enemies in this room to open it.
First, you should defeat the Beamos by standing east of it and holding up your Mirror Shield while facing it. This will cause the Beamos to shoot a beam of light that will get reflected back to them. This self-hit will cause the Beamos to deactivate.
As for the worms, you can clear them out easily enough with your Sword. When all foes have been felled, the door to the north will unlock. Go north to progress towards the Compass, however, be ready for a fight! As, beyond, you’ll find the first of this dungeon’s many mini-bosses.
Beat the Hynox Mini-Boss
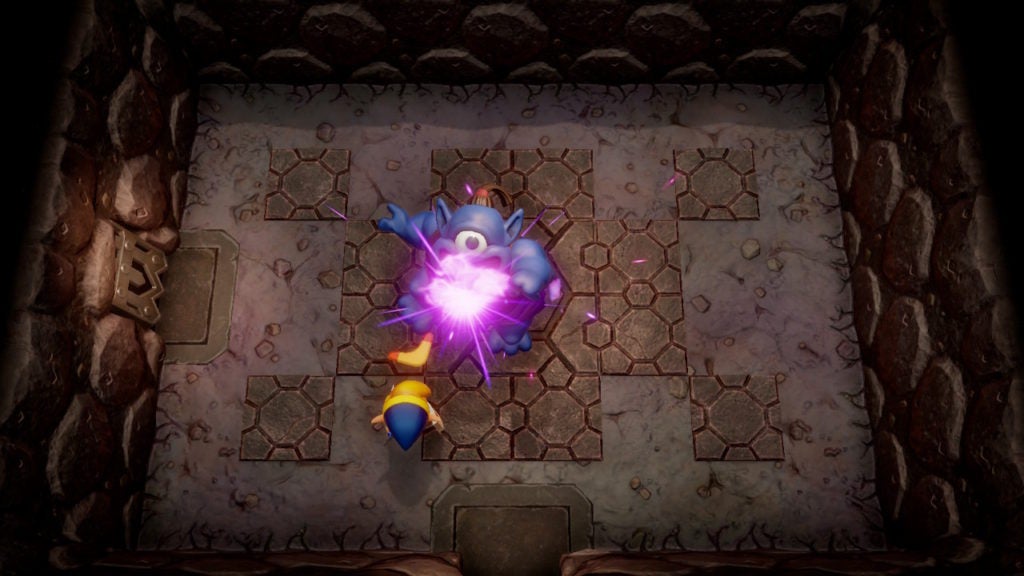
At this point in the game, fighting a Hynox in a room without holes in the floor will be rather easy. This is especially true if you have the Boomerang, as you can spam it to take down the blue Hynox very quickly.
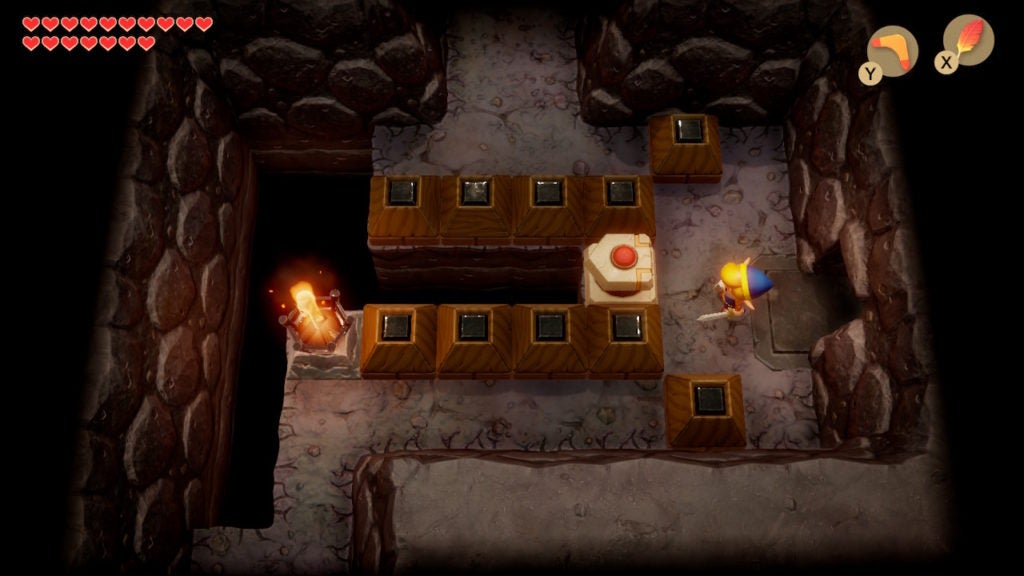
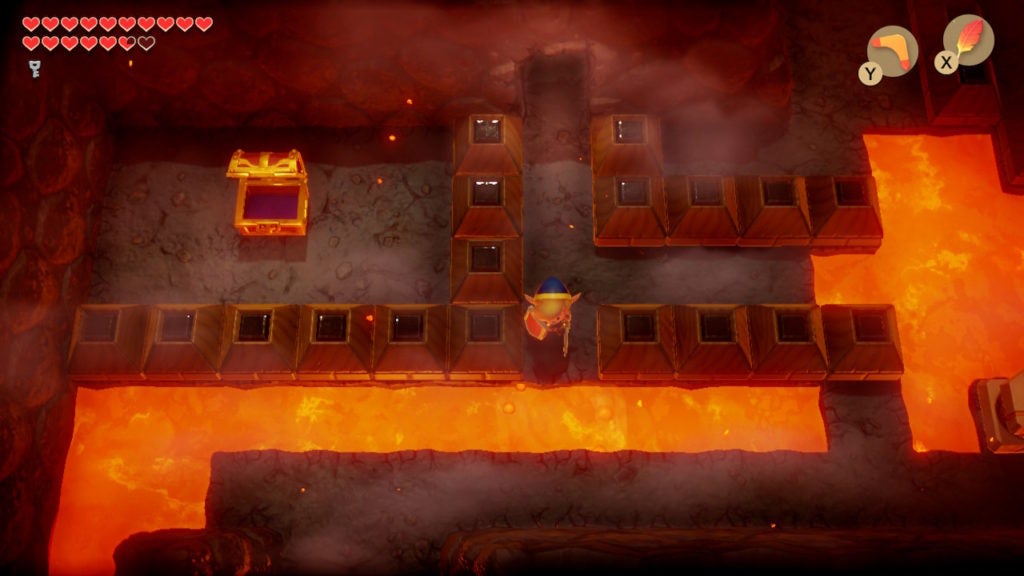
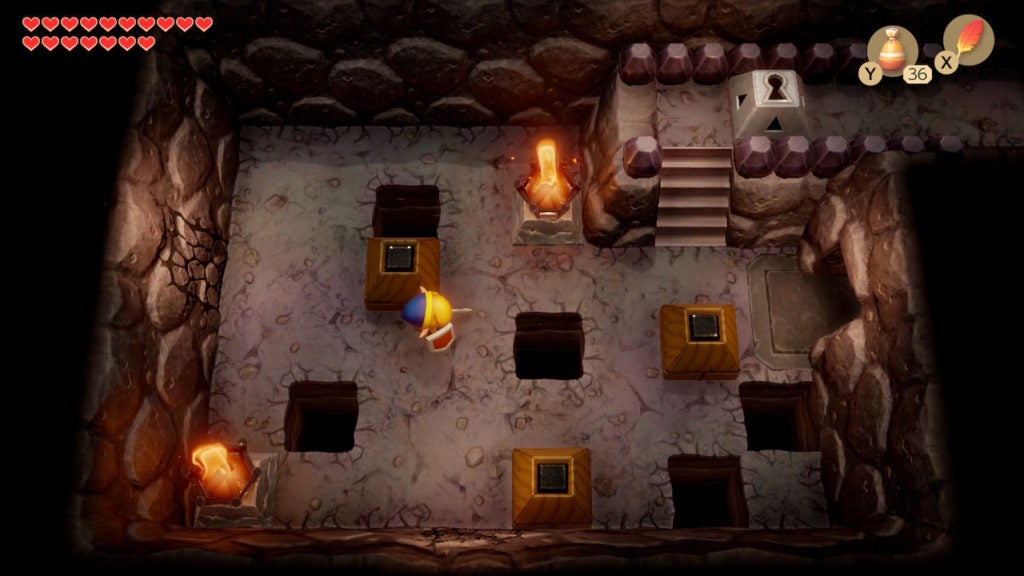
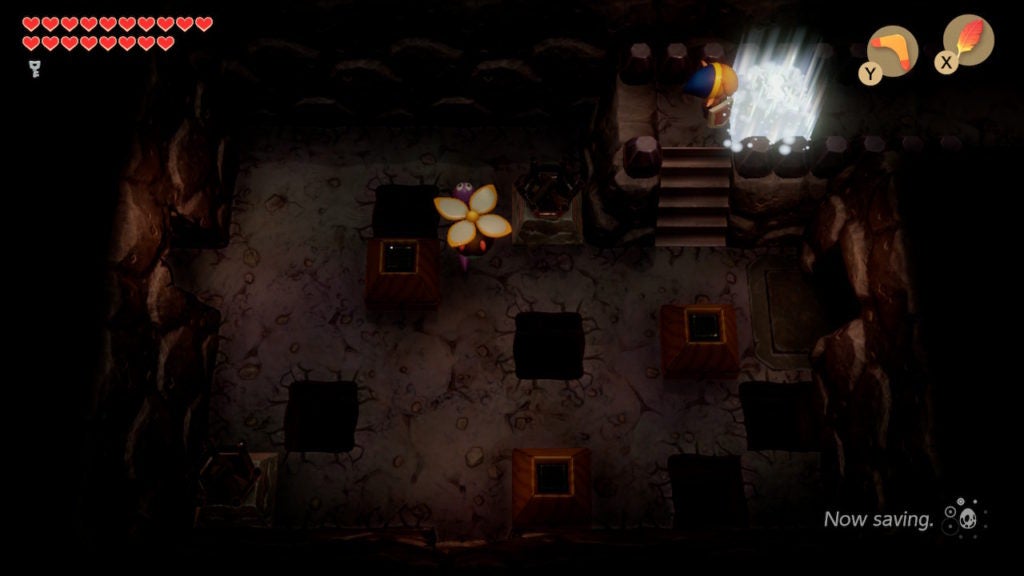
After your victory, the door to the west will open. Go through it and you’ll find a room with a new object. This object will create floor tiles where it passes over, so you can use it to get across this room.
When you walk up to the device and touch it, it will travel in the direction you are pointing with your left analog stick. You can send this machine along a path that can fill up all the floor holes in this room.
This will let you traverse the area easier and will also cause a chest with 20 Rupees to spawn in the northeast corner of this room if you fill up every hole. From this room, you’ll want to go south in search of the Compass.
Open the Chest with 50 Rupees

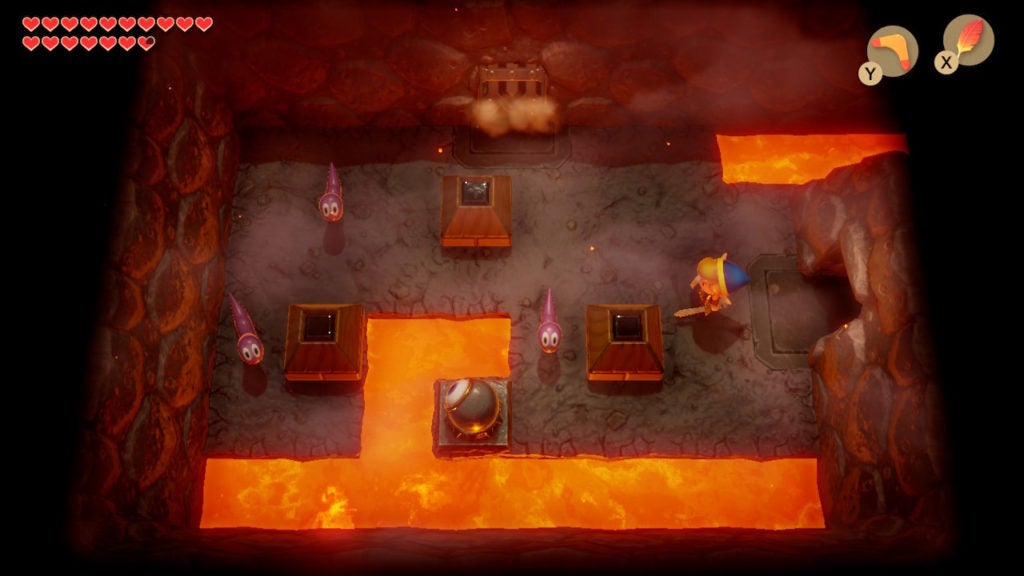
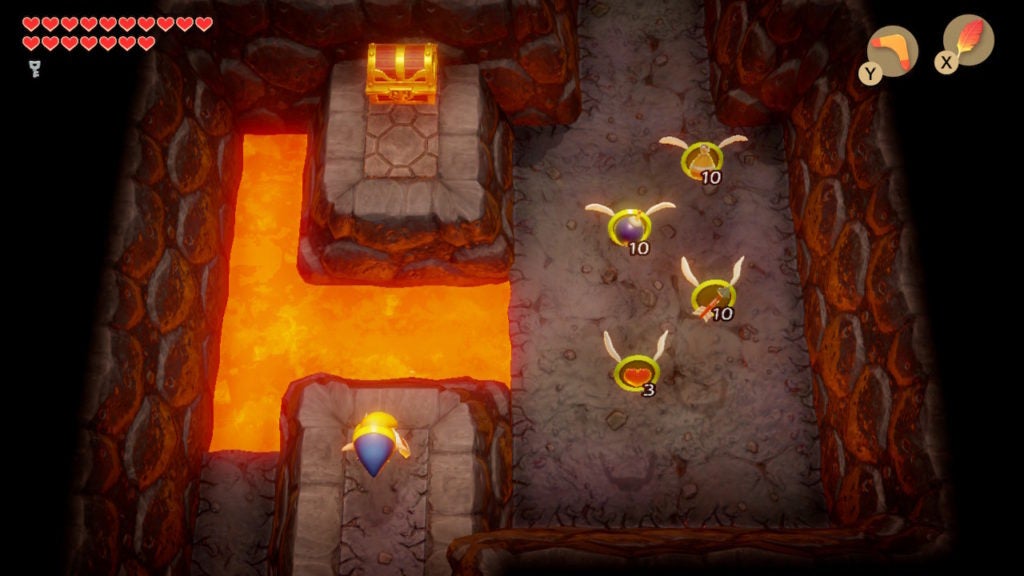
Traveling south will bring you into a room with many floor holes, a couple of Sparks, and a chest. Use the Roc’s Feather to leap to the chest and open it to get 50 Rupees. Afterward, you’ll want to go west into the next room. The area beyond will house another mini-boss that you’ve beaten in the past.
Beat the Spike Roller Mini-Boss
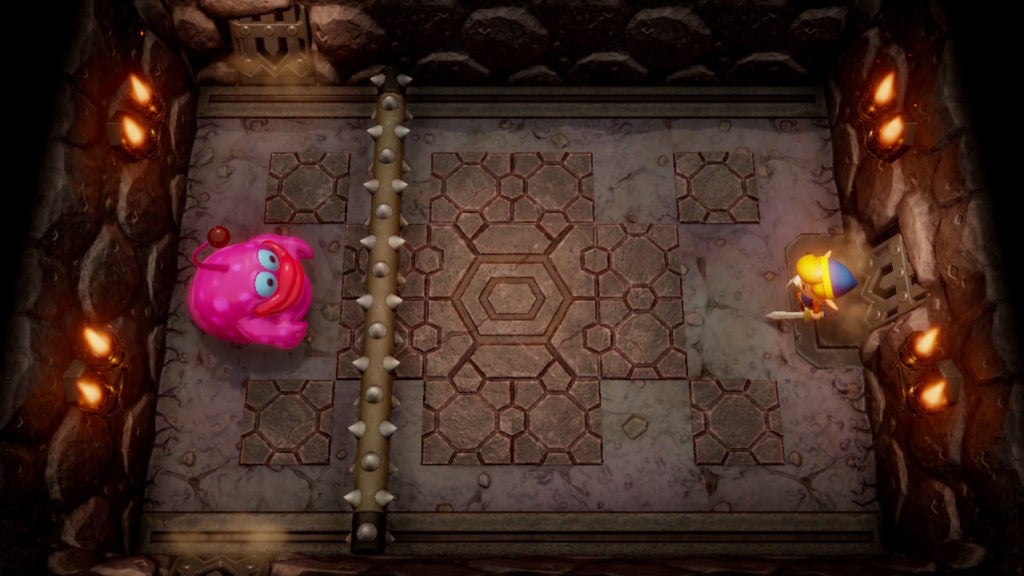
Much like the blue Hynox you recently defeated, Spike Roller shouldn’t be much of a challenge. As long as you time your jumps to leap over the rolling spike log, you’ll be fine. Use any weapon you see fit to dispatch the pink blob opposing you.
Afterward, both the north and south doors will unlock. Go south to proceed towards the Compass. If you need some health, be sure to pick up the Fairy that Spike Roller drops.
Open the Compass Chest

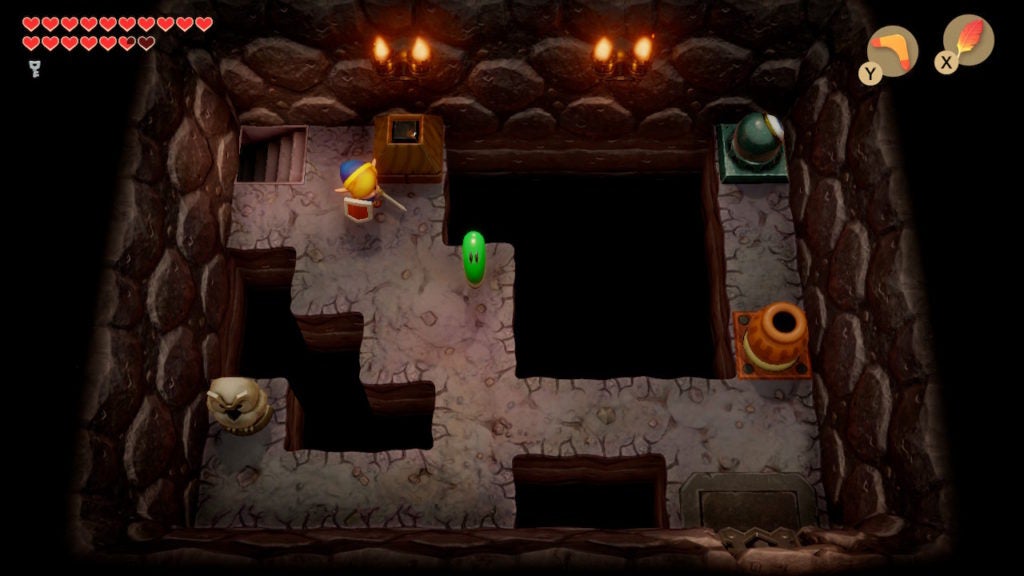
Here, you’ll find a room with a central chest and some foes guarding it. The Vacuum Mouth in the southeast corner is the most annoying foe, however, there are no floor holes nearby that you can fall into.
As such, you should be able to destroy the purple foe before clearing out the Green Zols nearby. When the coast is clear, loot the chest to get the Compass.
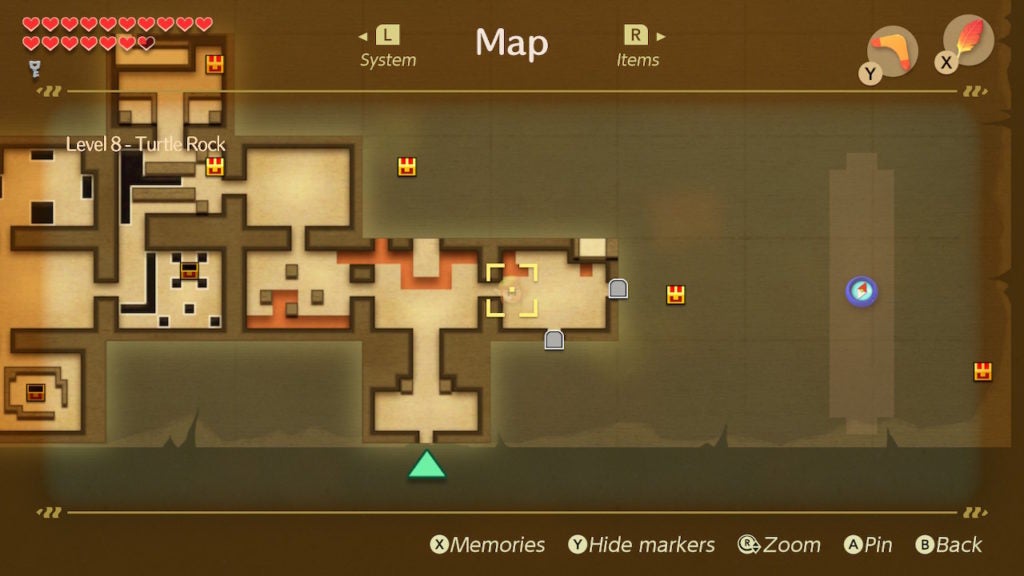
Check the Map

After you get the Compass, open your map to check out where the remaining chests and boss room are located. However, your next destination should be a room lacking a chest—yet holds loot.
Get the Small Key North of the Compass Chest Room
Go north into Spike Roller’s mini-boss room and then go north again to find a room occupied by a single Vire. You’ll need to defeat this demonic enemy to get your first Small Key in Level 8 – Turtle Rock.
Find The Stone Beak
The next of the dungeon-specific items that you should get is the Stone Beak. It’s located on the east side of Level 8 – Turtle Rock. As such, you should backtrack to the entrance of the dungeon and then start going east from there.
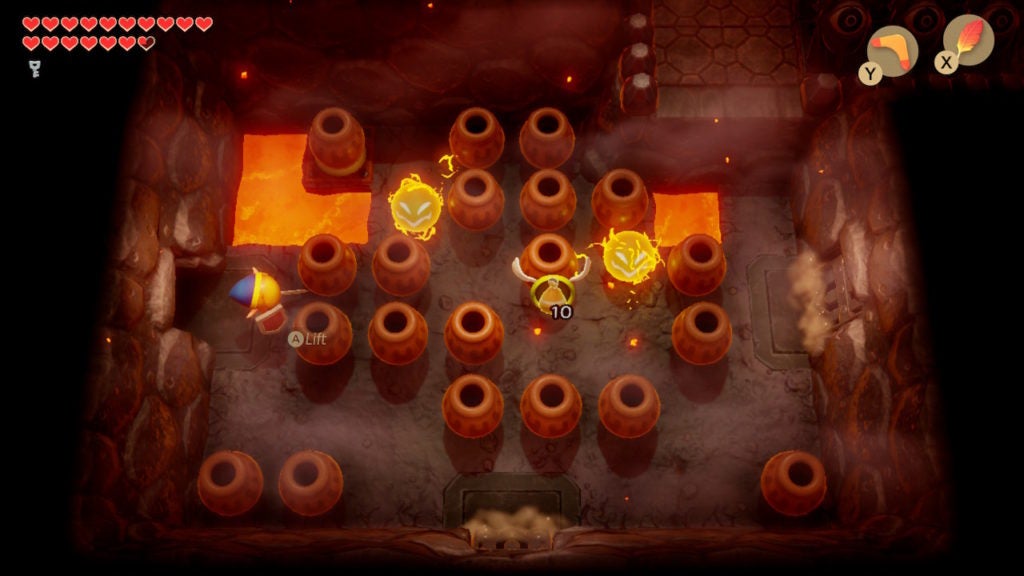
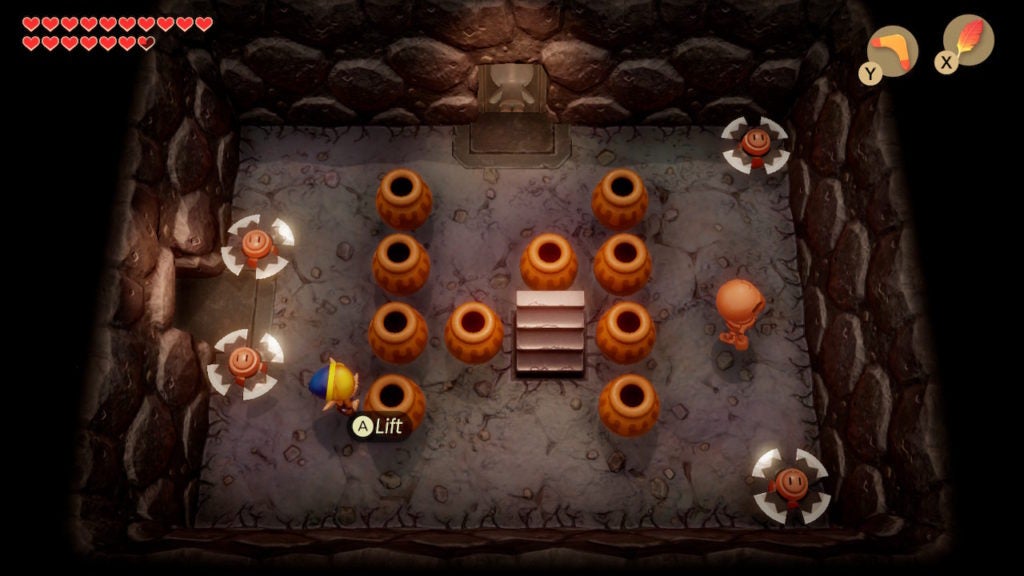
In the first eastern room, you’ll find it full of pots and a couple of Spark enemies. The Sparks here can be particularly annoying, so it would be best to destroy them with your Boomerang before solving this room’s puzzle.
To open the eastern and southern locked doors, you’ll need to lift up a pot in the northwest of the room. Below it will be a button that you’ll need to step on to unlock the doors. The room to the east will only hold a chest of 20 Rupees. Collect it and return to the button room. When you’ve done so, head south and into the room beyond.
Locate and Traverse the Underground Tunnel
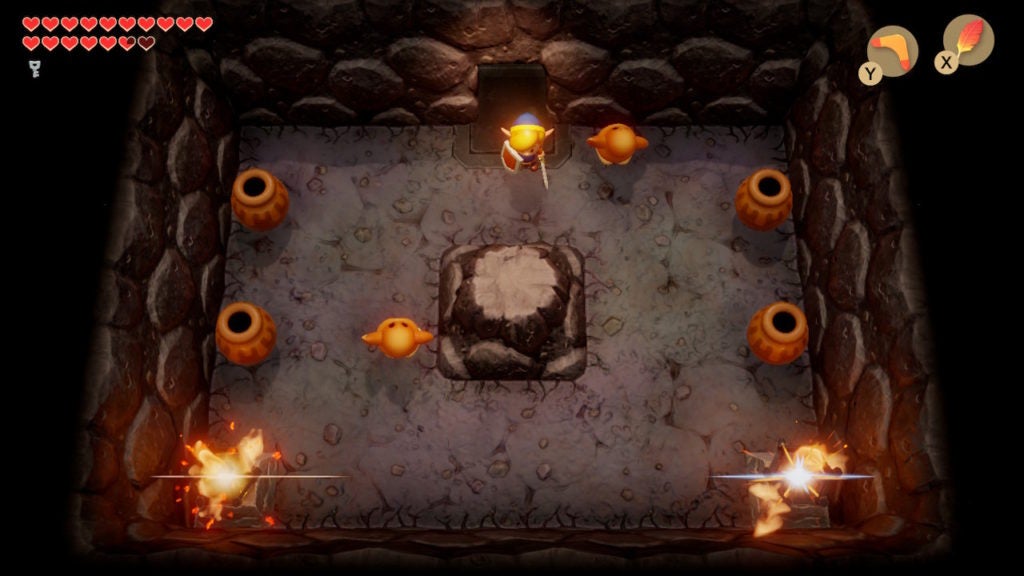
Here, you’ll encounter a pair of Arm-Mimics and some torches that will shoot energy attacks at you. You’ll want to take out the Arm-Mimics quickly, as doing so will cause the torches to stop firing. Furthermore, killing the Arm-Mimics will reveal a staircase in the northeast corner of the room. When you descend it, you’ll be in a side-view underground tunnel.
Go east while using the Roc’s Feather to hop across gaps. As long as you avoid the Spark and the spike traps, there’s nothing too dangerous in this tunnel. Ascend the ladder on the far east of this tunnel to get out of it.
When you exit the tunnel, you’ll be in a room with big floor holes and a couple of enemies. Use your Mirror Shield to take out the Beamos and your Sword to slay the Green Zols. Afterward, you’ll be free to walk across the room in safety.
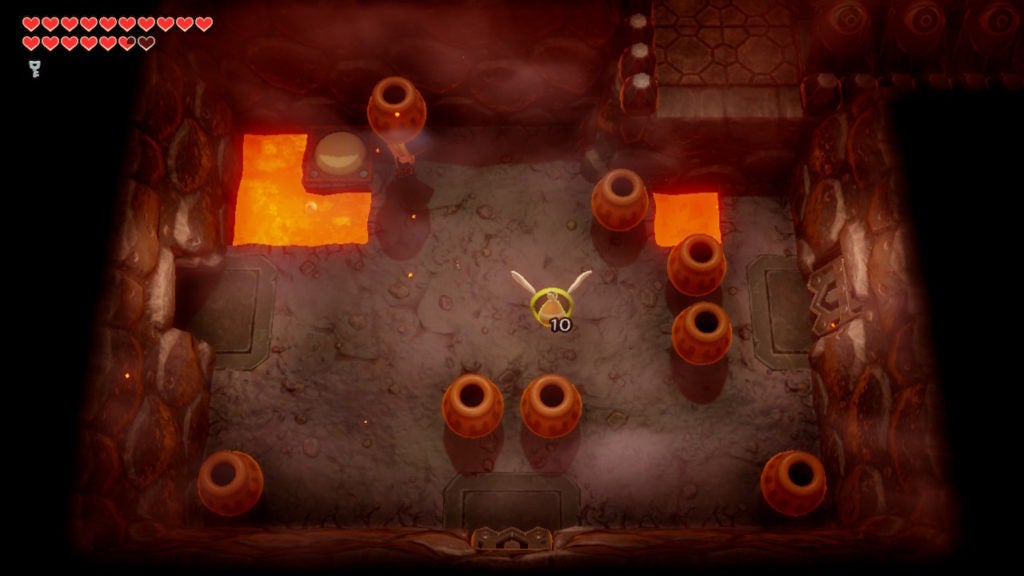
To open the locked door to the south, you’ll need to lift up the sole pot in the room and then step on the button beneath it. However, as you proceed, be ready for another mini-boss battle with a familiar foe.
Defeat the Rover Mini-Boss
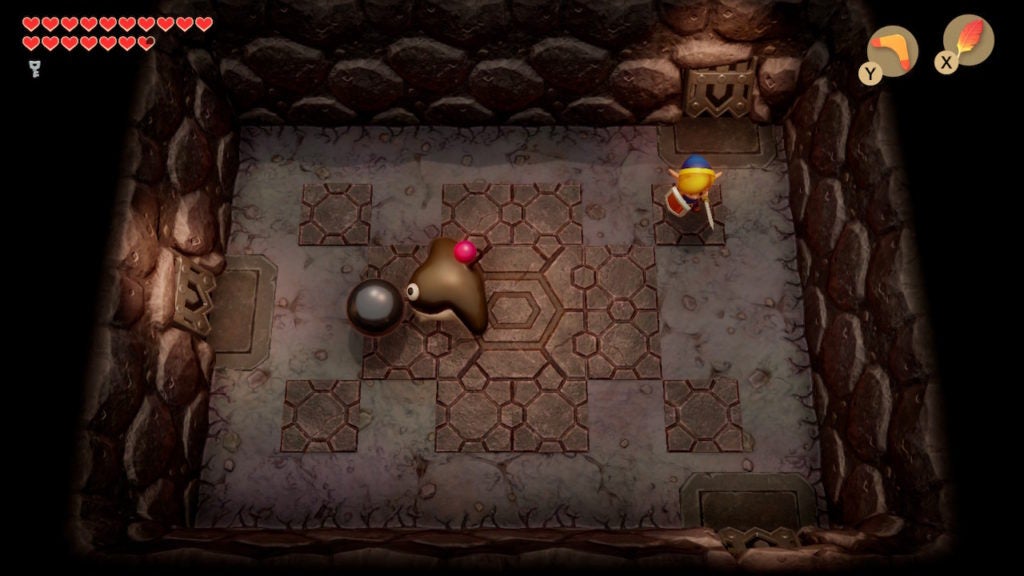
You’ll now have to play catch with Rover, much like you did in a past dungeon. The trick here is to dodge the heavy ball that the mini-boss will throw at you. After each toss, you can pick up the ball yourself and hurl it at Rover to hurt them. After you sufficiently beat Rover at their own game, go south through the now unlocked door.
Open the Stone Beak Chest
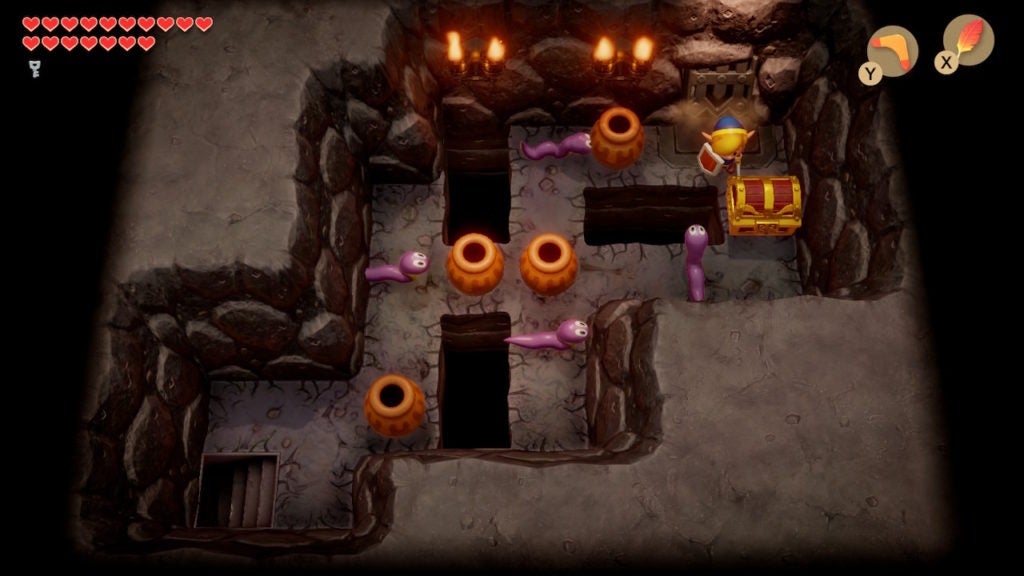
To the south, you’ll find an irregular room full of purple worms and a chest. Take out the enemies in your preferred manner and then get to the front of the chest. Opening it will give you the Stone Beak. You’ll now be able to get hints from any Owl Statues that you find.
At this point, you can travel back to the room north of Rover’s mini-boss room to speak with an Owl Statue there. However, if you’ve already figured out the floor-maker machine mechanic, this owl’s advice won’t be very helpful.
Find the Dungeon Map

After you get the Stone Beak, and possibly a hint, head through the staircase in the southwest of the room where you looted the Stone Beak. This will bring you to another side-view tunnel.
Travel Through a Lava-Filled Tunnel
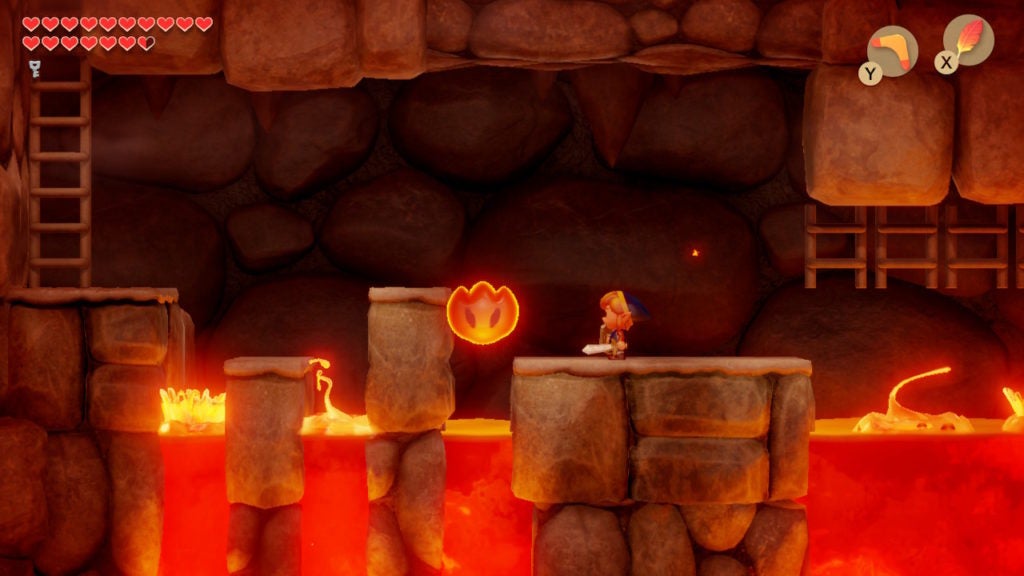
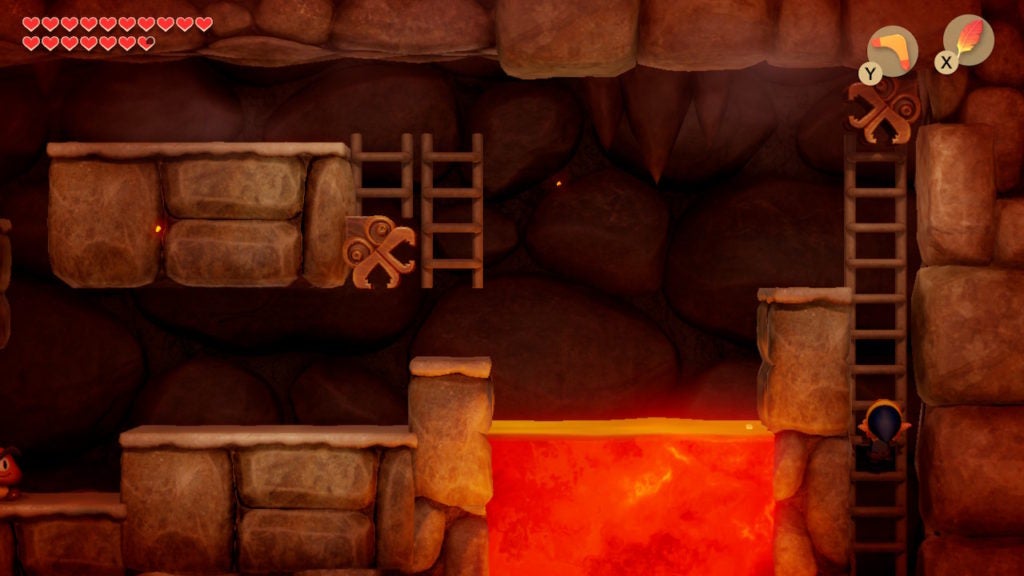
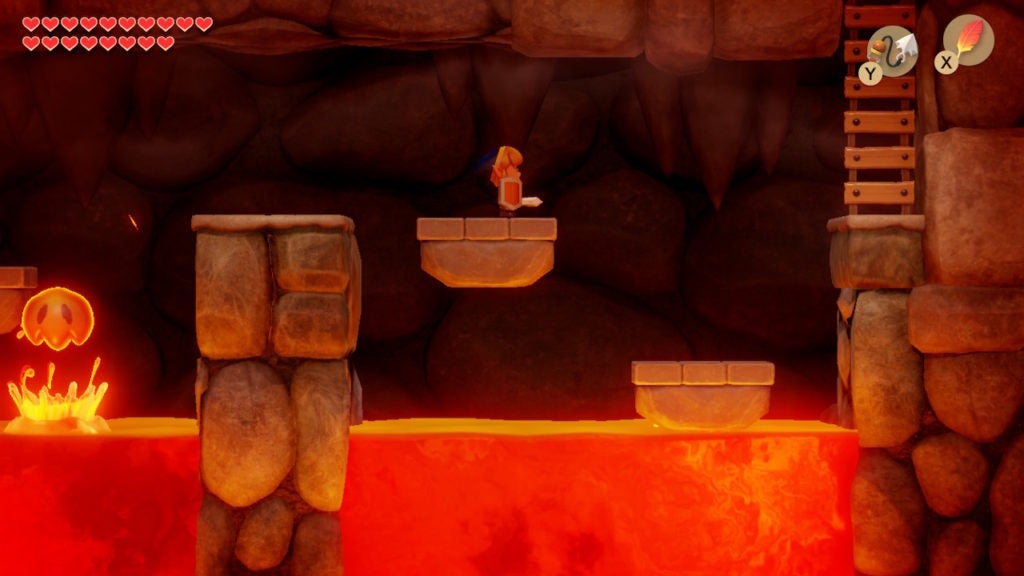
Below, you’ll have to head west and overtop pools of lava. What’s more, you’ll have to avoid Podoboos that will occasionally leap out of the burning pools. Thankfully, they’re easy to predict. Jump your way across to the ladder on the far west and climb it.
Find a Way to the Dungeon Map Chest
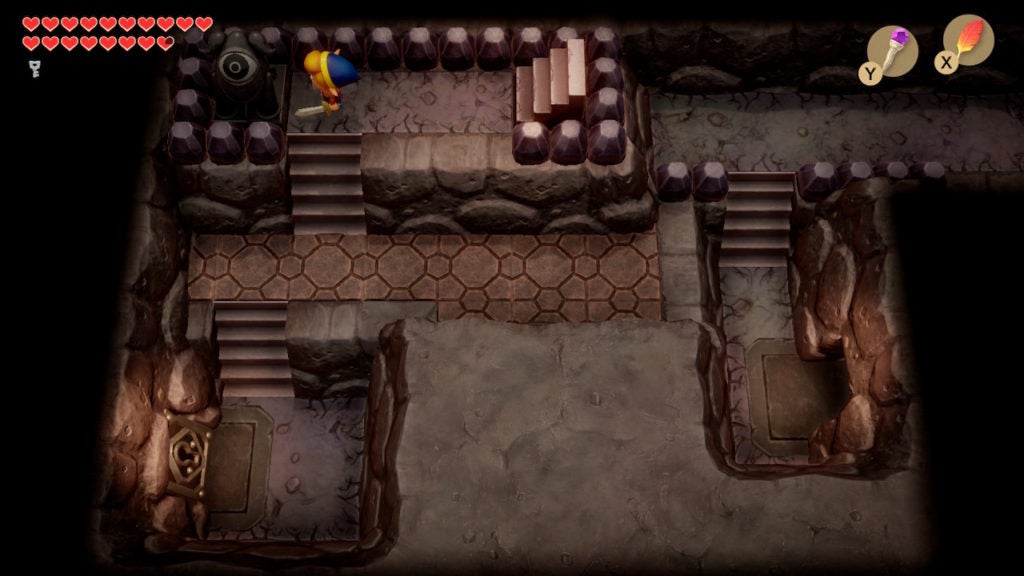
When you emerge, you’ll find yourself in a thin southern corridor of a large room. To the north, you’ll see some Peahats, however, don’t worry about them just yet. You’ll want to scan the southern wall for cracks. Use a Bomb to blow up a crack in the wall a short way east of the staircase and you’ll reveal a path that leads south.
After you pass through the new path, you’ll find a chest to your west. The way will be barred by some blocks, however, you can push them aside.
There are three blocks making a column that impedes your progress. You’ll need to push the northern and southern blocks to the west. Afterward, you’ll need to push the middle one north (or south). This will clear the way to the chest, within which lies the Dungeon Map.
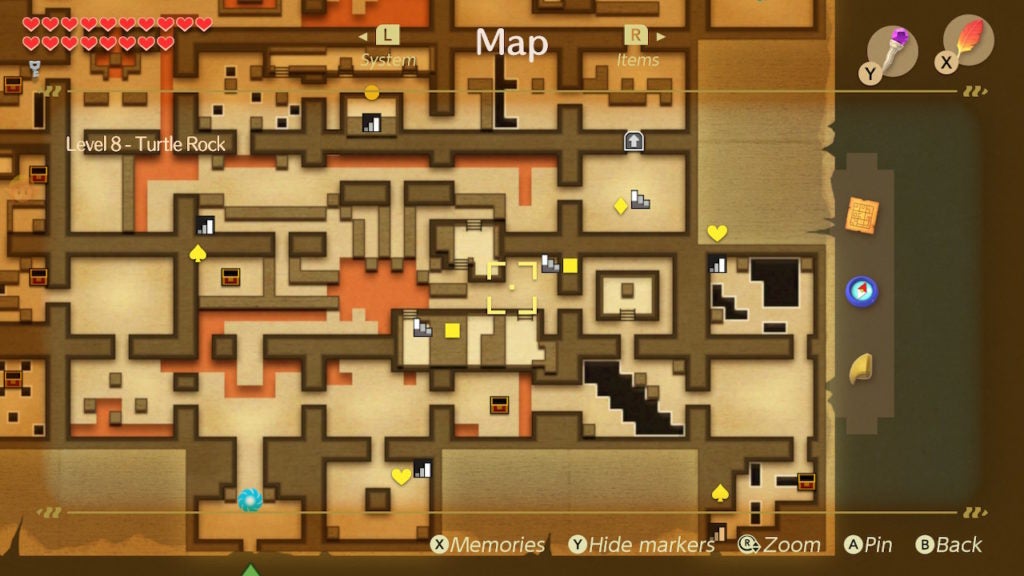
Check the Map Once More

When you open the map to survey the dungeon, you’ll notice that Level 8 – Turtle Rock looks like a turtle! Furthermore, you’ll also notice that you’ve only explored about half of this dungeon’s rooms so far.
After checking out the layout of the dungeon, you’ll want to backtrack through the lava tunnel and go to Rover’s mini-boss room.
Get the Second Small Key From the Room West of Rover’s Mini-Boss Room
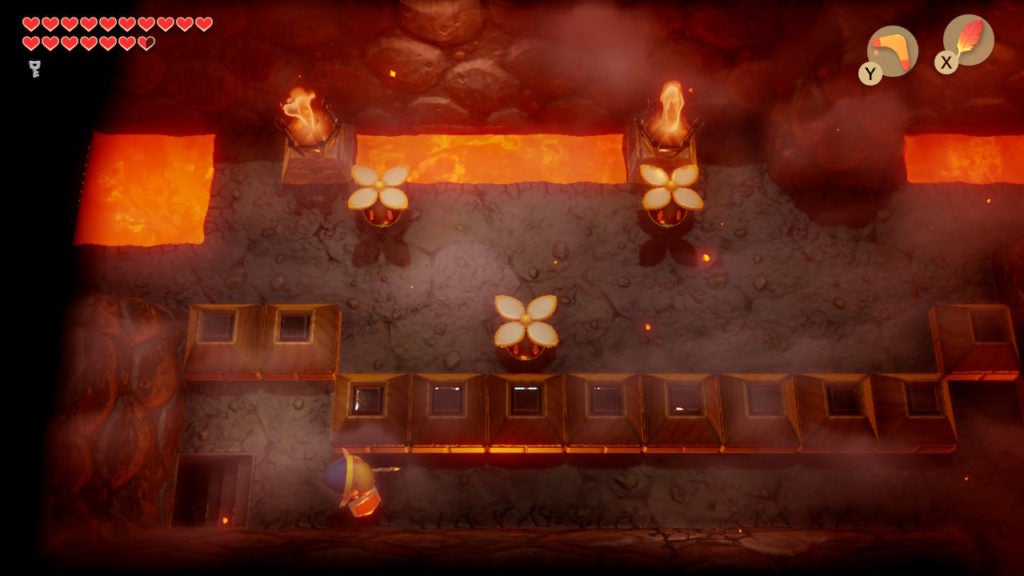
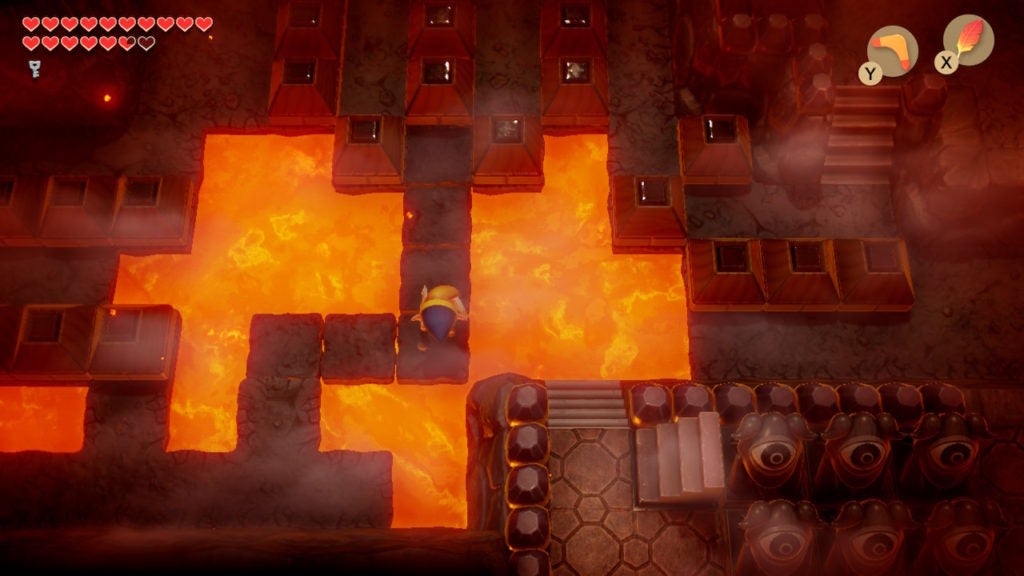
When you go west of Rover’s mini-boss room, you’ll find a room with a large hole in the middle and a floor-maker machine. To solve the puzzle in this room, and get the next Small Key, you’ll need to fill the gap entirely with floor tiles.
To do so, activate the machine and make it go northwest in a zigzag. When you reach the end of the pit in that direction, turn southeast and zigzag that way until you reach the final few empty spaces to the east. You’ll have to turn east, north, then east again, then south, and finally east one last time to finish the puzzle.
Afterward, a Small Key will land on the west side of the room, which you can now cross easily. Now that you have two Small Keys, you can make it to the northern half of the dungeon. However, before you head that way, you should find the dungeon’s Switch crystal.
Find the Switch Room

There’s a cracked wall to the north in the room where you just got your second Small Key. Blow this wall apart with a Bomb and head through the new passage. Here, you’ll find a crystal Switch.
Hit the Switch to make it orange, as you’ll want all the Blue Switch Blocks in the dungeon to be lowered. This won’t come into play until you get further into the dungeon. However, doing this now will save you from having to backtrack and find the Switch room later.
Unlock the Locked Block and Go East Through the Locked Door
To get to the northern half of the dungeon, you’ll need to return to the area where you got the Dungeon Map. Directly south of the entrance that you opened with a Bomb, there will be a block that you can push into the lava. Moving it out of the way will let you leap across and travel east.
Just east of your little jump, you’ll find a floor-maker machine. And, across the pool of lava, you’ll see a formation of blocks shaped like a “W”. Use the floor-maker to create a path to the spot in the middle of the “W” formation.
This will let you walk up to this spot. From the very north of your new path, push the eastern block further east and into the lava. This will open the way to a corridor that leads north.
Here, you’ll find a locked block. Open it with one of your two Small Keys. Afterward, head east.
As you progress, you’ll see a locked door to the east. Use your remaining Small Key to open it. Don’t worry, you’ll be able to pick up another Small Key soon. Proceed east to do so—but be careful!
Defeat the Gibdos to Get the Third Small Key
In this eastern room, you’ll need to immediately jump over a pair of Blade Traps. There is also a Red Stalfos that you’ll need to be wary of. However, you want to go north through the one-way door. As such, avoid all the enemies and head that way.
Get a Useful Hint From an Owl Statue
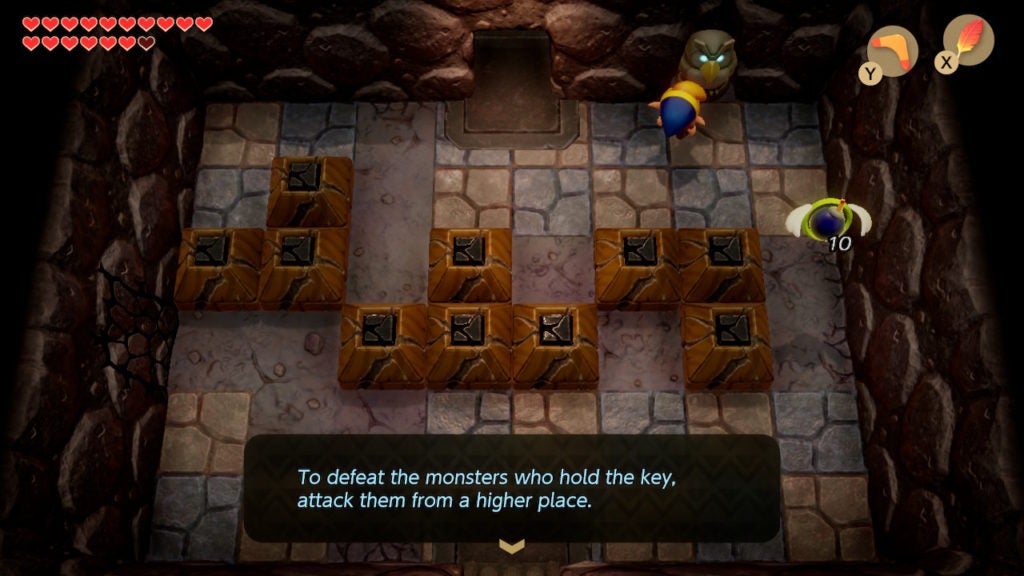
Beyond, you’ll find a room full of cracked blocks and an Owl Statue. If you interact with the stone avian, it will tell you that you need to defeat some monsters that hold a key from above. This is advice on how to get the Small Key that some Dodongo Snakes drop later on in the dungeon.
Additionally, you’ll find a cracked wall on the west of this room. Blow it apart with a Bomb, but don’t head through it yet. You’ll first want to go north to get a Small Key.
The Location of the Gibdos
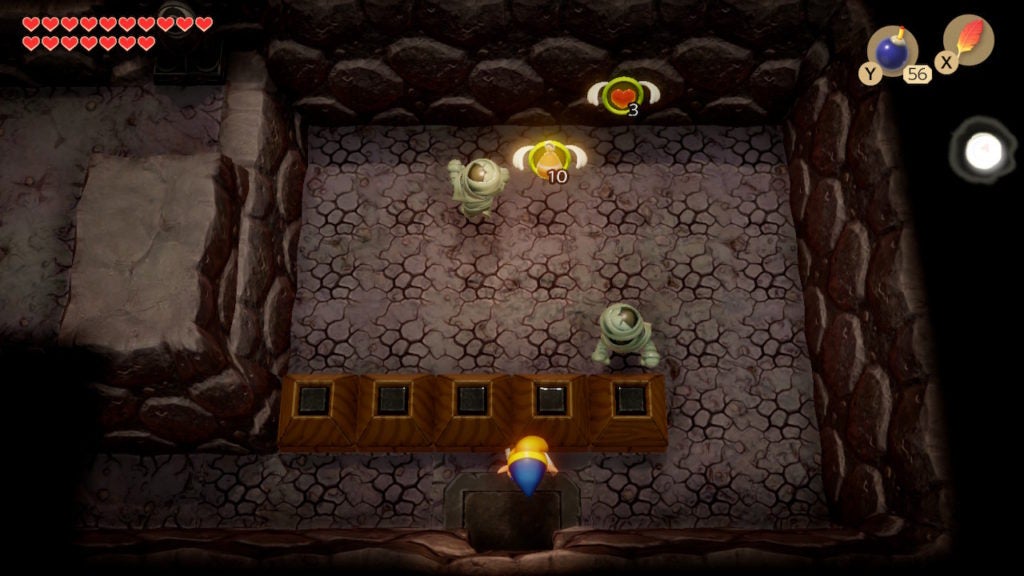
North of the room with the Owl Statue, you’ll find a pair of mummy-like Gibdos. You’ll need to take these enemies out for the dungeon’s third Small Key to drop by the doorway. Thankfully, Gibdos are rather weak and you can easily take them out with your Sword.
Get the Secret Medicine (Optional)
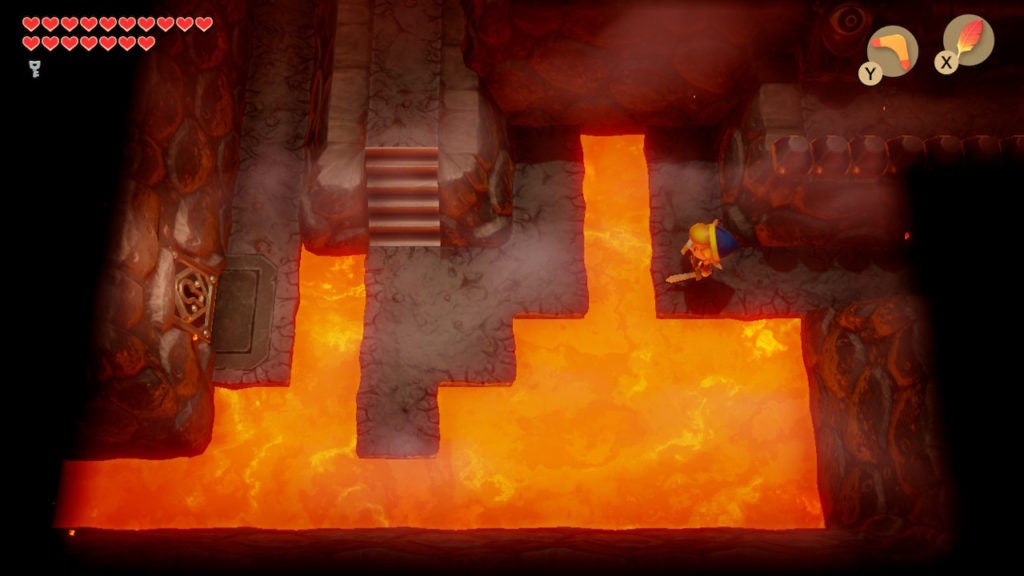
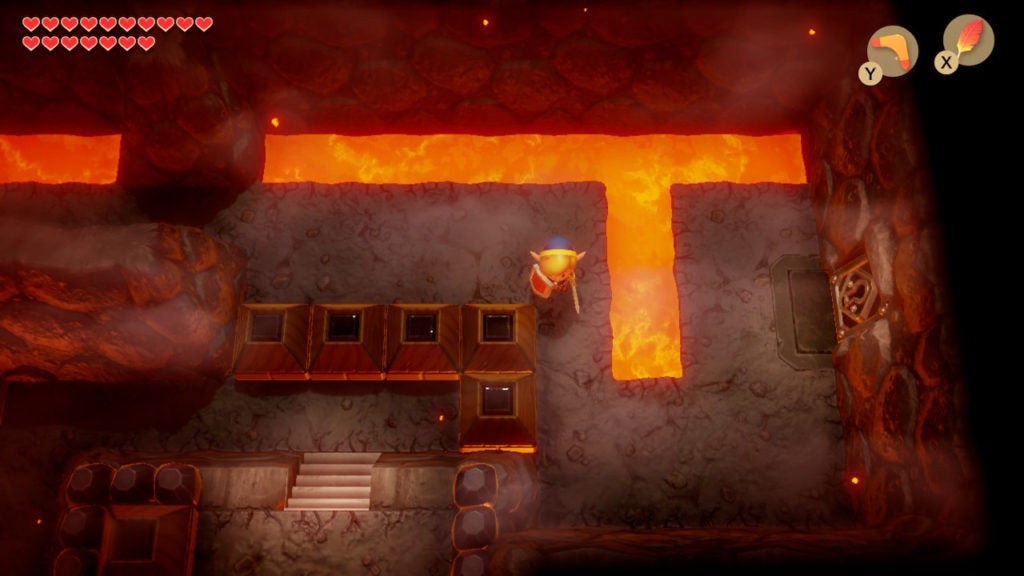
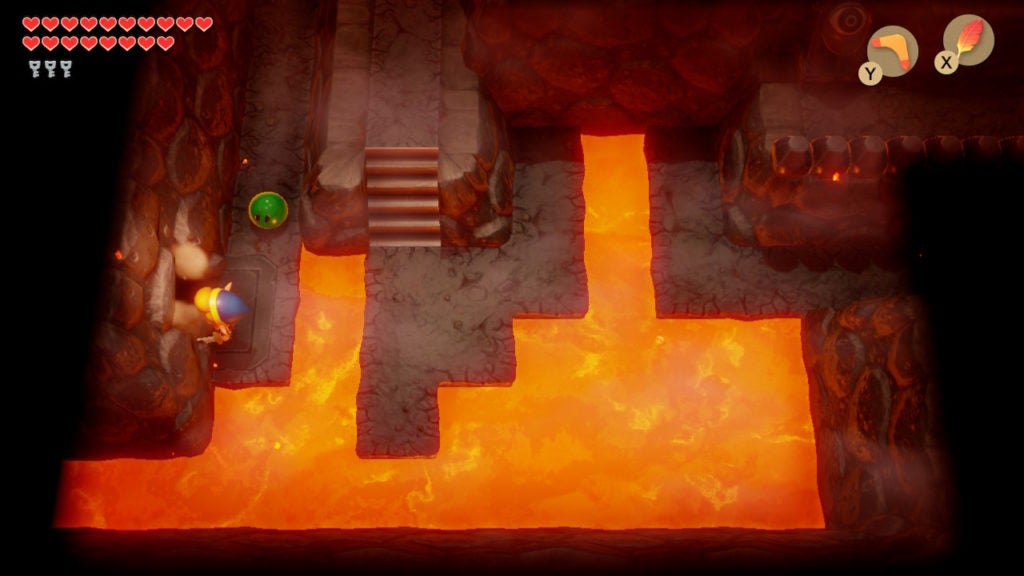
If you already have some Secret Medicine, head back south into the previous room. However, if you don’t have any Secret Medicine and want some, go west. Don’t worry about the Dodongo Snakes—just rush past them for now. When you enter the next room, you’ll find lots of lava.
To get to the chest holding the Secret Medicine in Level 8 – Turtle Rock, jump west across the thin stream of lava. After you do, ascend the stairs and go north to the next room.
At this point, you’ll be on a ledge across from another holding a chest. Use your Hookshot to latch onto the chest and pull yourself across. Open the chest to loot some Secret Medicine.
Afterward, hop down to the east and then go north. There, you’ll find a staircase that will lead you into a tunnel with lava. You’ll need to traverse this area with your Hookshot to reach the ladder on the east side. From there, descend the ladder to re-enter the room with the Blade Traps along all of the walls.
Go north, through the one-way door, and then go west through the wall you recently blew up. When you do, you’ll be in a dark room.
Unlock the Locked Block in the Dark Room With the Sparks
You’ll need to get to the west side of the room by jumping over the chasm that is splitting it. If you’re having a hard time seeing where the floor begins and ends, light the eastern torch in this room with some Magic Powder.
Avoid the two Sparks in this chamber and approach the locked block in the southwest. With the Small Key that you got from defeating the Gibdos, open the locked block and go west into the next room.
Keep Traveling West Until You Reach a Room With an Owl Statue
You’ll now be in another dark room with another locked block. This must be opened eventually, but, for now, keep heading west. You’ll need to take out the purple worms in this room to unlock the door on the west side. If you’re having issues spotting the worms, light up one or both of this chamber’s unlit torches with Magic Powder.
The next room you walk into will be dark as well. There is a cracked wall that you can blow up on the west side, however, to spot it better, you may need to light the torches in this room. Furthermore, there is also a cracked wall in the south that you can also blow apart. Though, for now, keep going west.
Shoot the Statue in the Eye to Get the Fourth Small Key
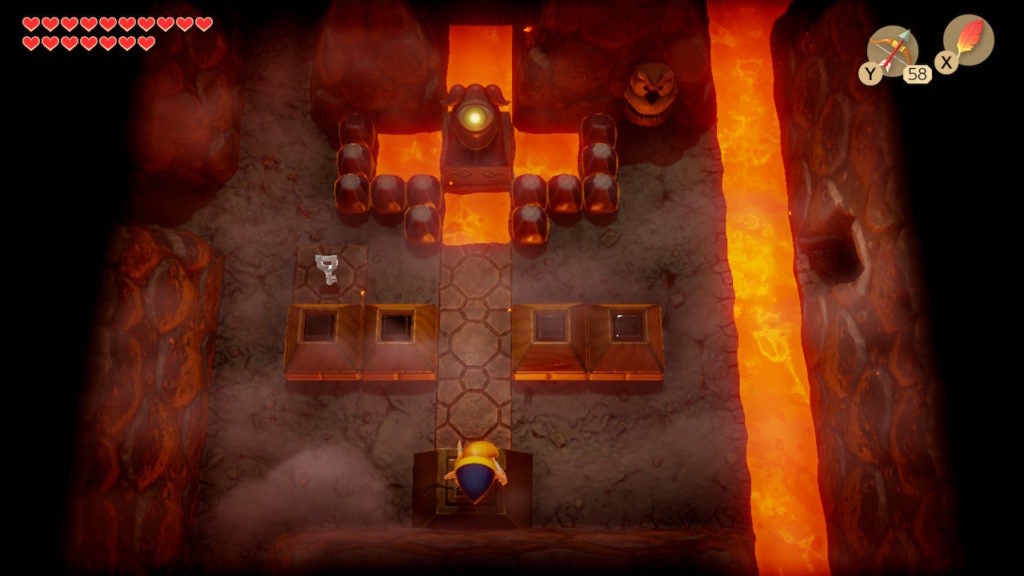
Beyond the broken wall, you’ll need to jump across a thin stream of lava to reach the rest of this room. Within, you’ll find an Owl Statue, an eye statue, and a pedestal at the south of the room.
Conveniently, the Owl Statue will give you a very direct hint: it will say to shoot the eye statue with an arrow. However, you will need to do so while standing on the pedestal to the south of the room.
When you do, it will cause the eye statue to light up and your fourth Small Key will drop into an ornate tile nearby. To continue your key hunt, go west into the next room.
Go West to Find the Fifth Small Key in a Chest
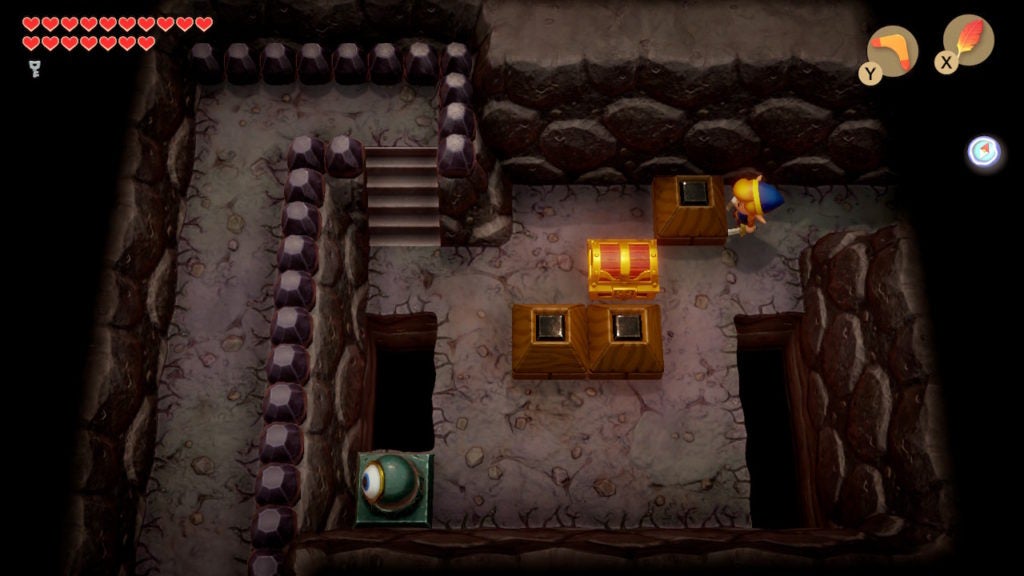
In this area, there is a chest partially obstructed by blocks, and a Beamos. Use your Mirror Shield to reflect the Beamos’ attack back at them to destroy this foe. Afterward, you’ll be free to move the blocks in front of the chest.
First, stand north of the block that’s southwest of the chest. Push that block southward. Them, stand west of the block that is directly south of the chest and push it east. This will clear your way to the chest, within which you’ll find your fifth Small Key.
Get to the Area Overlooking the Dodongo Snakes
At this point, you’ll need to take a detour out of the dungeon to get into a different area of Level 8 – Turtle Rock. This will let you take out the Dodongo Snakes from an upper area where the chest spawns when they are defeated. As such, you’ll be able to loot the chest.
You’ll need to go back to the room with the eye statue that you shot and go north. Here, you’ll encounter a Vire and some purple worms. Defeat them with your preferred method and then head through the doorway to the west that unlocks.
You’ll now be in the eastern corridor of a partitioned room. Don’t worry about the west side for now. Simply ascend the stairs nearby and then head east out of this room. At this point, you’ll be in the room where you just defeated the Vire and worms.
Loot 50 Rupees From a Chest
From this ledge, you can use your Hookshot to pull yourself over to the chest in the northeast corner of the room. Open this chest to loot 50 Rupees. Afterward, hop down towards the center of this room and then use the staircase in the north to temporarily exit the dungeon.
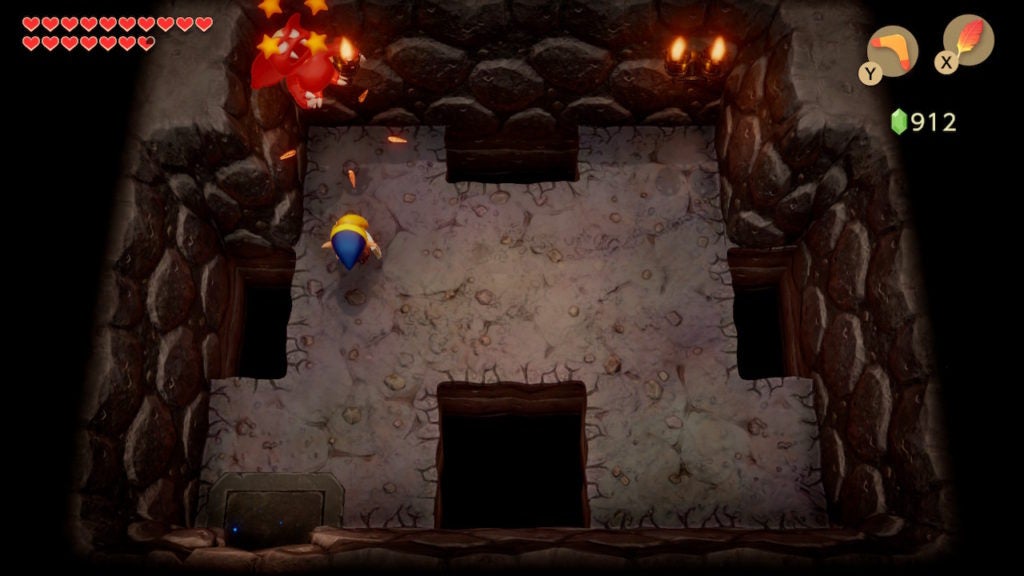
Find a Heart Piece Above the Dungeon
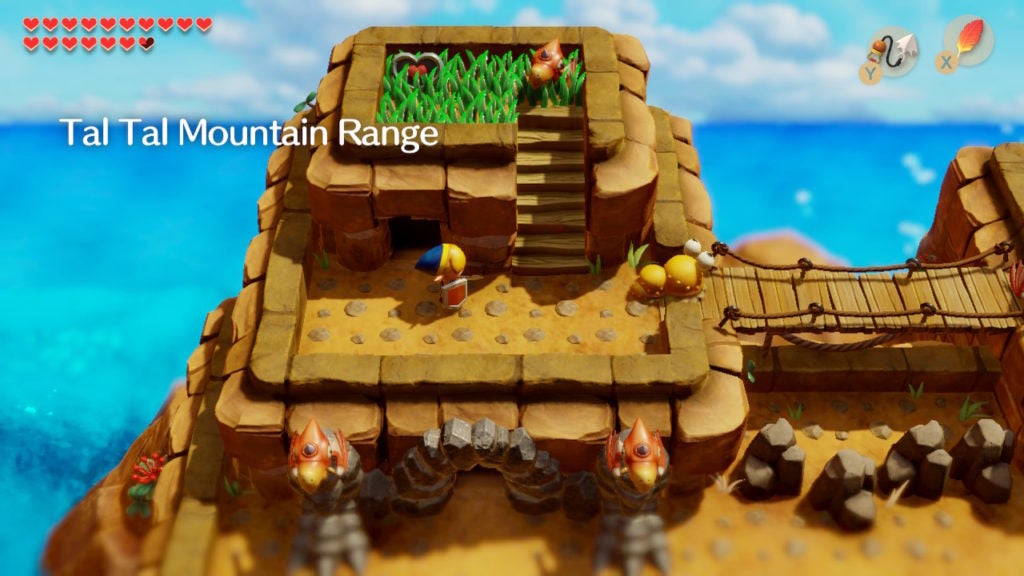
This will take you above the dungeon. There will be some minor enemies here, such as some Mini-Moldorms and a few Dactos. More importantly, there is a Heart Piece in the grass just above the hole you exited from.
Activate the Warp Point Above the Dungeon
Afterward, head east across the wooden bridge and you’ll find a Warp Point. Stand on it to activate the Warp Point and then head through the entrance you find nearby to re-enter Level 8 – Turtle Rock.
Defeat the Dodongo Snakes to Get the Sixth Small Key
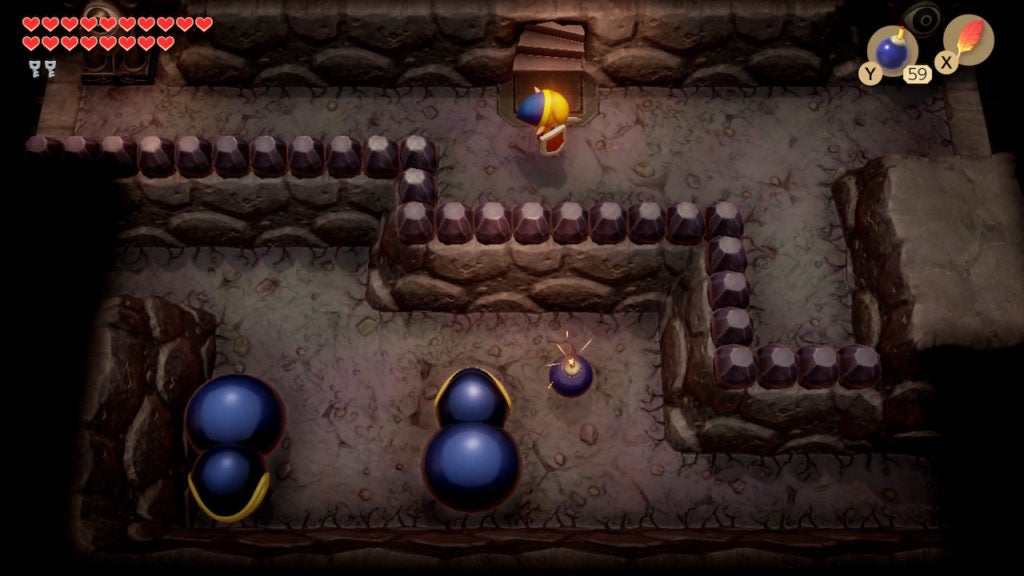
You’ll now be on the raised area overlooking the Dodongo Snakes. You’ll be completely safe here, so you can lob Bombs down at the fiends below at your leisure.
If you run out of Bombs, you can head north up the staircase and use the Warp Point to go back to Mabe Village and buy some more (and then warp back, of course). Just keep in mind that leaving the dungeon will cause the Dodongo Snakes to regain all of their health.
After you feed the Dodongo Snakes three Bombs each, they will explode and a chest will spawn a bit east of the staircase in the north. You’ll find the sixth Small Key of this dungeon within. You’re now ready to head to the center of Level 8 – Turtle Rock. It’s time to open the way that leads to the Magic Rod.
Unlock the Way to the Staircase in the Center of the Dungeon
From the raised area where you got the sixth Small Key, head west into the next room and drop down carefully. Make your way to the locked door on the west side and then open it with a key. Be sure to avoid touching the lava or the Green Zols that spawn here.
Backtrack to the Dark Rooms
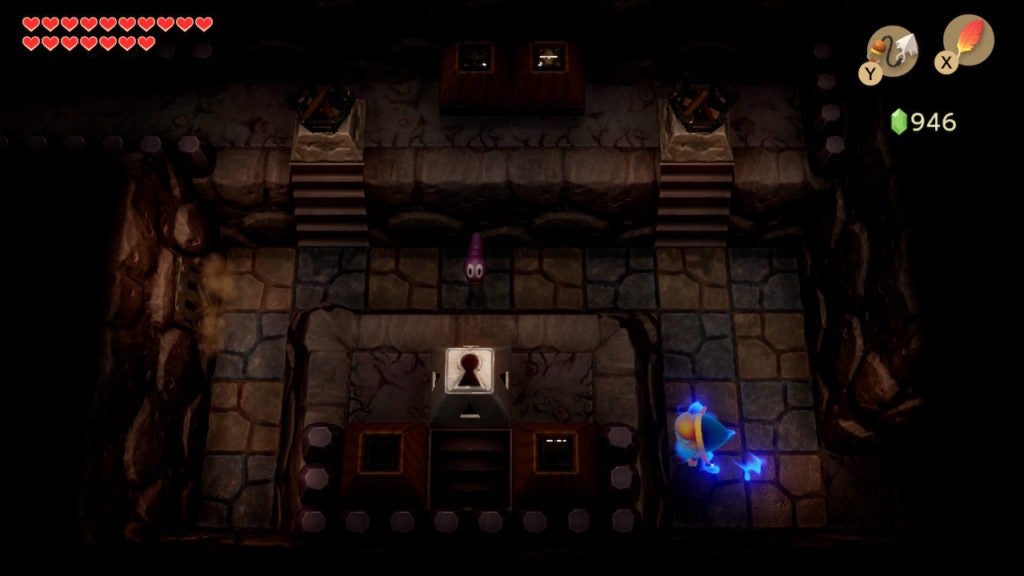
This will bring you into the room with the Nightmare door. You can’t reach it yet, so proceed west out of this room. When you get to the following area, go south so that you end up back in the room with the glowing eye statue that you shot with an arrow.
Carefully leap over the stream of lava on the east to get back into the corridor that leads to the dark room from where you found the eye statue room. Make your way to the northeast and unlock the locked block. This will let you go east with one remaining Small Key.
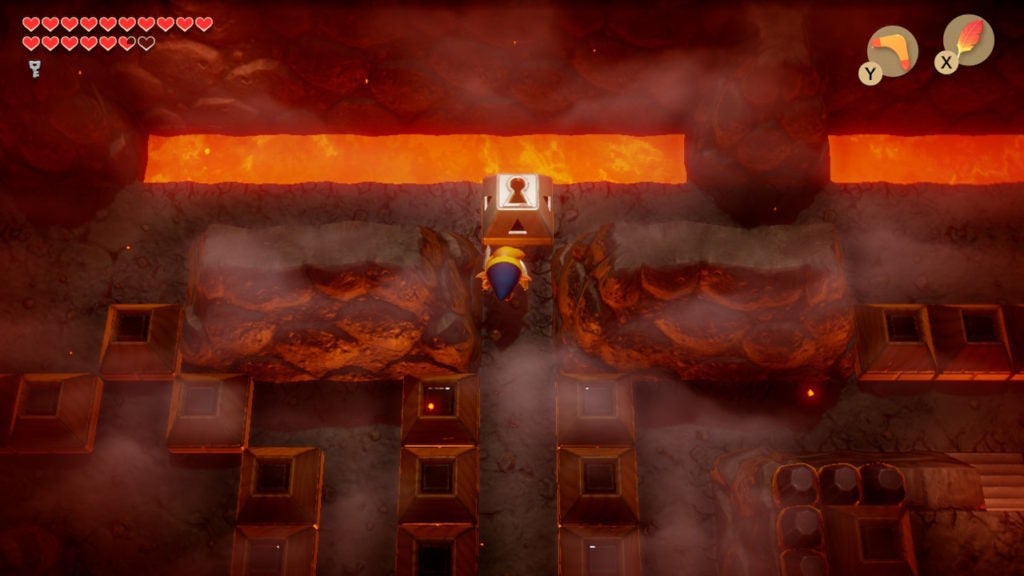
This is the central room with the staircase that you need to descend. From the middle of the northern part of the room, use your Hookshot to grapple towards the central island housing the locked block and staircase. Open the locked block and head down the staircase to enter a side-view tunnel with plenty of lava.
Besides the lava and some jumping Podoboos, this tunnel poses no threats to one equipped with the Roc’s Feather. Jump carefully to the ladder on the eastern side and climb it to get out of this burning cavern.
In the room above, you’ll find a chest in the north that’s separated from you due to some blocks. To reach the chest, you’ll need to head south and then circle back north to get into the room’s other door. However, when you jump off the southern ledge, you’ll enter a mini-boss room. Here, Blaino the boxer will be waiting to attack!
Defeat the Blaino Mini-Boss
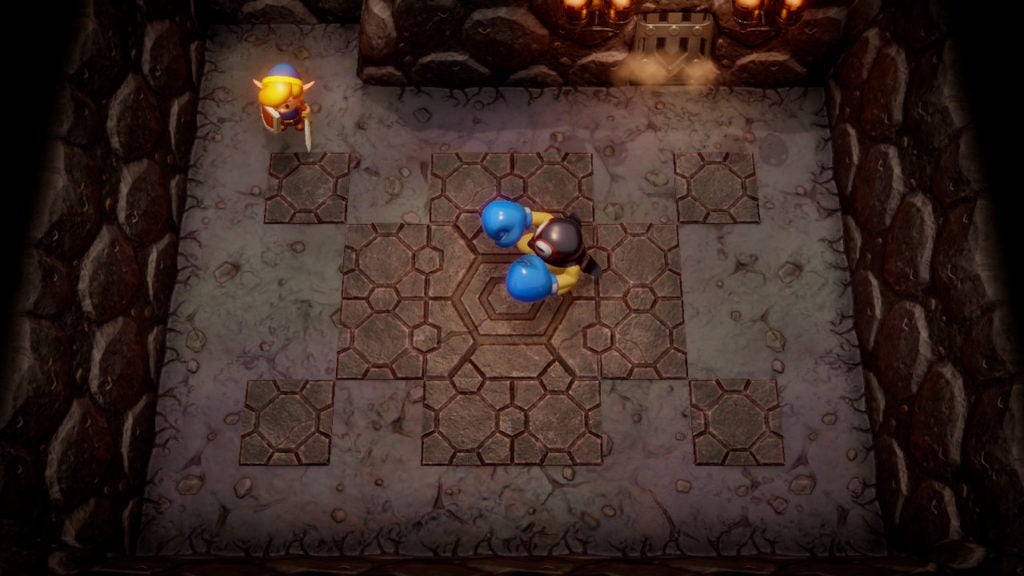
This blue-gloved foe is the true mini-boss of Level 8 – Turtle Rock and they will do their best to defend their dungeon. In terms of attacks, as you can probably guess, Blaino will repeatedly try to punch you.
When you see the adversary wind up for a big punch, get away from the area in front of them. The wind-ups are pretty obvious, however, the strikes are faster than you’d expect, so don’t underestimate this fellow.
Blaino is fast on their feet and can reposition frequently, which can make landing a hit of your own tricky. To hit Blaino, you’ll need to wait for them to perform one of their bigger punch attacks and then hit them from the side or from behind with your Sword.
How to Hurt Blaino
You’ll want to stand in front of Blaino as they look horizontally at you—but keep your distance. When you see them wind up for an attack, move either north or south. Since Blaino’s attacks are very linear, they can’t hit you if you aren’t directly in front of them.
After you sidestep a powerful punch from Blaino, you’ll have a second to land a hit on the mini-boss’ flank or rear before the foe raises their guard and repositions. This boxer can block attacks from the front with their gloves, making flanking and back-attacks essential for this fight. You’ll need to hit Blaino eight times to take them down.
Get the Magic Rod From the Chest North of Blaino’s Mini-Boss Room
When you defeat Blaino, a blue warp point will appear in the middle of the room, as will a Fairy. When you’re ready, head north through the door that unlocked following the mini-boss’ defeat.
Here, you’ll be back in the room with the chest, but in the southern entrance. If you’ve set the Switch in the dungeon to orange, the Blue Switch Blocks here should be lowered. If they aren’t, you’ll have to backtrack to the Switch room to flip the crystal’s colors.
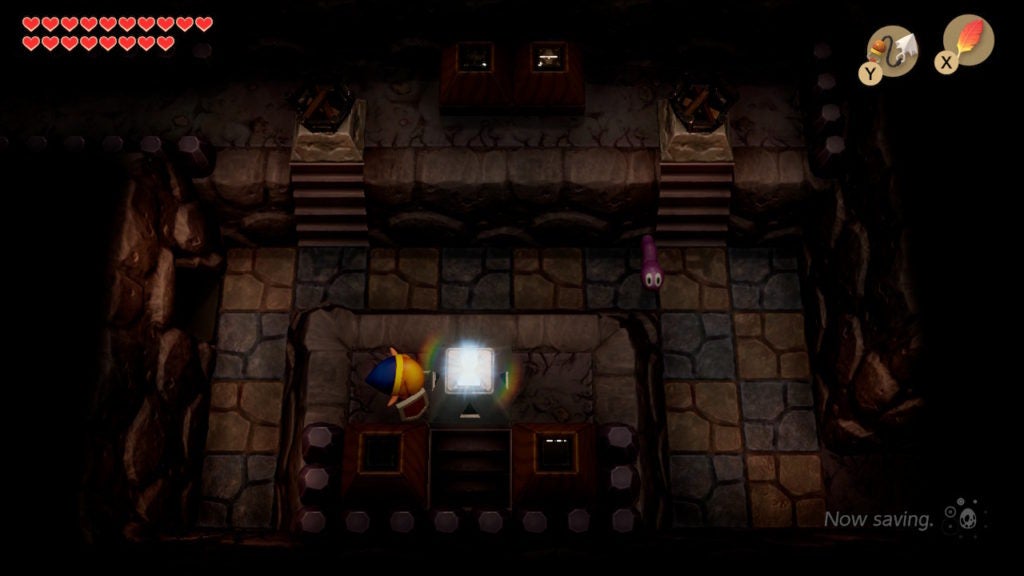
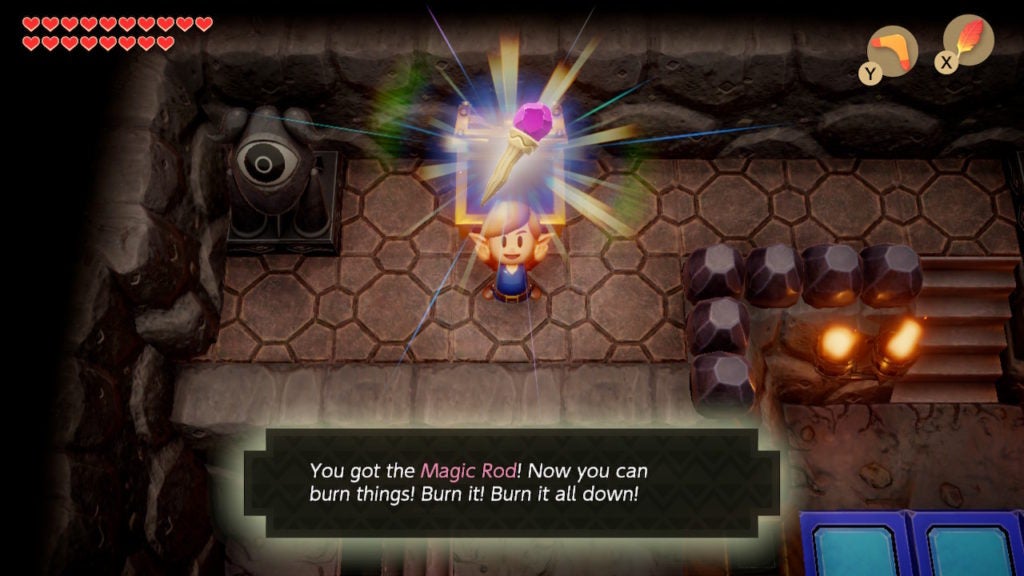
Make your way to the chest and open it to find the Magic Rod. This weapon will be accompanied by game text telling you to burn things down with this magical device. This is a hint that lets you know that the Magic Rod essentially casts fireballs in the direction of your choosing. However, like all your weapons, you’ll need to equip the Magic Rod to one of your equipment slots if you want to use it.
Go to the Western Dark Room to Find a Chest Holding the Seventh Small Key
After getting the Magic Rod, you can make your way towards the area holding the Nightmare Key. However, first, you’ll need to get the seventh (and last) Small Key to unlock the way.
To do so, head back to the room where you found the fifth Small Key in a chest surrounded by blocks. This room is located to the west of the room with the glowing eye statue that you shot with an arrow. From there, go south and you’ll be in a raised area in a dark room with two unlit torches in the southern corners.
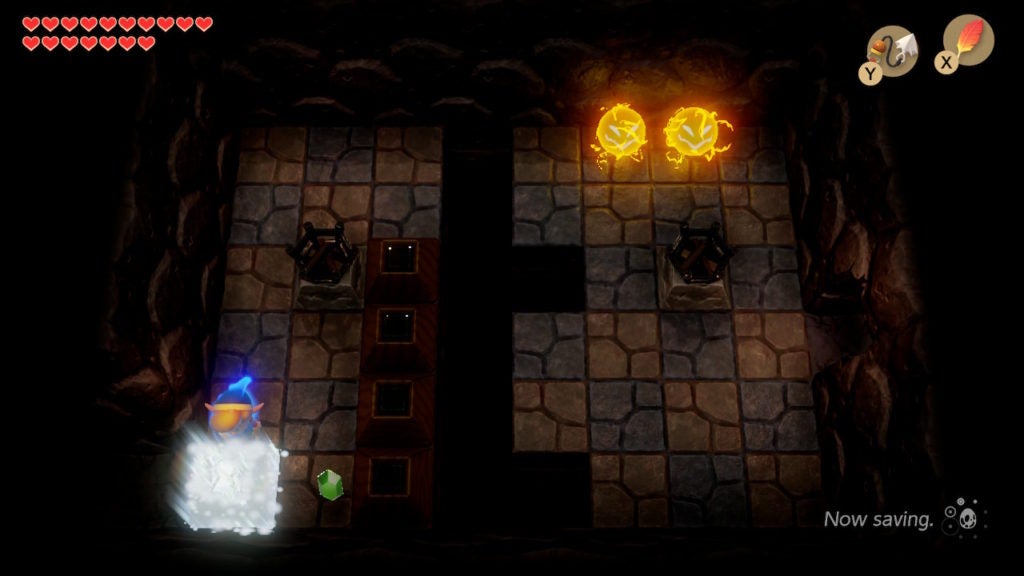
Leap down to the lower part of this room and use your Magic Rod to shoot fireballs at the torches beyond the short fences. When you light both torches, a chest will spawn in the northeast corner of the room. Within the chest will be the final Small Key you’ll need for this dungeon.
Find a Way to the Northwestern Leg of the Dungeon
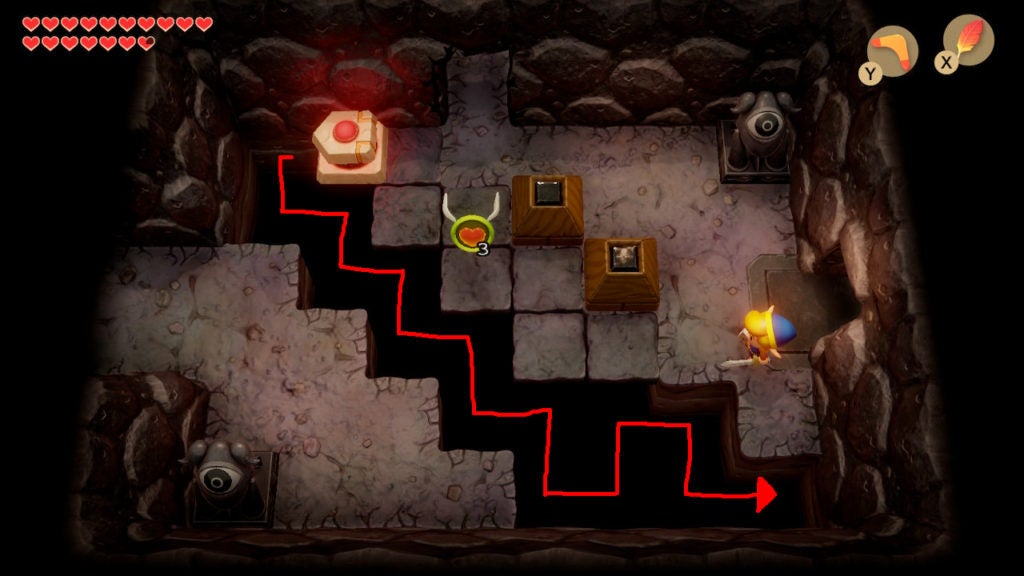
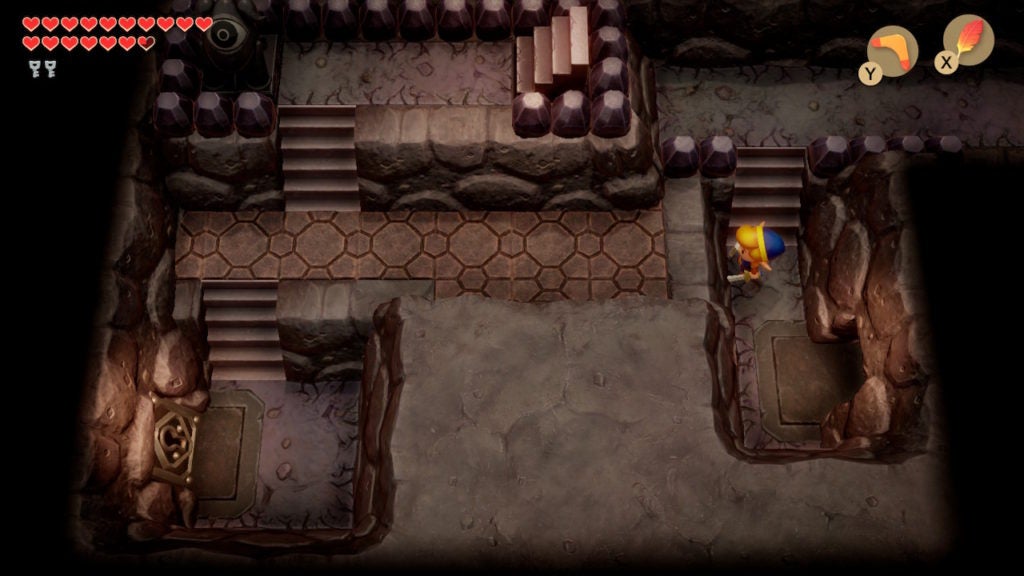
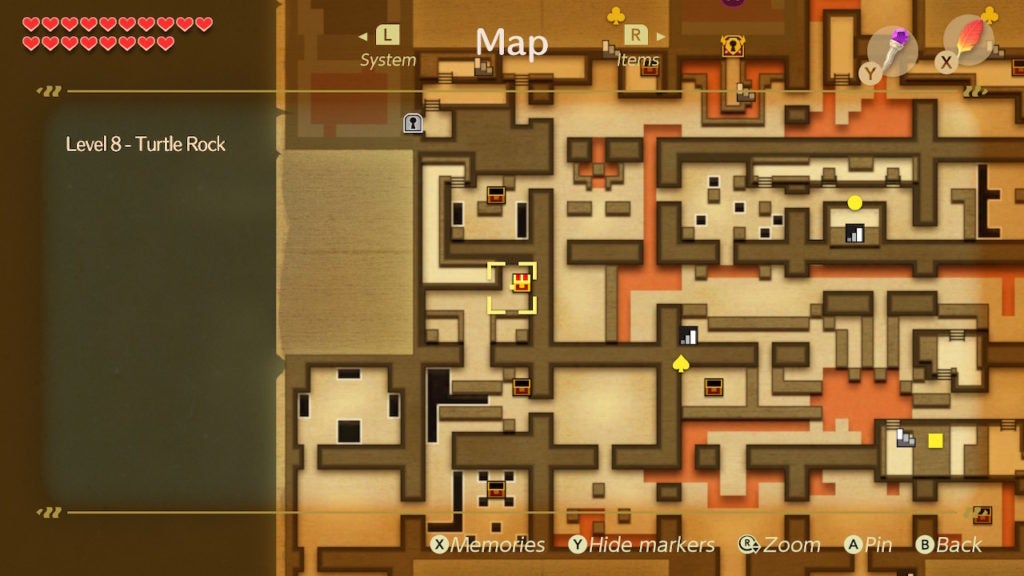
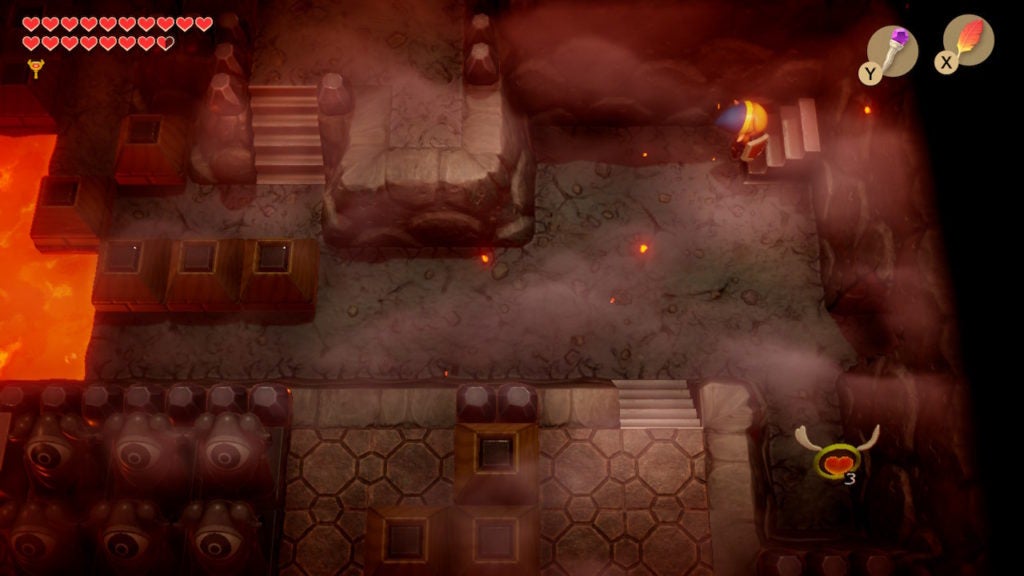
The Nightmare Key you’ll need to enter the boss room is in the northwest leg of Level 8 – Turtle Rock. However, to get there, you’ll need to use one of the two staircases in the southeast of the dungeon (marked with square-shaped pins in the image above).
The area where you can access both of these staircases is directly west of the Switch room. Although, it would be better to approach these staircases from the western lava pool with the floor-maker machine. The machine will let you make an easy path to the stairs leading to the southwestern staircase.
Solve the First Two Ice Puzzles to Traverse the Tunnel
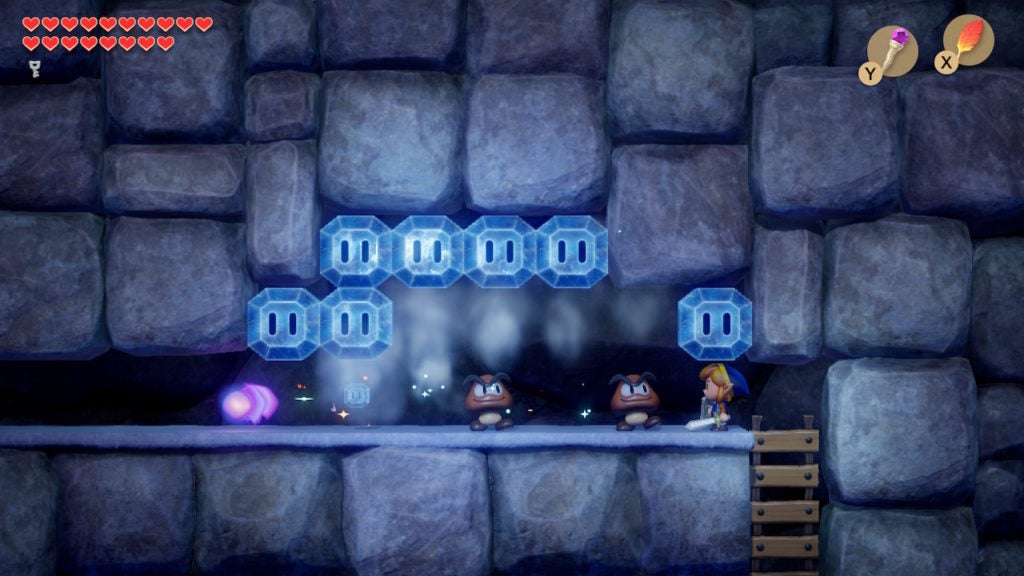
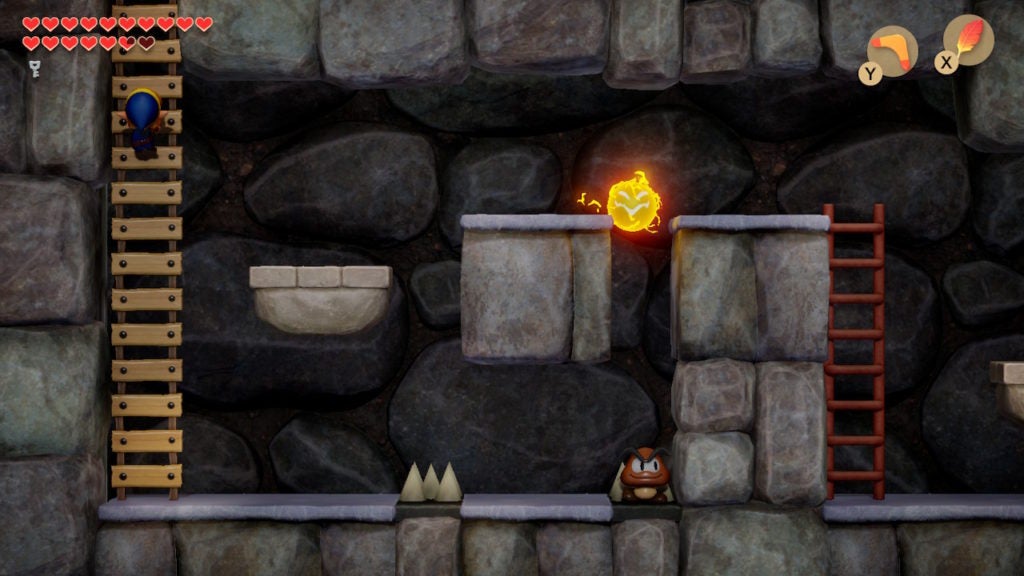
Head up the southwestern staircase to find yourself in a side-view tunnel with ice instead of lava. The first appearance of these new blocks will not be much of an obstacle. Simply use the Magic Rod to shoot through the ice blocks (and Goombas) to clear a path. Beyond, you’ll find a slightly more tricky ice puzzle.
In the tunnel room to the west, you’ll find two rows of ice blocks in your way. However, you’ll need to only clear the upper row so that you can use the lower row of blocks to get up the ledge leading to the ladder.
What you need to do here is jump with the Roc’s Feather and then shoot the Magic Rod’s fireball at the upper row while you’re in the air. If you mess up this maneuver, you can reset the blocks by going east out of the room and then coming back.
When you descend the ladder, you’ll be in the western part of a partitioned room. You recently had to traverse the east side of this room, but, now, it’s time to use the western portion. Descend the stairs and use your last Small Key to open the locked door to the southwest. Ahead, you’ll find a room that’s mostly lava that is housing yet another familiar foe.
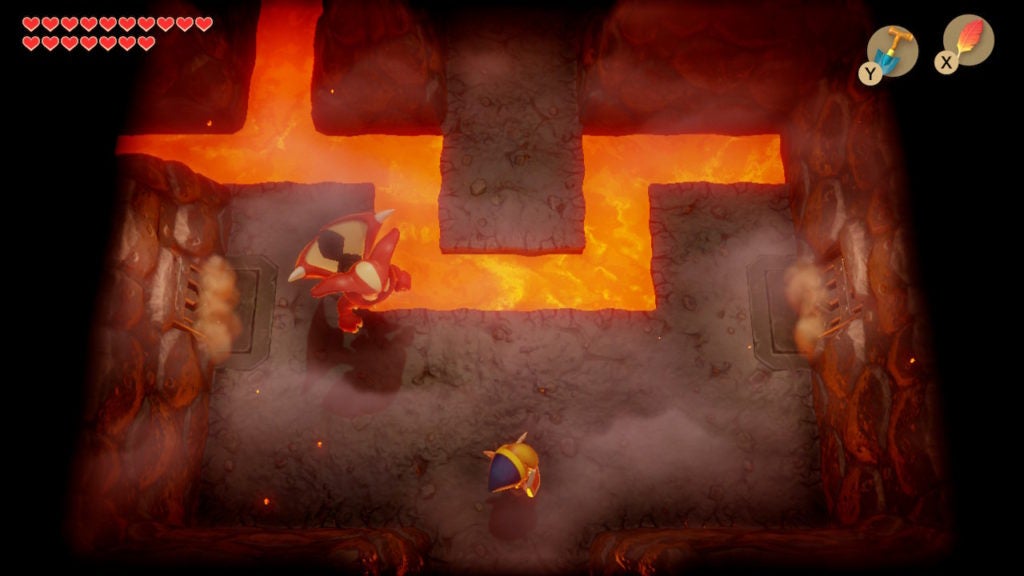
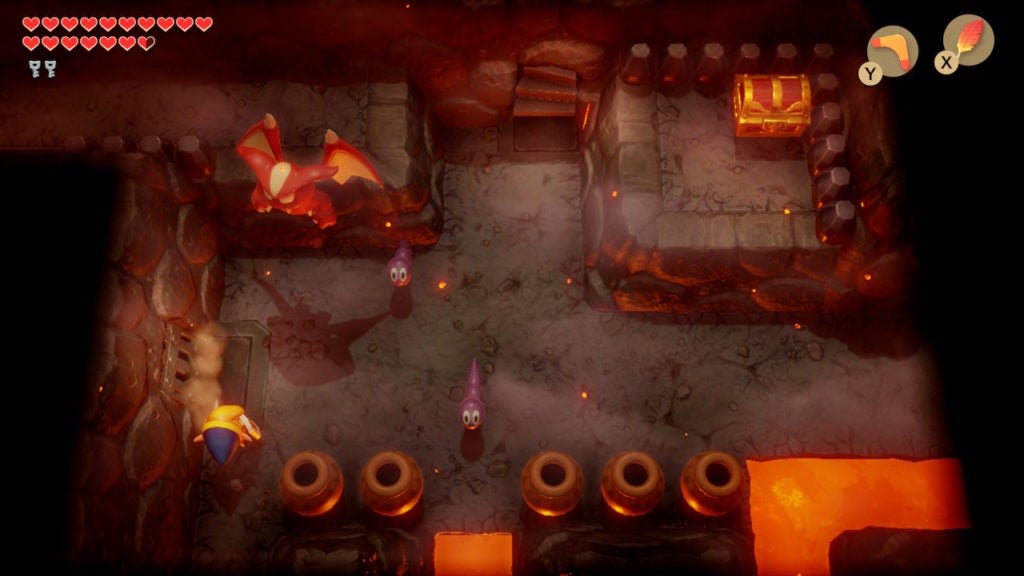
Defeat the Hydrosoar Mini-Boss

In your last encounter with a Hydrosoar, you were in a waterlogged room. However, this time, you’ll have to avoid lava as you outmaneuver this squid-like enemy. Thankfully, at this point, you’ll have the Boomerang, which will make the fight much easier than last time.
Hydrosoar will race around the borders of the room. You’ll have to jump around the room to a position where you can attack them from the side. When you’re to Hydrosoar’s side or back, throw the Boomerang at them to deal some damage. Keep doing this a few more times until the mini-boss goes down.
Alternatively, if you’re having trouble, try using the Bow and Arrow Set instead of the Boomerang. Although the Boomerang doesn’t need ammo, it moves through the air slower than arrows do. The faster speed of the arrows will allow you to hit Hydrosoar easier as they swiftly bounce around the lava-filled room.
After you fell this large foe, the locked door to the northeast will open. Beyond, you’ll find the most complex of the floor-maker puzzles yet.
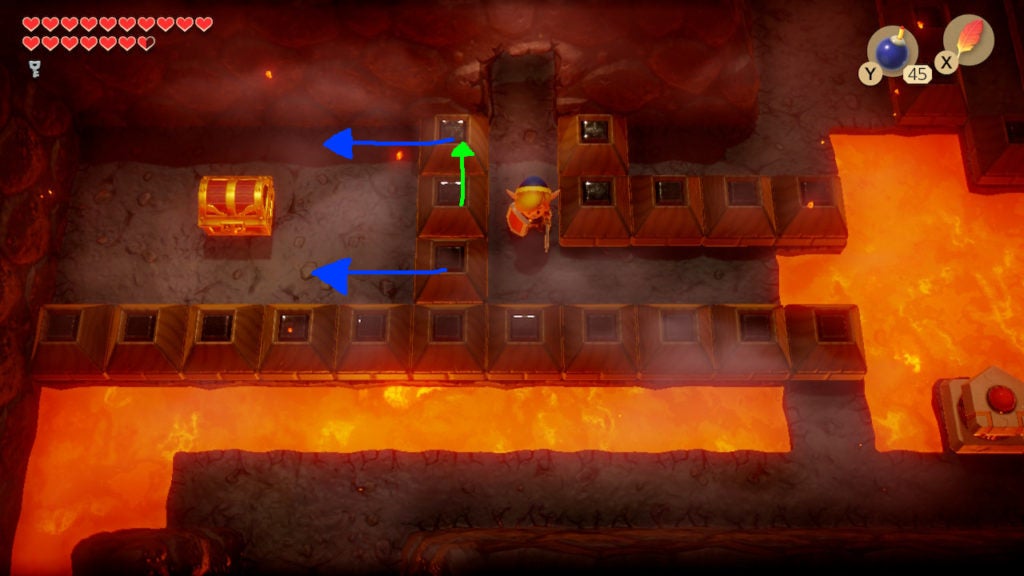
Solve the Floor Puzzle to Get the Nightmare Key
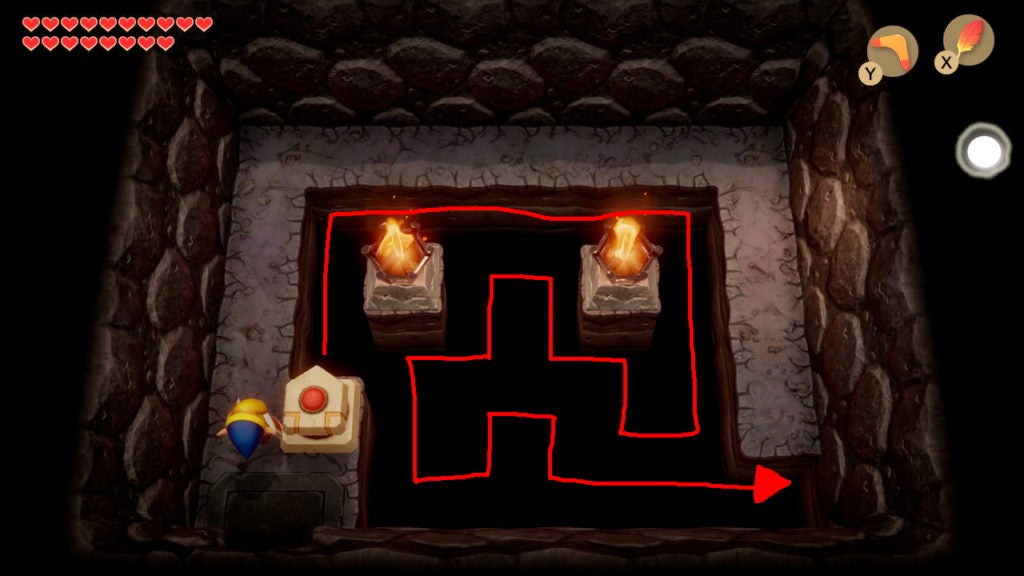
To solve this puzzle, you’ll first need to send the floor-maker machine north to the northwest corner of the hole. Then, go straight east to the northeast corner and then go down almost all the way to the southern edge of the hole.
From there, turn west and then north to arrive south of the room’s eastern torch. Afterward, go west and then north once more before turning south and then west to arrive south of the room’s western torch.
Next, go south until you reach the southwestern corner of the hole. Following this, go east, then north before turning east again and then going south. From this position, head east in a straight line to fill up the remaining holes in the floor.
When you’re done, a chest will appear in the northeast corner. Opening it will give you the Nightmare Key. With that, you’re ready to seek out the Nightmare’s lair. To do so, start by backtracking to the southeast of the dungeon—the room west of the Switch room.
Find Your Way to the Nightmare’s Lair
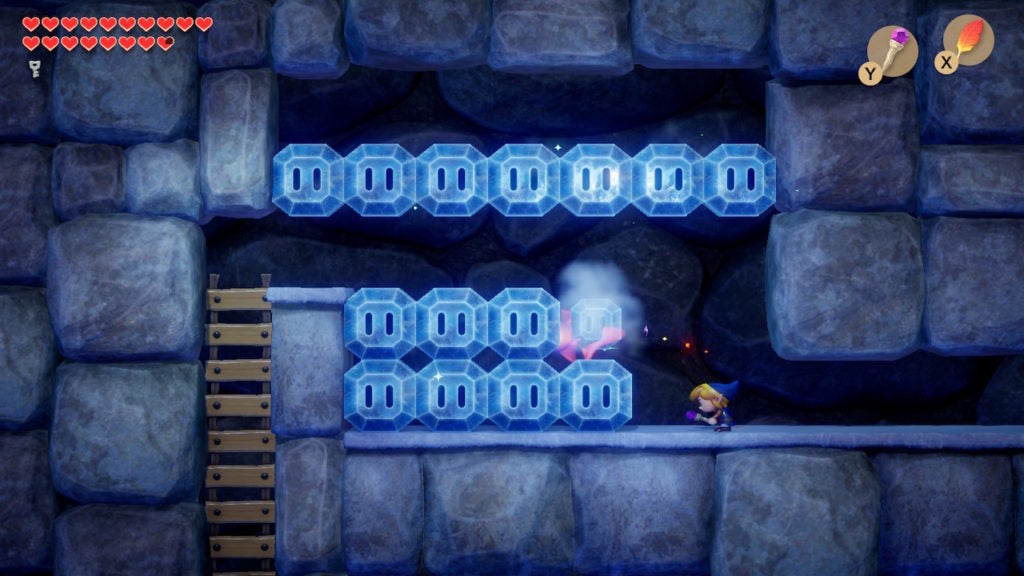
Ascend the northeast staircase here and you’ll find yourself in another tunnel full of ice blocks. The puzzles you’ll find here are more difficult than the ones in the other ice tunnel. However, it’s nothing that you can’t handle.
The First Ice Puzzle On the Way to the Nightmare’s Lair
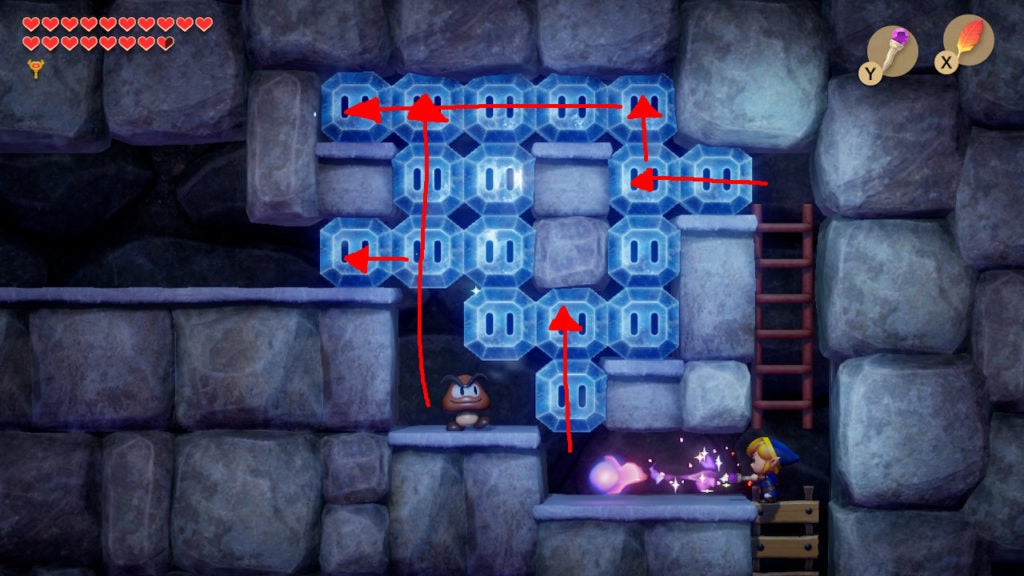
Start from the bottom of the ice formation and shoot north at the two isolated stone bricks in the middle. This will let you jump up the small ledge to the west and take out the Goomba. From the westmost spot on this low ledge, shoot northward again to clear the ice blocks above you. This will create a shaft of empty space.
Next, climb the ladder on the east and shoot west to destroy the two ice blocks to the west of the top of the ladder. Afterward, shoot northward to get rid of the ice block above you. This will allow you to jump and shoot a purple fireball west—all the way through the top of the ice formation.
Following this, walk west and drop down the shaft you created earlier on the west side of the ice formation. As you fall, shoot a fireball west at the sole ice block barring the way to the western corridor.
When you’ve cleared out these specific blocks, climb the ladder once more and head west before dropping down the shaft again. As you fall this time, hold the analog stick to the left so that Link moves in that direction as he descends. This will allow you to land on the lip of the ledge and will grant access to the western side of the ice tunnel.
The Second Ice Puzzle On the Way to the Nightmare’s Lair
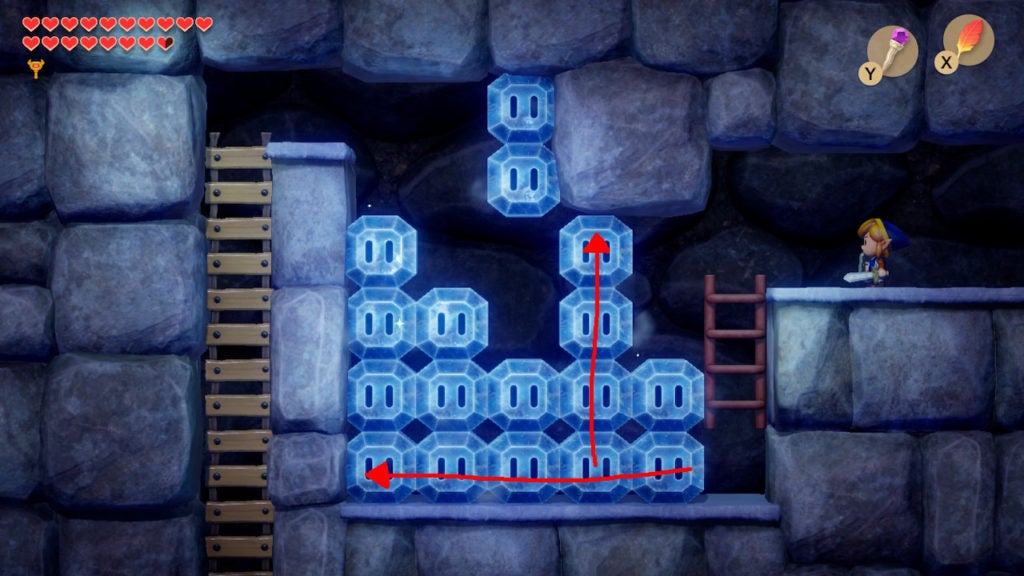
This ice puzzle is a fair deal easier than the other one—and requires less work! Simply shoot out the bottom row of ice blocks and then clear out the column of four ice blocks closest to the eastern ladder.
Afterward, hop on the lonely ice block in the southeast and use it to jump west to the staircase of ice blocks. From there, it’ll be easy to get to the ladder on the west and descend it.
After exiting the ice tunnel, you’ll find yourself directly in front of the door to the Nightmare’s lair. For this fight, you’ll only need the Magic Rod. Make sure it’s equipped and then head north to confront the boss of Level 8 – Turtle Rock.
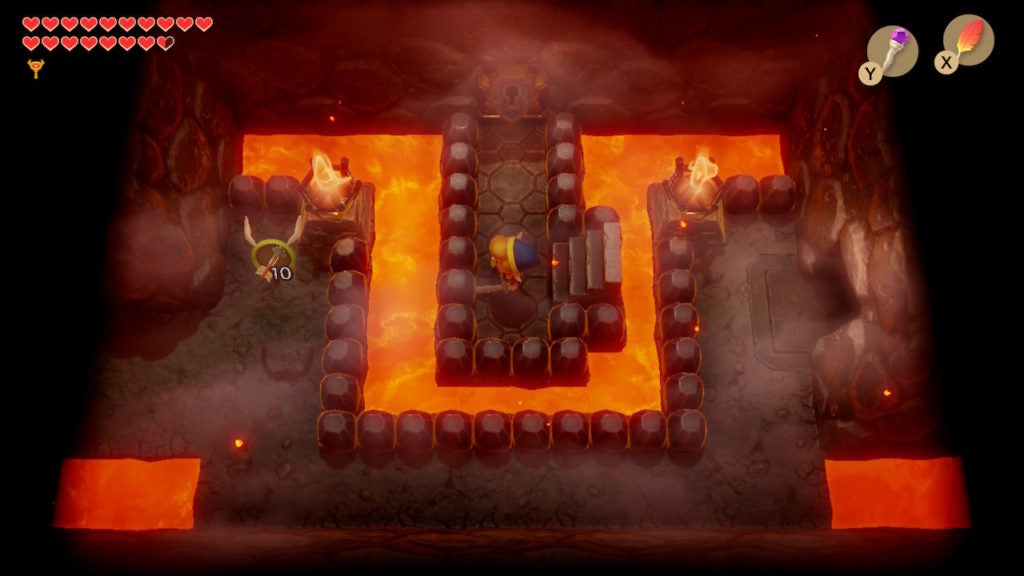
Defeat Hot Head, the Boss of Level 8 – Turtle Rock

Hot Head’s voice will appear before they do. The boss will tell Link that the hero’s journey will end here and that they will never play the Siren Instruments. Afterward, Hot Head will appear in the center of the room.
As their name implies, they are a literal head with two simple eyes and a basic mouth—although they are also coated in flames. Despite their impressive appearance, this boss is rather weak.
Throughout the fight, you will have to shoot purple fireballs at Hot Head with your Magic Rod. This is the only thing that will hurt this flaming foe.
Besides sending barrages of magic at the boss, you’ll also need to dodge the incoming attacks. Thankfully, this can be done by walking back and forth along the row of walkable tiles in the south of the room.
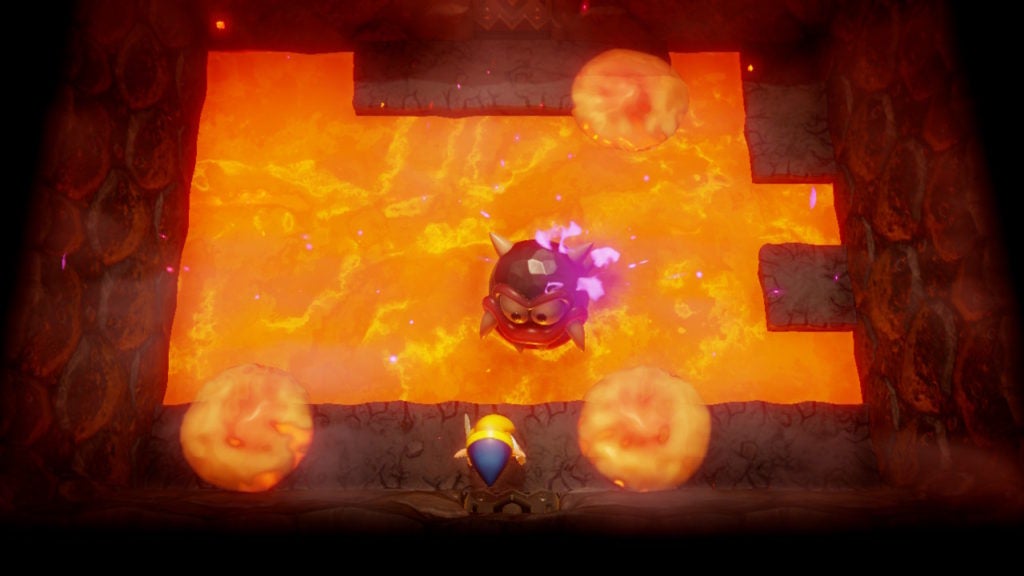
The boss’ attacks will consist of throwing lava projectiles at you as well as trying to headbutt you. After you hit Hot Head a few times, they will enter phase two, although, they will act very similarly to before. Keep shooting Hot Head with the Magic Rod while dodging left and right as needed and you’ll eventually take down this threat.
Pick Up the Heart Container and Final Siren Instrument
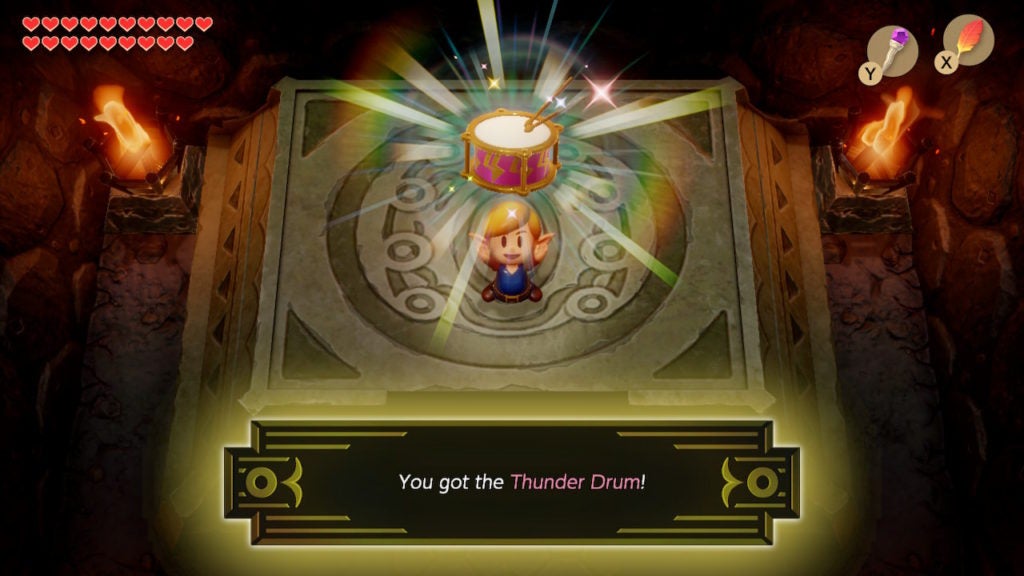
When defeated, the Nightmare will curse you before disappearing in explosions of purple fire. You’ll now be free to make your way to the north of this room to collect the Heart Container.
Afterward, proceed through the north doorway to find the Thunder Drum in the room beyond. Well done! You’ve collected all of the Siren Instruments and have cleared the last true dungeon in The Legend of Zelda: Link’s Awakening.
However, the game’s not over yet! There’s still one final challenge to face on Koholint Island…
Where to Go Next
First, stop by Mabe Village’s library to get a vital hint about the final area of the game. Afterward, you’ll need to head to Mount Tamaranch equipped with secret knowledge and unshaken resolve. With those, as well as all of the Siren Instruments, you’re now ready to crack open the Wind Fish’s Egg.