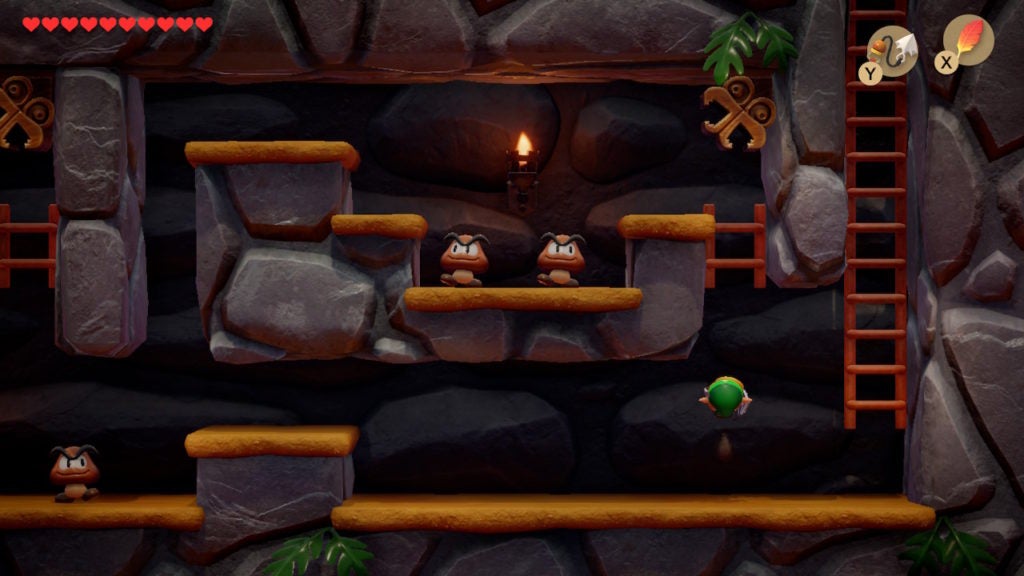
When you exit Level 4 – Angler’s Tunnel, you’ll be able to get to the next dungeon fairly quickly. However, before you do, you should visit some important NPCs nearby.
Table Of Contents
Manbo’s Mambo (a Song for the Ocarina)
If you swim a bit west of the entrance to Level 4 – Angler’s Tunnel, you’ll find a small cave entrance that has images of fish on either side.
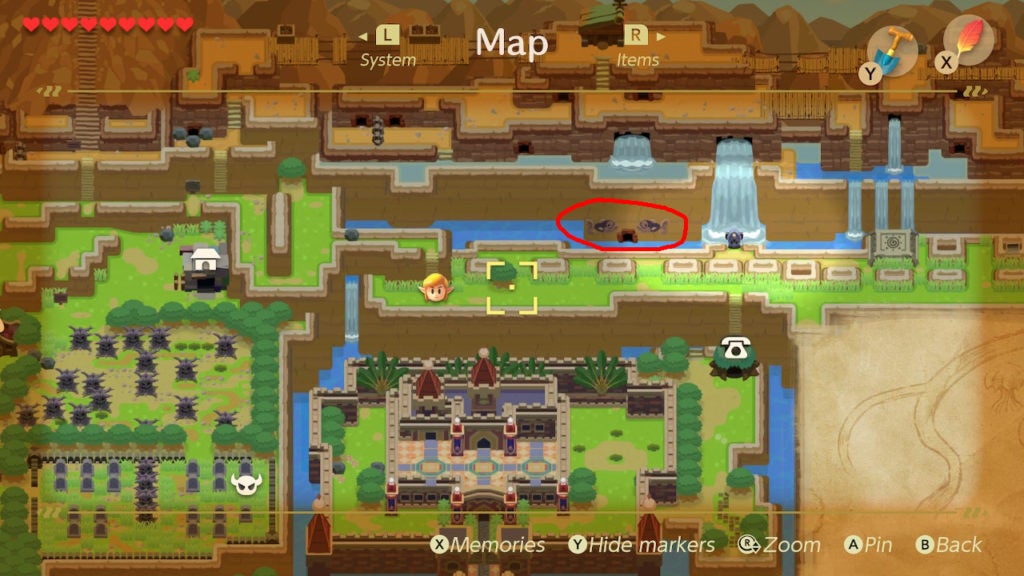
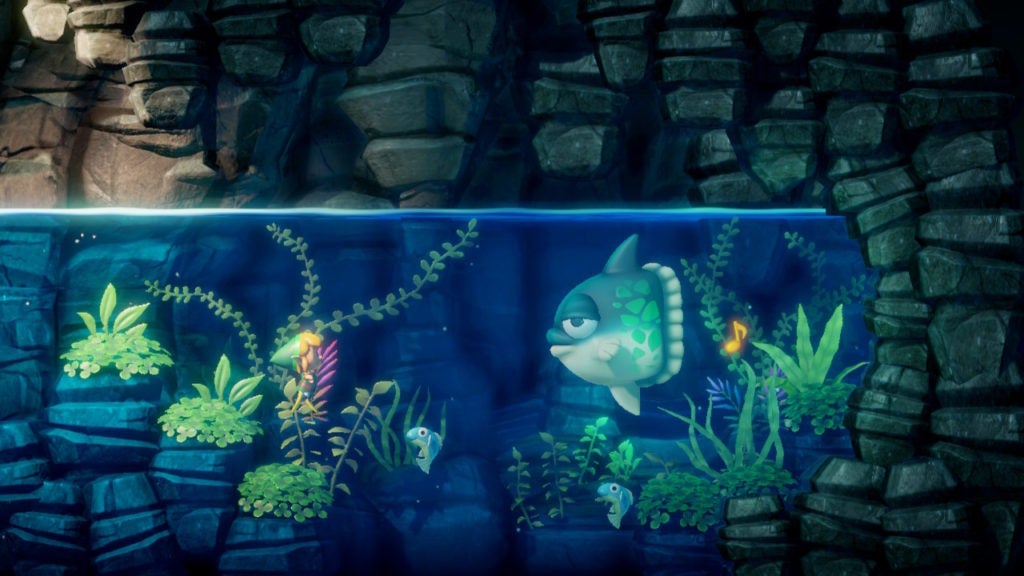
Within, you’ll find Manbo, the child of the Sun Fish. If you have the Ocarina, the music-loving fish will teach you Manbo’s Mambo for free. They’ll go on to briefly explain what their song does when played. Put simply, playing Manbo’s Mambo on the Ocarina lets you teleport to any Warp Point (or to Manbo’s Pond) from anywhere outside. If you play it while in a dungeon, it will take you back to the main entrance.
As such, it will make traveling around Koholint Island easier. While you can make your way to Martha’s Bay very quickly after leaving Manbo’s Pond, you should meet up with another helpful NPC beforehand. Although, the next person you meet will need your help before they give you anything.
Find and Help the Pink Ghost
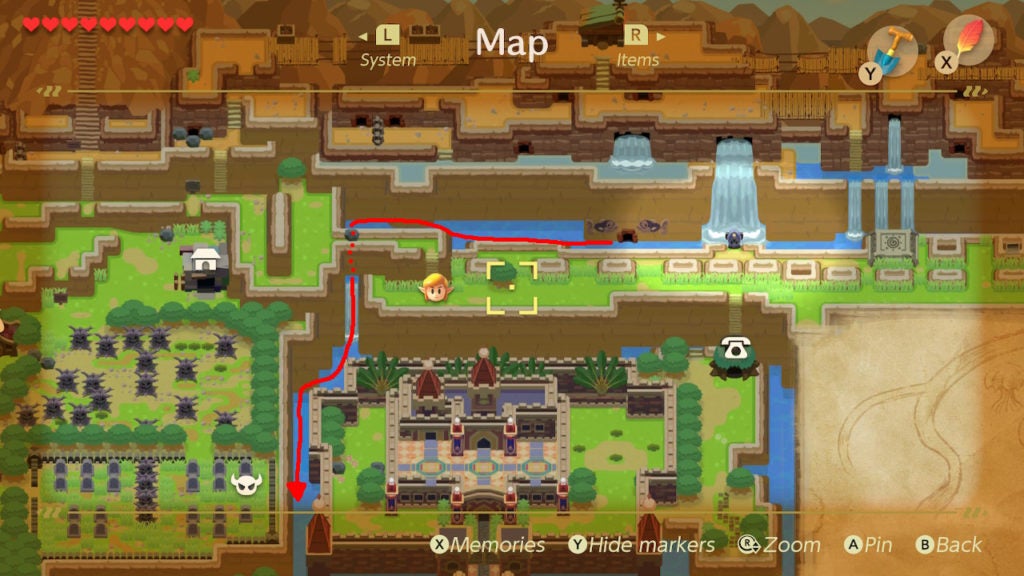
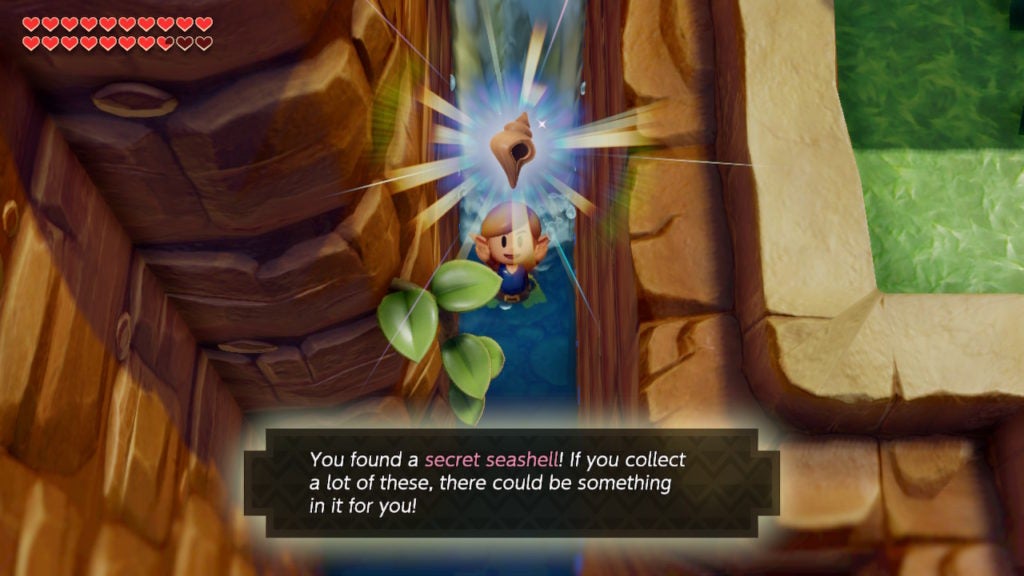
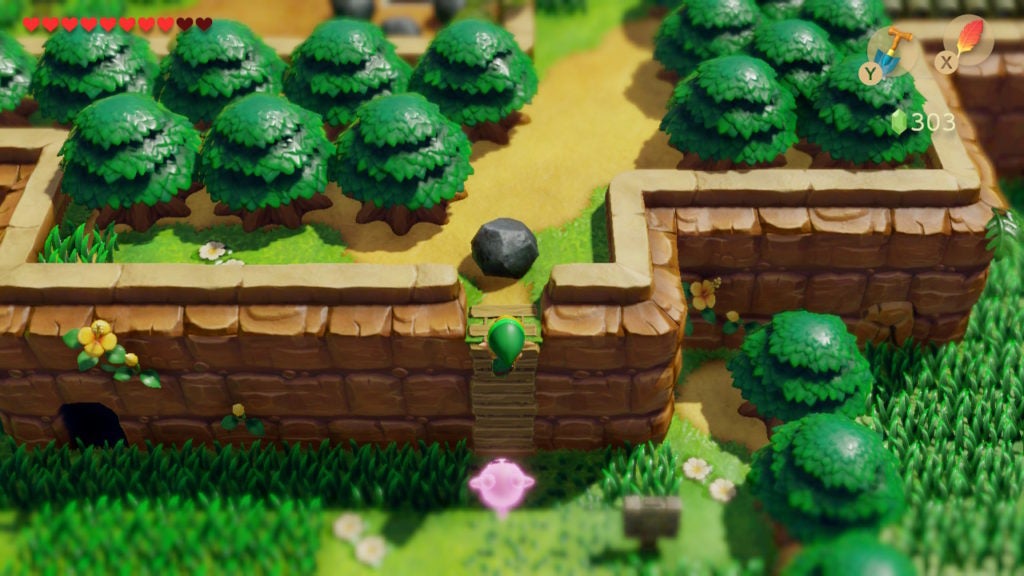
From Manbo’s Pond, swim west until you can’t go west anymore. This will place you north of a slim waterfall. If you swim south, you’ll end up inside the waterfall, which will bring you downwards without harming you. Keep swimming south to find the Pink Ghost, however, don’t miss the collectibles here! While the Pink Ghost’s quest has a pretty awesome reward (1 Fairy Bottle), there are plenty of stops along the way you should make for collectibles and other useful goods.
Get the Secret Seashell Below the Waterfall
At the base of the waterfall will be a Secret Seashell. You can dive using the B button to retrieve it.
After obtaining the Secret Seashell, swim south until the Pink Ghost floats up to you.
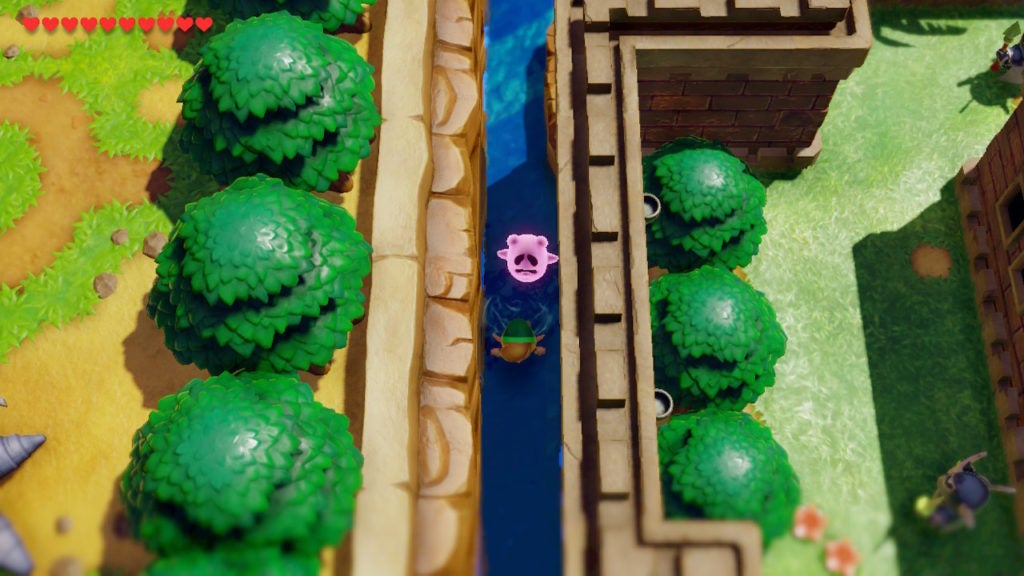
This spirit will want you to take them to their home in Martha’s Bay, but first, you should snag another collectible nearby.
Get the Heart Piece in the Western Part of Kanalet Castle’s Moat
There’s a Heart Piece just southeast of here. Swim in that direction until you reach the bridge leading into Kanalet Castle and dive underwater to pick it up.

Following this, you’re ready to head to Martha’s Bay. Equip your Ocarina and select Manbo’s Mambo on it to teleport.
The Pink Ghost’s Home in Martha’s Bay
After you teleport to the Warp Point in Martha’s Bay, head south, and then leap across the wide gap to the west. This will lead you to a rundown house. This is the abode of the Pink Ghost. Head inside for them to react and speak with you.
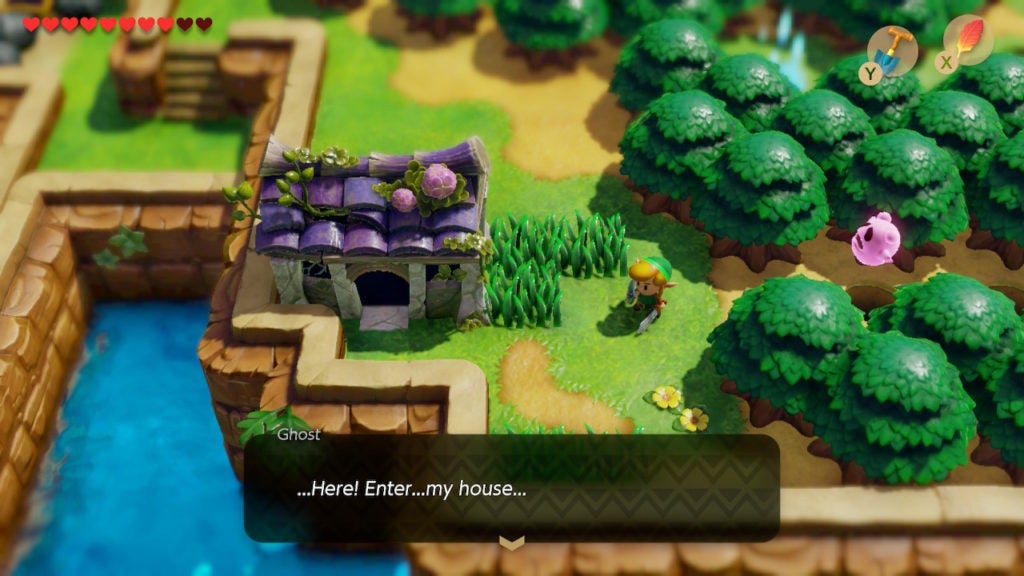
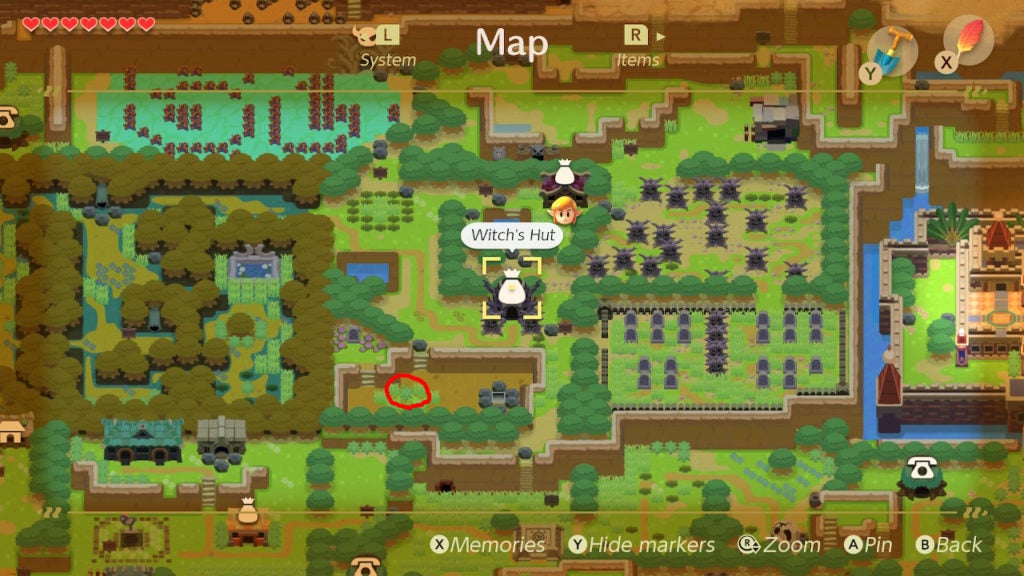
After looking around, the Pink Ghost will then ask you to escort them to their grave, which is located in Koholint Prairie southwest of the Witch’s Hut.
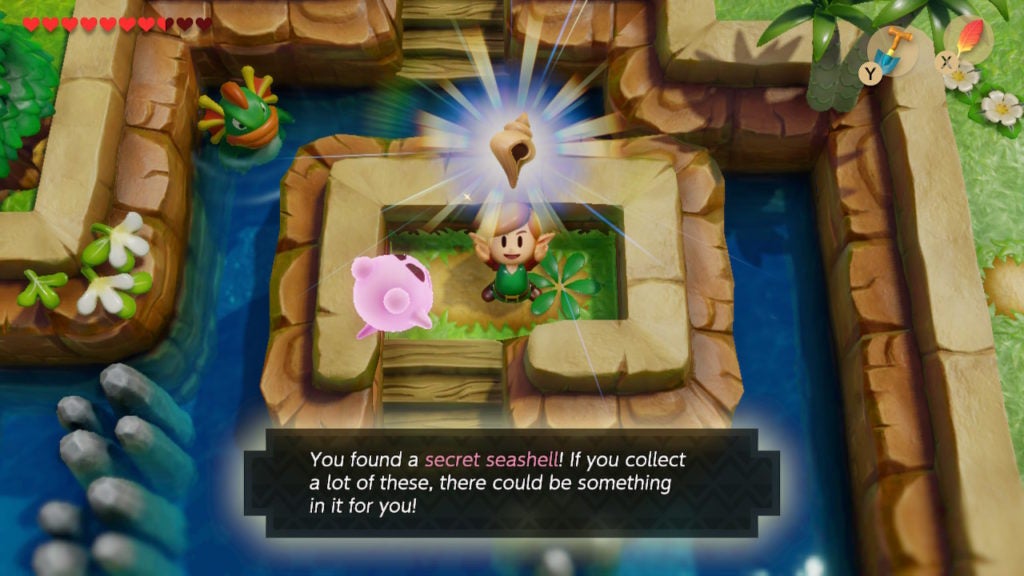
The Secret Seashell South of the Telephone Booth in Martha’s Bay
Though, before teleporting towards that area, you’ll want to grab another Secret Seashell that’s nearby and easy to obtain. South of the Telephone Booth that lies a bit to the east of the Pink Ghost’s house is some stairs that lead into the water. The waterway curves around to a tiny island upon which grows a single shrub. Cut down this shrub to find a Secret Seashell.
After you grab this collectible, you should teleport to the Warp Point in the west of Ukuku Prairie for the quickest way to the Pink Ghost’s grave.
Meet Crazy Tracy On the Way to the Pink Ghost’s Grave
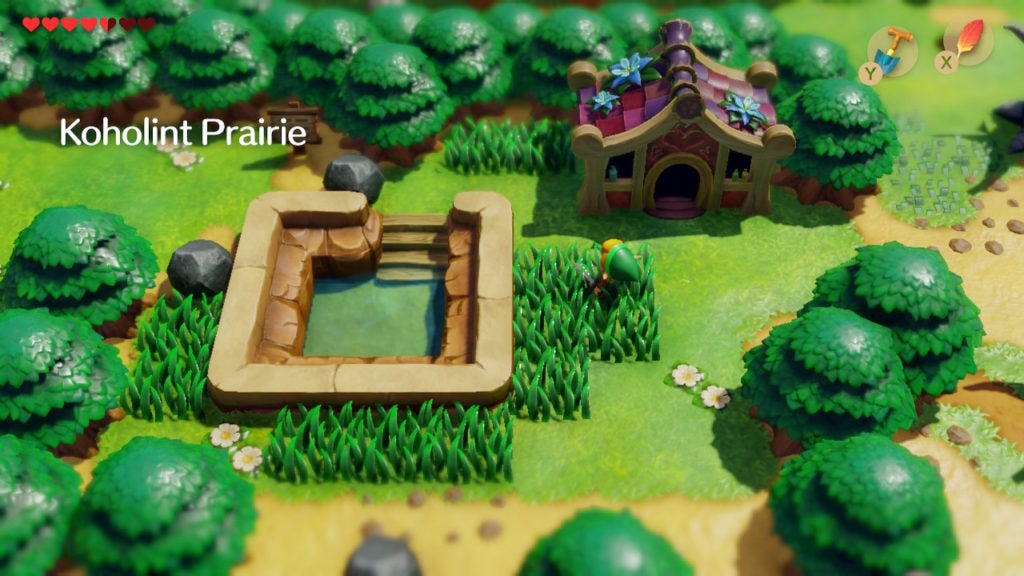
After you reach Ukuku Prairie, go north and climb the ladder nearby. You’ll have to move a rock out of your way and get by some annoying Zombie enemies as you proceed.
However, before you head to the site of the Pink Ghost’s grave, now would be a good time to meet Crazy Tracy whose house resides northeast of the Witch’s Hut. You’ll see a sign and some rocks near a small pool that marks the location.
When you enter this colorful house and speak to Tracy, she will offer to sell you a secret for 42 Rupees. If you pay Tracy, she’ll give you some Secret Medicine, which is a powerful item that will automatically revive once if you lose all your Hearts.
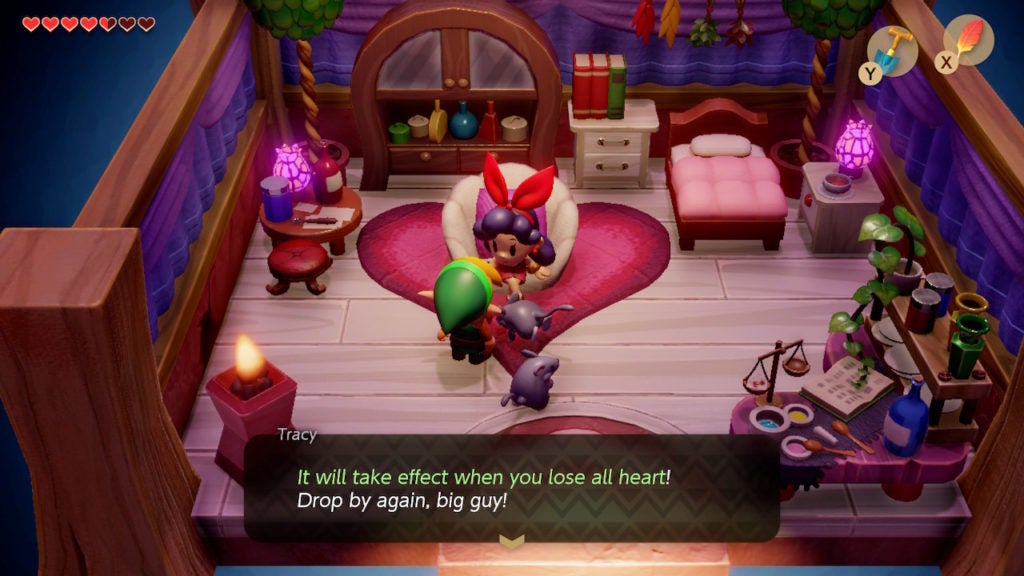
Think of Secret Medicine as an extra life. Just keep in mind that it will only work once before disappearing from your Items inventory. You can always come back here and buy more from Tracy’s spa if you need to. However, with that, it’s time to continue towards the Pink Ghost’s grave.
Find the Heart Piece Near the Pink Ghost’s Grave
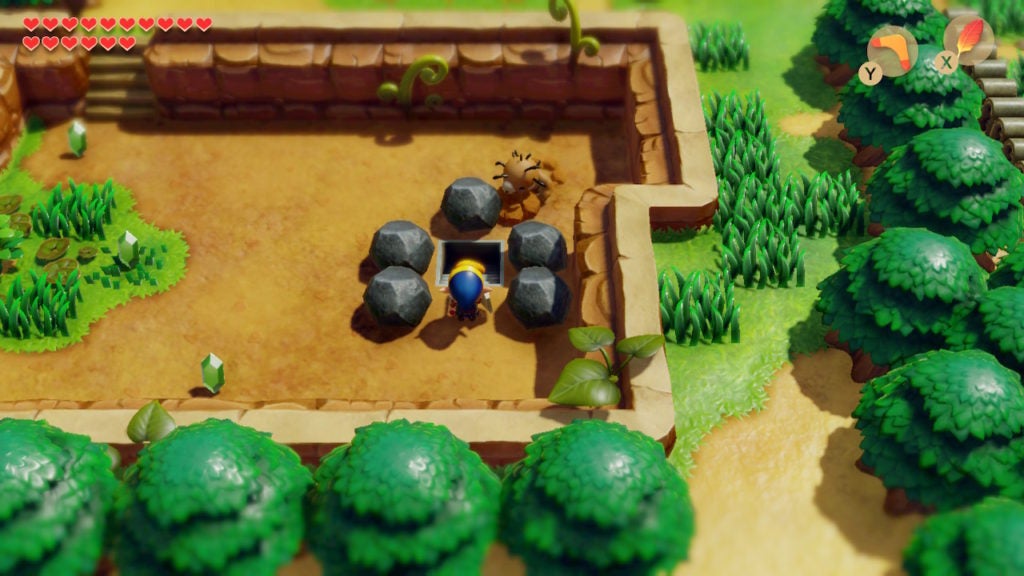
Go to the west of the Witch’s Hut to find a rock blocking some stairs that lead south. Head down them to find yourself in a mostly grassless area where a few Zombies will repeatedly spawn. On the east, you can move some more rocks and dig to find a hidden staircase that will lead you to a Heart Piece.
Underground, there will be a stretch of land that leads east to a large gap. In the northeast, you’ll be able to see a Heart Piece.

Although it’s much easier to get this Heart Piece after you get the Hookshot, it’s still possible to get it with precise usage of the Pegasus Boots. On the thin bit of ground south of the staircase leading out of the cave, you can charge up a dash. When you’re at top speed, if you time your jump correctly, you can make it to the single tile of land on the east. From there, jump north to pick up the Heart Piece.
For an easier way back, push the rock west of the Heart Piece into the hole to its west and the other rock south and into the void. If you ascend the stairs nearby, you’ll find yourself in the cemetery to the east of Witch’s Hut. You don’t need to go there right now, so backtrack through the staircase on the west of the cave.
Find the Secret Seashell Near the Pink Ghost’s Grave
After you find yourself back in the mostly grassless area with the Zombies, head a bit west and dig into the tile of ground between the 4 conspicuous patches of grass.
When you do, you’ll find another Secret Seashell to add to your collection. With that, you can now head to the Pink Ghost’s grave to complete this loot-filled quest.
Take the Pink Ghost to Their Grave
Ascend the stairs to the northwest to find a lone grave surrounded by pink bulbs. As you reach this area, the Pink Ghost will thank you.
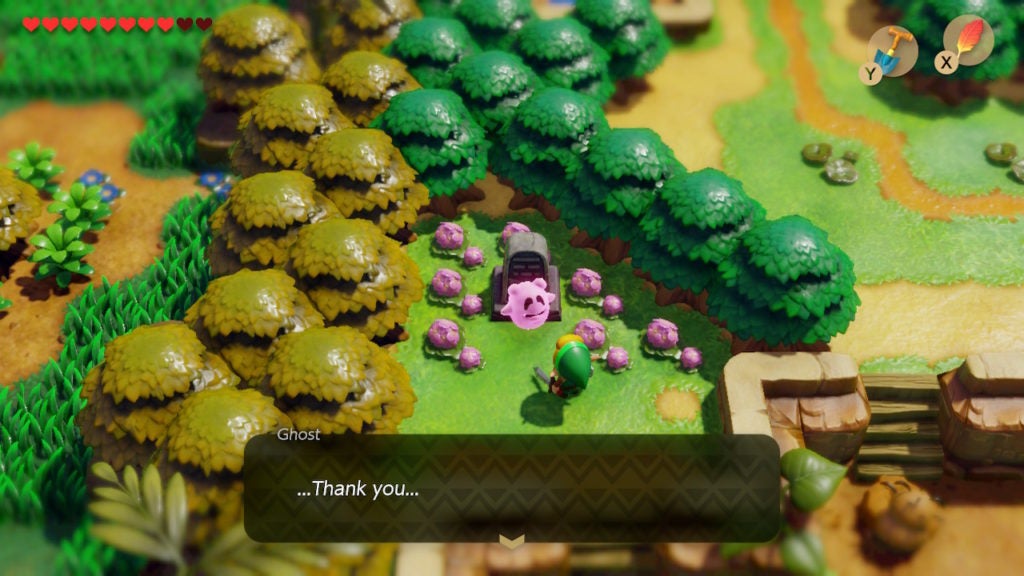
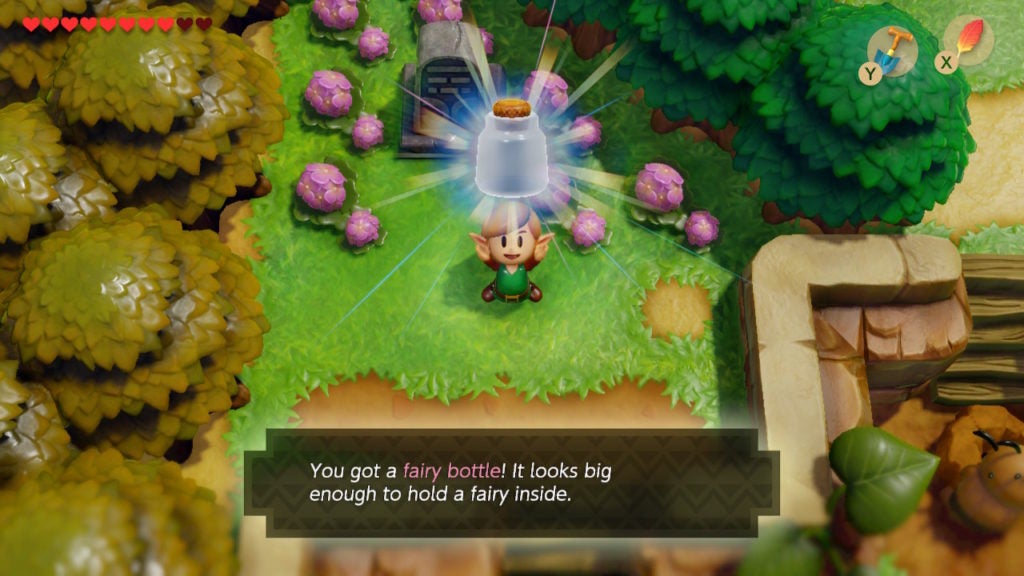
Following this, the Pink Ghost will then give you an empty Fairy Bottle! Since there is only 3 total in the game, this is a rare piece of treasure. You can use Fairy Bottles to capture Fairies and release them later for emergency healing. When the Pink Ghost gives you your reward, they will fade away and be at peace.
Afterward, the wise Owl will show up to remind you of your next destination.
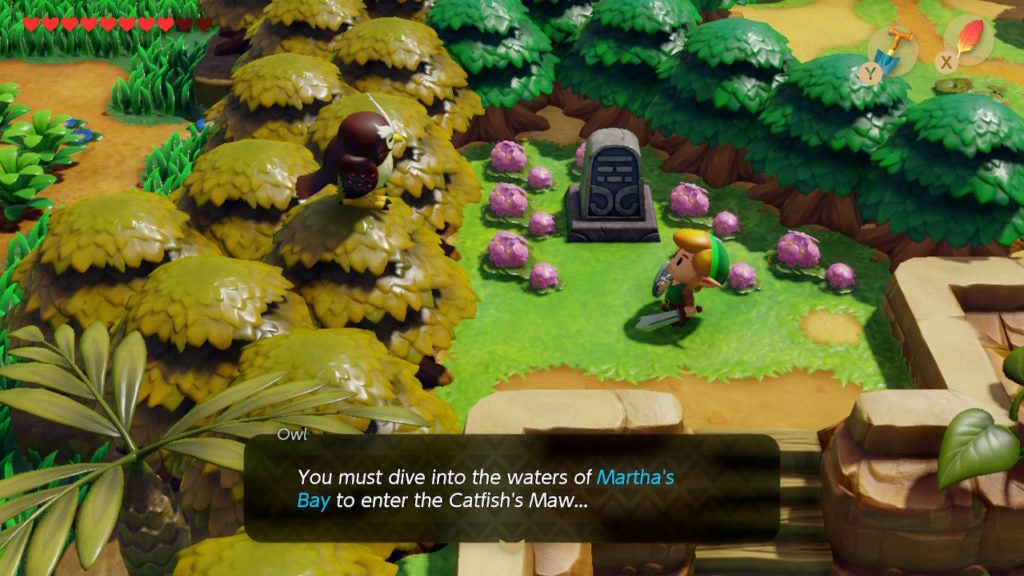
This is an indication that this rather long side-quest is intended to be found and completed before going to Level 5 – Catfish’s Maw. Now, with much loot acquired, it’s time to finally make your way to the entrance of the fifth dungeon.
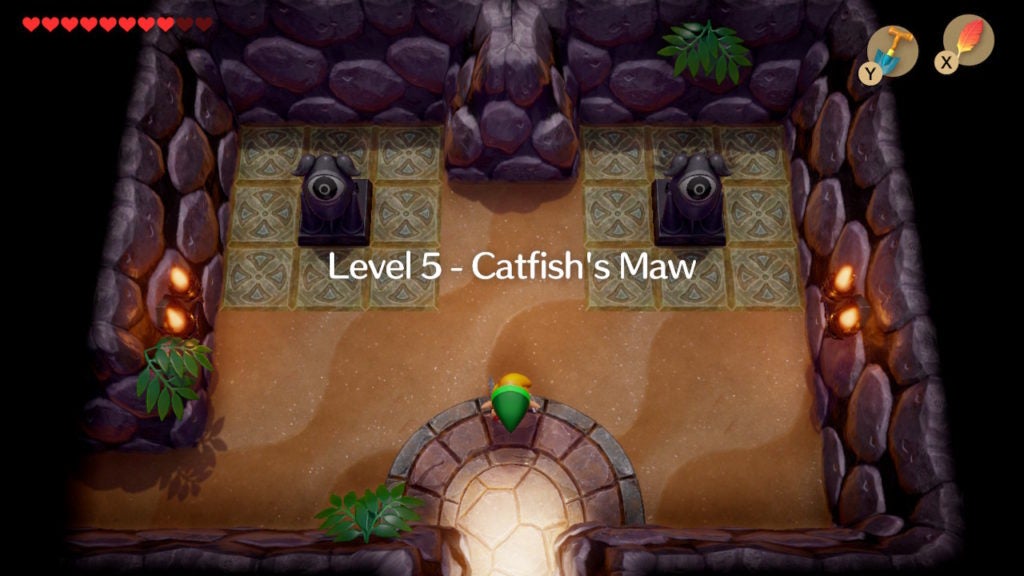
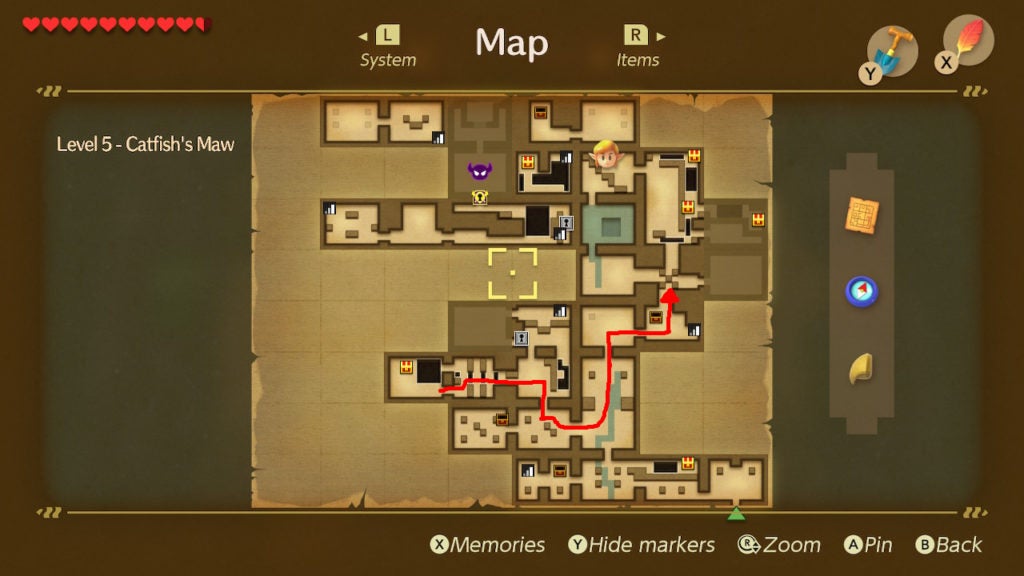
How to Get Into Level 5 – Catfish’s Maw
Teleport back to the Warp Point in Martha’s Bay and proceed northeast until you find some stairs that lead down into the waters of the bay.
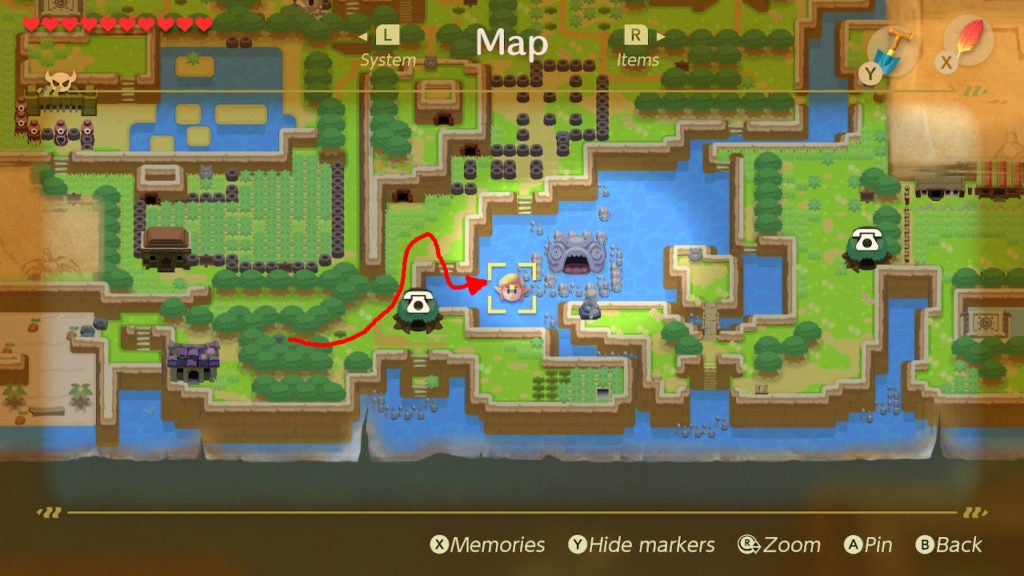
When you get into the water, swim to the western side of the rocky barrier blocking the big stone catfish’s head. There is a little nook that you need to swim into position to find. There are slight ripples here that give away the required position.
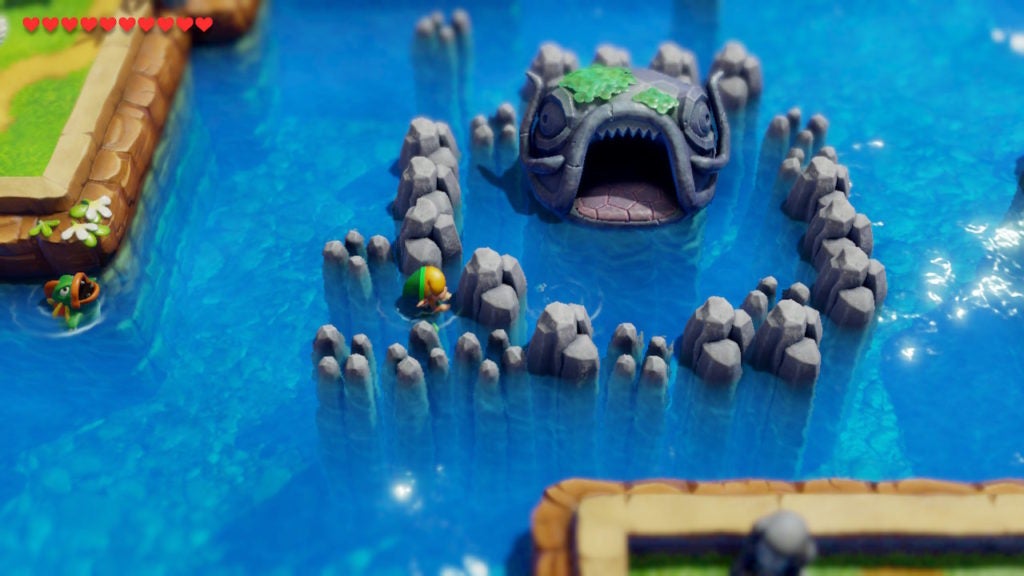
When you are in this specific water tile, press B to dive down and enter a side-view underwater passage.
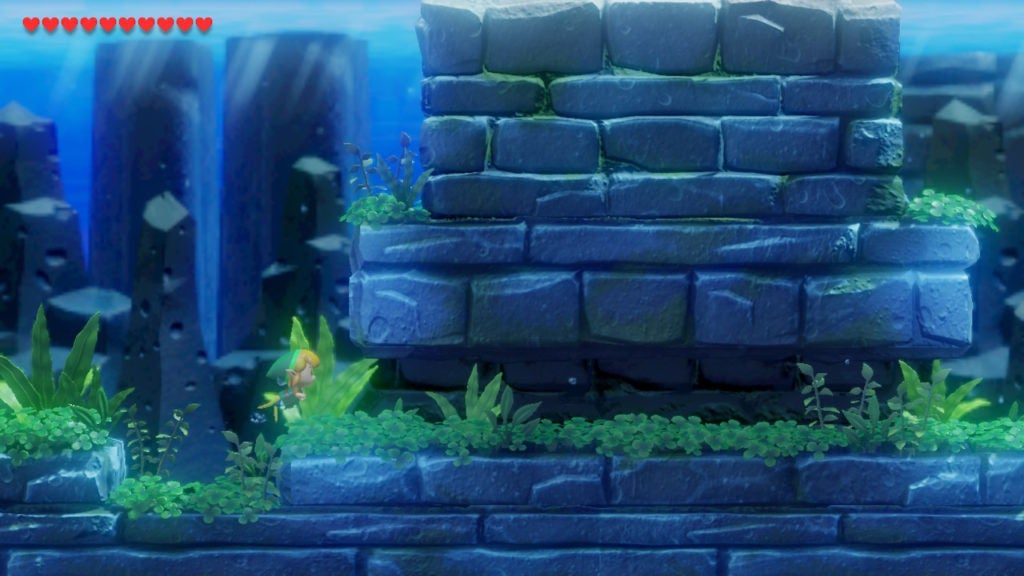
Here, you’ll have to swim down and then pass through a thin tunnel while going east. After that, rise to the surface once more to find yourself before the gaping mouth of the dungeon’s entrance.
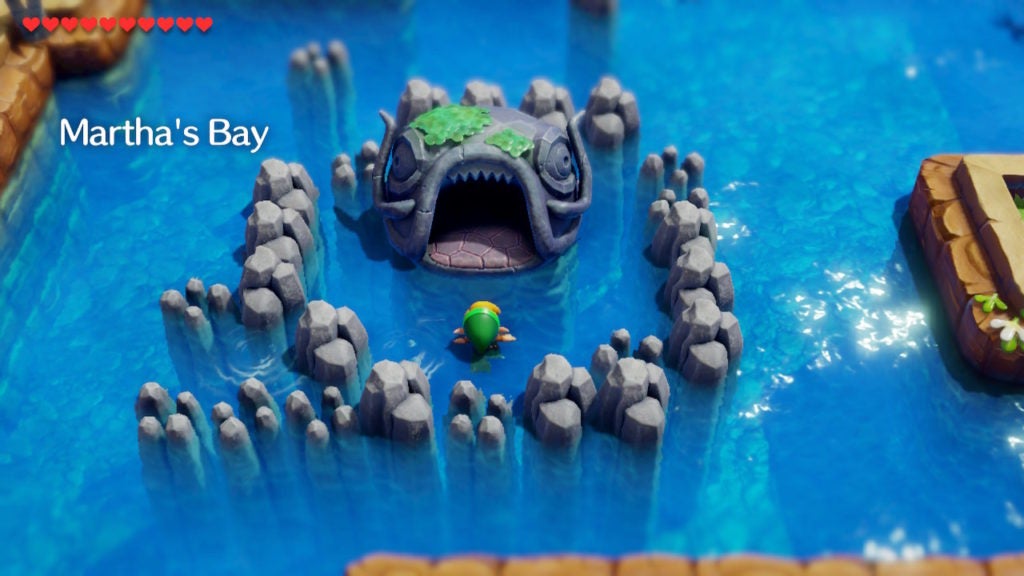
Now, you’ll need to jump into the jaws of this stone beast to dive into Level 5 – Catfish’s Maw.
Find the Compass
As you enter the dungeon, you’ll notice that you can only go west. Head that way to begin your quest for the dungeon’s Compass.
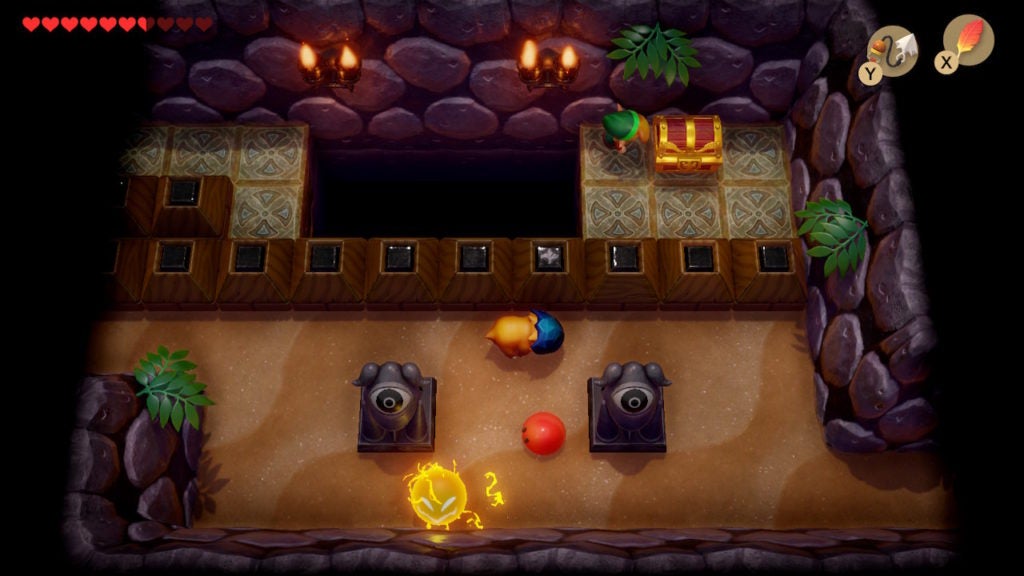
When you do, you’ll find yourself in the southern portion of a segmented room. On the side of the room that you’re in, there is also 1 Spark, 1 Red Zol (that will split into 2 Red Gels), and 1 frontally-armored enemy called a Helmasaur.
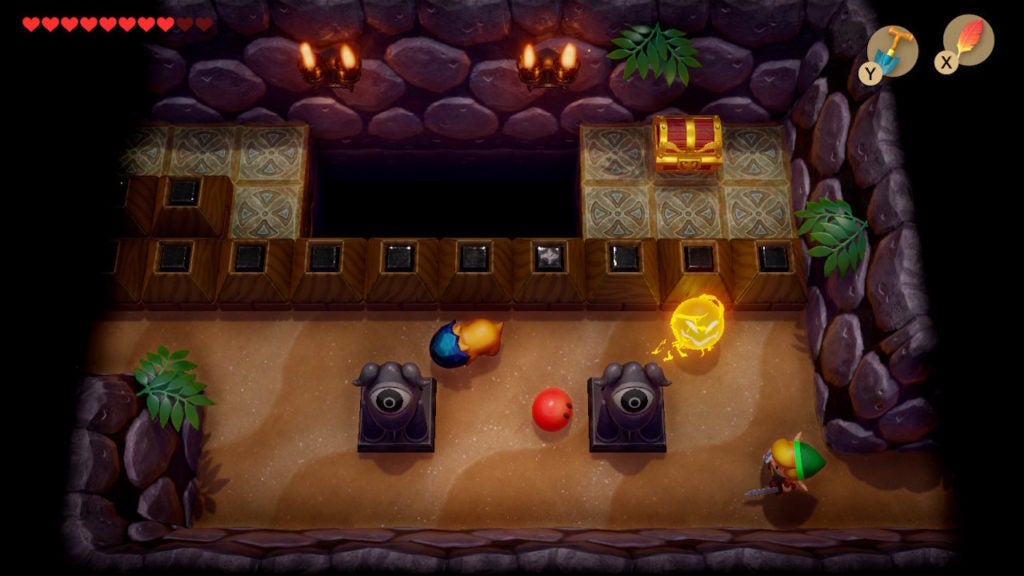
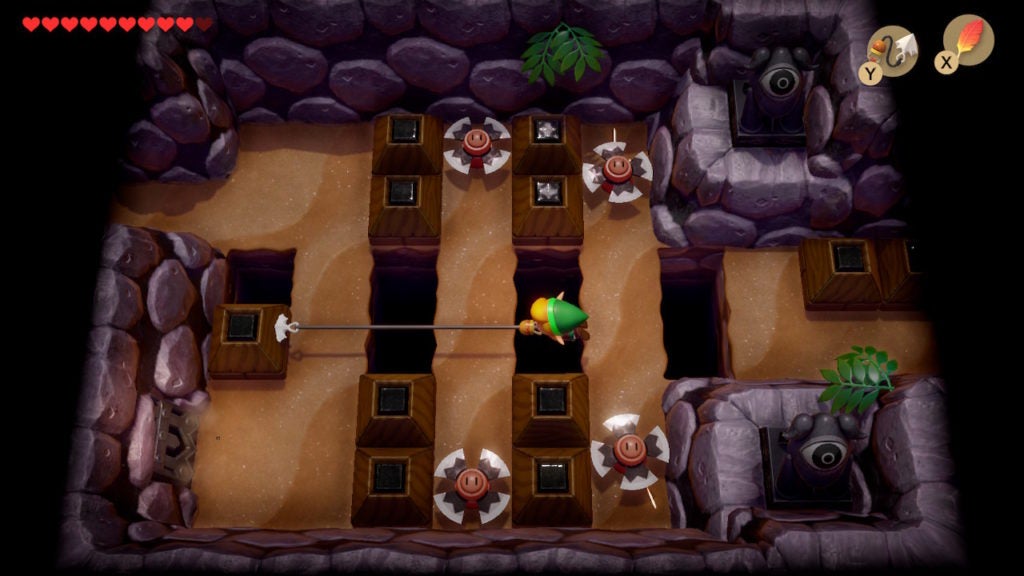
The new enemy is a type that you will have to strike in their sides or from behind with your weapon to defeat them. There is also a chest in the north, but you won’t be able to get it for a while. It contains a Small Key that you’ll need after getting the Hookshot. For now, make your way to the west and out of this room. In the one beyond, you’ll find a more spacious room with a few Keese and another Helmasaur.
There are also 2 locked doors. The 1 to the north requires a Small Key to open, but, to get a Small Key, you’ll need to go west. To unlock the western door, you’ll have to defeat the 4 Keese and 1 Helmasaur in this room. Afterward, proceed west into the next room.
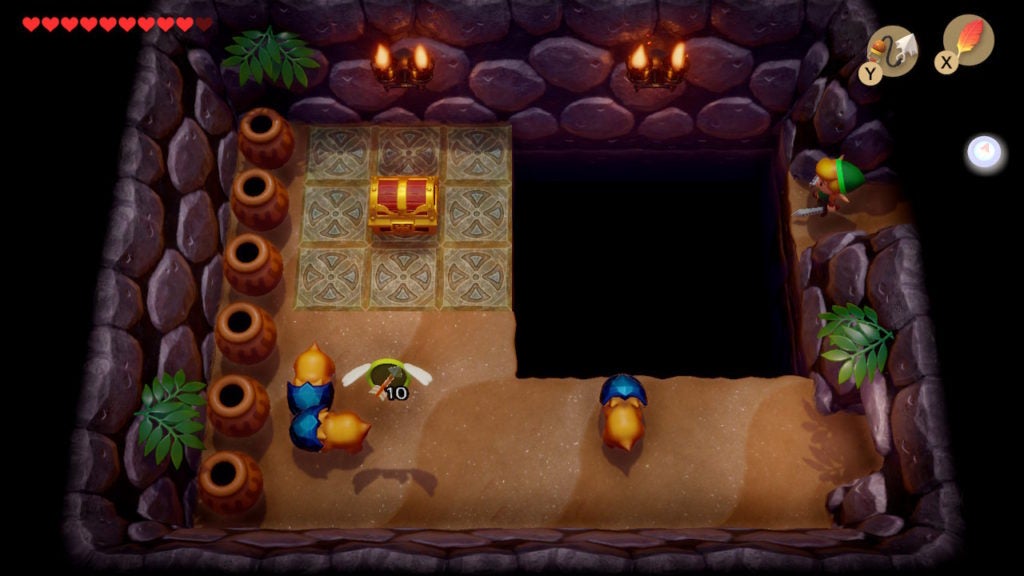
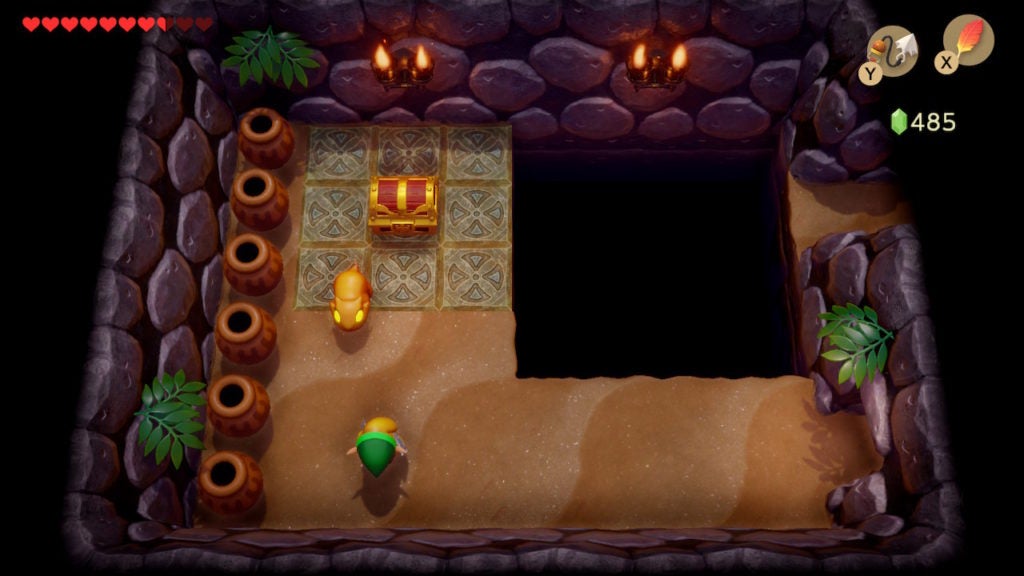
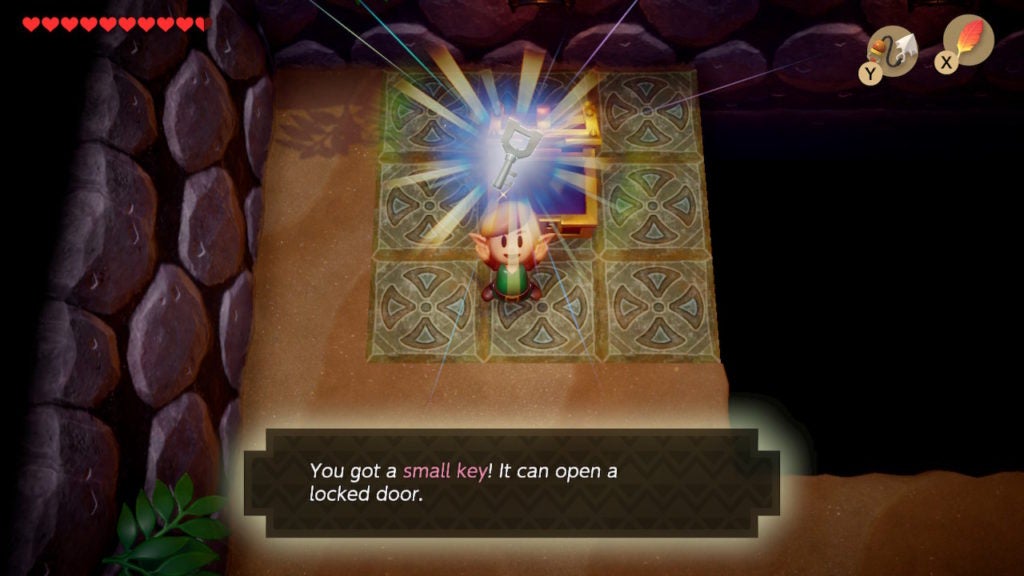
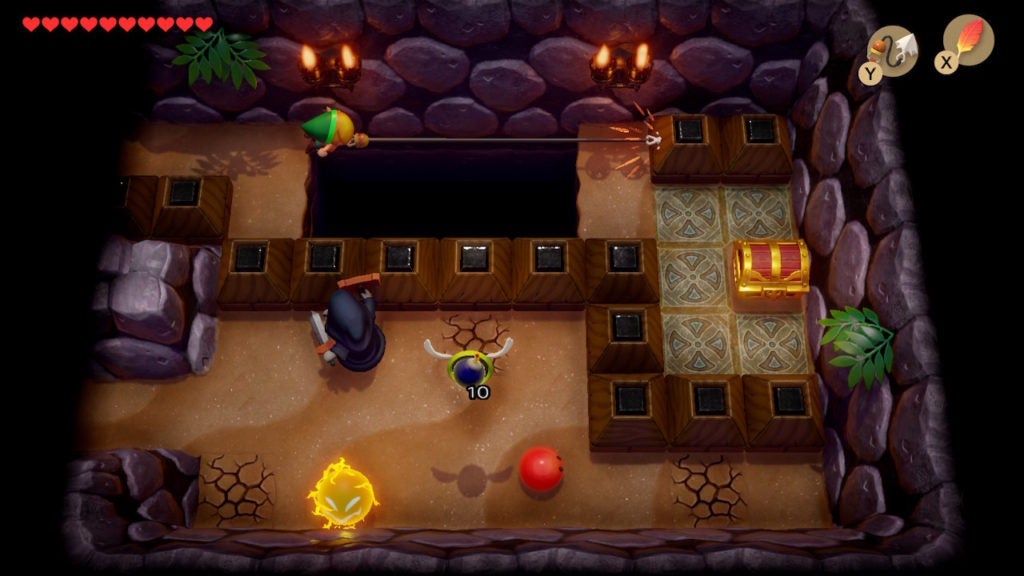
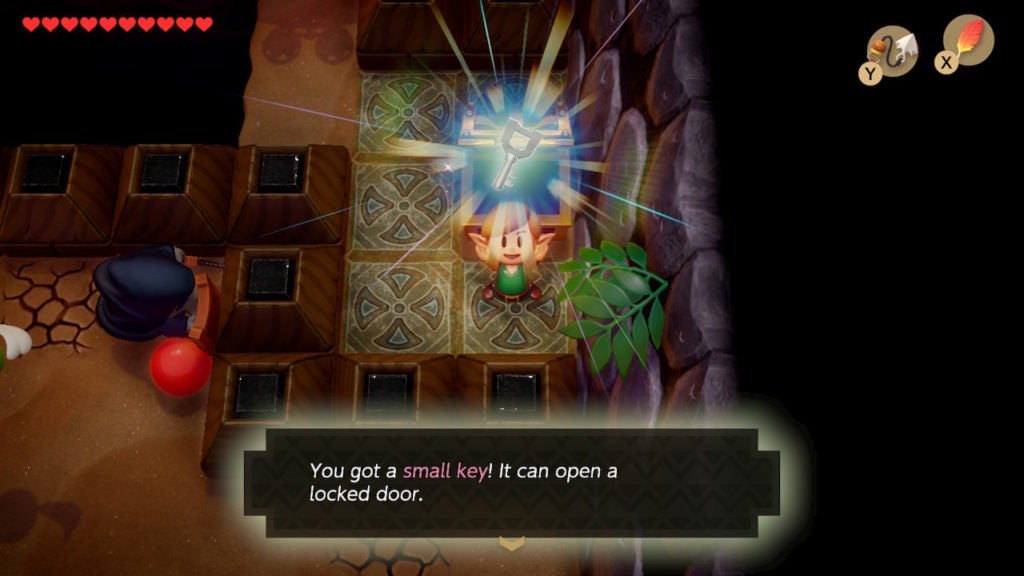
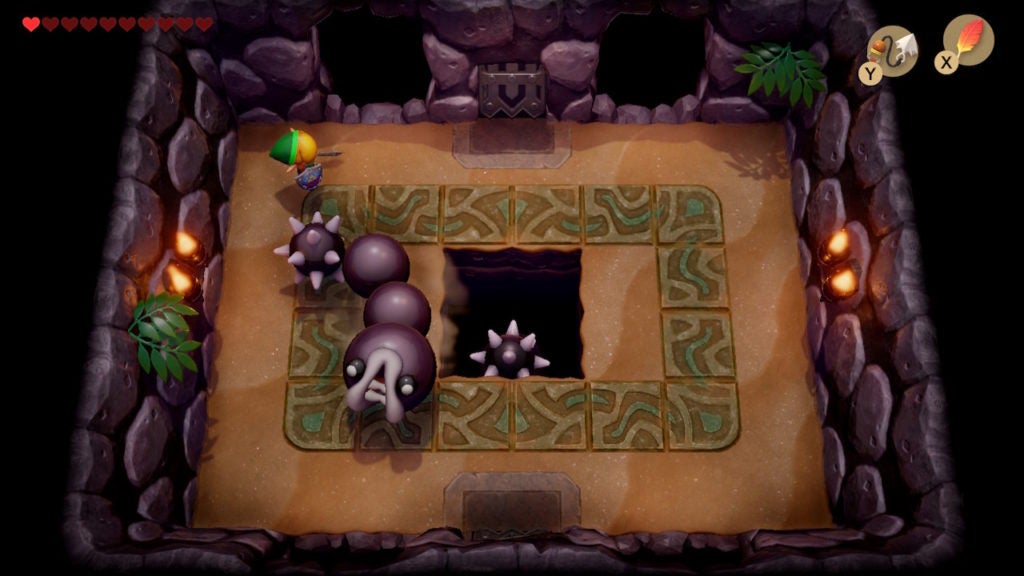
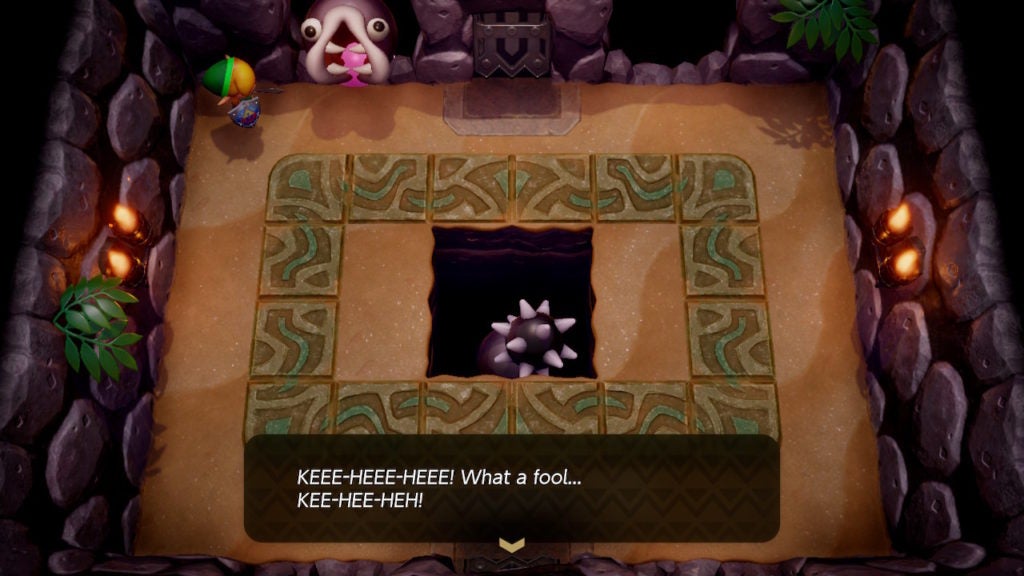
Here, you’ll find a room with a chest in the northeast as well as a few enemies. There are 2 Helmasaurs and 1 Spark that you’ll need to deal with, as the door locks behind you and will only open when the Helmasaurs are slain. When you can, open the chest to loot the Compass.
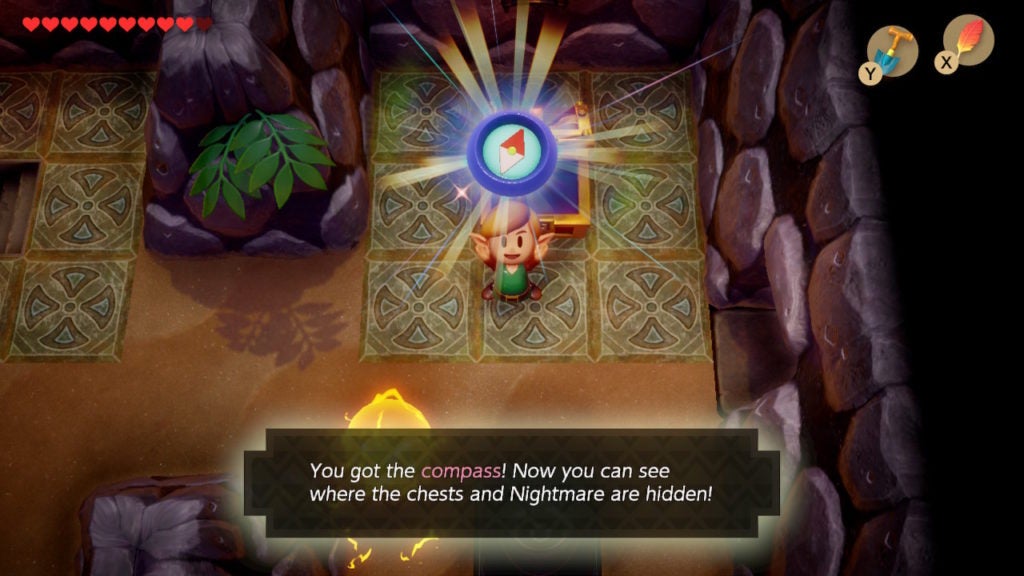
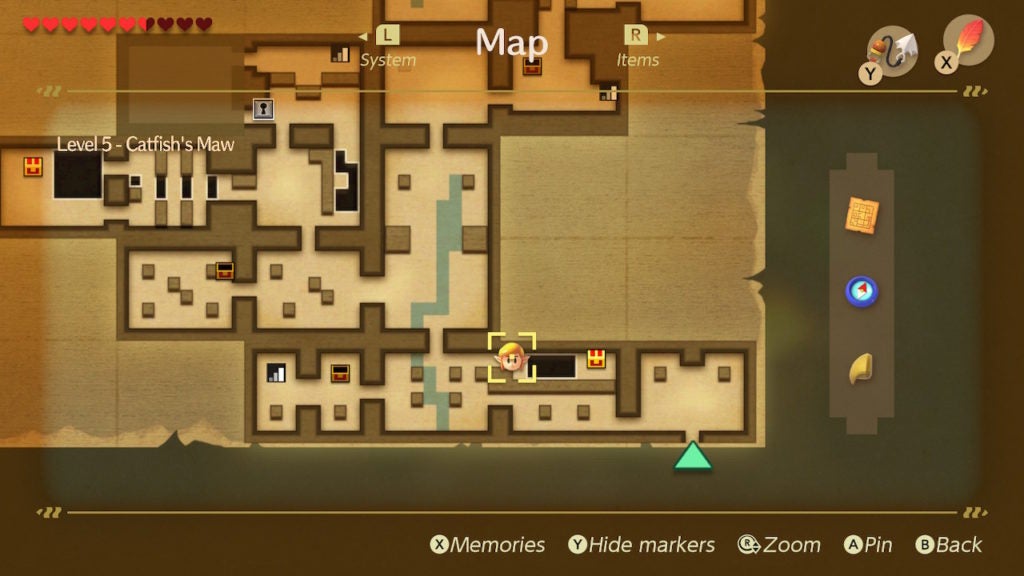
Take a Look at Your Map to Scout the Dungeon
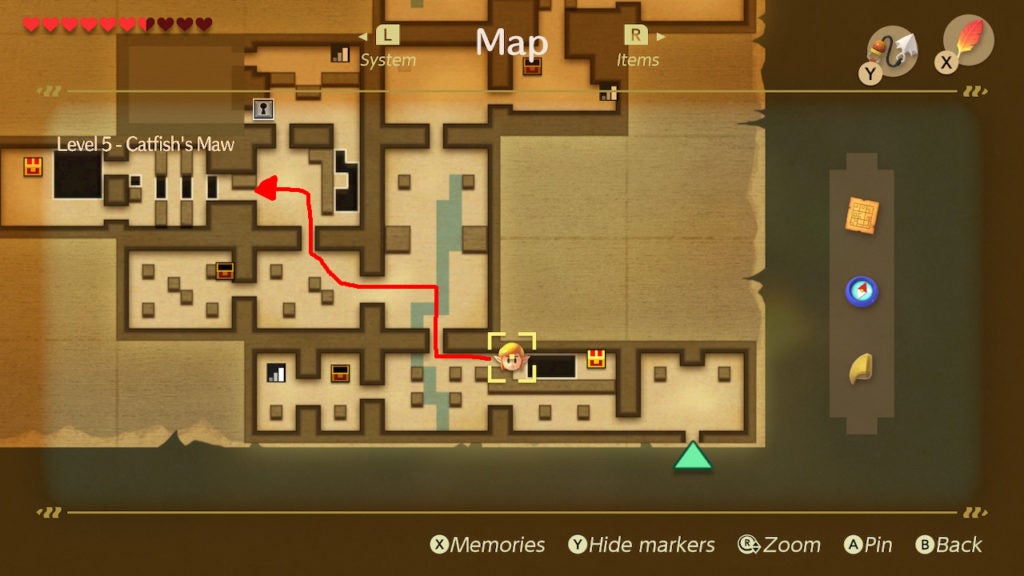
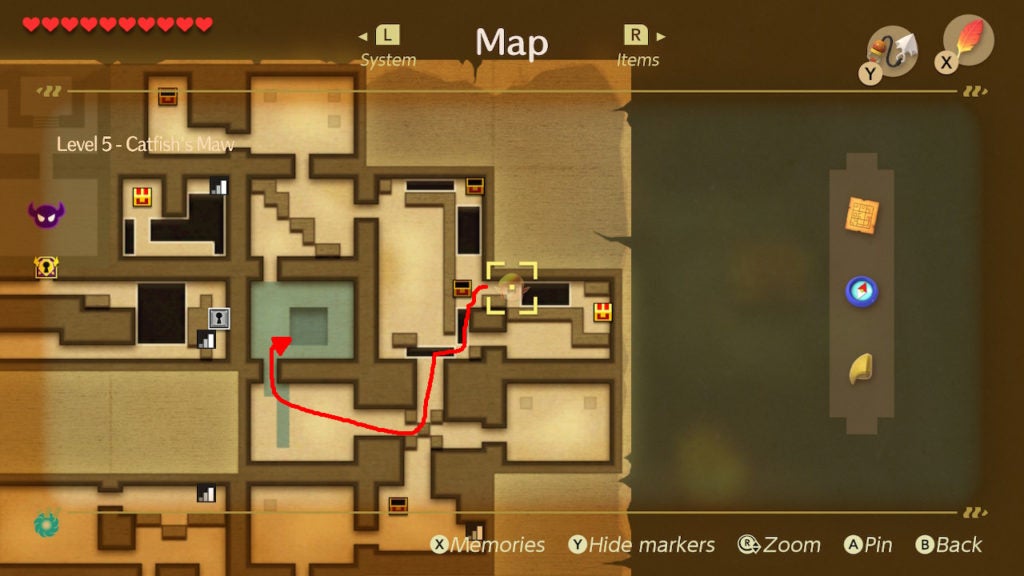
After you acquire the Compass, you should take a look at your Map to note the locations of all the chests and the boss room.

You can tell by looking at the Map in this state that you must proceed north. However, to get the Small Key you need to head that way, you’ll have to head down the staircase in the west of the Compass-chest room.
Find the 1st Small Key in the Dungeon
When you descend the staircase, you’ll be in a side-view underground tunnel. You’ll have to jump across all of the small gaps with the help of the little platforms. However, they will descend as you stand on them, though, since they are connected to each other, you can use this to your advantage.
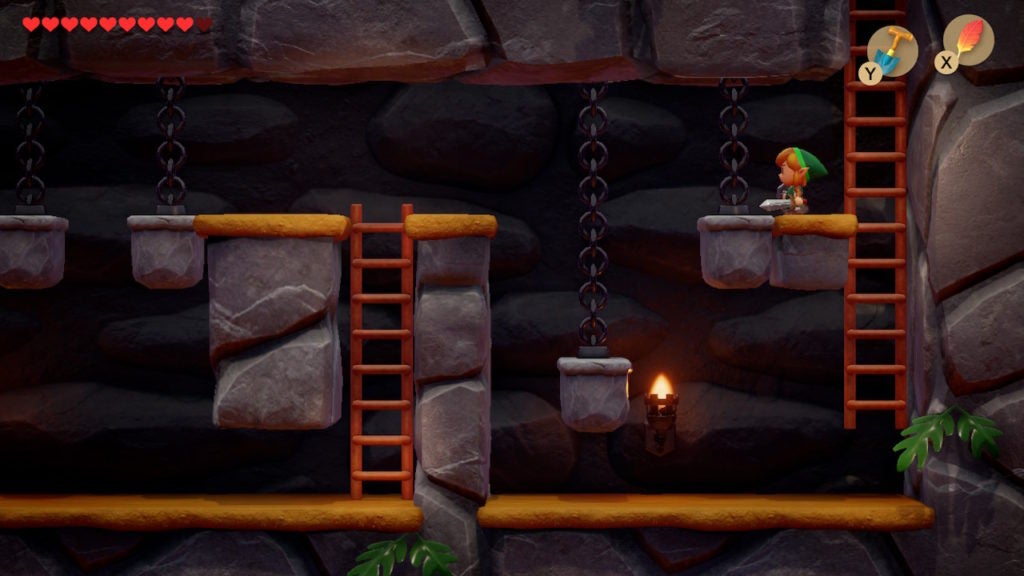
Stand on the closest platform to lower it while getting the other to the west to rise. Jump across to reach the western half of the underground tunnel.
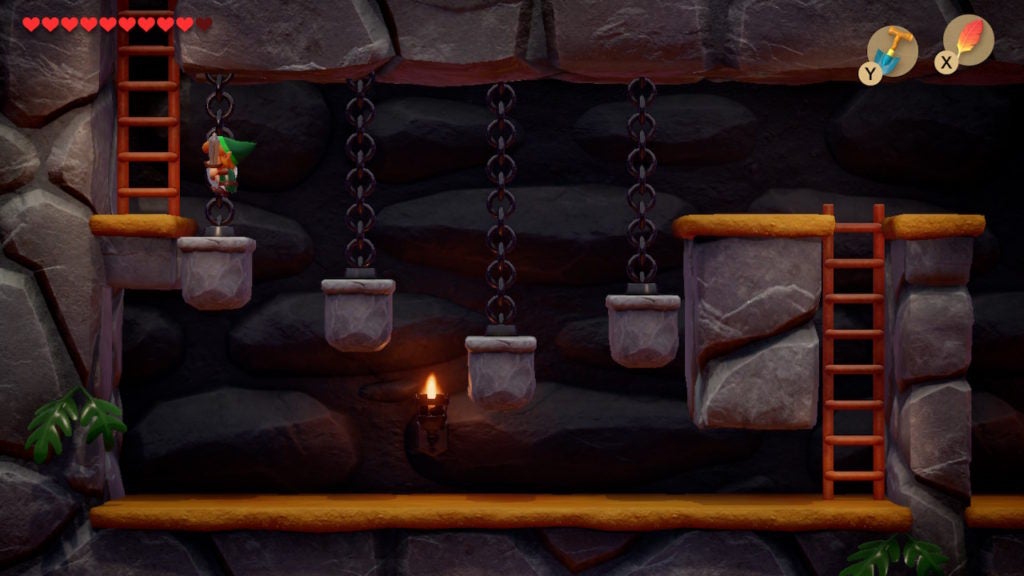
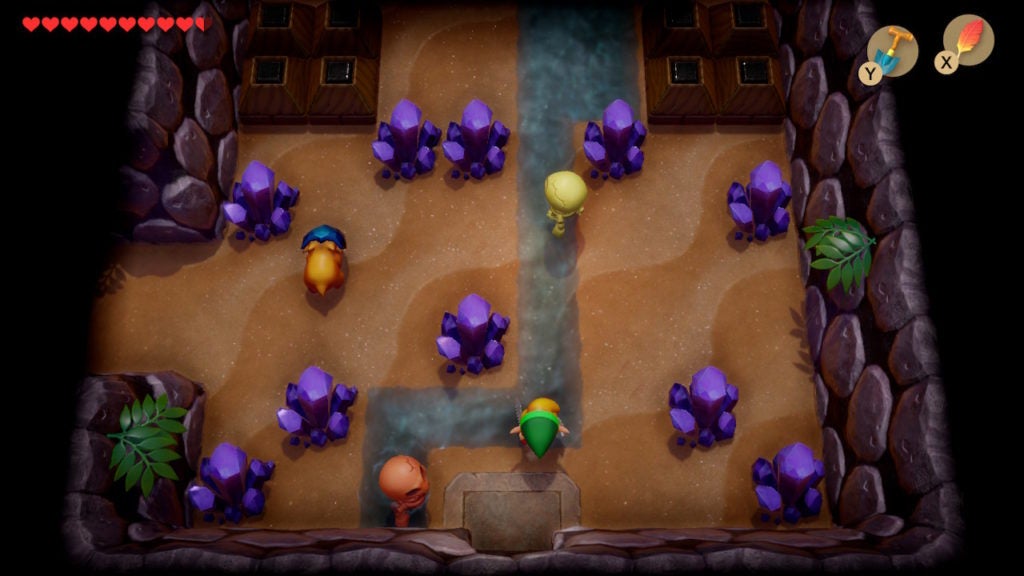
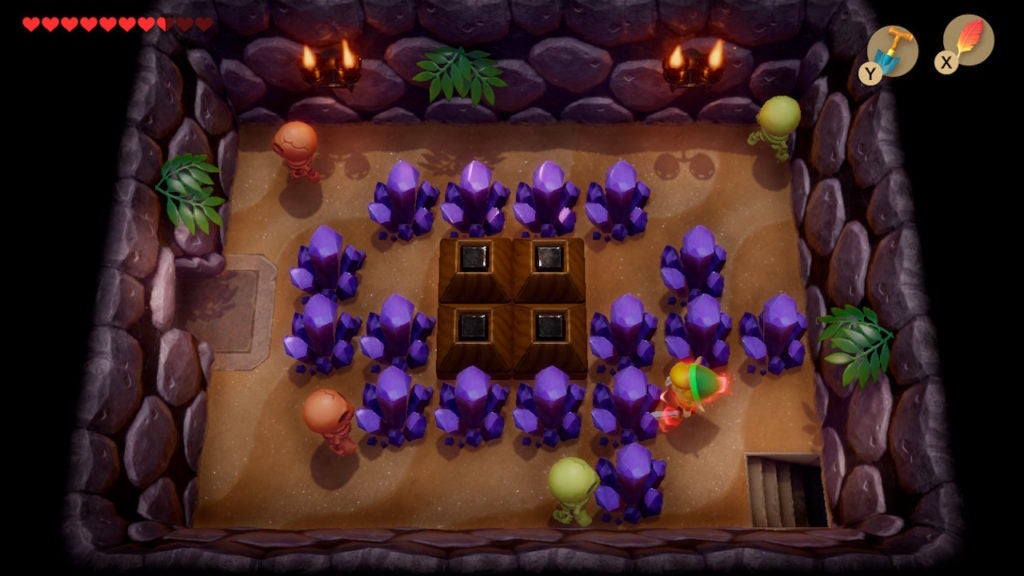
Use the same method as before to manipulate the 4 connected platforms in the tunnel’s western portion. You’ll be able to raise and lower them with your own weight to make a path that will lead to the ladder in the west. When you ascend the ladder, you’ll be in a room in the far northwestern part of the dungeon. There will be tons of purple crystals and a few enemies here.
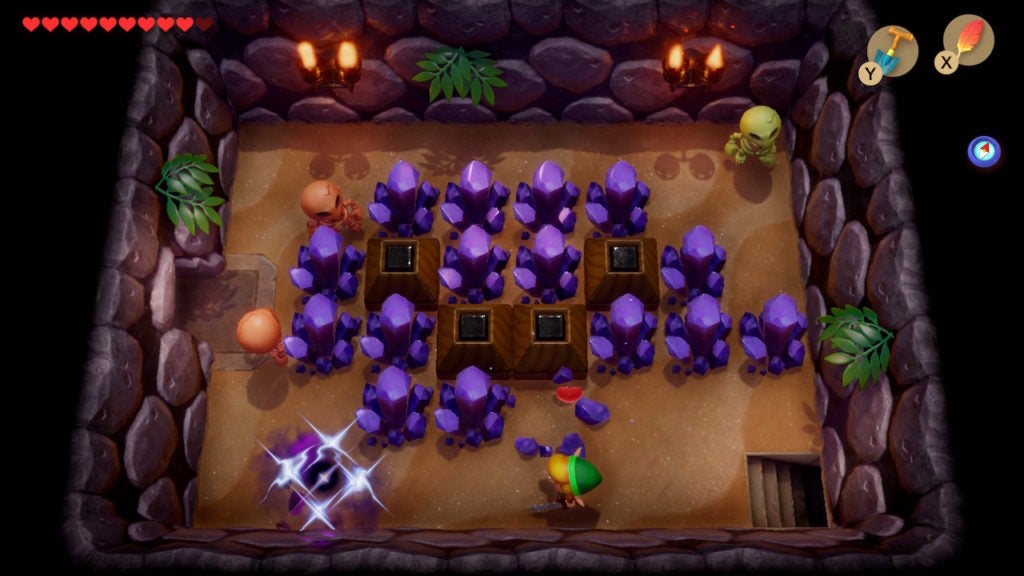
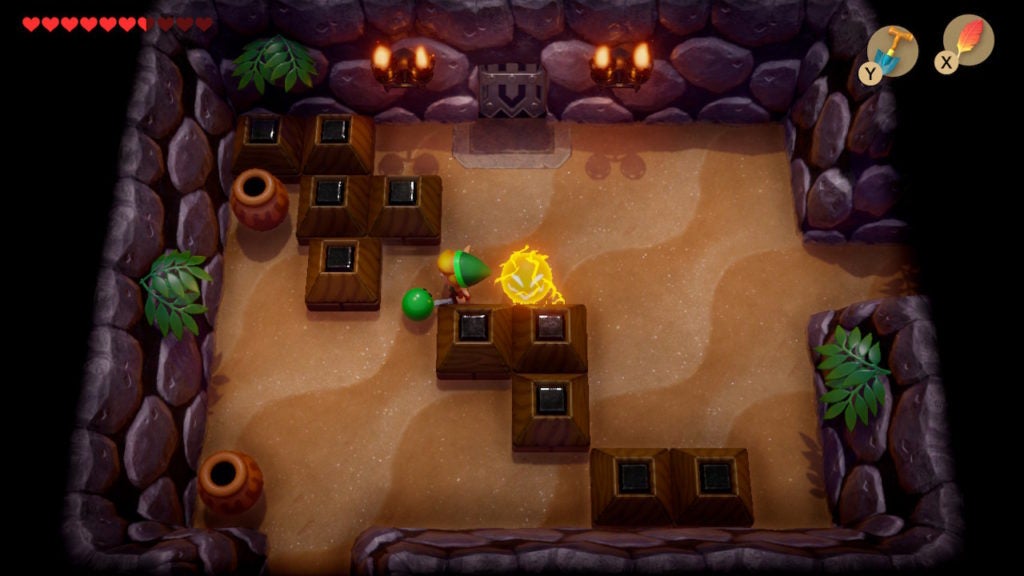
Clear the enemies out and destroy all of the crystals so that you can solve the puzzle with the 4 blocks.
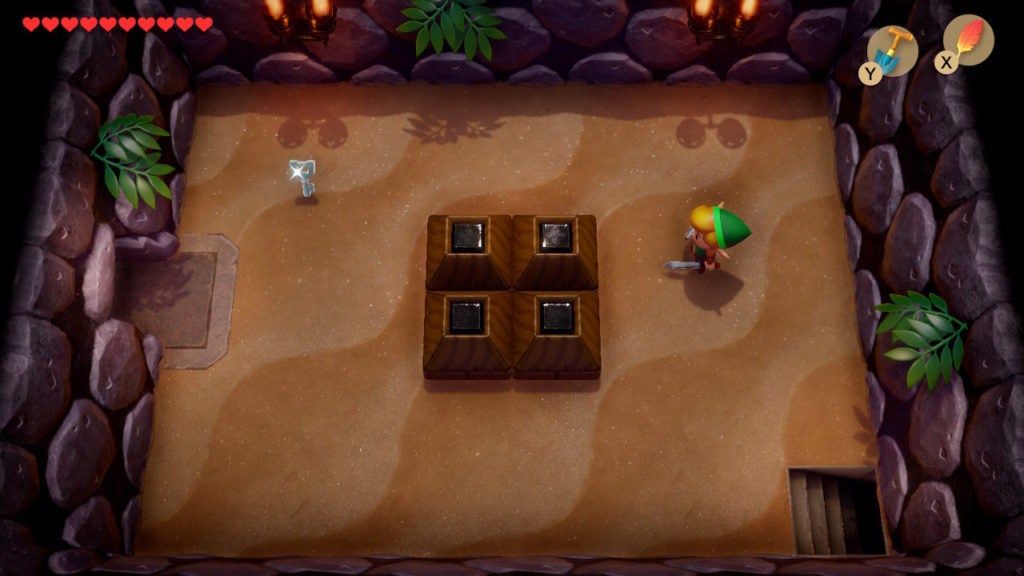
The 2 northernmost blocks can be pushed together to get the 4 blocks to form a square. When you do this, 1 Smal Key will drop nearby. You can pop your head into the room west after getting the Small Key to find a room with an ominous skull on the floor. However, you won’t need to do anything in this room for a while. Now’s when you should backtrack to the locked door that will lead you north. Head through the underground tunnel once more to get there.
Find the Stone Beak
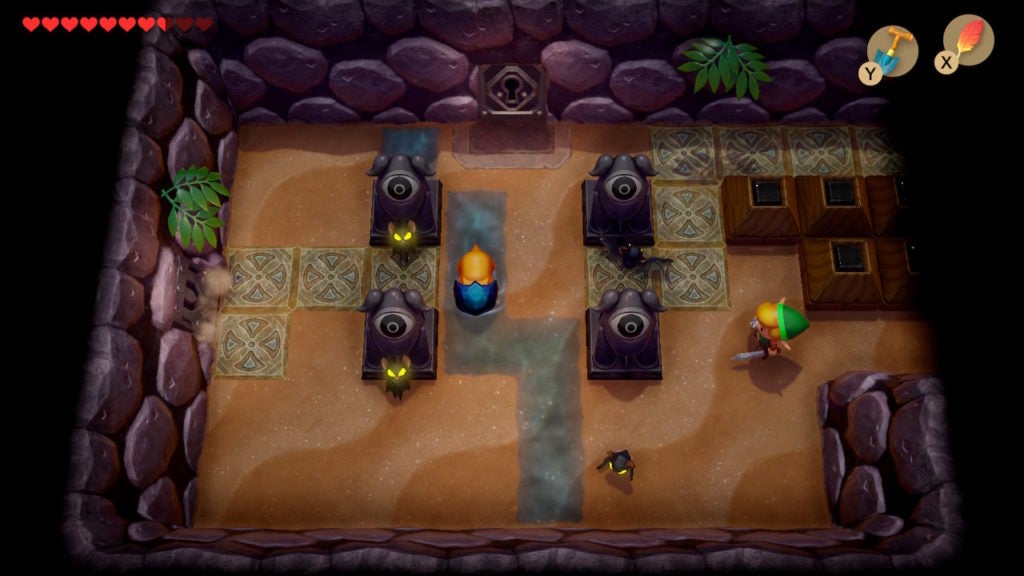
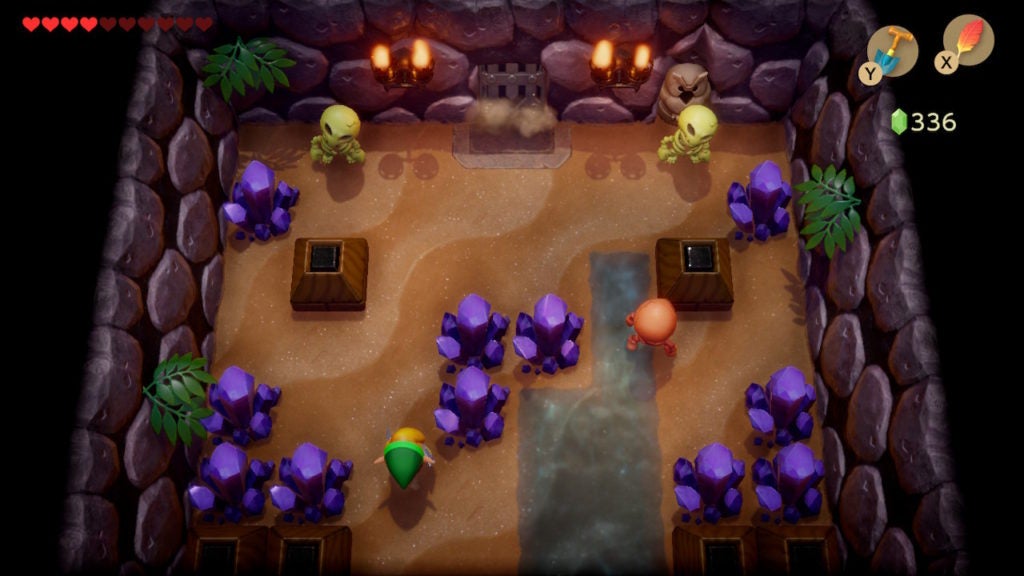
After you get back to the room with the locked door leading north, unlock the door with your Small Key. When you proceed ahead, you’ll find more purple crystals and a few more enemies.
There will be 1 Red Stalfos, 1 regular Stalfos, and 1 Helmasaur here. For progress, go west into the next room. But, when you do, be careful! Be sure to jump right away, as there are a couple of Blade Traps on the other side.
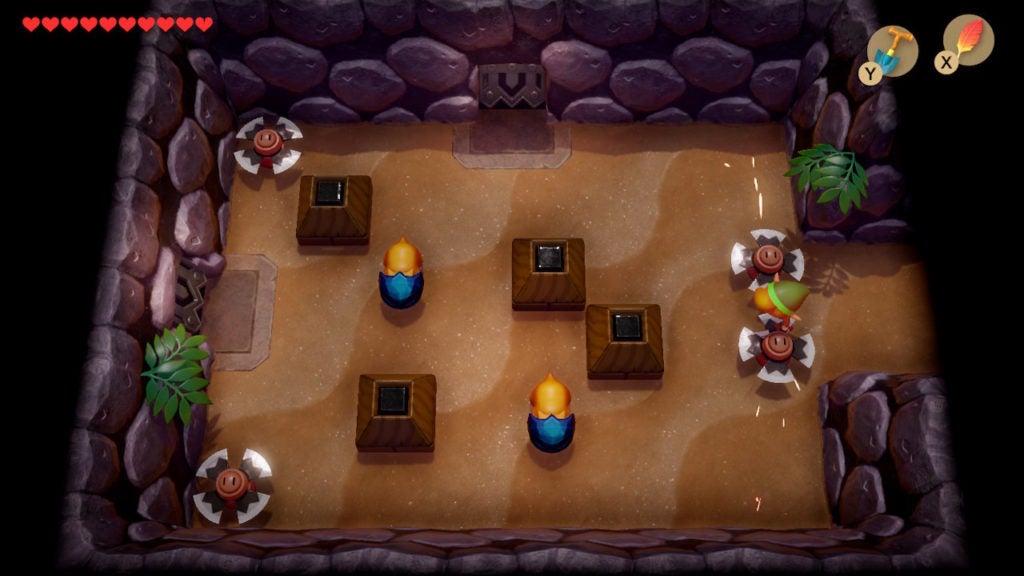
To open the exits of this room, you’ll have to take out the 2 Helmasaurs in the middle of the room. When you manage to do so, go west. Here, you’ll find a room with 2 more Helmasaurs and 1 Spark.
You’ll need to defeat the 2 Helmasaurs in this room to get a secret chest to appear. When it does, it will spawn in the northeast corner of the room. Open it up to obtain the Stone Beak.
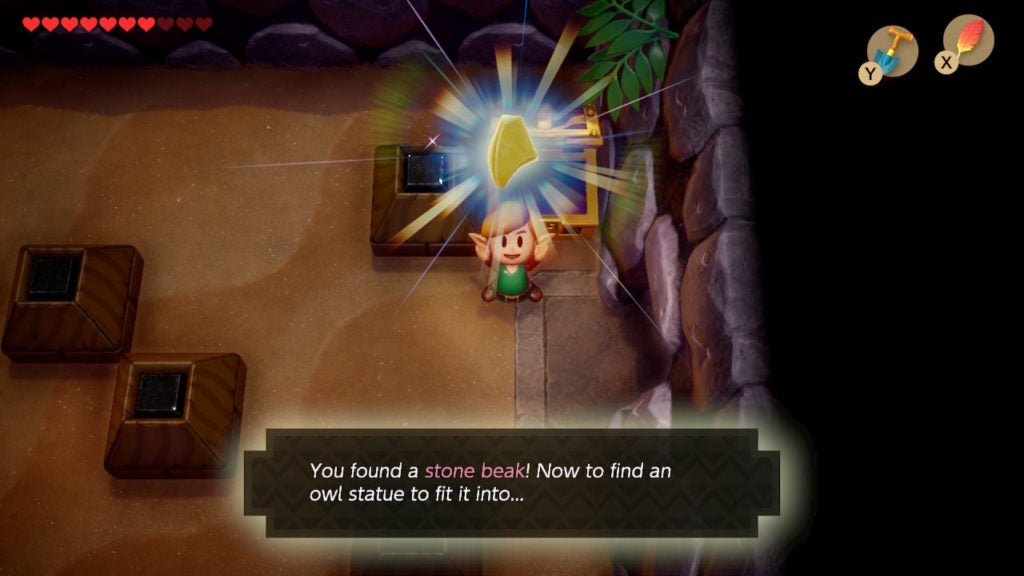
With this, you’ll be able to get hints from the Owl Statues that you come across. This will come in handy when you’re about to take on 1 of this dungeon’s 2 mini-bosses.
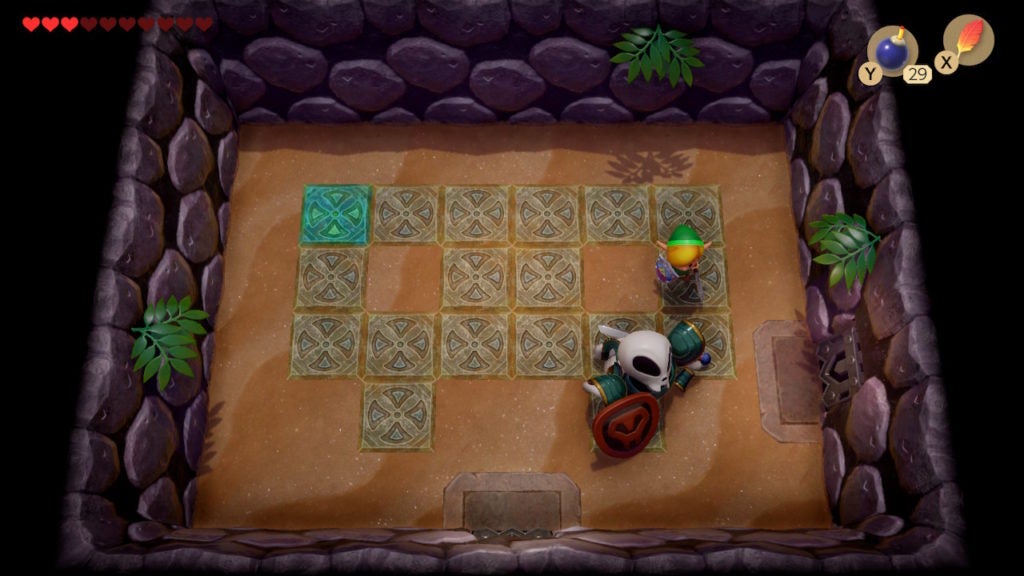
On a related note, it’s time to face off against a most persistent foe. You’ll have to fight Master Stalfos 4 times to fully defeat them, after which you’ll get the Hookshot. If you know where to look, you can hunt them down throughout Level 5 – Catfish’s Maw relatively quickly.
Fighting Master Stalfos (1st Encounter)
Backtrack to the room with the stream and the sparse purple crystals. From there, go north to find more Stalfos enemies among even more purple crystals.
You’ll need to dispatch the 2 regular Stalfos and 1 Red Stalfos here. After the coast is clear, interact with the Owl Statue in the northeast corner to get a hint about the upcoming mini-boss.
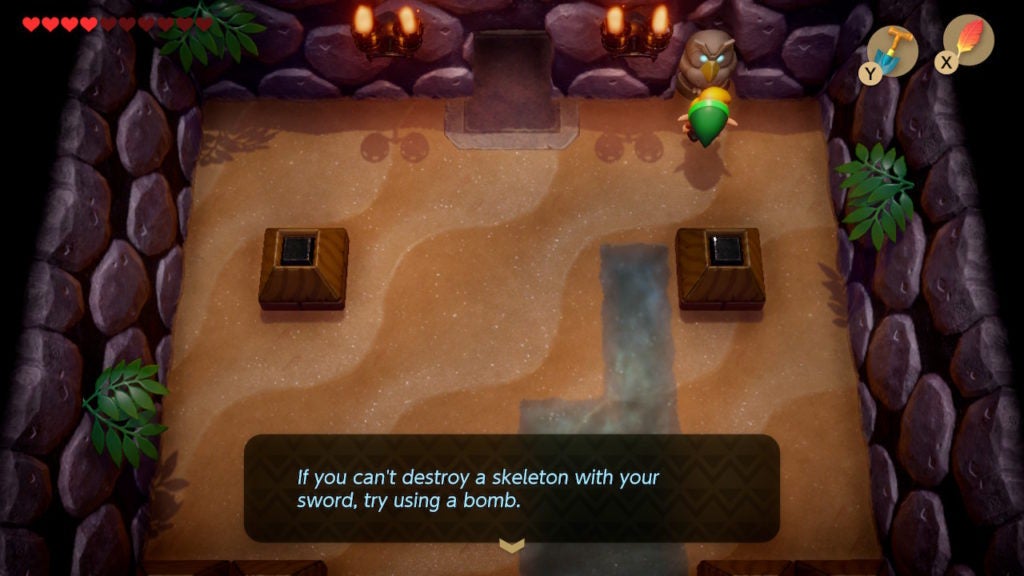
The hint will be that you need Bombs to hurt Master Stalfos. This means you should equip your Bombs and get ready for a rumble. Proceed north to challenge Master Stalfos.
How to Hurt Master Stalfos
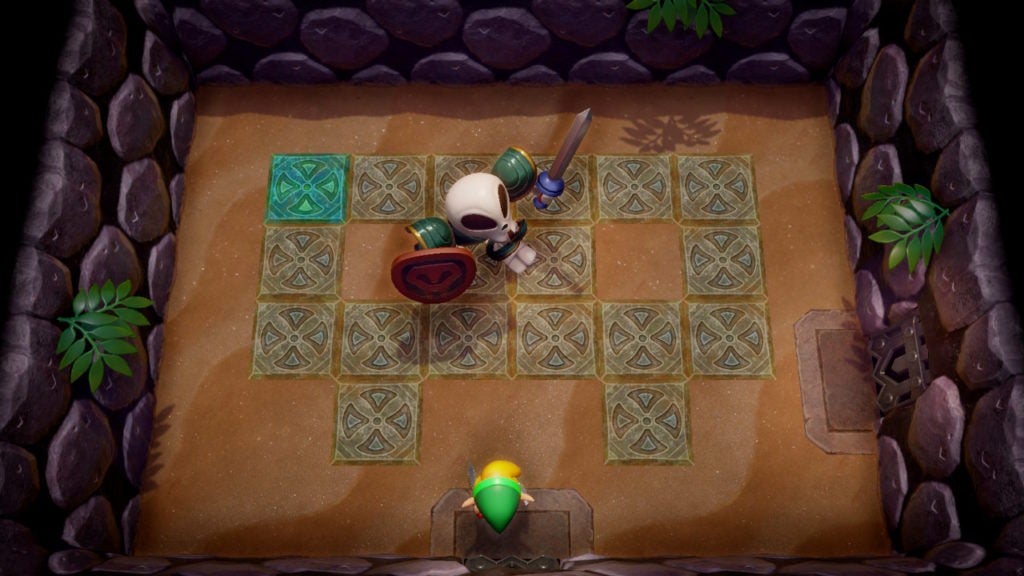
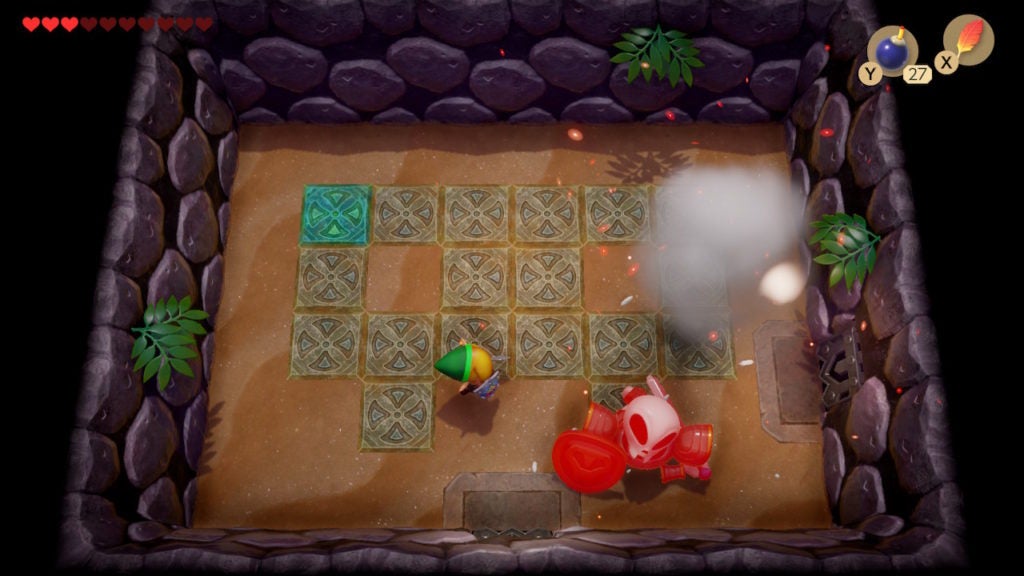
You’ll have to use a combination of Sword and Bomb attacks to defeat Master Stalfos. The huge skeleton wields a sword and shield themselves, and acts a bit like a bigger version of the Sword Stalfos enemies you’ve seen here and there. When Master Stalfos is winding up for a sword slash, they let their guard down, during which you can hit them with your Sword to knock them down.
However, simply disassembling Master Stalfos won’t kill them—it won’t even damage them! While the mini-boss is on the ground as a heap of bones, you can plant a Bomb next to them to do some real damage.
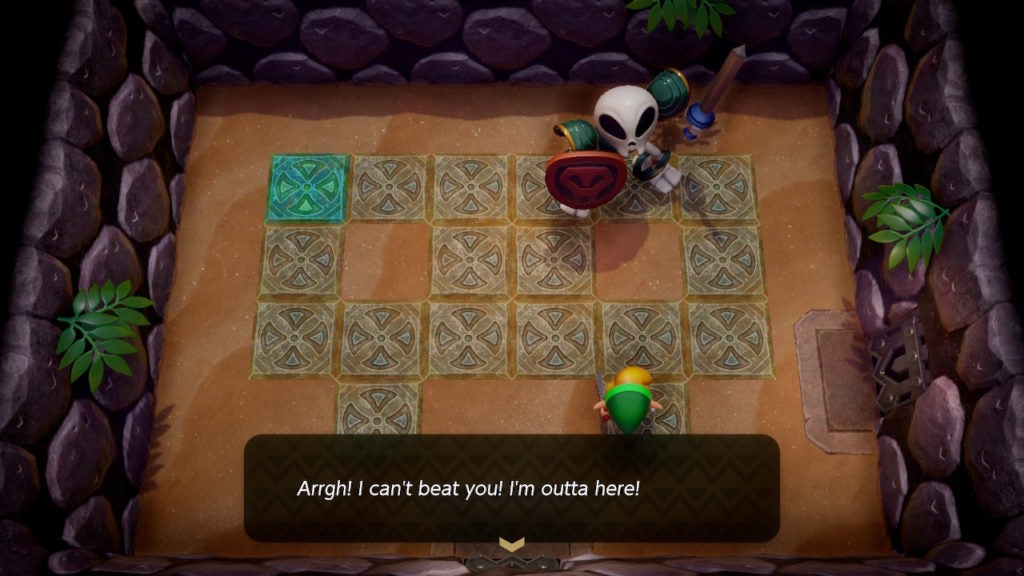
Repeat this process a few more times and Master Stalfos will admit defeat, though, will not be vanquished. They escape to another room in the dungeon, which will force you to hunt them down.
Alternate Method for Hurting Master Stalfos
In addition to hitting them while they are winding up, you can instead plant a Bomb beside or behind the mini-boss when they are about to attack. This will cause them to turn in the direction of the explosion, allowing you to strike them on their flanks or from the back. After you knock them down, you still have to use another Bomb to injure the resilient adversary, so this method is more Bomb-expensive.
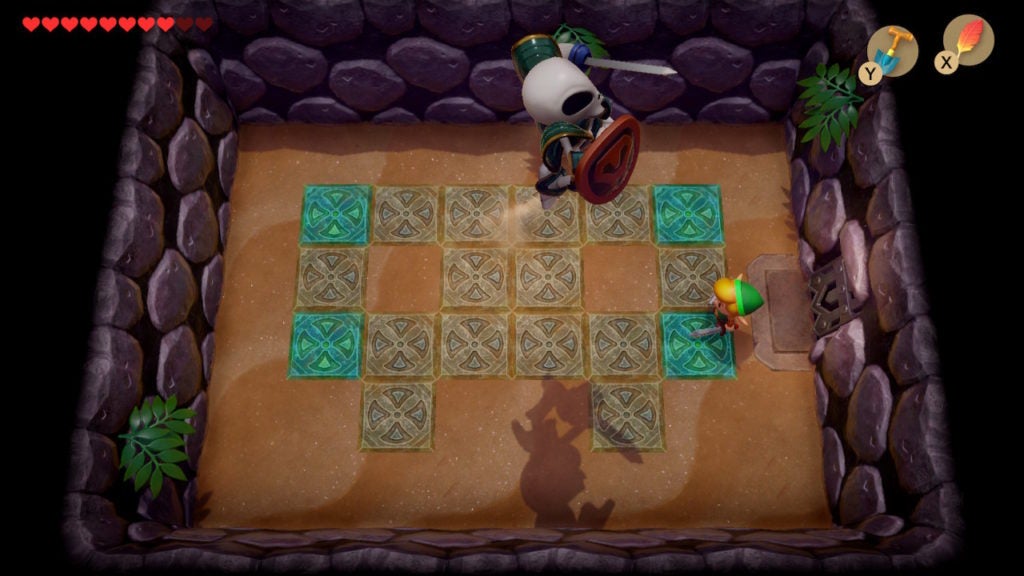
Thankfully, the rooms you need to enter to find Master Stalfos are fairly easy to get to from here. You’ll have to visit them in order, with this sequence being represented by how many brightly colored tiles are in the mini-boss room. For example, there is 1 such tile in the room where you have your first encounter with Master Stalfos. The next room you’ll need to find to encounter Master Stalfos will have 2 vibrant tiles like this, and the third room will have 3, etc.
Fighting Master Stalfos (2nd Encounter)
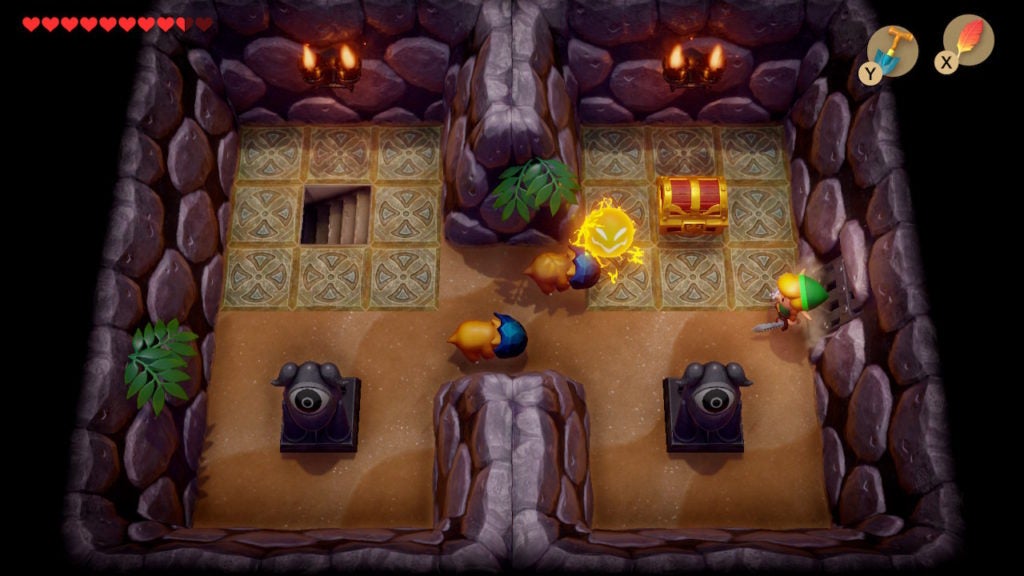
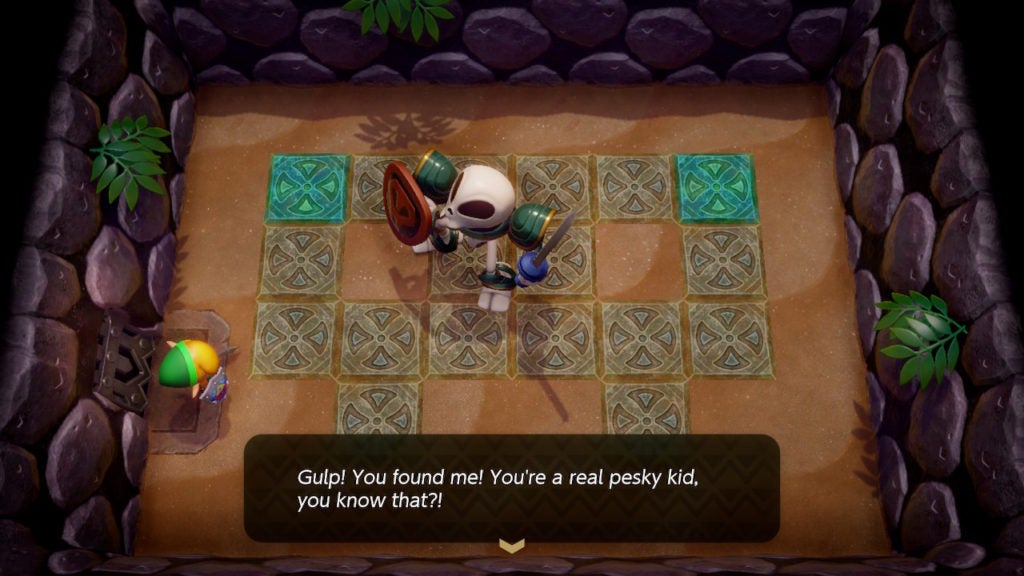
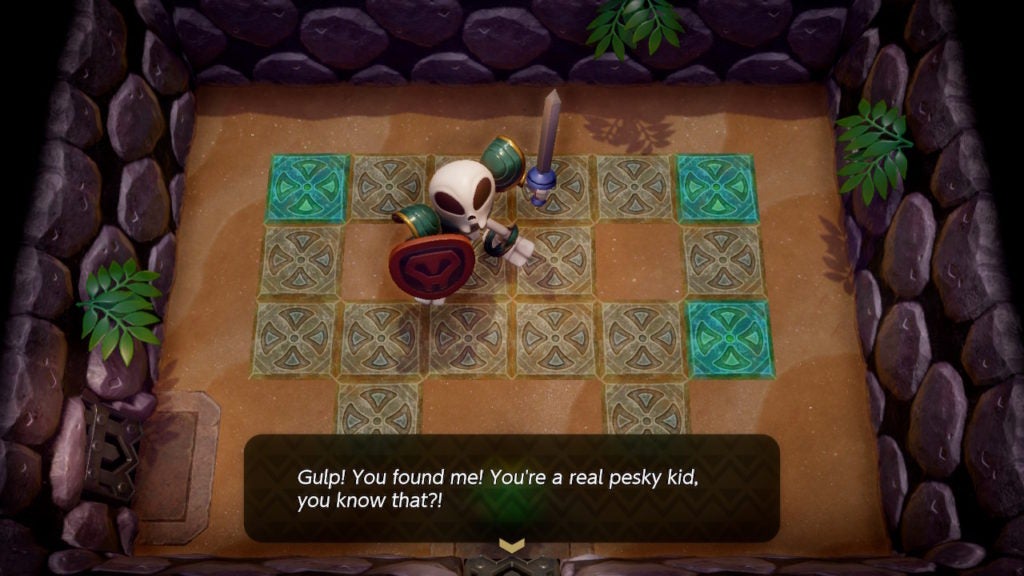
To find the second encounter with Master Stalfos, you’ll need to head east out of the room with the first encounter with them. You’ll then be in a room with a chest and a few Green Zols. Unlike the Red Zols, these don’t split into 2 Gels when slain.
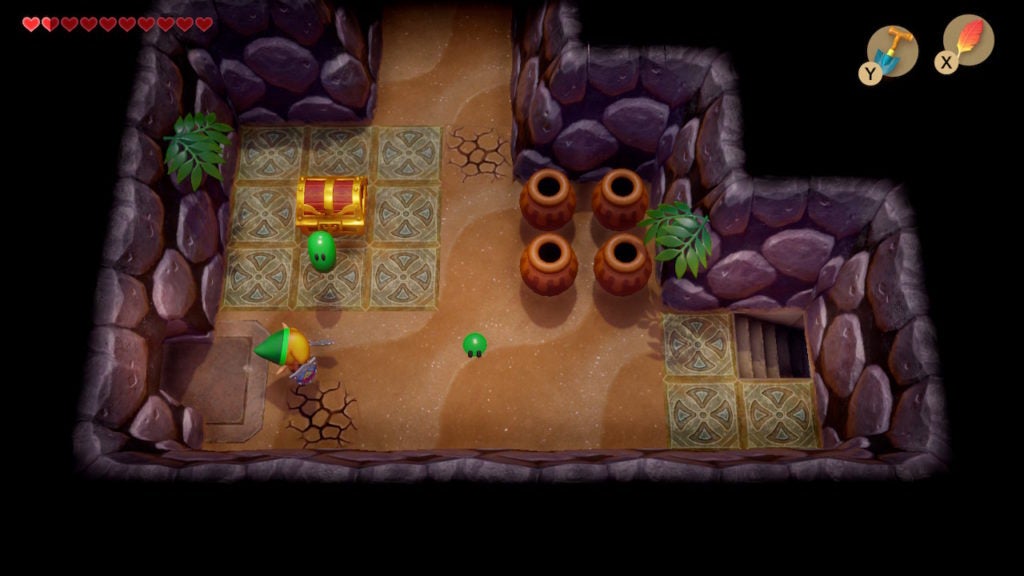
After you clear out the Green Zols, you’ll find the chest to be lacking in treasure. Instead, there will be a note inside from Master Stalfos that says they took the item that was in this chest. The note goes on to challenge Link, saying that if he wants the item, he’ll have to come and get it.
In the room north of here, you’ll find 4 hallways that meet in the center by an arrangement of 5 blocks (and 2 annoying Sparks). You can push the center of the X-shaped block arrangement northward to access the west hallway. When you leave the screen and come back, the blocks will have been reset. Due to this, you’ll be able to make your way to the beige floor button in the north hallway. When you press it, the locked door in the east hallway will open.
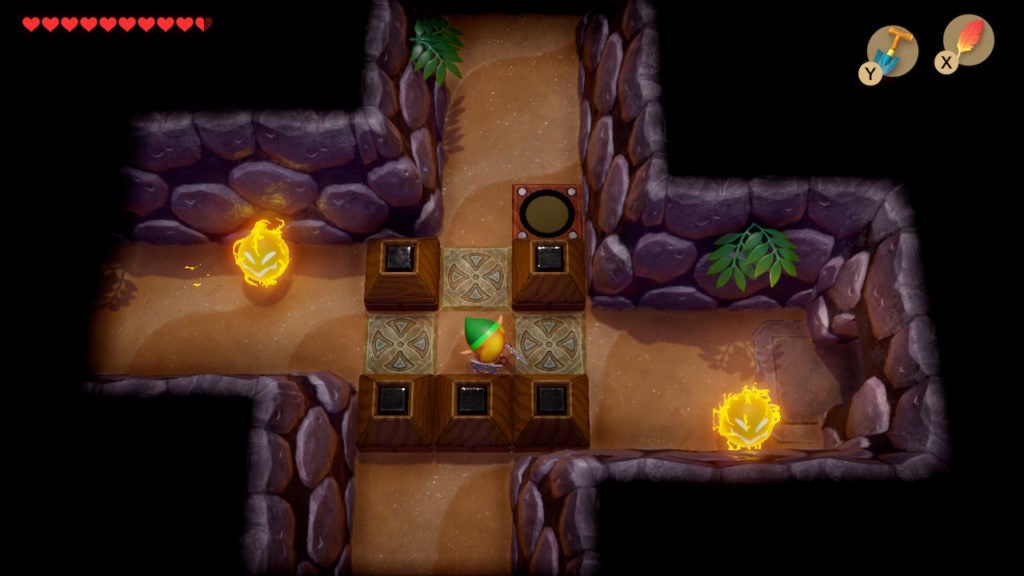
Reset the blocks in the room by leaving and coming back once more. Then, push the center block south and out of your way and head through the now open eastern exit to find the second encounter with Master Stalfos.
However, the fight will very similar to the last time you faced off against this foe. Defeat them in the same way and they will once more flee. The third encounter is not far, so stay hot on Master Stalfos’ bony heels!
Fighting Master Stalfos (3rd Encounter)
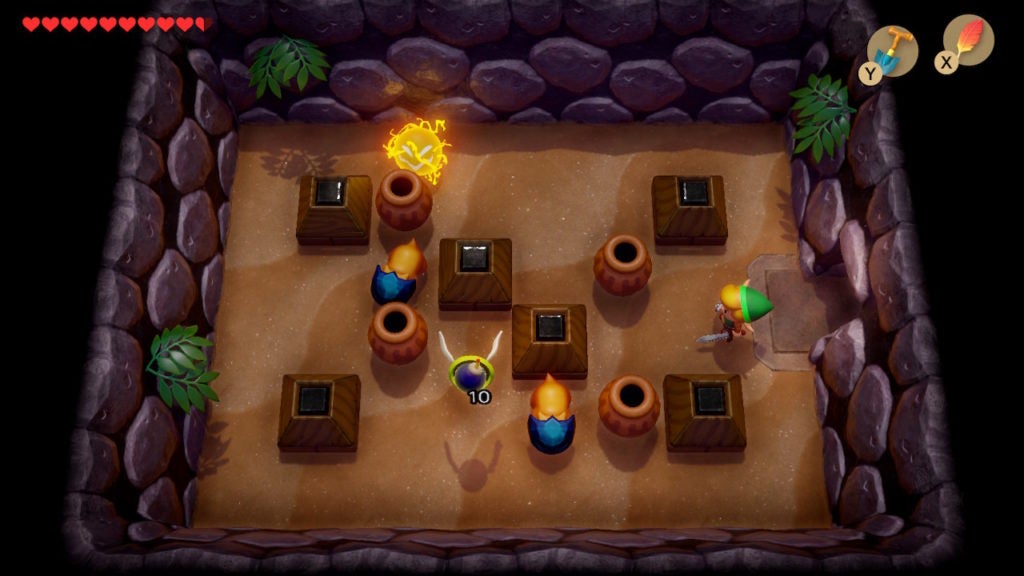
After defeating the mini-boss for the second time, you’ll have to go north for the third encounter. Backtrack into the room with the 4 hallways and then go north. This will bring you to a vertically-oriented large room with some pots and a few enemies. Here, you want to go to the northwest and exit through the doorway you find. For now, don’t worry about the chests in this room, you’ll need the Hookshot to reach them later.
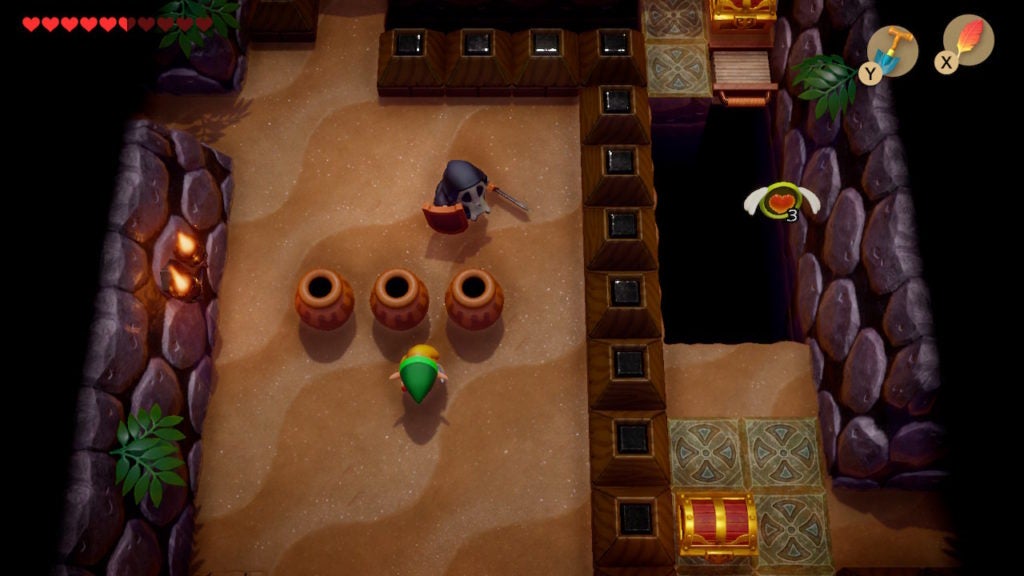
When you enter the next room, you’ll find it split diagonally by blocks. There is 1 Spark patrolling the edges of the room, though, a few Green Zols will spawn as well.
To open the locked door in the north of the room you’ll have to take out all of the Green Zols. This means slaying blob-like foes in both halves of this room. Thankfully, you can smash the pot in the center of the room and push the block west of it further west to access the southwestern section.
After all Green Zols and dealt with, go north to find Master Stalfos for the third time.
You know what to do. Use your Sword to knock the skeletal foe down before hurting them with a Bomb. After they get hurt a few times, they will again run away.
Find the Dungeon Map
After dispatching Master Stalfos for the third time, you should grab the Dungeon Map from the room to the west of here. There won’t be anything interesting inside this room besides the chest that holds the desired item, so go ahead and loot it!
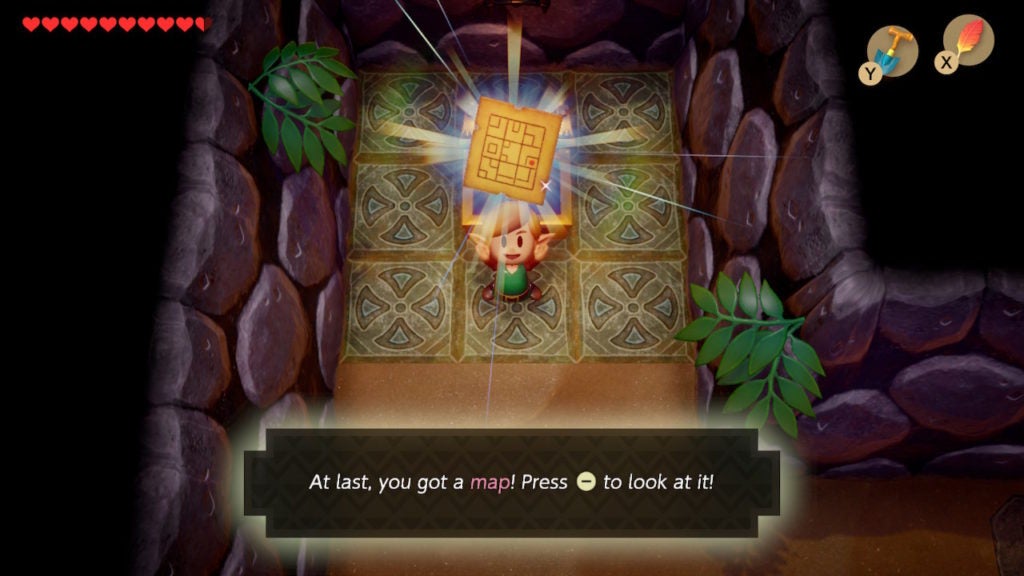
Following this, you should open your Map menu to take a look at Level 5 – Catfish’s Maw with newfound clarity.
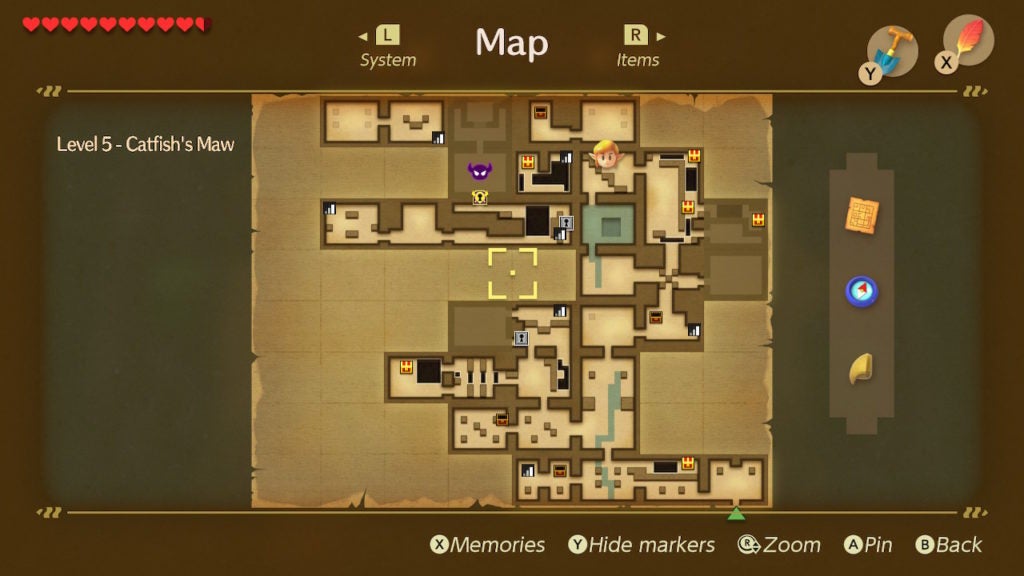
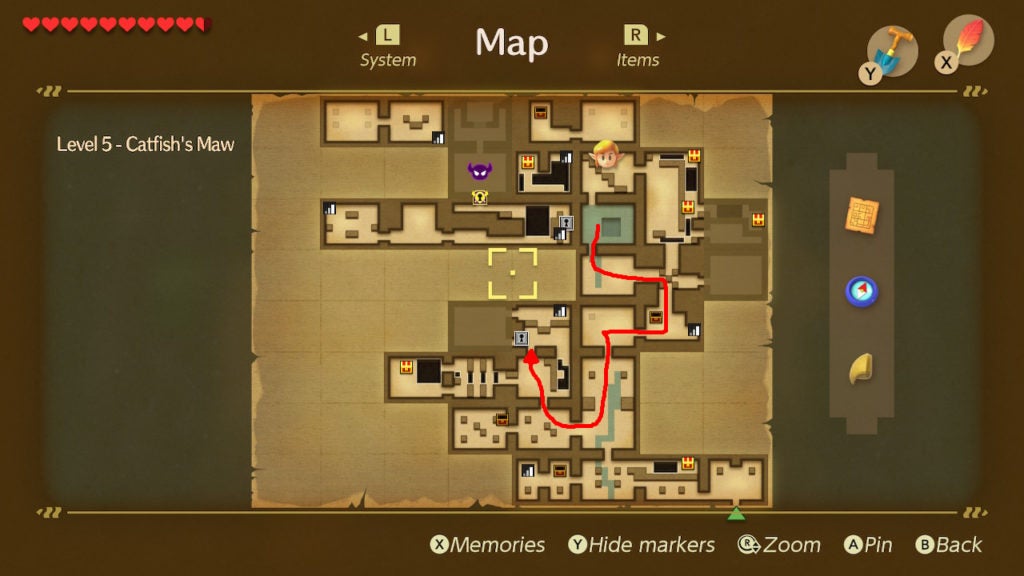
You can survey the dungeon to find a room with 4 dots located in the northwest corner. This is the site where your fourth encounter with Master Stalfos will occur. To get there, you’ll need to travel all the way to the very south of the dungeon and then a bit west. There’s a staircase in the room where you found the Compass that you’ll need to descend to get to the northwest corner of Level 5 – Catfish’s Maw. You’ve already been through here, though, on this trip, you’ll have to go a bit further.
Fighting Master Stalfos (4th Encounter)
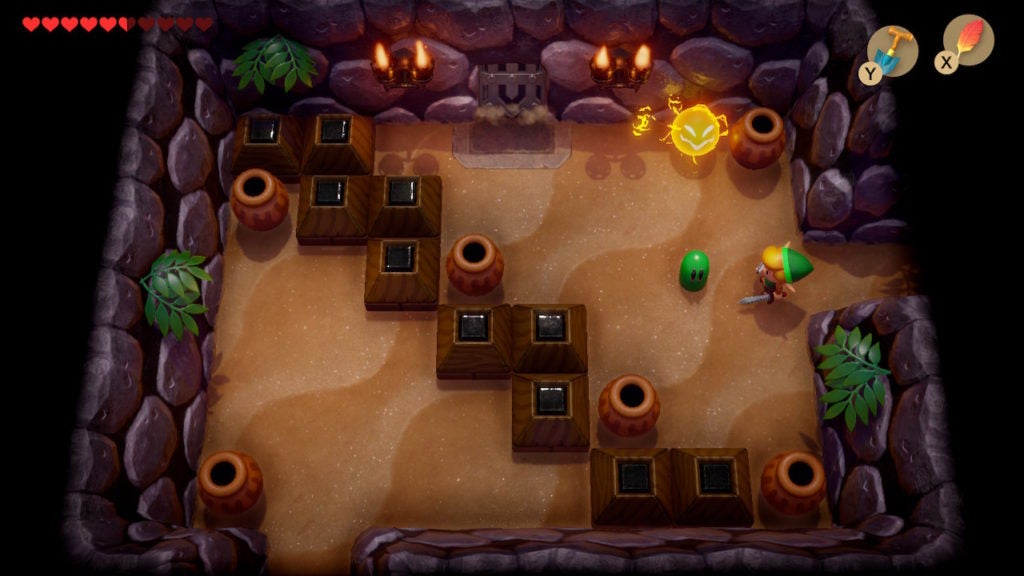
From the staircase in the room that held the Compass, go down into the side-view underground tunnel. Then, make your way west and ascend the ladder you find at the end of the tunnel. When you emerge from the subterranean passage, you’ll be in the room with the many purple crystals and some blocks you had to push into a square formation.
Go west into the next room to encounter Master Stalfos for the fourth and final time.
You can defeat Master Stalfos as you have in the past, however, there will be 1 key difference in this fight. Master Stalfos will now occasionally leap into the air in an attempt to crush you from above. As such, stay on the move to avoid this incoming divebomb. Keep knocking Master Stalfos down with your Sword before blasting them with Bombs to defeat them once and for all. After the skeletal fiend explodes into purple flames, the Hookshot will drop onto the ground nearby.
Pick Up the Hookshot
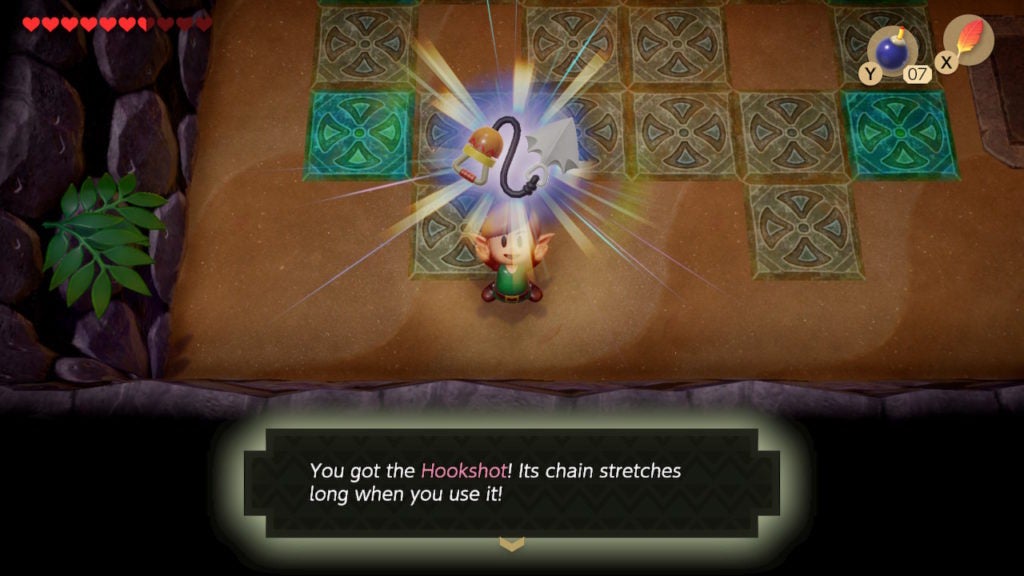
The Hookshot is an equippable item that you can assign to either your X or Y buttons. When used, the Hookshot will shoot a metal grappling hook in a chosen direction. This can let you hit enemies to stun them or allow Link to grab onto a heavy object and pull himself to it. Both of these tactics will be useful in coming trials of Level 5 – Catfish’s Maw.
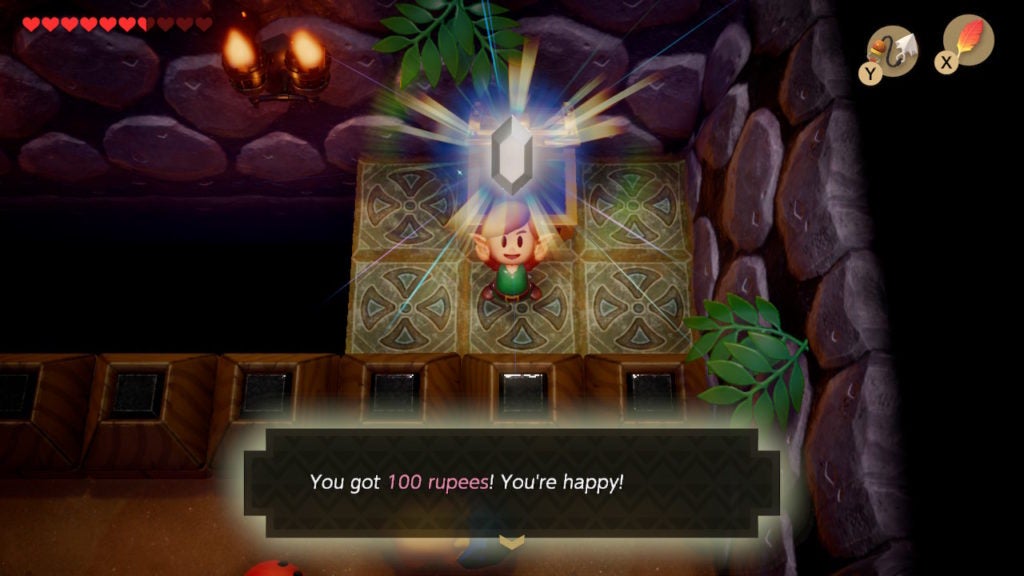
Open the Chest with 100 Rupees Close to the Main Entrance
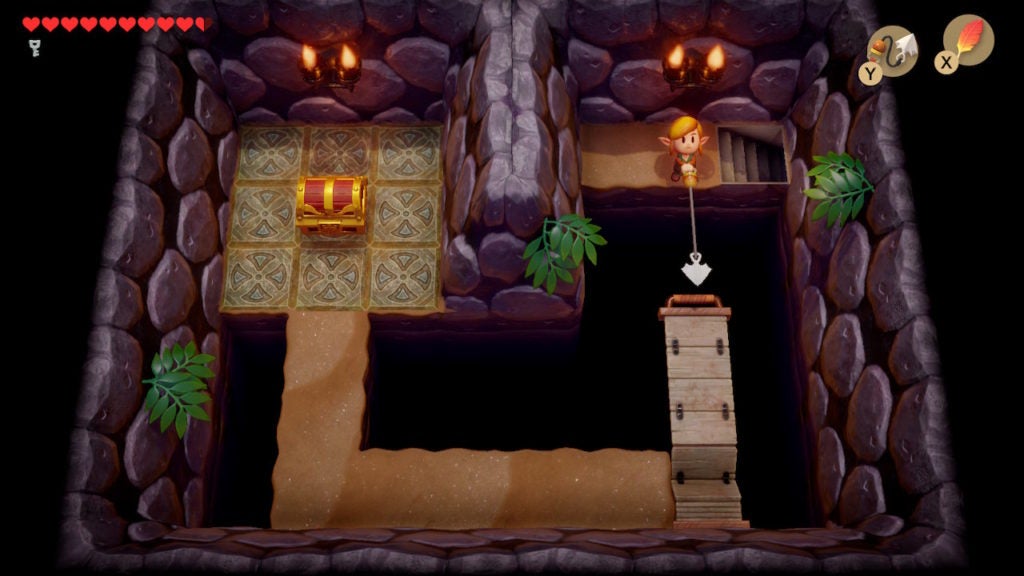
After you get the Hookshot is the best time to start opening all those chests you couldn’t reach before. The first chest you should seek out, as it’s the closest, is the one in the room just west of the main entrance.
You’ll need to approach this room from the northwest so that you’re across the gap from the chest.
Stand directly to the west of the chest and use the Hookshot to hit it. When the grappling hook makes contact with the chest, you’ll be pulled across the gap. You’re now free to loot the chest and obtain 100 Rupees!
In a similar manner, you can gather up the remaining Small Keys that you need to progress as well as the other chests that contain Rupees.
Small Key and Rupee Chest Round-up
From the chest with the 100 Rupees, you’ll want to make your way to the west of the dungeon while also heading a bit north.
Keep going until you reach a room with 4 Blade Traps and a few holes in the floor.
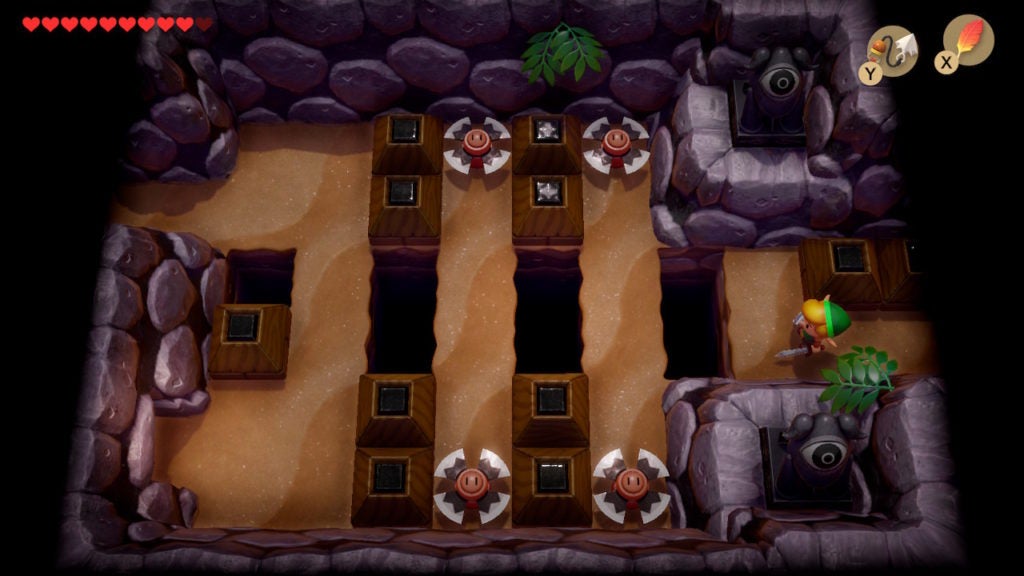
Normally, getting across this room would be a nightmare. Though, now that you have the Hookshot, you can zoom by the Blade Traps swiftly and safely.
When you get to the other side, head out of the northwestern exit.
Get the Small Key in a Southwestern Room
In the room beyond, you’ll see a chest on the far side of a large gap.
Use the Hookshot to get to the other side and take out the Helmasaurs if you feel like it. It’s worth noting that with the Hookshot, you can pull the helmets off of the Helmasaurs to reveal their faces.
This will allow you to take them out much easier with your Sword. When you’re ready, open up the chest in this room to get 1 Small Key.
With the goods in hand, head out of the southeastern exit to leave the room. Your next destination, if you want some more Rupees, should be a large room in the northeast of the dungeon.
Rupee Chest #1
To get there, go back to the room with the 4 hallways and the X-shaped arrangement of blocks.
When you get here, go north. To do this, you’ll have to push the central block of the X-shape north, exit to the west, and then come back into the room to reset the blocks. From there, push the central block east and go north. This will lead back you into a room with the 2 chests on the east that you couldn’t reach before.
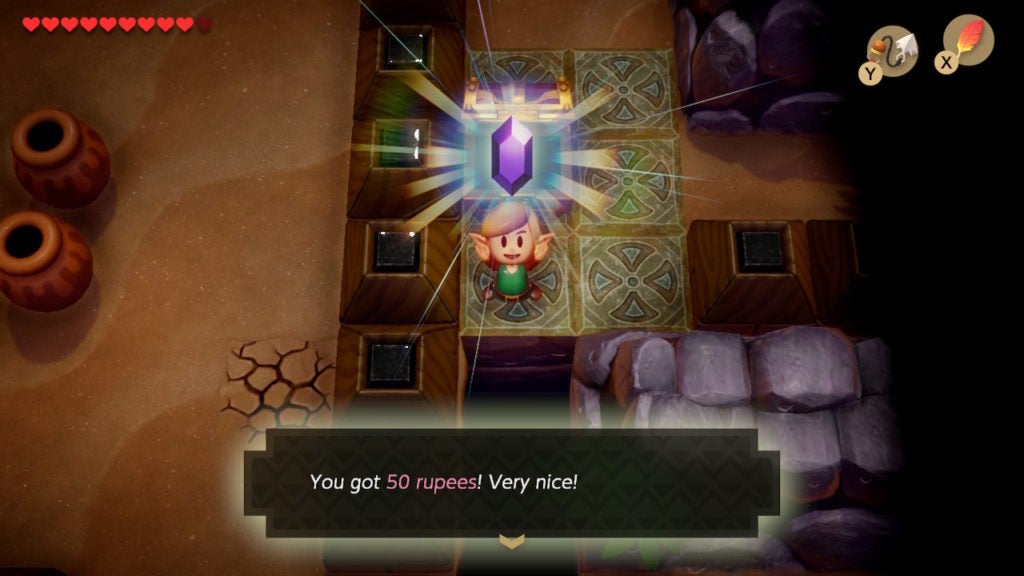
To get to the first chest, go to the southwestern corner of the room and use the Hookshot to cross the gap in the south towards the southeast corner.

After that, use the Hookshot to latch onto the chest to the north to travel to it. You’ll now be able to open this chest for 50 Rupees.
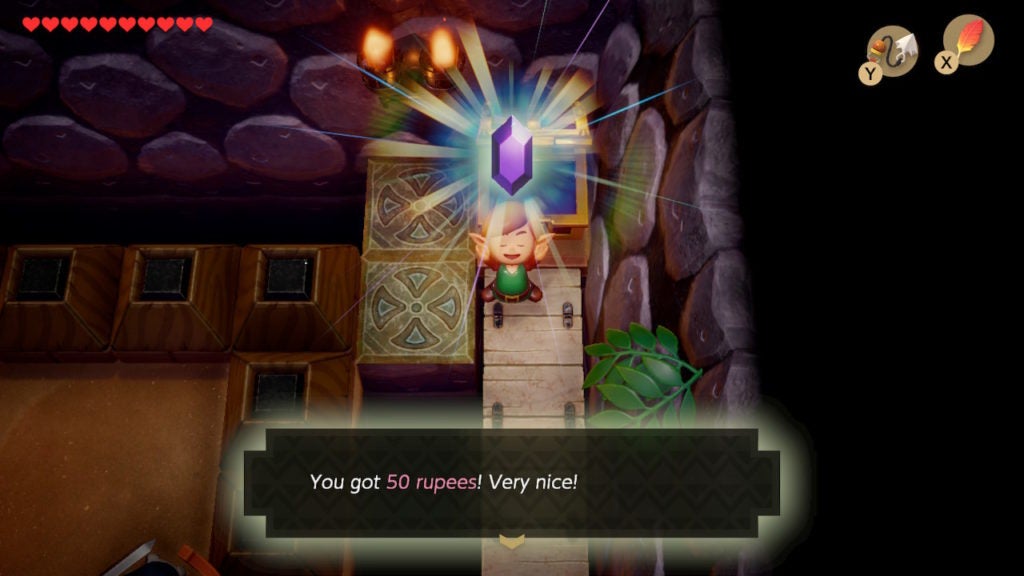
Rupee Chest #2
Getting the next chest, which lies just north, will be easy. When you walk northward, you’ll see a little handle to the south of the second chest, which lies across a large floor gap. Use the Hookshot on the handle south of the chest to create a bridge.
This will let you walk up to the chest and open it to acquire another 50 Rupees.
Get the Small Key in a Northeastern Room
After opening the second chest of Rupees, head back south a bit and then go east of the first chest in this room. This will lead you into another room with a chest across a gap.
Like you’ve learned by now, you can use the Hookshot to cross big gaps. Use this technique to reach the chest on the east side to obtain the last Small Key you’ll need in this dungeon.
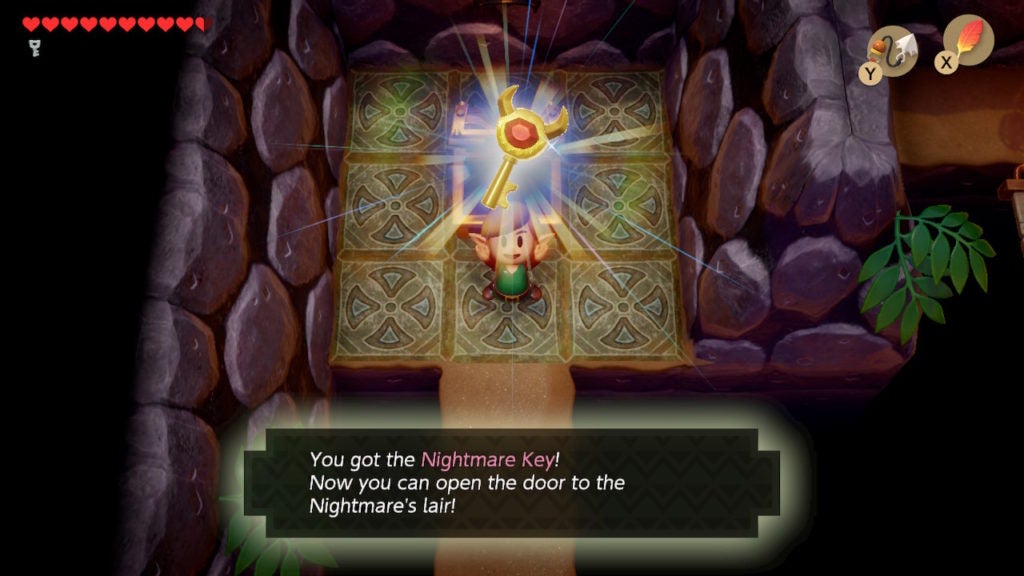
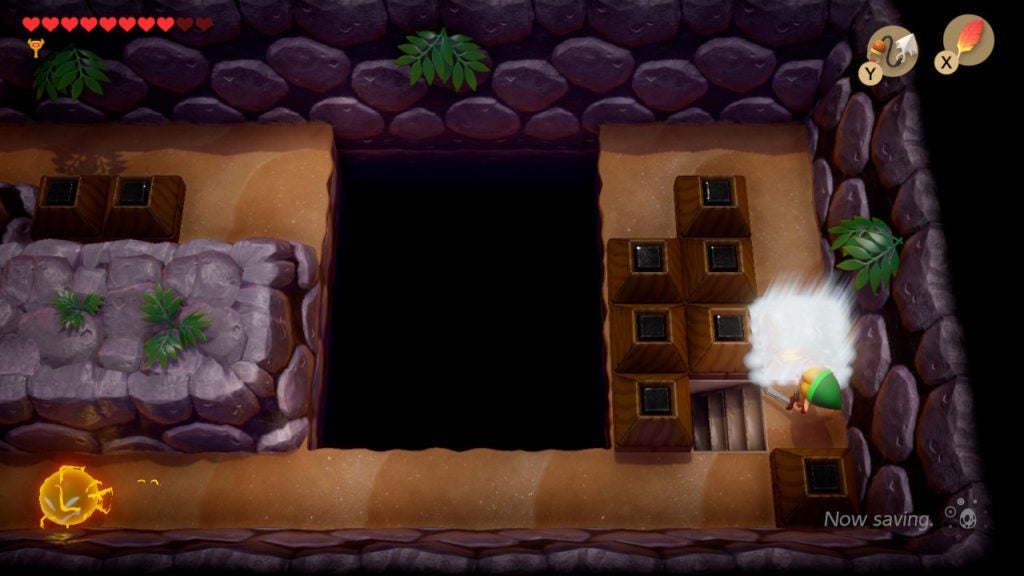
Find the Nightmare Key
After obtaining the optional chests full of loot and gathering the remaining Small Keys, it’s time to track down the Nightmare Key. For this, you’ll first want to head to the room with the central pool of deep water.
When you get here, swim into the center of the square-shaped pool.

When you do, dive down by pressing the B button to find a side-view underwater cavern.

You’ll have to swim to the west of the flooded cavern while avoiding or slaying the Bloopers that will harass you. When you ascend the ladder in the west, you’ll be in a room with a large hole and a drawbridge that you can open with the Hookshot.
Cross the bridge south and then make your way northwest to the chest. When you open it, you’ll find the Nightmare Key.
You’re now ready to proceed to the boss room. To do so, you’ll need to go through another mini-boss. Thankfully, this foe will be easier to take down than Master Stalfos.
Find the Mini-boss (Gohma)
Backtrack to the room with the square pool of water and make your way to the center of the dungeon. Go into the room with the locked block.
Here, you’ll find a Bubble enemy that you can destroy with some Magic Powder. Regardless of whether you take them out or not, you can use 1 of your 2 Small Keys to open the locked block and go west into the mini-boss room.
How to Beat Gohma
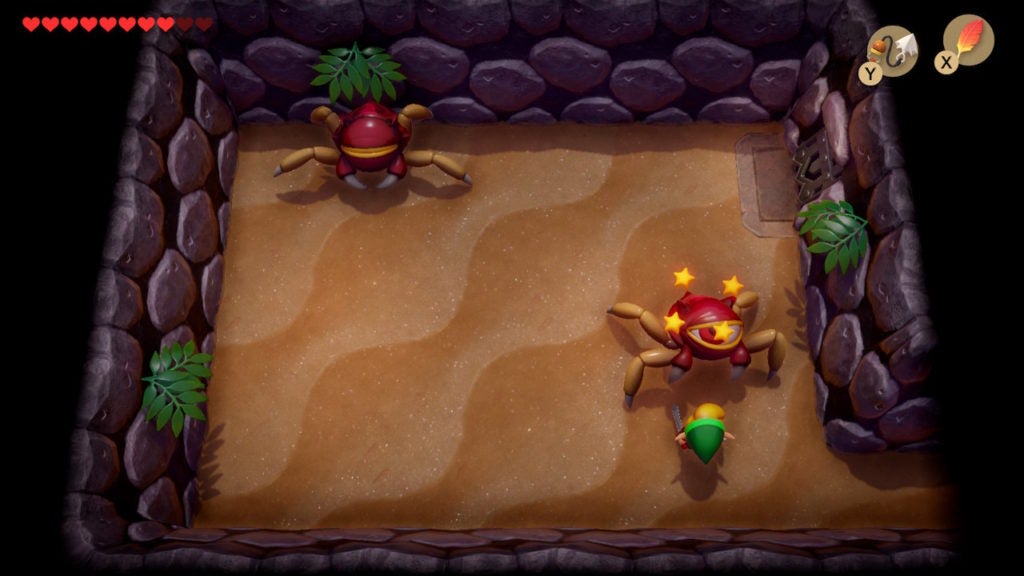
When you enter the room to the west, you’ll find 2 crab-like adversaries with large, singular eyes. Each of these fiends is a Gohma and you’ll have to defeat both of them to progress.
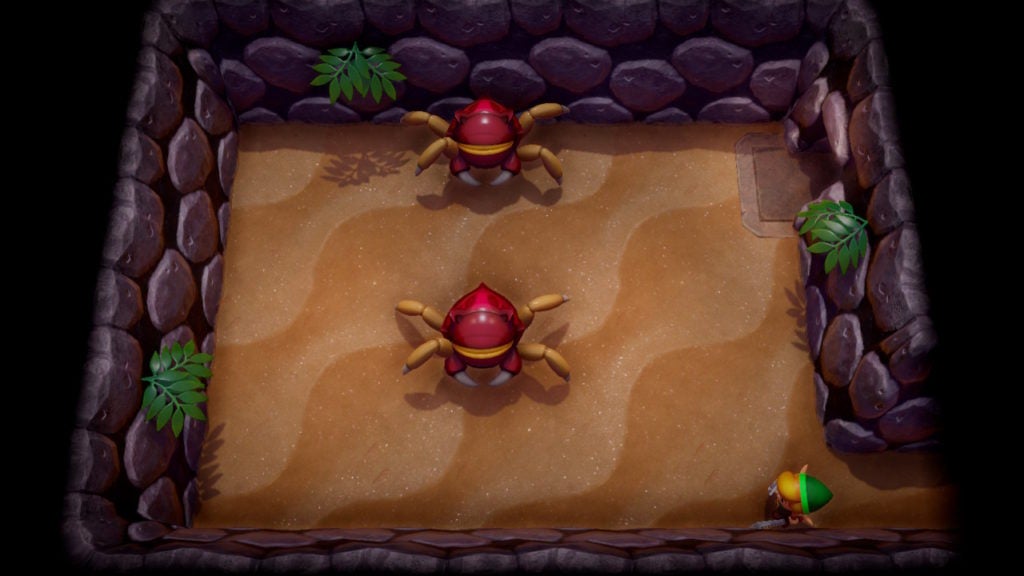
As you’ve likely come to expect when facing enemies with this body plan, you’ll have to strike the Gohmas in their large eyes to hurt them. The eyelids of these creatures are quite strong, however, so your attacks will only be effective if you attack while the eyes are open. However, the Gohmas only open their eyes very briefly. This makes it difficult to avoid their attacks while also getting into a position to attack.
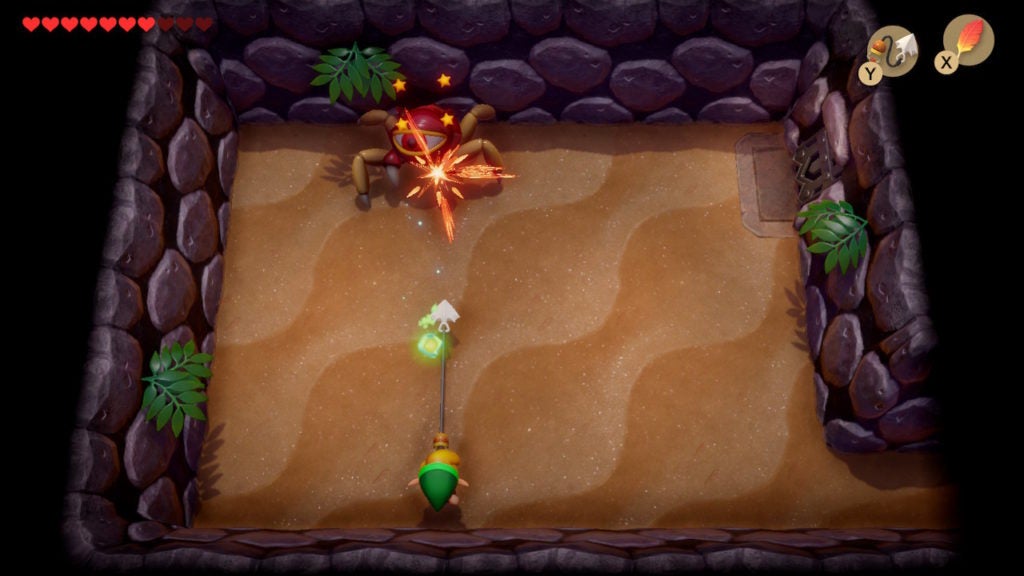
Stun the Gohmas With the Hookshot
When the eye of your targeted Gohma is open, use the Hookshot to poke them in their weak point from afar to stun the crustaceous adversary. This will give you a few seconds to run up to them and slash their eye with your Sword.
Which Gohma to Take Down First
You should defeat the southern Gohma first, as their attacks are harder to dodge due to them being closer and also because they are crowding the optimal area to fight the other Gohma from. This fight will be a very vertical one with the 2 Gohma raining attacks down from the north while you counterattack from the south.
The Gohmas’ Attacks
The attack the Gohmas will use the most is their energy orb, where they will shoot a green sphere at you in a linear path. Simply walk to either the east or west of the glowing projectile to avoid it.
The other attack that the Gohmas may use is a charging maneuver where they will run at you for a brutal tackle. You can see the charge move coming when a Gohma stops walking around horizontally. Stay either to the east or west of a charging Gohma to avoid the body slam.
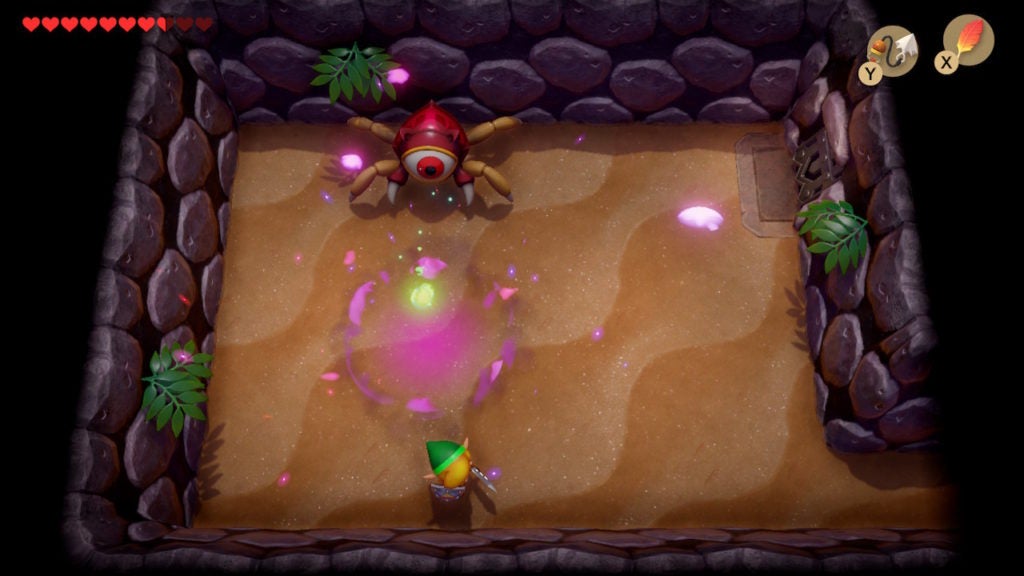
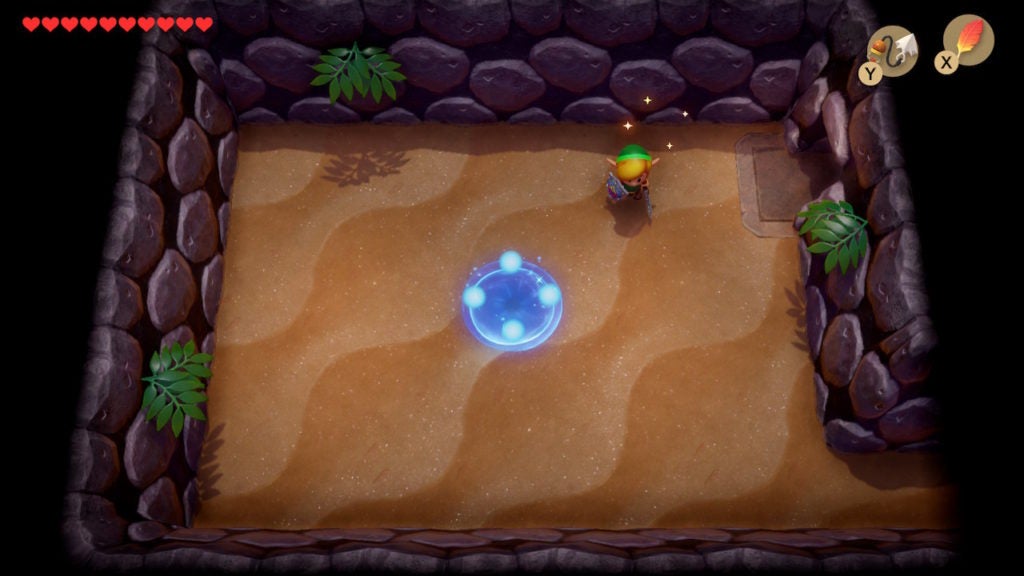
After you slay the 2 Gohma, a blue warp point will appear in the center of the room. Furthermore, the locked door to the northeast will open and a Fairy will spawn as well.
After you grab the Fairy for a quick heal, you should proceed east through the doorway. You’re now close to finding the Nightmare’s lair—just a few more rooms.
Find the Boss Room
East of the room where you defeated the Gohmas will be a room that holds a staircase. When you descend it, you’ll be in a side-view underground tunnel.
You’ll need to head west, though, you’ll need the Hookshot’s help here. There are grapple points on the ceiling that you can use the Hookshot on to ascend. Use such a grapple point in the east of the cave to get up to the area with the 2 Goombas. Jump past them and drop down the shaft to the west to get to the western part of the tunnel.
Here, you’ll find another Goomba that you can easily dispatch. There’s also another grapple point that you should use the Hookshot on to get up and out of this subterranean passage. When you do, you’ll be in an area with a locked block to your north.
Open the way with your last Small Key. Go north and then use your Hookshot on a block west of the big gap to get across. From there, go west to find the door leading to the Nighmare’s lair. Use the Nightmare Key to unlock it, and, when you’re ready, proceed north to fight the boss of Level 5 – Catfish’s Maw.
How to Beat Slime Eel
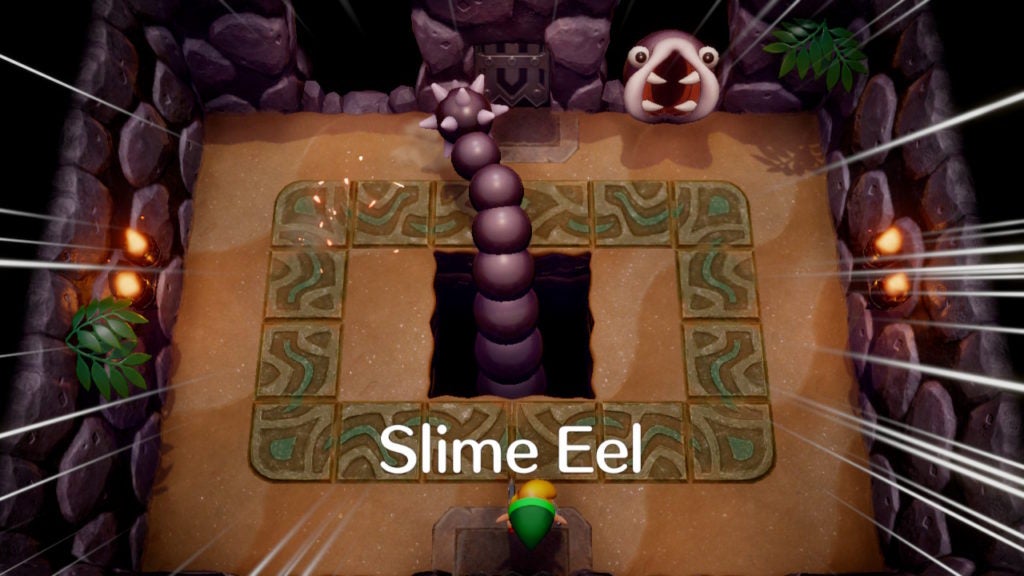
Slime Eel is one of the most unique bosses in Link’s Awakening, as they are huge enough to appear in multiple parts of the same room. Their attacks are fairly easy to avoid, however, getting to their weak point will be tricky.
How to Hurt Slime Eel
To deal damage to the boss, you will have to use your Hookshot on its mouth from across the room and pull them out to expose the pink weak point on its body.

When the glowing segment is exposed, strike it as much as you can with your Sword until Slime Eel retreats back into the wall. You’ll have to do this a few times until you deplete all of the boss’ health. A good trick is to walk around the edges of the boss room until Slime Eel’s head reappears. When that happens, get to the opposite end of the room from them and use your Hookshot on their open mouth. It’s recommended to pull Slime Eel out as much as possible for more time to attack their weak point.
Slime Eel’s Attacks
The most obvious attack that Slime Eel will throw at you is their mace-like tail. They will swing this flail around the center of the room. The ornate tiles that ring the hole in the floor are the limits of the tail’s reach. As such, you can completely avoid the tail by staying close to the walls of the boss room.
Another trick that the Slime Eel will use against you is a decoy. Sometimes, instead of popping their real face through a wall, a fake Slime Eel will appear. The way to tell the difference is to look at the eyes.
The real head of Slime Eel has white eyes with black pupils while the fake eels have black eyes and white pupils. When you pull a fake eel out of the wall, it will explode after a few seconds, so stay away from it. In fact, it’s better to avoid the fake eels altogether, as killing them does nothing.
Keep attacking Slime Eel’s weak point until they are defeated. As the fiend lies dying, they will insult you before their demise. When the Nightmare explodes into a cloud of purple flames, they’ll drop a Heart Container and the door to the north will open.
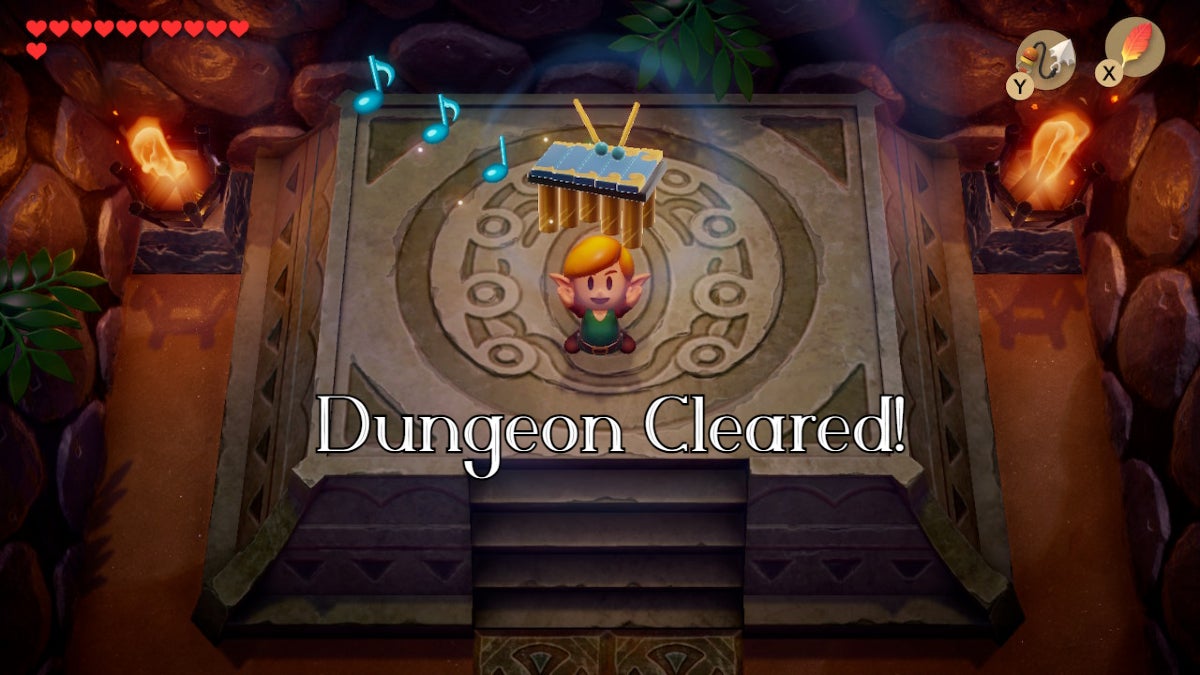
Collect the Heart Container and Siren Instrument
Pick up the Heart Container to increase your maximum number of Hearts by 1 and to get a free full-heal. Afterward, make your way north into the room holding the Siren Instrument.
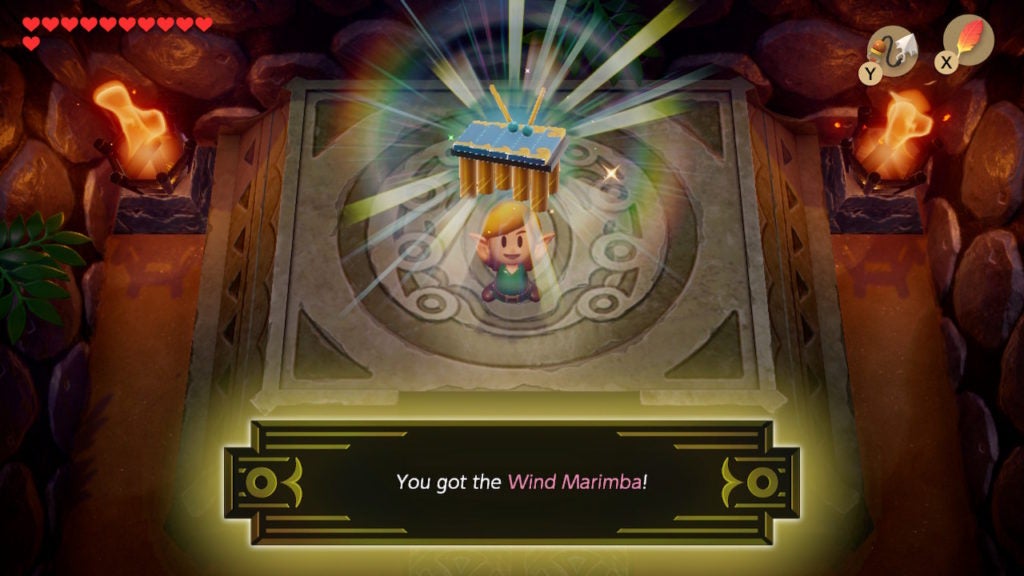
Ascend the dais to grab the Wind Marimba—the fifth of the Siren Instruments! When you do, you’ll be given a hint over a white screen that you need to seek out a shrine. Furthermore, you get told that the “island’s secret” is in this shrine.
Where to Go Next
After getting out of Level 5 – Catfish’s Maw, you’ll need to go to the east side of Koholint Island in search of the next dungeon. However, to get into it, you’ll need a special item to unlock the entrance. As such, your next task is to ransack the Ancient Ruins to find the Face Key.