
Carved Pumpkins can be used for more than basic crafting recipes in Minecraft. You can use them as helmets, turn them into blocks that emit light, and even spawn different kinds of golems. Carved Pumpkins are also easy to make.
Table Of Contents
What You Need to Carve a Pumpkin
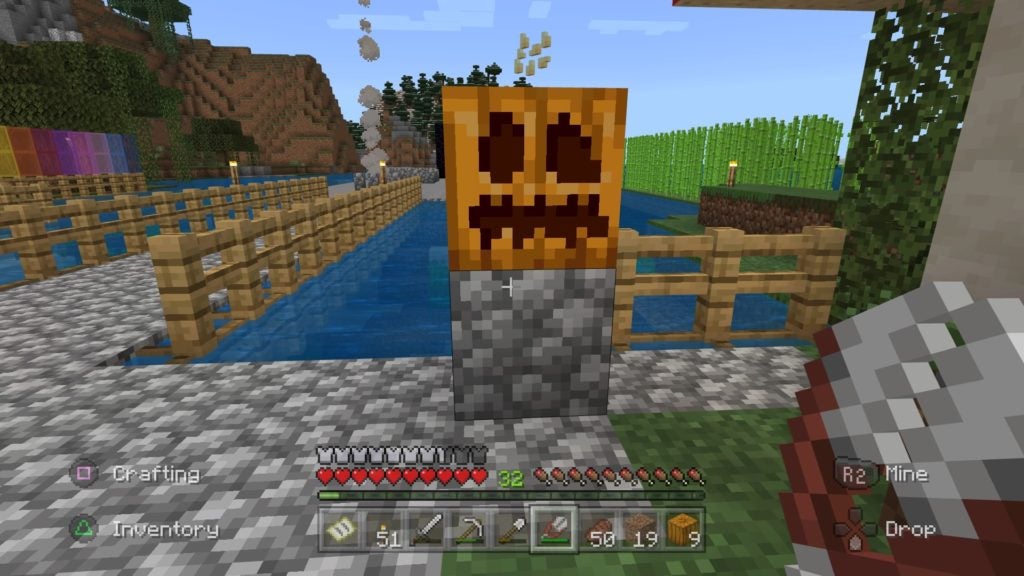
The only tool that you can use to turn a Pumpkin into a Carved Pumpkin is a pair of Shears. First, you need to place a Pumpkin. After that, equip a pair of Shears in your hand and use them on the placed Pumpkin. This will cause a face to appear on the nearest side of the Pumpkin. The 2 eyes and jagged mouth of the Carved Pumpkin will be accompanied by 1 Pumpkin Seed that will drop when the Pumpkin is sheared.
How to Get a Pair of Shears
You can craft a pair of Shears with 2 Iron Ingots. Simply place the ingots diagonally from each other in any kind of crafting grid. Shears can also be obtained as Shepherd’s Chest loot in Villages, though there is only a 12.3% chance of this. Alternatively, you can also potentially trade a Novice-level Shepherd Villager 2 Emeralds for 1 pair of Shears.
How to Get Pumpkins
Pumpkins can spawn in any type of overworld biome that has grass. However, their spawn rate is very low–only a 3.1% chance to be generated in each chunk with the right conditions. Furthermore, wild Pumpkins will only appear in areas where the grassy terrain isn’t obstructed. In other words, there have to be spaces with nothing but grass-covered dirt blocks. Even flowers will prevent Pumpkins from spawning.
However, you can also find Pumpkins in certain kinds of Villages. Taiga biome Villages have a chance to generate Pumpkin patches instead of Wheat farms. If you’re playing the Bedrock Edition of Minecraft, you can also find such Pumpkin patches in Snowy Taiga biome Villages. Pumpkins can also appear in Pillager Tents and within Woodland Mansions.
What You Can Use Carved Pumpkins For
There are 3 main uses for Carved Pumpkins: using one as a helmet, using one to make a Jack o’Lantern, and using one for making a golem. Since these functions are very different, Carved Pumpkins can be a versatile resource to have around.
How to Use a Carved Pumpkin as a Helmet
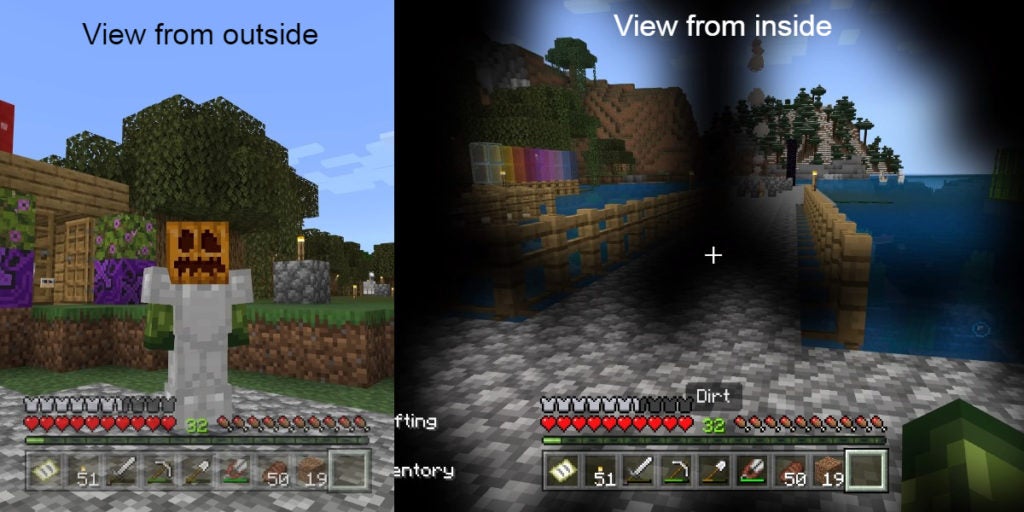
To equip a Carved Pumpkin, go to your inventory screen and then place the Carved Pumpkin onto your helmet armor slot. Depending on your perspective (first-person or third-person), you’ll notice the effects of wearing a Carved Pumpkin differently.
From the outside, your character will now have a Carved Pumpkin between their shoulders. But from within, your view will be partially obstructed. You’ll be able to see through the eye and mouth holes, however, everywhere else will be black. Although this effect can be a bit annoying, wearing a Carved Pumpkin on your head will prevent Endermen from getting angry when you look at them. As such, when you’re traveling through the End, it can be useful to wear a Carved Pumpkin in areas full of Endermen.
How to Make a Jack o’Lantern With A Carved Pumpkin
This easy crafting recipe only requires you to place 1 Carved Pumpkin onto any kind of crafting grid along with 1 Torch. Place the Torch underneath the Carved Pumpkin and you’ll be able to take a Jack o’Lantern out of the finished-item slot.
Jack o’Lanterns will produce light at level 15, which is as bright as sunlight. This makes Jack o’Lanterns better for lighting up areas than Torches, which only produce a light level of 14. In this regard, you can use Jack o’Lanterns when farming for more efficient light coverage of your crops.
How to Make Golems With Carved Pumpkins
You can make 2 different kinds of golems in Minecraft: Snow Golems and Iron Golems. Snow Golems are made from placing 2 blocks of Snow in a vertical line and then topping it off with a Carved Pumpkin. After the Carved Pumpkin is placed, the Snow Golem will come to life and start moving around. These artificial creatures will mostly act like other mobs due to their similar programming. However, Snow Golems automatically attack nearby monsters, so they can be used to build up your base’s defenses.
Irons Golems will be much more expensive to create, as you will need a lot of resources. To make an Iron Golem, you will need 4 Iron Blocks, which are each made from 9 Iron Ingots. This results in you needing 36 Iron Ingots total. When you have the 4 Iron Blocks and Carved Pumpkin ready, place 2 Iron Blocks in a vertical line, like how you would place the Snow blocks to make a Snow Golem. Following that, to make the golem’s arms, put 1 Iron Block on opposite sides of the 2-block-tall column. Finally, place the Carved Pumpkin on top of the central Iron Block and the Iron Golem will come to life. Iron Golems will also attack monsters on sight, though they are much stronger than Snow Golems.