![]() Key Takeaway
Key Takeaway
In the Java Edition, you need to change your skin from the launcher menu. Although, you can further customize your appearance in the Options screen of the main menu. In the Bedrock Edition, you can change your skin and customize accessories in the Dressing Room screen from the main menu.
While there’s nothing wrong with the Steve and Alex skins, they are both pretty boring. If you want to make your Minecraft experience truly unique, you should download and equip a skin that fits your style and personality.
Table Of Contents
How to Change Your Skin in the Java Edition
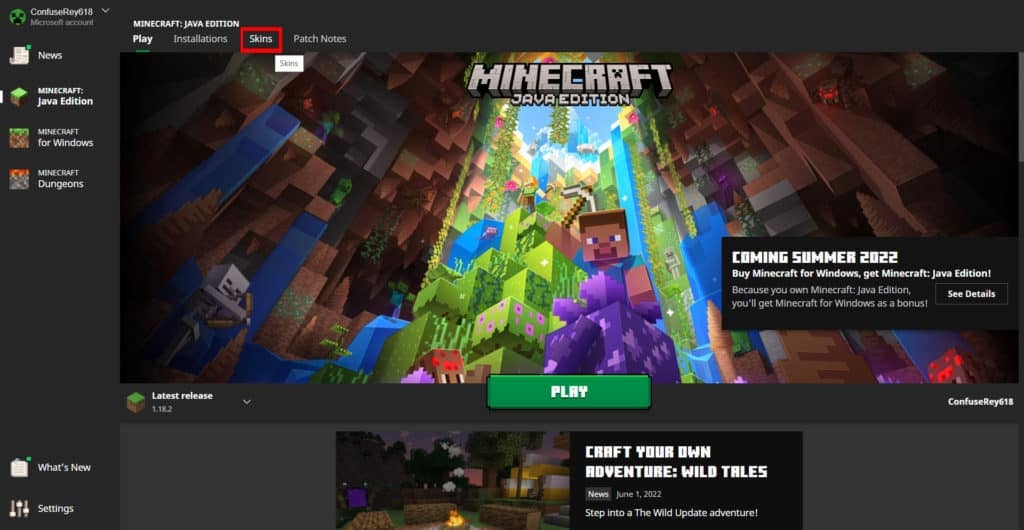
First, open the Minecraft launcher. Before you click the Play button, take a look at the tabs near the top of your screen. Here, beside the Installations tab, you find the Skins tab.
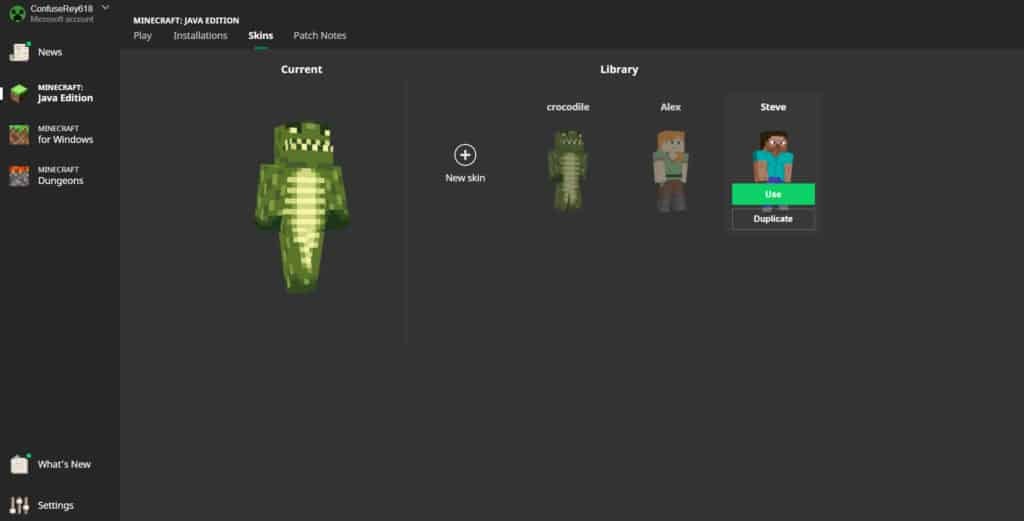
When you click on the Skins tab, you’ll see all the available skins that you can equip. By default, there will be 2 here: the Steve skin and the Alex skin. However, all skins that you’ve downloaded and added to your game files will also appear here. Furthermore, on the left, you’ll see which skin you currently have equipped.
To change skins, simply hover over the one that you want to use and click “Use”. Additionally, you can duplicate skins in a similar manner.
If you want to add more skins to equip, you’ll need to click the “New Skin” button. This button is to the left of your available skins and is marked with a plus sign (+).
How to Download New Skins in the Java Edition
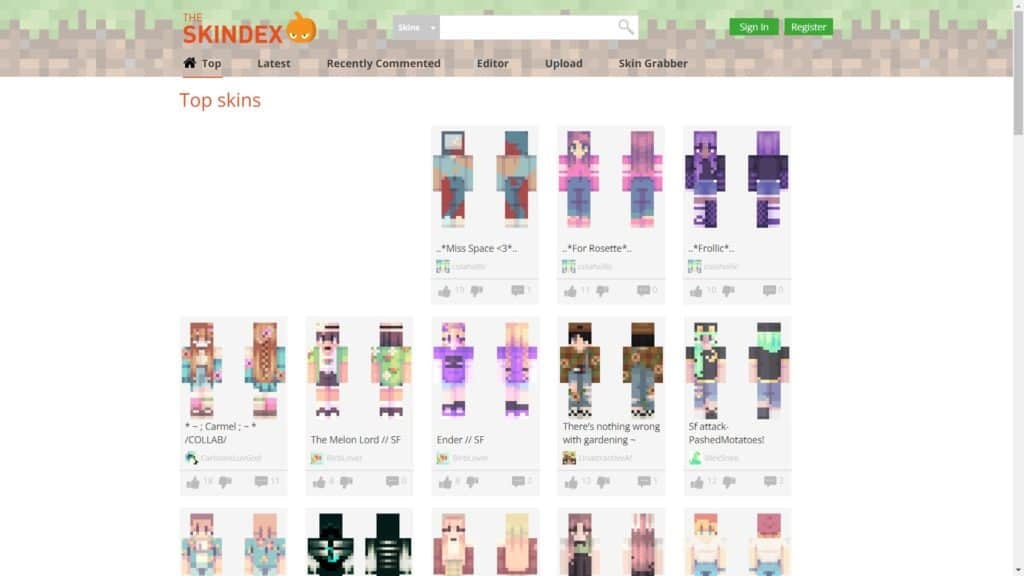
There are many websites out there that can let you safely download new custom skins for free. The most popular of these is minecraftskins.com. On this and similar sites, you can search for a skin that fits your style and personality.
All you need to do to get a new skin is click on the image of the one you want and then click the “Download” button. This will give you a PNG file with your skin displayed in a flat and unfolded state.
To get this new skin into your copy of Minecraft, all you need to do is select the appropriate PNG file from your computer after you click on the New Skin button in the Minecraft launcher’s Skins tab.
How to Further Customize Your Skin in the Java Edition
If you want to further tweak your look, you’ll have to do so from the main menu. Click the Play button from the Minecraft launcher menu to get to the main menu of the game.
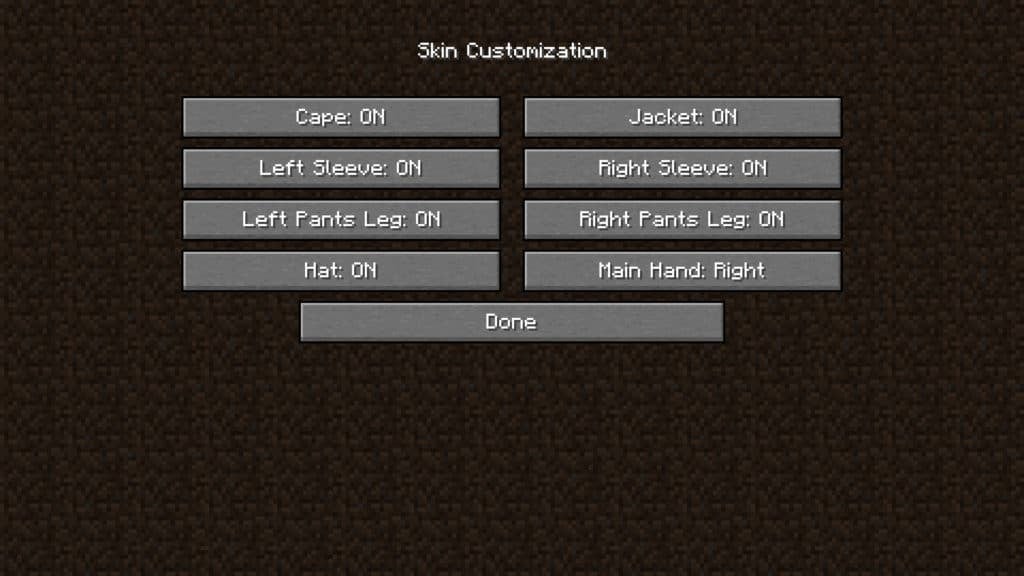
From there, click “Options” and then click on “Skin Customization”. In the Skin Customization screen, you’ll find 8 buttons. These will let you toggle the appearance status of hats, capes, and jackets as well as either sleeve or pant leg. Furthermore, you can choose which is your dominant hand.
How to Change Your Skin in the Bedrock Edition
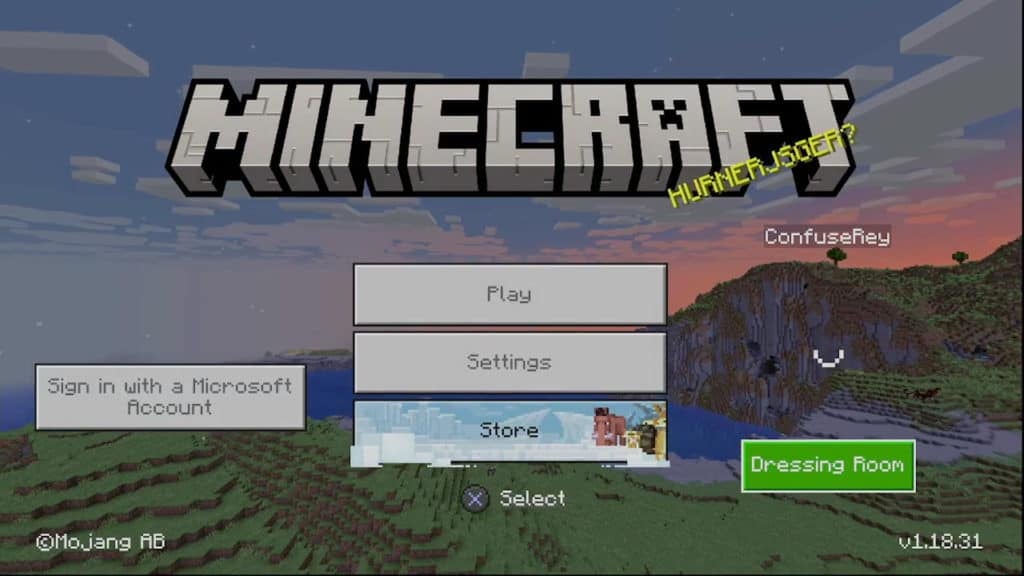
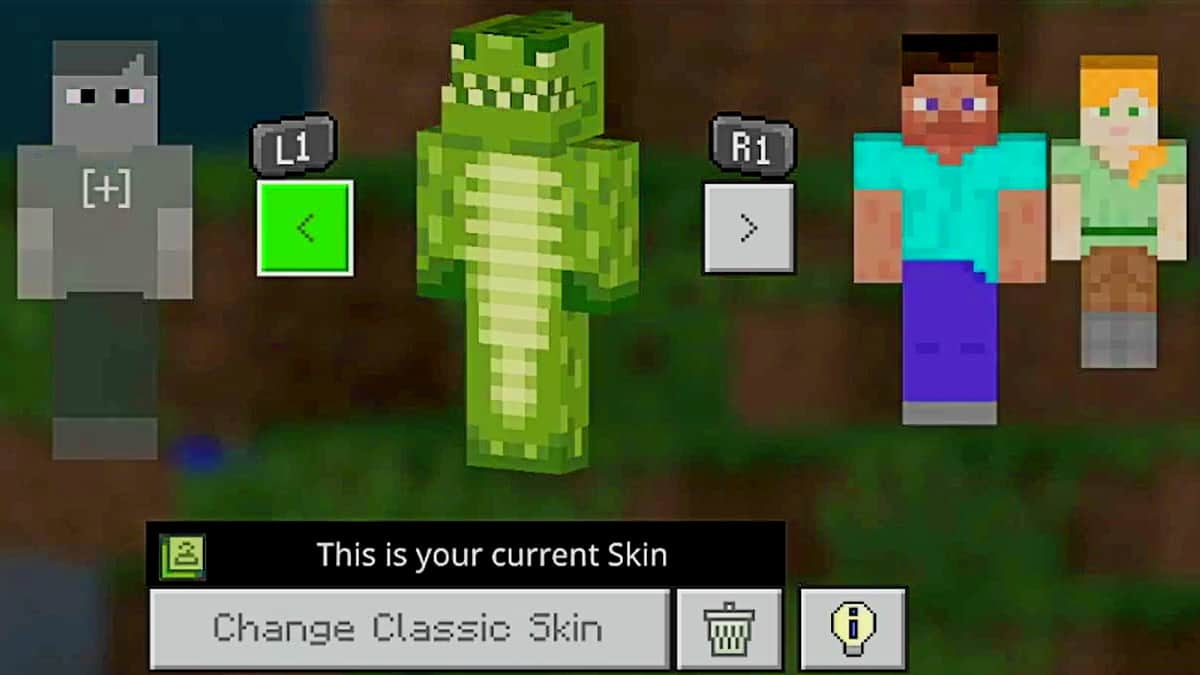
Things are more simplified in the Bedrock Edition. From the main menu, you need to click on the “Dressing Room” button on the right to access your appearance options.
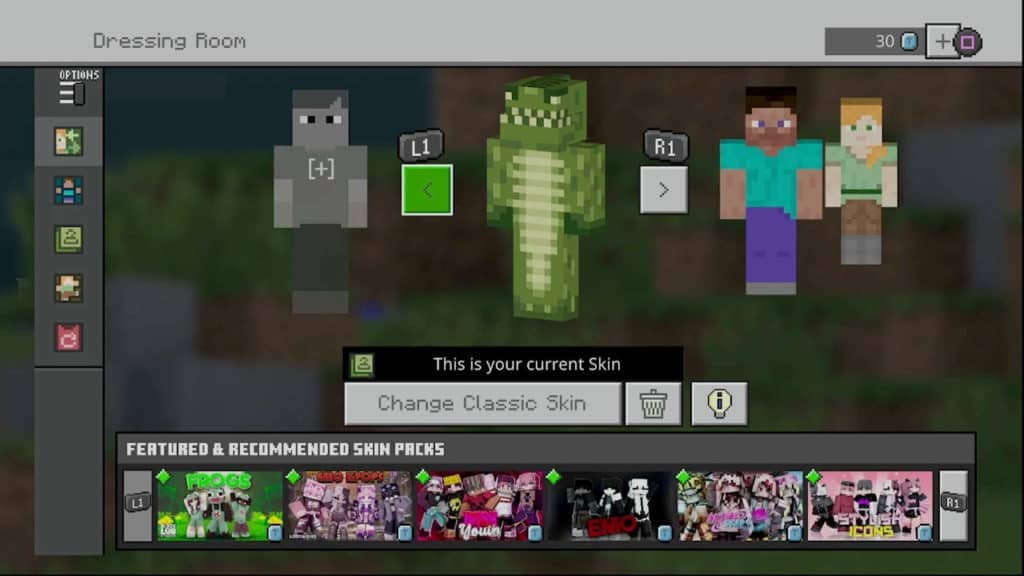
When you click on the Dressing Room button, you’ll be brought to a screen where you can see all of your available skins. Like in the Java Edition, you’ll find the default Steve and Alex skins here as well as any others you’ve downloaded. Furthermore, this screen is similar in layout to the Skins tab in the Java Edition’s launcher menu.
You can add new skins by selecting the grayed-out figure to the left of your current skin. Here, you can search for more to add from what’s available on the platform you’re playing on. There are tons of free ones to choose from.
However, there are more options here. On the left, you can open a sub-menu that will allow you to tweak your skins, such as enabling capes and more. And, at the bottom of the screen, you’ll find many featured and recommended skin packs.
Just keep in mind that these skin packs are not free. They cost Tokens (or other units of fake currency) which need to be bought with real money. Before you go spending a few dollars on a skin pack, it’s recommended to look through the free ones first.