![]() Key Takeaway
Key Takeaway
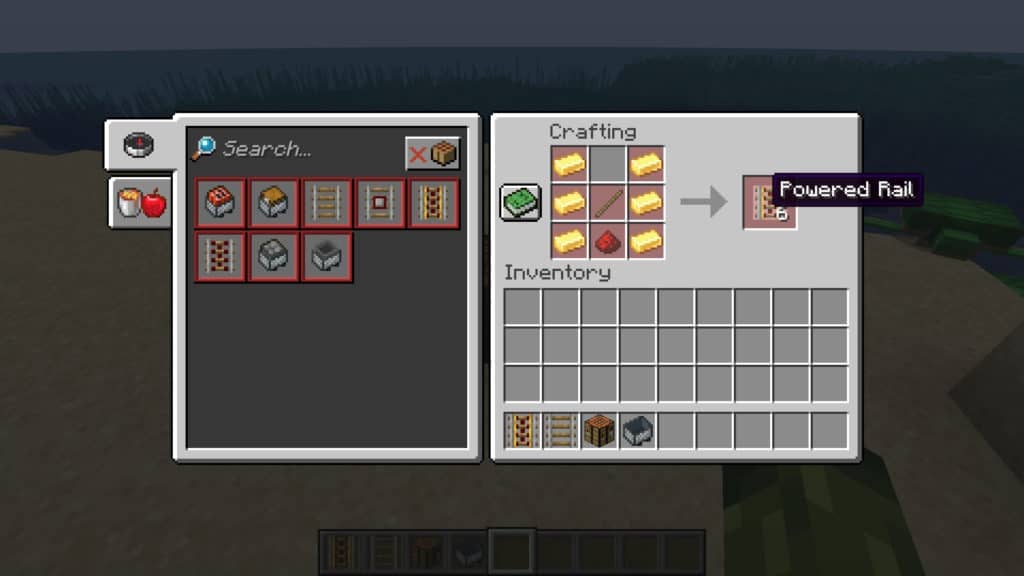
To make Powered Rails, you’ll need a lot of Gold Ingots, some Redstone Dust, and a few Sticks. When you combined 6 Gold Ingots, 1 Redstone Dust, and 1 Stick on a Crafting Table, you’ll get 6 Powered Rails.
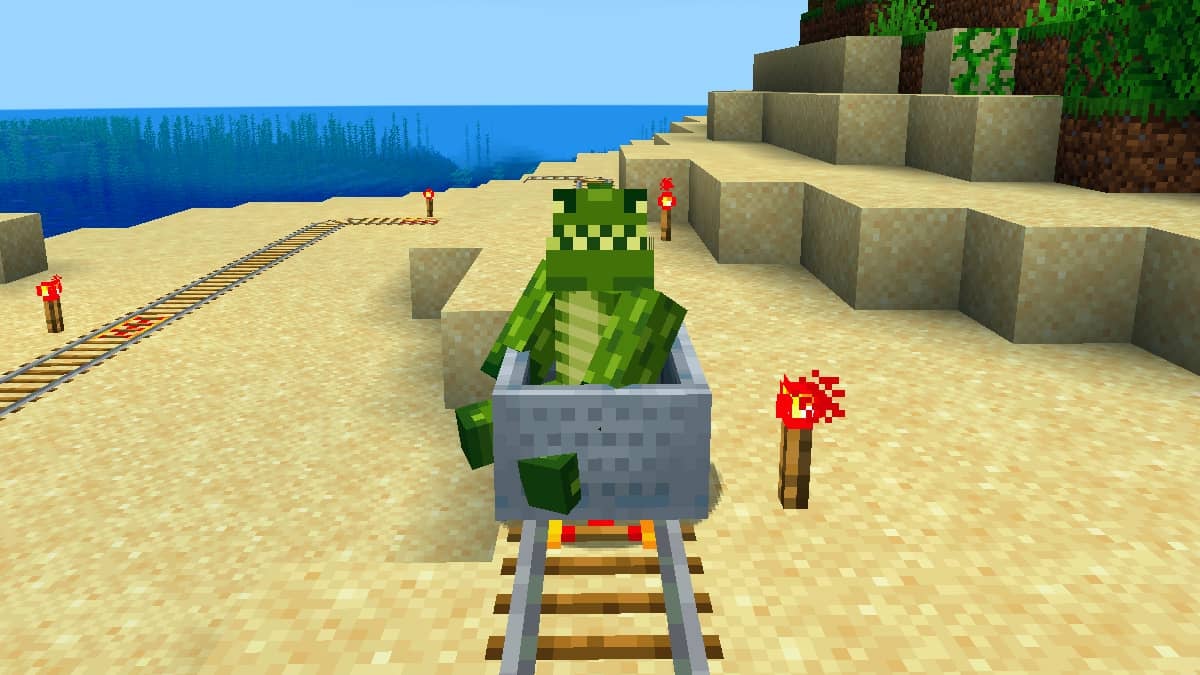
While regular Rails can help you assemble a basic Minecart system in Minecraft, you’ll need Powered Rails to upgrade it. Powered Rails will give your Minecart a boost when it travels over them, which allows for greater speed and efficiency.
Table Of Contents
The Crafting Recipe for Powered Rails

You’ll need at least 6 Gold Ingots, 1 Redstone Dust, and 1 Stick to make Powered Rails. First, on a Crafting Table, fill the left and right columns with the 6 Gold Ingots. Next, place the 1 Redstone Dust in the bottom-middle slot. Lastly, place the 1 Stick in the centermost slot. This crafting recipe will give you 6 Powered Rails.
How to Get Gold Ingots by Mining and Smelting
To make Gold Ingots, you’ll need to smelt Raw Gold in a Furnace. To do so, place Raw Gold in the top slot of a Furnace and some fuel in the bottom slot. For every 1 Raw Gold you smelt, you’ll get 1 Gold Ingot. The type of fuel you use doesn’t matter—Charcoal, Wooden Logs, Lava Buckets, and more can be used.
If you need Raw Gold, you can get some by mining Gold Ore blocks (1 Gold Ore block gives you 1 Raw Gold when mined). You’ll need an Iron Pickaxe or better to mine Gold Ore, otherwise, it will drop nothing.
Such blocks are found between layer 90 and layer 0. However, the highest concentration of Gold Ore can be found around layer 45. Since the sea level of the world is around layer 62, you’ll usually need to dig down to find Gold Ore. However, in the Badlands biome (and its variants) Gold Ore can spawn much higher. As such, those rugged biomes are the best place in the Overworld to find Gold Ore.
Alternatively, if you’re feeling brave, you can head into The Nether to seek out Gold Ore. Nether Gold Ore blocks are much more common than Gold Ore blocks in the Overworld. Although, keep in mind that Nether Gold Ore drops Gold Nuggets (2 to 6) instead of Raw Gold. You can combine 9 Gold Nuggets on a Crafting Table to create 1 Gold Ingot.
How to Get Redstone Dust by Mining
Redstone Dust is the item that drops from Redstone Ore blocks. Such blocks are often found in the Overworld at similar elevations as Gold Ore. Specifically, Redstone Ore can spawn between layer 75 and layer 1. When you mine a block of Redstone Ore, it will drop 4 to 5 Redstone Dust. However, like with Gold Ore, you’ll need an Iron Pickaxe or better to actually get the drops.
Unlike Raw Gold, you don’t need to smelt Redstone Dust to get it into a useable state—it’s ready to use in its original form! While it’s possible to find Redstone Dust in the Chests of various structures, you’ll often get much more from mining it.
How to Get the Most Sticks
By far the most efficient way to get Sticks is by breaking down trees. When you chop down a tree, you’ll get Wood Logs. Each Wood Log you put into a crafting grid of any kind will give you 4 Wooden Planks. Then, if you place Wooden Planks on top of each other in a 1×2 configuration, you’ll get 4 Sticks for every 2 Wooden Planks you use.
As such, for every 1 Wood Log, you can make 8 Sticks. Furthermore, the type of wood you use does not matter. Sticks can be made from any kind of Wooden Plank—even different types used at the same time.
Where to Find Powered Rails
Instead of making your own Powered Rails, you can potentially find some while exploring. However, the only location whose Chests can contain Powered Rails as loot is Mineshafts. Since Mineshafts are pretty rare underground structures, you’ll need to be relatively lucky to find one…unless you do a lot of mining.
To increase your chances of finding a Mineshaft, you should explore a Badlands biome (or one of its variants). Mineshafts in such biomes can spawn at much higher elevations—much like how Gold Ore generates there.
How to Use Powered Rails

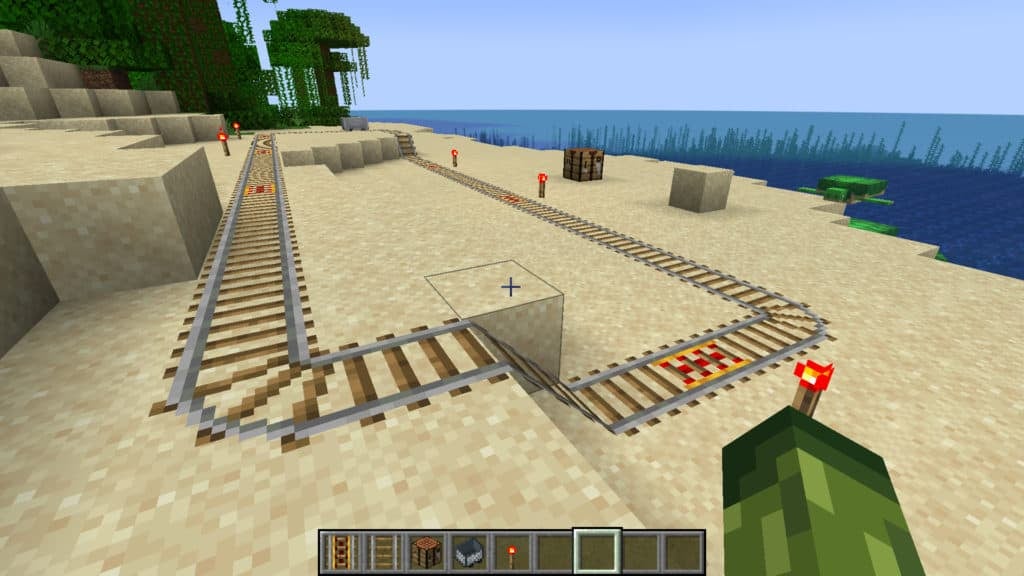
To activate your Powered Rails, you’ll need some sort of Redstone device. Out of all the options, Redstone Torches are arguably the easiest and more efficient to use. When you place a Redstone Torch next to a Powered Rail, it will light up, which indicates that it is now active. If you don’t activate a Powered Rail, it will decrease the speed of Minecarts that pass over it as opposed to speeding them up.
Where You Can Place Powered Rails
You can only place Powered Rails on opaque and solid blocks. Furthermore, they can be placed on blocks that are 1 block below an adjacent block. This allows Powered Rails to spawn diagonally when placed, allowing them to function on slopes.
Where You Can’t Place Powered Rails
Unlike regular Rails, Powered Rails cannot curve. If you try to connect 2 other Rails that are perpendicular to one another with a Powered Rail, it will appear in its normal straight configuration. For this reason, you should only place Powered Rails before or after curves in your rail system.
Powered Rails—like normal Rails—cannot be placed on walls or ceilings. It would definitely be cool if this was the case, as you could make a wicked rollercoaster this way, but, sadly, it’s not possible in-game…yet.
How Fast and Far Powered Rails Will Propel Your Minecart
An activated Powered Rail will increase the speed of a traveling Minecart by 8 blocks per second. However, this speed tapers off pretty quickly. How far this will actually send your Minecart will vary depending on the following factors:
- The initial speed of the Minecart
- Whether or not something is in the Minecart
- Whether or not there is a slope ahead of the Minecart
- If there is anything on the Rails ahead that can slow a Minecart (like an inactive Powered Rail)
When you’re traveling along a flat surface, a good rule of thumb is to place a Powered Rail every 6 to 8 blocks in order to maintain the maximum speed of 8 blocks per second. Although, if you’re traveling uphill, you’ll want to place a Powered Rail every 2 blocks, as gravity will greatly slow down your Minecart.


